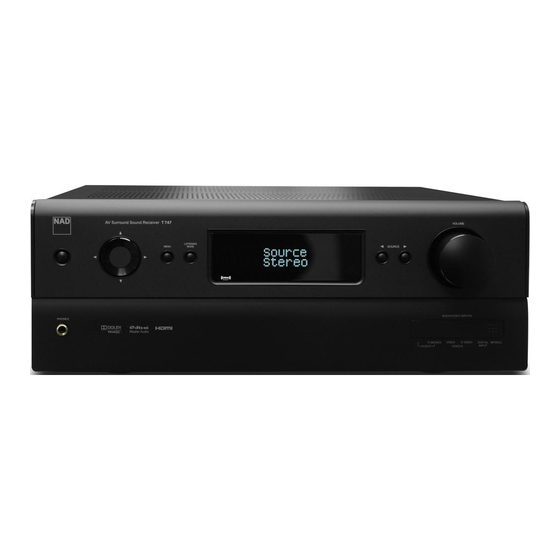
NAD T747 Owner's Manual
Av surround sound receiver
Hide thumbs
Also See for T747:
- Owner's manual (42 pages) ,
- Specifications (3 pages) ,
- Service manual (130 pages)
Table of Contents
Advertisement
Quick Links
T 747
®
AV Surround Sound Receiver
IMPORTANT NOTICE REGARDING FIRST TIME SETUP OF NAD T 747
The T 747 includes a high performance video processor that can upscale
Standard Definition (SD) video to High Definition (HD) video. The HD video is
only available on the HDMI (up to 1080p resolution) or Component Video (up to
1080i resolution only) output.
If you are using an HD capable TV, you should connect either HDMI or
Component Video, not both. All SD sources will be upscaled to HD over these
HD connections. Be sure your TV is HD capable before selecting an HD
resolution. Note that the default SD is backward compatible with non-HD sets.
For the On Screen Display (required for Setup) to be shown at your connected
TV, set your T 747 to the Source number that corresponds to your TV's signal
type:
Source 1 = defaulted to HDMI Monitor OUT
Source 2 = defaulted to Component Video Monitor OUT
Source 3 = defaulted to S-Video Monitor OUT
These default settings can be changed, but should be used to get started. It must
be noted from the above that with Source 1 defaulted to HDMI, the On Screen
Display will only be available via HDMI Monitor OUT when at Source 1. Select
Source 2 or other enabled Source numbers (except Source 1) for the On Screen
Display to be available at Component Video, S-Video or Video (Composite)
Monitor OUT.
Advertisement
Table of Contents

Related Manuals for NAD T747


Summary of Contents for NAD T747
- Page 1 ® AV Surround Sound Receiver IMPORTANT NOTICE REGARDING FIRST TIME SETUP OF NAD T 747 The T 747 includes a high performance video processor that can upscale Standard Definition (SD) video to High Definition (HD) video. The HD video is only available on the HDMI (up to 1080p resolution) or Component Video (up to 1080i resolution only) output.
- Page 2 T 747 ® AV Surround Sound Receiver Owner’s Manual...
-
Page 3: Important Safety Instructions
IMPORTANT SAFETY INSTRUCTIONS NOTE TO CATV SYSTEM INSTALLER THE LIGHTNING FLASH WITH ARROWHEAD SYMBOL, WITHIN AN EQUILATERAL TRIANGLE, IS INTENDED TO ALERT THE USER This reminder is provided to call the CATV system installer’ s attention to Section TO THE PRESENCE OF UNINSULATED “DANGEROUS VOLTAGE” 820-40 of the NEC which provides guidelines for proper grounding and, in WITHIN THE PRODUCT’S ENCLOSURE THAT MAYBE OF particular, specifies that the cable ground shall be connected to the grounding... - Page 4 Serial no.: ........NAD is a trademark of NAD Electronics International, a division of Lenbrook Industries Limited...
-
Page 5: Table Of Contents
NAD IPD 2 ........ -
Page 6: Introduction
S-Video or Composite video input. contemplating on locating the T 747 within a cabinet or other furniture, consult your NAD audio/video specialist for advice on providing adequate airflow. To modify the above default settings and for a better understanding of source setting and combinations, please refer to the item about “SOURCE SETUP”... -
Page 7: Identification Of Controls
IDENTIFICATION OF CONTROLS FRONT PANEL 1 POWER BUTTON: Press this button to switch ON the T 747. The Standby 7 REMOTE SENSOR: Point the AVR 3 remote control at the remote sensor LED indicator will turn from amber to blue and illuminate the VFD. Pressing and press the buttons. - Page 8 IDENTIFICATION OF CONTROLS FRONT PANEL 10 PHONES: Accepts stereo headphone using a standard 1/4-inch stereo phone plug (use a suitable adapter for headphones equipped with a smaller plug). Plugging in headphones automatically mutes output from all channels. With headphone listening, toggle front panel’ s LISTENING MODE button (or AVR 3’...
-
Page 9: Rear Panel
IDENTIFICATION OF CONTROLS REAR PANEL ATTENTION! Please make sure that the T 747 is powered off or unplugged before making any connections. It is also advisable to power down or unplug all associated components while making or breaking any signal or AC power connections. 1 DIGITAL AUDIO IN/OUT (COAXIAL 1-2, OPTICAL 1-2): Connect 5 zONE 2: Sends zone selected video output source to the to the corresponding optical or coaxial S/PDIF-format digital output corresponding video input of another zone. Use high quality patch of sources such as CD or DVD players, HDTV or satellite tuners and cables to reduce noise pickup over long distance runs. - Page 10 15 MP DOCK: The T 747 is equipped with a data port in the rear panel sound and lowest background noise. Fix the antenna in the desired where an optional NAD IPD (NAD IPD Dock for iPod) 1, NAD IPD 2 and position by using thumb tacks, push pins or any suitable means.
- Page 11 IDENTIFICATION OF CONTROLS REAR PANEL 18 zONE OUT - FIX, VAR: Connect both FIX and VAR ZONE OUT to the corresponding audio input of an external integrated amplifier, preamplifier or receiver. FIX: When FIX is the selected ZONE 2 audio output port, the ZONE 2 volume level can only be varied by using the VOLUME control of the external amplifier or receiver it is connected to.
-
Page 12: Remote Control
USING THE AVR 3 REMOTE CONTROL The AVR 3 remote control handset handles the key functions of the T 747 as well as other NAD Stereo Receivers, Integrated Amplifiers and Preamplifiers. It has additional controls to remotely operate NAD CD Players, AM/FM Tuners and dedicated AM/FM/DAB Tuners. - Page 13 ] button to increase or decrease the loudness level. Release the button when the desired level is reached. The VFD on the front panel will indicate the level set. For NAD Receivers, the VFD will also show “Volume Up” or “Volume Down” or “Volume: _ _ dB” (_ _ indicates the numerical dB level) while pressing AVR 3’s .
- Page 14 NAD Receiver or Tuner for control button compatibility. You can also load the applicable NAD code library to this device so that it can be made compatible with your other NAD equipment. Refer to the section below about “LIBRARY” on how to load a NAD code library.
-
Page 15: Library
REMOTE CONTROL LIBRARY The AVR 3 can store or assign a different NAD code library for a particular DEVICE. If the original default library does not control your NAD CD player, DVD player, or other component, follow the procedure below to change the library code. -
Page 16: Operation
OPERATION USING THE T 747 – MAIN MENU ABOUT THE ON-SCREEN DISPLAY (OSD) LISTENING MODE The T 747 receiver employs a simple, self-explanatory system of on-screen display “menus” that will appear on the connected video monitor/TV. These are required during the setup process (and are useful in day-to-day operation), so be sure to connect the monitor/TV before proceeding with setup. -
Page 17: Adjusting Listening Modes
Panorama (On/Off): Adds a “wrap around” effect by extending some Two-channel recordings, whether stereo or surround-encoded, are reproduced with proprietary NAD surround processing with output signals stereo content into the surround channels. to the front left/right, center and discrete left/right surround channels, plus subwoofer (assuming these are present in the current “Speaker... -
Page 18: Tone Controls
OPERATION USING THE T 747 – MAIN MENU TONE CONTROLS Volume “Volume” refers to the adjustable secondary Zone 2 Volume level that can be increased or decreased depending upon its settings. “Volume” can either be set to “Fixed” or “Variable”. This is applicable only if the selected ZONE 2 Audio Output port is the ZONE 2 VAR. -
Page 19: Using The T 747 - Setup Menu
OPERATION USING THE T 747 – SETUP MENU SETUP MENU CREATING PRESETS The Setup Menu allows one to customize the operation of the T 747 to the Creating a Preset consists simply of storing a complete set of the ancillary equipment used in one’s specific AV system. Unless your system parameters set forth in the “Listening Mode”, “DSP Options”, “Tone Controls”, exactly matches the factory defaults, you will need to use the Setup Menu “Speaker Setup”... - Page 20 OPERATION USING THE T 747 – SETUP MENU SAMPLE PROCEDURE FOR SETTING UP A/V PRESETS Speaker Setup: from the Speaker Setup menu, go to “Speaker Configuration” sub-menu and change “Subwoofer” from “On” to “Off”: 1 Setup first your preferred settings for the following options (access “Front”...
- Page 21 OPERATION USING THE T 747 – SETUP MENU 3 At “A/V Presets” page, set “Preset: 1” to the following conditions: 4 Now, repeat again Step 1 above but this time with the following settings Listening Mode: PLIIx Music Use [ ] to select “Yes”...
-
Page 22: Source Setup
OPERATION USING THE T 747 – SETUP MENU 5 With the above settings, scroll to “A/V Presets” from the SETUP MENU 7 You can setup up to 5 Presets. These same Presets can also be page. Use [ ] to access “A/V Presets” menu. associated/defaulted to each Source in the “Source Setup (Normal View)”... - Page 23 OPERATION USING THE T 747 – SETUP MENU Source Digital Audio The T 747 is equipped with ten configurable Sources (Source 1 -10). The To take advantage of the T 747’s high performance surround and digital settings for each Source are dependent on the configurations set forth in audio circuitry, it is advisable that its Digital Audio inputs are selected.
-
Page 24: Source Setup (Table View)
“Off”. Audiobook Speed: Set the playback speed with the following options - Normal, Fast and Slow. Note that for “Audiobook Speed” to be available in the menu, an iPod player must be docked in the linked NAD IPD model. -
Page 25: Auto Calibration
OPERATION USING THE T 747 – SETUP MENU AUTO CALIBRATION MEASUREMENT IS THE FIRST STEP It has been shown that many, if not most, surround sound systems are not Connect the microphone jack into the front panel’s MP/MIC input. Place accurately setup and calibrated. -
Page 26: Speaker Configuration
“Back” setup item to “Off”. number 33-2050, makes this task easier, more accurate and more repeatable. Ownership of such a meter could prove a valuable audio tool. Your NAD audio Depending on the relationship between speakers, the possible selections specialist may be able to help you with temporary use of a meter. -
Page 27: Speaker Distance
OPERATION USING THE T 747 – SETUP MENU SPEAKER DISTANCE SETTING SPEAKER LEVELS AT TEST MODE While at “Speaker Levels” menu, press the AVR 3 remote’s “Test” key activating the T 747’s Speaker Levels balancing test signal. You will hear a Test tone. -
Page 28: Amplifier Setup
OPERATION USING THE T 747 – SETUP MENU AMPLIFIER SETUP LISTENING MODE SETUP If the surround back speakers are not used in the main zone, their surround The T 747 has various listening mode options and is mostly configurable. back amplifier channels could be assigned for Main Back or Zone 2. These are provided to reproduce a variety of sound effects depending upon the content of the source to be played. - Page 29 OPERATION USING THE T 747 – SETUP MENU DOLBY DIGITAL SURROUND MODES The following are further descriptions about the Dolby Digital surround The Digital Theater System Digital Surround (simply called DTS) is a multi- modes. channel digital signal format that can process higher data rates than with Dolby Digital.
-
Page 30: Dolby Setup
OPERATION USING THE T 747 – SETUP MENU DOLBY SETUP DTS - ES™ MATRIX 6.1 Under this menu, the Dolby Digital’s Dynamic Range Control can be In this format, the additional signals of the back channel receive a matrix adjusted as well as the settings for Dolby Digital Pro Logic IIx Music. encoding and are inputted into the right and left surround channels. -
Page 31: Front Panel Display Setup
OPERATION USING THE T 747 – SETUP MENU FRONT PANEL DISPLAY SETUP VIDEO SETUP The Vacuum Fluorescent Display (VFD) and On-Screen Display (OSD) can be This menu allows you to set the display resolution of the T 747 along with shown in various ways by navigating through the parameters at the “Front the compatible video format setting and picture setup. - Page 32 OPERATION USING THE T 747 – SETUP MENU Video Format: Video format refers to the number of frames or images that are projected or displayed per second in motion pictures, television or computer video display. Depending upon your area and video resolution capability of your TV/Monitor, the following “Video format”...
-
Page 33: Using The T 747 - Listening To Am/Fm/Xm Radio
OPERATION USING THE T 747 – LISTENING TO AM/FM/XM RADIO LISTENING TO AM/FM RADIO ASSEMBLING THE LOOP ANTENNA The T 747’s internal AM/FM tuner offers very high quality sound from radio broadcasts. The reception and sound quality will always be dependent to a degree however on the type of antenna(s) used as well as proximity to the broadcast origin, geography and weather conditions. -
Page 34: About User Names
OPERATION USING THE T 747 – LISTENING TO AM/FM/XM RADIO ABOUT RDS AUTOMATIC PRESET Preset stations may also be programmed automatically for the entire FM (or The Radio Data System (RDS) permits sending small amounts of digital AM) band. information using conventional FM radio broadcasts. The T 747 supports 1 Toggle the [AM/FM/DB] button to select FM (or AM) band. -
Page 35: Listening To Xm Radio
[ENTER] after entering the XM channel number. For example, to enter XM channel 8, press “0”, “0” and “8” or press “8” then [ENTER]. NOTES • Check with your NAD audio specialist for other versions of XM Mini- VIEW XM INFORMATION Tuner compatible with T 747. Toggle AVR 3’s [INFO] button to display the XM information of the selected • When using the AVR 3 remote control to carry out XM commands,... -
Page 36: Using The T 747 - Listening To Dab Radio
NAD-specified outboard DAB antenna, you can increase the signal strength. Consult an antenna module – the NAD DAB Adaptor DB 1. All the control software for this professional for more information. format is included; just plug-in the module and start enjoying the CD-like quality sound and expansive content selection available with DAB. -
Page 37: Preset Tune
They will be listed at the top of the channel list. A heart-shaped icon [ ♥ ] will be illuminated beside a favourite station. The “DAB Reset” option enables the re-initializing of the NAD DAB Adaptor DB1 by going to Full Scan mode. -
Page 38: Information Settings
OPERATION USING THE T 747 – LISTENING TO DAB RADIO INFORMATION SETTINGS While listening to a DAB broadcast, the type of information displayed in the lower line of the VFD can be varied. Toggle the AVR 3’s [INFO] button to step through the following display options: Program Type Station Name... -
Page 39: Listening To Your Ipod Player
IN to their applicable power sources. • Current iPod playback mode (shuffle, repeat modes) 5 With your iPod player, NAD IPD and T 747 all at power ON state, toggle • Song title • front panel’s [SOURCE ] to select “iPod”... -
Page 40: Nad Ipd 2
LISTENING TO YOUR iPod PLAYER NAD IPD 2 The NAD IPD 2 has its own remote control - the DR 1. DR 1 can be used to control NAD IPD 2 only at “Simple Mode”. When using the DR 1 to command your iPod player docked in the NAD IPD 2, you have to refer to your iPod player’s own display screen to make full use of its feature;... -
Page 41: Reference
REFERENCE TROUBLESHOOTING CONDITION POSSIBLE CAUSES POSSIBLE SOLUTIONS No sound from all channels. • AC power unplugged. • Check AC cable connection and outlet. • Power not switched on. • Outlet has no power. No sound from some channels. • Faulty/missing cables. •... -
Page 42: Specifications
REFERENCE SPECIFICATIONS AMPLIFIER SECTION Power output, Stereo Mode 2 x 110 W (ref. 0.08 % THD, 8 Ω) IHF dynamic power - 8 Ω 2 x 160 W 4 Ω 2 x 220 W Power output Surround Mode 7 x 60 W Total harmonic distortion at rated power 0.08 % IM distortion at rated power... - Page 43 ©2009 NAD ELECTRONICS INTERNATIONAL A DIVISION OF LENBROOK INDUSTRIES LIMITED All rights reserved. No part of this publication may be reproduced, stored or transmitted in any form without the written permission of NAD Electronics International T 747 Manual Volume 1 03/09...
Need help?
Do you have a question about the T747 and is the answer not in the manual?
Questions and answers