
Related Manuals for Wisper 806 Classic 2013


Summary of Contents for Wisper 806 Classic 2013
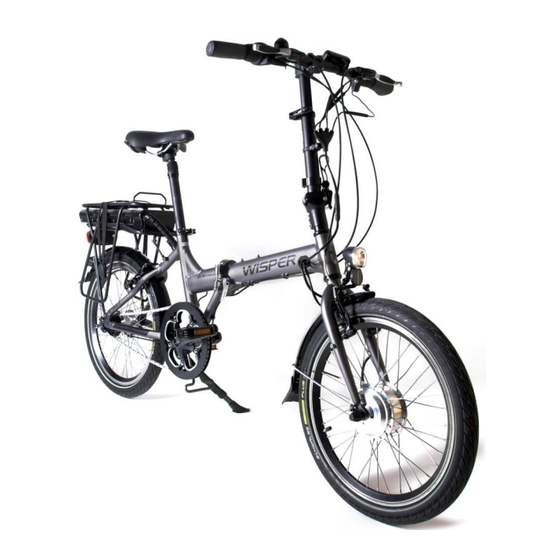
- Page 1 Owner’s Manual Wisper Classic 2013 Model January 2013 1st edition We strongly recommend that you read this entire manual before using your Wisper bike...
-
Page 2: Table Of Contents
Contents Introduction ............................3 Part 1 - Caring for your Wisper bike and pre use checks ..............4 Before you set off for the first time ..................4 Before each use ......................... 5 Battery care ..........................6 Recharging your battery ......................6 Water ............................ -
Page 3: Introduction
1 Introduction Thank you for choosing a Wisper electric bicycle. Before you use your Wisper electric bike it is important that you read this manual carefully. If there is anything you do not understand completely please contact us. Please observe traffic regulations, and do not lend your bicycle to anyone who is unfamiliar with it. -
Page 4: Part 1 - Caring For Your Wisper Bike And Pre Use Checks
2 Part 1 - Caring for your Wisper bike and pre use checks Your Wisper bike has been thoroughly tested at the factory prior to delivery, and undergone a pre delivery inspection as detailed in the table in appendix 1 of this manual. Please ensure the table has been completed by your Wisper dealer. -
Page 5: Before Each Use
2.1.8 Press the on/off switch (labeled with O’ symbol) on the LCD display located on the left hand side of the handlebars to check the battery capacity and the power assistance level selected. 2.1.9 To avoid dangerous unplanned acceleration, always make sure that the electrical system is turned off and the power indicator lamps are not illuminated when mounting, dismounting or leaving the bike unattended. -
Page 6: Battery Care
2.3 Battery care 2.3.1 Before you use the battery for the first time it is essential to condition the battery. To fully condition your new battery give it a complete deep charge, and discharge cycle. This is achieved by charging your battery for 12 hours until the charger LED turns green, then use the bike until the battery almost drained and recharge as above. -
Page 7: Water
2.4.2 Always charge the battery in a well ventilated area. 2.4.3 Do not leave the charger connected to the mains when not in use. 2.5 Water 2.5.1 Your electric bicycle is rain and splash proof and can be used in all weathers. 2.5.2 The electrical components of the vehicle, such as motor, battery, and controller, must not be submerged in water. -
Page 8: Technical Specifications & Performance
Lithium Ion with advanced battery management system (BMS) 36V 9Ah 324Wh Capacity Weight 2.5kg Controller 36V 14A developed specifically for Wisper for optimum performance Mains charger Lithium 120V or 240V input, Intelligent charge system communicates with BMS, auto stop when fully charged... - Page 9 Car/boat charger Lithium 12V input (Optional at extra cost) Connections All electronic components and motor wheel have individual connectors for ease of servicing Assisted range Average 30miles/50 kilometers* Assistance modes 1. Throttle only: to 15.5mph/25kph available in UK (4mph/6kph in EC) 2.
- Page 10 Cranks Annodised black alloy Pedals Alloy folding, sealed bearings Brakes Rear: Tektro V Front: Tektro V Levers: Tektro comfort Rims Alloy double walled 20” x 1.5” Büchel Germany Spokes 13g stainless steel Büchel Germany Tyres 20” x 1.75” Schwalbe Energizer Plus with 3mm Green Guard puncture protection and hi-visibility reflective walls Mudguards Polycarbonate shatterproof...
-
Page 11: Simple Trouble Shooting
3. Battery capacity loss or 3. Replace battery damage 4. Use pedal assist mode 4. Hill climbing, frequent and try to avoid using stops, strong head winds, throttle excessively over loading. Also see section on Wisper website regarding range issues... - Page 12 The bicycle is equipped with built in diagnostics. Should a fault be detected during use then the LCD display will display a fault code as shown below to indicate the fault. Fault code Description Possible Solution Code 02 Motor current is too high. Check for motor cable damage.
-
Page 13: Part 2 Controls And Equipment
3.1 Battery on off and battery lock 3.9.1 Your Wisper bike is supplied with 3 identical keys. The key is only used for locking the battery into the bike. Please keep a careful note of the key number as we cannot replace it without this number should it become mislaid. - Page 14 C: Down (decrease) adjustment button. For decreasing the level of assistance. D: Set. When pressed, you can switch the bike lights on and off and set the single trip distance. If you press it together with C button, you can set the bike’s tyre size. E: This shows the instantaneous power consumption.
-
Page 15: The Lights
3.2.3.7 If a problem is suspected with the bike press the set button and down arrow simultaneously to display any error code. Refer to section 2.8 for the error code descriptions. Contact your Wisper dealer for advice should this occur. -
Page 16: Pedelec Mode And Assist Mode
3.4 Pedelec mode and ASSIST mode 3.4.1 When you first ride your 806Classic you will notice that after half to one turn of the pedals the motor will start working assisting you ride the bike by adding power to the front wheel. This is the standard or pedelec mode. -
Page 17: Throttle Mode
3.5 Throttle Mode 3.5.1 The throttle is located on the left hand handlebar and can be used independently to the pedelec mode to provide full power irrespective of assist level selected (providing at least level 1 is selected) but the operation will vary depending on the country where the bike is supplied. Bikes are set up to be legal in the region in which they are supplied and will either provide full power (100%) or power up to 4 mph (6kph) (walkalong mode) independently of the pedelec. - Page 18 The Wisper pedelec system simply detects that the pedal cranks are turning and any continued forward motion of the cranks will result in the bicycle electronics proving the full level of assistance selected on the handlebar display regardless of rider input effort.
-
Page 19: Gear Shifter
3.7 Gear shifter 3.6.1 The 806 Classic is fitted with a 7 speed Shimano Nexus gear unit contained within the rear hub. 3.6.2 The twist grip gear shifter is located on the right hand side of the handlebars. Turning the twist grip away or towards you as shown by the arrows on the grip you will change gear which will be indicated by a corresponding gear number in the twist grip housing. -
Page 20: Brakes
3.8 Brakes 3.7.1 Front and rear V brakes are fitted to the bicycle. 3.7.2 The brake levers are fitted with cut outs which are required by law. This means that when you pull on either the back or front brake lever the motor immediately stops working. 3.7.3 Inspect brake pads for wear on a regular basis. -
Page 21: The Front Connection Box (Manifold)
3.7.6 Re insert the curved tubular cable into the left hand brake arm and adjust the brake cable so that the combined pad/rim clearance (the gaps from left pad to left rim surface and from right pad to right rim surface) is 2mm. This adjustment can be made either at the handlebar brake lever cable adjuster or the inner cable clamp screw on the right hand brake arm. -
Page 22: Quick Release Saddle Height, Handlebar Adjustment And Folding Mechanism
3.10 Quick release saddle height, handlebar adjustment and folding mechanism 3.9.1 Your Wisper bike has been fitted with a quick release seat post clamp to facilitate the movement of the saddle to change the riding position. 3.9.2 It is important that the knurled nut on the collar is tightened so the post will not move in the seat post tube when the clamp lever is closed. - Page 23 3.9.5 To fold the bike first fold each pedal by pushing the pedal inwards and then fold the pedal through 90 degrees as shown below. Lower the handlebars to the lowest position using the quick release clamps above, then release the quick release clamp at the base of the handlebar stem and fold the handlebars downwards taking care not to strain any of the control cables.
- Page 24 The picture below shows the bike in the correct folded position. 3.9.6 To unfold the bike follow the reverse steps above ensuring all quick release clamps are securely fastened and no cables are trapped. Ensure the safety catch for the handlebar lower quick release lever is engaged after making the adjustment.
-
Page 25: Saddle Post Suspension
3.11 Saddle post suspension 3.10.1 For your comfort your bike has been fitted with saddle post suspension and it has been set for a person weighing 75kg. If you are lighter than this you may not feel any benefit and if you are heavier you may feel the suspension bottoming out. -
Page 26: Drive Wheel Removal
3.13 Drive wheel removal 3.12.1 To completely remove the rear wheel it is necessary to disconnect the main motor cable connecting the motor to the bicycle electrical system. This is located on the front fork. Turn off all electrical systems on the bike and un plug the two halves of the connector by carefully pulling them apart taking care not to strain the cables. -
Page 27: Chain Adjustment
3.14 Chain adjustment 3.13.1 It is important that the chain is correctly tensioned. The correct tension is obtained when the chain can be deflected by approximately 10mm in the middle of the chain run between the chainwheel and the rear sprocket under moderate finger pressure. If it is necessary to adjust the tension slacken the rear wheel spindle nuts and move the wheel spindle backwards or forwards in the frame dropouts until the correct tension is achieved. -
Page 28: Warranty
IMPORTANT To validate this Warranty the retail customer must register the bike at www.wisperbikes/mywarranty within 14 days of purchase. Only use this product in accordance with this user manual. Wisper offer a limited warranty on the following items. Main frame... -
Page 29: Battery Maintenance And User Responsibilities
Exceptions to Limited Warranties Your Wisper bike may not be covered by our Warranty for any of the following reasons: Damage resulting from misuse, not maintaining the vehicle or not following the guidelines within our user guide or using the vehicle for any kind of competitive sport Accidental or deliberate damage. -
Page 30: Service
We reserve the right to check batteries claimed under warranty to ensure they have been maintained as per our instructions. 5 Service After sales service is available through your retailer. If you are unable to contact your retailer please contact our Wisper Support at support@wisperbikes.com Wisper Ltd 10 Oakenbrow... -
Page 31: Appendix 1 Pre Delivery Inspection And 300 Mile Service Check List
The PDI is a critical part of the overall QA process and must be completed by the supplying dealer followed by a test ride and sign off before passing the bike to the customer. The following items below are a generic list for all current Wisper models and must be covered during the PDI. - Page 32 Check seat post clamp quick release clamp is properly Adjust as necessary in place and secure and saddle is correctly fitted and secure Check smooth operation of gear change on either Adjust as necessary derailleur or 806 hub gear and ensure all gears can be selected Ensure side stand supports bike correctly and does not interfere with other moving cycle parts...
- Page 33 Notify Wisper Support if any manufacturing faults are Print out and Sign off the above identified quoting details on the QA label and...
Need help?
Do you have a question about the 806 Classic 2013 and is the answer not in the manual?
Questions and answers