Table of Contents
Advertisement
Advertisement
Table of Contents

Related Manuals for First Degree Fitness Viking 2 AR


Summary of Contents for First Degree Fitness Viking 2 AR
-
Page 1: Owners Manual
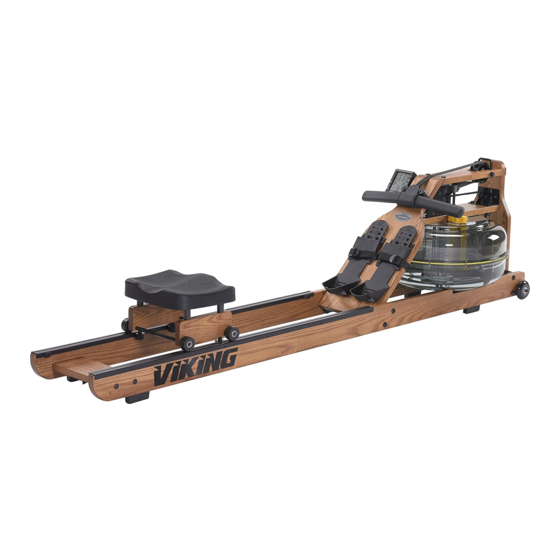
Owners Manual Featuring Patented Adjustable Fluid Resistance Technology... - Page 2 Congratulations on your purchase of the Viking 2 AR Rower. First De- gree Fitness is proud to present the Viking 2 AR Rower as part of our ex- clusive range of commercial and home use products featuring patented Adjustable Resistance.
- Page 3 1. Keep hands and fingers away from moving parts, as indicated in this manual. 2. The Viking 2 AR Rower can stand vertically for storage. Make sure a secure location is chosen, such as the corner of a room or against...
-
Page 4: Table Of Contents
Contents Viking 2 AR Rower Box Contents Side Rail/Rear Brace/Transport Wheel Assembly Mounting Rower Seat and Upper Mainframe Attaching Footboard to Mainframe Completing The Viking 2 AR Assembly Adjustable Resistance (AR) Tank Note on Filling the AR Tank Tank Filling and Water Treatment... -
Page 5: Viking 2 Ar Rower Box Contents
Viking 2 AR Rower Box 1 & 2 Contents Box 1 Contents Box 2 Contents... - Page 6 Item Qty Description Item Qty Description Mainframe M8 Nylock Nut Left / Right Side Rail M6x15mm bolt Footboard M8x45mm bolt Rower Seat M6x65mm bolt Rear Brace 5mm Allen Key Footplate 6mm Allen Key Bungee hook mount 13mm Spanner Transport Wheel Assembly AA Duracell Battery Rower handle bar catch Water Treatment Tablet...
-
Page 7: Side Rail/Rear Brace/Transport Wheel Assembly
Side Rail/Rear Brace/Transport Wheel Assembly Start with the Rear Brace and on the underside you will find a pre-installed bolt. From the hardware kit, take the Bungee Hook Mount and install it onto the Rear Brace as shown. Note the orientation of the Brace and hook must be correct in order to hold the end of the Bungee Shock Cord as depicted by the arrow in the illustration, which points toward the front of rower. -
Page 8: Mounting Rower Seat And Upper Mainframe
Transport Wheel Assembly Transport Wheel Axle Transport Wheel Washer Note Transport wheels must be mounted on the outside of Side Rails as pictured a bove. Side Rail Right Nylock Nut Once the Rear Brace and Side Rails are assembled, mount the Transport Wheel Assembly[8] onto the Left/Right Side Rails[2] Note: One washer on outside and one washer on the inside of the side rail Do not over tighten the Transport Wheel Axle as it may inhibit Transport Wheel ro-... - Page 9 Next, install the Mainframe onto the Side Rail Assembly as shown. You will need 4x M8x45mm bolts[14], 8x M8 washers[10], 4x M8 standard nuts[11] and 4x M8 Nylock nuts[12]. Secure but do not tighten. You will find that the lower bracket bolts can be difficult to access.
-
Page 10: Attaching Footboard To Mainframe
Attaching Footboard to Mainframe First, undo the rower handle and move forward. Then, install the footboard[3] onto the main frame using the Rower handle bar catch[9], 2x M6x65mm bolts[15] for the top of the footboard, and 4x M8x45mm bolts[14], 8x M8 washers[10], 4x M8 standard nuts[11], 4x M8 nylock[12] nuts for the lower footboard to side rail as- sembly. -
Page 11: Completing The Viking 2 Ar Assembly
Details regarding can be found in the Computer sec- tion of this manual. Choose a flat, level surface on which to use your Viking 2 AR Rower, to avoid rocking and potential premature wear. Tighten frame bolts... -
Page 12: Adjustable Resistance (Ar) Tank
Adjustable Resistance (AR) Tank The Adjustable Resistance (AR) Tank, developed and patented by First Degree Fitness, offers a true multi-level experience. Water is moved between the "storage" and "active" chambers of the AR Tank. Your new Rowing Ergometer can adapt - at the turn of a dial - to the resistance preferred by each user in the home environment. -
Page 13: Note On Filling The Ar Tank
Note on Filling the AR Tank Important: Please Read Before Filling Tank: Caution: When filling the AR tank, the adjuster handle must be set to the “MAX” position as shown to allow accurate fill levels. Using any other setting other than “MAX” will result in inaccurate fill levels and in extreme cases could cause leakage to occur during use or when stored in the standing position. -
Page 14: Tank Filling And Water Treatment
Tank Filling and Water Treatment Tank Filling and Water Treatment Pro- cedures Note: 17 liters of water is required for Siphon maximum filling. Fill tank with adjuster handle set to “MAX” Tank plug only. 1. Remove Rubber Fill Plug from the top of the tank. 2. -
Page 15: Removing/Changing Tank Water
Removing/Changing Tank Water: Set Adjuster handle to “MIN” Row a minimum of ten complete strokes before com- mencing tank draining. Remove tank plug, insert rigid end of siphon into tank and begin draining. NOTE: Approximately 40% of tank water will remain. It is not possible to completely drain the A/R tank without disassembly. -
Page 16: Slider Footplate
Slider Footplate To adjust, lift and slide Mounting pegs Footstrap The Slider Footplate is designed to fit a wide range of foot sizes, and is very simple to use. To adjust, lift the top of the sliding portion of the footplate and slide up or down. The numbers 1-6 represent a guideline from which the proper length can be determined. -
Page 17: How To Row
How to Row? 1. Begin the stroke comfortably forward and push strongly back with your legs while keeping your arms and back straight. 2. Begin to pull your arms back as they pass over your knees and continue the stroke through to completion rocking slightly back over your pelvis. 3. -
Page 18: Viking 2 Ar Computer
Viking 2 AR Computer Options: Auto Start: Commence rowing to activate. Reset all values: Hold button down for 3 seconds first to RESET. Distance: Add 100m distance, up to 1000m then add 500m, each button push to accumulate required distance then begin rowing to initiate distance count down. -
Page 19: Using The First Degree Fitness Usb Interface
Using the First Degree Fitness USB Interface Description: The USB connectivity now built in to all new models of FDF Console and IPM allow you to enhance your exercise experience by connecting to your home PC or Laptop. Using FDF's own sample applications you can exercise while enjoying your favorite movies. -
Page 20: Detaching The Rower Belt
Detaching the Rower Belt 1. To detach belt, simply pull beyond the range of the normal rowing stroke until the belt detaches from the belt bungee pulley. Tip: You’ll hear the Velcro separating just before the belt detaches. 2.Unhook the Bungee Shock Cord from the Rear Leg. Inner Clip Then, push out the Inner Clip from the Bungee Hook End Frame. - Page 21 Rower Handle 3.Wind the Rower Belt onto the Belt/ Bungee Pulley until the Rower Handle is as it’s furthest forward position. Belt/Bungee Pulley 4.Rethread the Bungee Shock Cord (on opposite side of the Idle Wheel) back Bungee Pulley through the Bungee Pulleys and tie off at the Attachment Point.
-
Page 22: Troubleshooting
(strokes per mi- out of position nute). Please contact your nearest FDF Wiring harness customer service center for details The Viking 2 AR Batteries installed Replace/reinstall batteries in correct Rower Computer incorrectly or need position and try again. If the LCD does not illuminate replacing. -
Page 23: Warranty
Wooden Frame – 5 Year Limited Warranty First Degree Fitness Limited will repair or replace the wooden Main Frame of the Rower should it fail due to any defect in materials or workmanship within 5 years of the original purchase. Warranty does not ap- ply to frame coating Polycarbonate Tank &...
Need help?
Do you have a question about the Viking 2 AR and is the answer not in the manual?
Questions and answers