
Related Manuals for Aastra 7444ip


Summary of Contents for Aastra 7444ip
- Page 1 USER GUIDE 6/1553-DBC 444 01 2010 Aastra 7444ip IP Phone for MX-ONE™ USER GUIDE Annakarin Roos aroos CoE MX-ONE XXXXXX XXXX CoE MX-ONE...
- Page 2 The contents of this document are subject to revision without notice due to continued progress in methodology, design and manufacturing. Aastra shall have no liability for any error or damage of any kind resulting from the use of this document.
-
Page 3: About This User Guide
About this User Guide This user guide describes the available features of the Aastra 7444ip phone (also known as DBC 444) when it is connected to MX-ONE. The user guide is valid for MX-ONE Telephony System – Telephony Switch and Telephony Server. -
Page 4: Safety Instructions
AFETY NSTRUCTIONS Safety Instructions Read this chapter before using the telephone. For safe and efficient operation of the telephone, observe the guidelines given in this manual and all necessary safety precautions when using the telephone. Follow the operating instructions and adhere to all warn- ings and safety precautions located on the product, the Quick Reference Guide and this User Guide. - Page 5 IP P MX-ONE™ HONE FOR Precautions Note: When using your telephone or connected equipment, the following basic safety precautions should always be followed to reduce risk of fire, electrical shock and other personal injury. • Save this manual. It includes important safety information and operating instructions.
-
Page 6: Disposal Of The Product
AFETY NSTRUCTIONS • Avoid using a telephone (other than a cordless type) during an elec- trical storm. There may be a remote risk of electric shock from light- ning. • Do not use the telephone to report a gas leak in the vicinity of the leak. -
Page 7: Regulatory Compliance Statements (Usa And Canada Only)
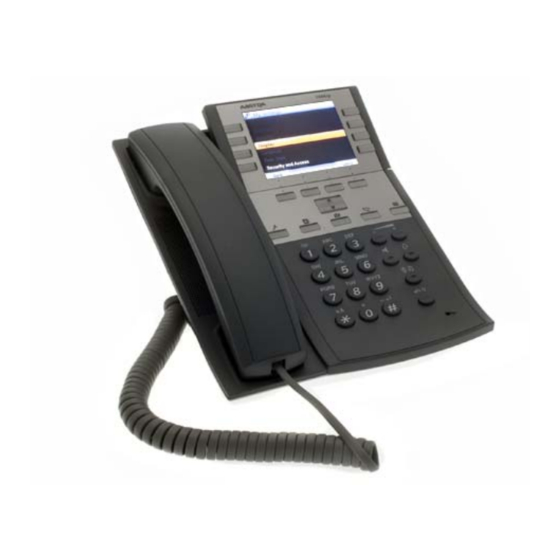
HONE FOR Regulatory Compliance Statements (EU and EFTA only) Hereby, Aastra Telecom Sweden AB, Box 42214, SE-126 17 Stockholm, declares that this telephone is in conformity with the essential require- ments and other relevant provisions of the European Directive 1999/5/EC (R&TTE Directive). - Page 8 ESCRIPTION Aastra 7444ip Description This chapter describes the Aastra 7444ip phone and its main features. The phone has a 3.5 inch, backlit color display with 4 soft keys and 2 navigation keys. It also has 8 programmable shortcut keys, 5 menu keys, 6 function keys, and a standard keypad with 12 alphanumeric keys.
-
Page 9: Functions And Accessories
IP P MX-ONE™ HONE FOR Functions and Accessories The Aastra 7444ip main features are listed below, in Table 1 Features, and its accessories are listed in Table 2 Accessories. Table 1 Features Intuitive graphical user interface Downloadable ring melodies Call list sorted by call type... -
Page 10: Display Information
7444 ASTRA ESCRIPTION Display Information The icons and text in the display indicate functions and settings available to the user. The display gives visual feedback on all actions performed, and also text information. In idle mode, the phone display shows your name or extension number, or both, along with time and date information in the top row of the display. -
Page 11: Display Icons
IP P MX-ONE™ HONE FOR 3.2.1 Display Icons The phone display conveys information about call status, presence, and a number of settings. This information is conveyed via messages and icons. The icons are described below. Table 3 Display Icons Icon Description Idle mode indicator Appears in the upper left corner of the display to... - Page 12 7444 ASTRA ESCRIPTION Icon (Cont.) Description (Cont.) On hold Indicates that the call is put on hold. Diversion Indicates that your extension is diverted. Missed calls This icon indicates, together with the text “Missed calls” that you have new missed calls. The number of missed calls are specified next to the icon.
-
Page 13: Function Keys
For more information, see 15 Messages on page 88. 3.2.3 Function Keys The function keys are the volume keys, the loudspeaker key, the headset key, the mute key and the clear key, see 1 Aastra 7444ip Front View on page 8. 6/1553-DBC 444 01 Uen A1 2010-06-10... -
Page 14: Shortcut Keys
7444 ASTRA ESCRIPTION 3.2.4 Shortcut Keys The shortcuts look different depending on the type of shortcut. They look either like a yellow sticky note, or a blue soft key, see the table below for a detailed description of the shortcut types and their symbols. For information on how to add, edit and delete shortcuts, see 14 Short- cuts on page 82. -
Page 15: Menu Structure
IP P MX-ONE™ HONE FOR Menu Structure In the sections below, the phone menus are described in brief. For a detailed description of the various menu options, please see the relevant sections in this manual. Note: Depending on the phone configuration, the menus in your phone may differ from the menu figures below. - Page 16 7444 ASTRA ESCRIPTION Figure 4: Settings menu structure 6/1553-DBC 444 01 Uen A1 2010-06-10...
-
Page 17: Contacts Menu
IP P MX-ONE™ HONE FOR 3.3.3 Contacts Menu Pressing the key activates the Contacts menu. See figure below for a description of the menu structure. Figure 5: Contacts menu structure 3.3.4 Shortcuts Menu Pressing the key opens the 2nd page of the Shortcuts menu. See figure below for a description of the menu structure. -
Page 18: Call List Menu
7444 ASTRA ESCRIPTION 3.3.5 Call List Menu Pressing the key activates the Call List menu. See figure below for a description of the menu structure. Figure 7: Call list menu structure 3.3.6 Messages Menu Pressing the key activates the Messages menu. See figure below for a description of the menu structure. - Page 19 IP P MX-ONE™ HONE FOR 3.4.1 Ring Signals - Incoming Calls There are three different types of incoming calls, each with their own characteristic ring signal. The signals shown below are the three most commonly used signals worldwide. However, many markets have adapted the signals to local standards.
- Page 20 7444 ASTRA ESCRIPTION 3.4.2 Ring Tones - Outgoing Calls When you attempt to make a call, you hear different ring tones depending on the line status. The tones described below are the most commonly used tones worldwide. However, many markets have adapted the tones to local standards.
-
Page 21: Status Indicators
IP P MX-ONE™ HONE FOR Status Indicators Several phone keys have indicator lamps that indicate line status as well as other types of status according to different flash patterns, see descrip- tion below. Indicator Description Indicates that the feature is inactive. Steady light Indicates that the feature is active. -
Page 22: Installation
Note: For information on which power adapters to use, see 2 Safety Instructions on page 4. Figure 11:Aastra 7444ip Back View Note: The phone’s headset port requires a headset cable with an 8-pole connector, see 2.1.2 Required Headset Adapter on page 4. - Page 23 IP P MX-ONE™ HONE FOR 4.1.1 Cabling Icons Table 5 Cable Icons Icon Description Power Inlet The phone is powered by an external AC/DC adapter (see details below) or, alternatively, over a Power over Ethernet (PoE) switch. • If you use the external power adapter, connect one end of the adapter to the phone connection marked , and the other end to a power...
- Page 24 NSTALLATION Icon (Cont.) Description (Cont.) Panel Unit (Optional) Connect the Key Panel Unit or the Display Panel Unit to the connector marked Panel. Note: The phone does not work during power failure, unless powered through a PoE switch. Tiltable Display The phone is equipped with a display that is tiltable, allowing you to change the display angle by pulling its upper part towards you, see figure below.
- Page 25 IP P MX-ONE™ HONE FOR Figure 13:Tiltable Foot Console 4.3.1 Installing the Foot Console To install the foot console, do the following: Attach the foot at the arrows on the back of the phone. Press until you hear a click sound. Note: If you wish to remove the foot console, pull the console firmly towards you to release it before removing it from the phone.
- Page 26 NSTALLATION For detailed information about the cables, see 4.1 Cabling on page Option Unit (Optional) It is possible to install an option unit in the phone. The option unit, which is built into the foot console, provides the phone with Gigabit Ethernet and an extra bell and busy signal.
- Page 27 IP P MX-ONE™ HONE FOR 4.4.1 Installing an Option Unit To install the option unit, do the following: Log off the phone and disconnect the power from the phone to avoid electrostatic discharges, ESD. Connect the ribbon cable to the phone, making sure the cable does not get stuck.
- Page 28 NSTALLATION Note: Unless the LAN cable is connected to the port marked Net on the option unit, the phone will not work. Attach the ESD covers on the back of the phone to protect the connectors from ESD. For this you need a screwdriver. 4.4.2 Removing an Option Unit To remove the option unit, do the following:...
- Page 29 Use the Design Card Manager (DCM) tool to create your own designation cards with shortcut keys. The latest version of the DCM tool can be downloaded from www.aastra.com. For more informa- tion, please contact your Aastra Enterprise Certified Sales Partner.
- Page 30 NSTALLATION Lock the unit, see figure below. Remove the rubber piece from the back of the panel unit. Connect the ribbon cable to the phone. Make sure it fits correctly before pressing it down. 6/1553-DBC 444 01 Uen A1 2010-06-10...
-
Page 31: Wall Mounting
IP P MX-ONE™ HONE FOR Replace the rubber piece. Connect the foot console on the KPU or DPU (the console is enclosed in the box). This is done in the same way as connecting the phone's foot console to the phone. 4.5.2 Removing a KPU or DPU To remove a KPU or DPU, do the following:... -
Page 32: Starting And Logging On
TARTING OGGING N AND Starting, Logging On and Off This chapter describes how to start the phone, and how to log on and off. It also describes free seating, and how to check which software version is used. All system settings for your phone must be set by the system adminis- trator before you can use the phone. -
Page 33: Logging On To The System
IP P MX-ONE™ HONE FOR 5.1.2 Logging On To the System When the phone is logged on to the network, you can either use the phone directly, or you need to log on to the telephony system, see below. • The phone logs on automatically to the telephony system, and the phone is ready to use. - Page 34 TARTING OGGING N AND Enter your extension number if it does not already appear in the display. The displayed number is erased automatically when you start entering new digits. The display shows your entered digits. Press Log On. Depending on the configuration, you are logged on automatically, or prompted for login details.
-
Page 35: Logging Off The Phone
IP P MX-ONE™ HONE FOR Logging Off the Phone If logging off the phone is allowed, the option Log off: [logged on user] appears when you press more..To log off from the phone, do the following: Press more... when the phone is in idle state. Select Log off: [logged on user] and press Select. -
Page 36: Updating The Phone Software
Software Version To view which software version is installed currently, do the following: Press Select Help and press Select. Select About Aastra 7444ip and press Select. 6/1553-DBC 444 01 Uen A1 2010-06-10... -
Page 37: Free Seating
IP P MX-ONE™ HONE FOR The software version is displayed at the top row. Press Back to return to previous menu. Note: Press to return directly to the idle display. Free Seating The free seating feature enables you to log on to your IP extension from any IP phone that allows temporary or free users. -
Page 38: Hands-Free Mode
ANDSFREE AND EADSET Handsfree and Headset This chapter describes how to answer and make calls in handsfree mode or by using a headset. The standard mode of answering and making calls is to lift the handset, and this is also the default mode in the procedures described in this user guide. - Page 39 IP P MX-ONE™ HONE FOR Action (Cont.) Procedure (Cont.) Switch from headset to Press handsfree Headset Using a headset allows you to make and receive calls without using the handset. The telephone supports wireless headsets that enable the user to answer and end calls remotely, via the headset.
- Page 40 ANDSFREE AND EADSET Action Procedure Activate Headset Preset Press and hold for at least 4 seconds. A short acknowledgement signal is heard, and the headset icon appears in the display. Deactivate Headset Preset Press and hold for at least 4 seconds.
-
Page 41: Incoming Calls
IP P MX-ONE™ HONE FOR Incoming Calls This chapter describes how to answer and reject incoming calls, how to pick up calls on other extensions, and how to check missed calls. Receiving Calls An incoming call is indicated by a ring signal, and a flashing indicator associated with the line on which the call is presented. -
Page 42: Missed Calls
NCOMING ALLS When you get a busy tone, press CallPickUp. Missed Calls If you have unanswered calls, this is indicated by a flashing indicator lamp on the call list key. A message appears in the display with informa- tion about the number of missed calls, see below. To check your missed calls, do the following: Press Select or the call list key to enter the call list. -
Page 43: Automatic Answer
IP P MX-ONE™ HONE FOR Automatic Answer It is possible to set incoming calls to be answered automatically in handsfree mode. This means that you get speech connection without having to perform any action. The feature is called automatic answer. These are the settings for the automatic answer feature: Auto Answer OFF The feature is disabled. - Page 44 NCOMING ALLS To answer a second incoming call, do the following: The second incoming call is indicated by a flashing line key and information about the caller, see figure below. Press the flashing line key to answer the second call. The first call is put on hold automatically.
-
Page 45: Parallel Ringing
IP P MX-ONE™ HONE FOR Press Back to return to the idle display. Parallel Ringing Parallel ringing makes it possible for an incoming call to ring several phones simultaneously and for the call to be answered on any of these phones. -
Page 46: Outgoing Calls
UTGOING ALLS Outgoing Calls This chapter describes how to make outgoing calls, and lists the options available to you when you receive a busy tone or no answer. Making Calls To make a call, you either dial a number, press a shortcut, dial an abbre- viated number, or find the contact stored in the phonebook. -
Page 47: Abbreviated Dialing
IP P MX-ONE™ HONE FOR 8.1.3 Abbreviated Dialing Frequently used phone numbers can be stored in the exchange as common abbreviated numbers, that is, a few digits that represent a complete internal or external number. Note: Common abbreviated numbers are programmed by the system administrator and are stored in the telephony system. -
Page 48: When You Receive A Busy Tone Or No Answer
UTGOING ALLS You can also redial numbers using the call list, see 11.1 Dial a Call List Item on page 69. To redial the last dialed external number, do the following: Lift the handset and wait for a dial tone. Dial ***. - Page 49 IP P MX-ONE™ HONE FOR Note: When the other party becomes available, you will receive a callback alert. 8.2.1.2 Ordering Callback When All External Lines Are Busy If all external lines are busy (after dialing the digit or digits to get an external line), do the following: Press the Callback shortcut key.
-
Page 50: Call Waiting
UTGOING ALLS 8.2.1.4 Canceling All Callbacks To cancel all callbacks, do the following: Select Cancel all Callbacks, and press Select. The message “Callbacks are pending. Delete all?” is displayed. Press Yes to confirm, or No to cancel. Note: This procedure cancels all callbacks to extension numbers and busy external lines. - Page 51 IP P MX-ONE™ HONE FOR End the ongoing call. Wait for a ring signal. Lift the handset to answer the waiting call. 8.2.2.3 Canceling Call Waiting To cancel call waiting, replace the handset. You can also press 8.2.3 Intrusion You can intrude on an ongoing call on a busy extension. Note: If intrusion is not allowed at either the calling extension or the called extension, you will continue to hear a busy tone.
-
Page 52: Emergency Calls (Sos Calls)
UTGOING ALLS Note: U.S. and Canada: Dial *1* extension number #. Emergency Calls (SOS Calls) This section describes how to make emergency calls in different modes. The emergency call feature allows you to make emergency calls even when the phone is not logged on to the exchange. The emergency call feature is enabled by the network administrator. -
Page 53: Number Presentation Restriction
IP P MX-ONE™ HONE FOR 8.3.3 The Phone Is Logged Off, Emergency Call Disabled When the emergency call feature is disabled, the SOS text does not appear at the bottom of the display, which means that you cannot make emergency calls unless you log on the phone. The display looks like this: Figure 16:Phone logged off, emergency call disabled Log on with your extension number, then call the SOS number. -
Page 54: Individual External Line
UTGOING ALLS Wait for a dial tone. Dial the desired number. Individual External Line To call an individual external line, do the following: Lift the handset. Dial *0*, individual external line number #. Dial the external number. 6/1553-DBC 444 01 Uen A1 2010-06-10... -
Page 55: During Calls
IP P MX-ONE™ HONE FOR During Calls This chapter describes a number of features that you can activate during an ongoing call. Placing a call on hold, making a transfer, and starting a conference are a few examples. During an ongoing call, the display shows information about the dialed (or called) number and name (if available) and the duration of the call. -
Page 56: Switching Between Calls
URING ALLS • Press more..., select Retrieve [call on hold], and then press Select. Inquiry When you make an inquiry, you place an ongoing call on hold while calling a third party. 9.2.1 Making an Inquiry To make an inquiry to a third party, do the following: Press Hold (or any line key). -
Page 57: Transfer To Your Mobile Phone
IP P MX-ONE™ HONE FOR Note: If you have put more than one call on hold, the last call that was put on hold will be transferred. If the dialed extension is busy, or if transfer is not allowed, your phone will ring again. 9.3.1 Transfer to Another Number To transfer an ongoing call to another number, do the following:... - Page 58 URING ALLS new conference leader, and the conference continues with the other included parties. When there are only two parties left, the conversation is changed back to a normal two party connection. You can add up to 6 participants in a conference. Only the person initi- ating the conference, the conference leader, can add participants.
-
Page 59: Call Forwarding
IP P MX-ONE™ HONE FOR Call Forwarding This chapter describes different ways to forward incoming calls to other numbers, or the operator. The type of call forwarding described in this chapter is called Follow-me. Follow-me is useful when, for example, you are working temporarily from another room and want your calls to follow you to that room, or if you want your incoming calls to be forwarded to one of your extension number. - Page 60 ORWARDING The display shows the text “FollowMeTo” followed by the answering position number. The Follow-me key indicator is lit. When you lift the handset again, a special dial tone is heard. Note: The Follow-me key works only as an indicator that follow-me is activated.
- Page 61 IP P MX-ONE™ HONE FOR Press the soft key Availability. Select Follow-me and press Select. Enter your own extension number. Press Done. The display shows the text “FollowMeTo” followed by the answering position number. The Follow-me key indicator is lit. To order follow-me from another telephone: Lift the handset and wait for dial tone Dial *21*own extension number * extension number of the new...
-
Page 62: External Follow-Me
ORWARDING 10.1.6 Canceling Follow-me Remotely To cancel remote programming of follow-me from another telephone than the telephone with the diverted number: Lift the handset and wait for dial tone Dial #21*diverted extension number# Replace the handset The indication of the active follow-me on the telephone with the diverted number disappears, if there is no additional diversion remaining. - Page 63 IP P MX-ONE™ HONE FOR The display shows the text “Diverted to external. The Follow-me key indicator is lit. When you lift the handset again, a special dial tone is heard. Note: The Follow-me key works only as an indicator that follow-me is activated.
-
Page 64: Selecting Profiles
ORWARDING The prerequisite is that all the involved telephones have the right service profile. To order programming of external follow-me for another extension, do the following: Lift the handset and wait for a dial tone. Dial *22* extension number to divert # route access code and the external number # Replace the handset. - Page 65 IP P MX-ONE™ HONE FOR profile, make sure to always update your greeting with the absence information. 10.3.1.1 Selecting a Profile From Your Phone To select a profile from your phone, do the following: Press the soft key Availability. Select My Profile and press Select. Enter a profile number and press OK.
- Page 66 ORWARDING – Activate Free on Busy (if available) – Follow-me to VoiceMail – Follow-me to the operator • If an answering machine, a fax or other answering device is used as an early answering position, it might interfere with the searching. Disconnect the answering device, or design the ring times so they do not affect the searching.
- Page 67 IP P MX-ONE™ HONE FOR Table 7 Example Profile 2 - At home Search Type of phone or Phone Ring time order answering position number (seconds) Examples: Desk, Cordless, Mobile, External, Voice Mail, Operator, and so on External 00082222222 Mobile 0706666666 Voice Mail 0822255555...
-
Page 68: Call List
Call List This chapter describes the call list and its features. The phone keeps a call log of 50 positions listing received calls, missed calls, and dialed calls. Each item in the call list contains detailed information about the call. From the call list, , you can call and remove call list items, and add them as contacts or shortcuts. - Page 69 IP P MX-ONE™ HONE FOR Icon (Cont.) Description (Cont.) This icon indicates received calls. This icon indicates missed calls. 11.1 Dial a Call List Item To dial from the call list, do the following: Press the call list key to open the call list. The latest call appears highlighted at the top of the display.
- Page 70 Press Done when you are done editing the contact fields. The new contact is saved. Press to return to the idle screen. 11.2.2 Adding a Call List Item To the Shortcuts To add a call list item to the shortcuts, do the following: Press and select the number you wish to add.
- Page 71 IP P MX-ONE™ HONE FOR Select Delete all calls in list and press Select. The message “Delete all calls in list?” is displayed. Press Yes to confirm deletion. The message “No calls in CallList!” is displayed Press Exit or to return to the idle screen. 6/1553-DBC 444 01 Uen A1 2010-06-10...
-
Page 72: Dial A Contact
ONTACTS Contacts This chapter describes how to manage contacts. From the contacts menu, you can call, add, edit, and remove contacts. • For information on how to copy corporate directory contacts to your personal contacts, see 12.5 Corporate Directory on page 77. •... -
Page 73: Add A Contact
IP P MX-ONE™ HONE FOR • To find a contact beginning with “Ab”, hold and press 2 once to display the letter A. Then press 2 twice in a row to display the letter B after A. 12.2 Add a Contact There are several ways to add a contact: •... -
Page 74: Edit A Contact
ONTACTS For instructions on how to change the ring signal, see 12.3.3 Changing Ring Signals For a Contact on page 76. Press Done when you are done editing the contact fields. The new contact is saved. Press to return to the idle screen. Note: The digits can be stored by adding the country code number after a plus sign, for example +46 8 719 0000. -
Page 75: Entering Information
IP P MX-ONE™ HONE FOR 12.3.1 Entering Information • Enter text or numbers in fields by multi-tapping the dialing keys 2-9. The most common letters are printed above each dialing key on the phone. Example: To enter the letter A in a field, press 2 once. To enter the letter B, press 2 twice. -
Page 76: Delete A Contact
ONTACTS 12.3.3 Changing Ring Signals For a Contact To change ring signals for a certain contact, do the following: Press and select the entry you wish to edit Press Edit. A dialog box appears with the fields Number, Name and Ring Signal. -
Page 77: Corporate Directory
IP P MX-ONE™ HONE FOR 12.5 Corporate Directory The corporate directory, which holds all contacts in your organization, resides on a corporate directory server. When you search a contact in the corporate directory, a request is sent to the corporate directory server, which returns a list of names that matches the search. -
Page 78: Microsoft® Outlook® Contacts
ONTACTS A dialog box appears with the fields Number or Phone and Organi- zation. Enter the name or number you wish to search and press Search. The search result is displayed. Select the contact you wish to add to your phonebook and press Add. - Page 79 Note: You find the phone IP address by clicking , and selecting Help, About Aastra 7444ip, Phone IP Address. Click OK. All available Microsoft Outlook contacts are listed on the left side and the contacts that are already in your phone are listed on the right side.
-
Page 80: Presence Information
RESENCE NFORMATION Presence Information This chapter describes different availability settings available, and how you select them. Presence information is used to inform callers when you are out of the office, and when you expect to return. Available absence reasons are, for example, Lunch, Busy, Vacation, Meeting and Trip. -
Page 81: Canceling Absence
IP P MX-ONE™ HONE FOR A list of absence reasons is displayed. Scroll the list with the navi- gation keys. Select an absence reason and press Select. The name of the selected absence reason is displayed. Depending on the reason selected, the field Return time (HH:TT) or Return date (MM.DD) may also appear below the reason. -
Page 82: Shortcut Keys
HORTCUTS Shortcuts This section describes how to call, add, edit, and delete shortcuts from the Shortcuts pages. Note: You can also add, edit, and delete shortcuts from the Settings menu, see 18.2 Shortcuts on page 104. 14.1 Shortcut Keys The phone has 8 programmable shortcut keys, allowing you to program up to 80 shortcuts on 10 pages, with 8 shortcuts on each page. - Page 83 IP P MX-ONE™ HONE FOR 14.3.1 Adding New Shortcut Manually To add a shortcut manually, do the following: Press and press a shortcut key that is not programmed. Press an unprogrammed shortcut key. The message “Not programmed! Program shortcut?” is displayed. The shortcut key indicator starts flashing slowly.
-
Page 84: Editing A Shortcut
HORTCUTS 14.3.3 Adding New Shortcut From Contacts To add a shortcut from your contacts list, do the following: Press and press a shortcut key that is not programmed. Press an unprogrammed shortcut key. The message “Not programmed! Program shortcut?” is displayed. The shortcut key indicator starts flashing slowly. -
Page 85: Delete A Shortcut
IP P MX-ONE™ HONE FOR 14.4.2 Editing an MNS Key MNS keys can only be programmed by the system administrator, but you can change the alert signal and the shortcut label. To edit an MNS key, do the following: Press . - Page 86 HORTCUTS Press more... and select Delete? and press Select. The message “[shortcut name or number] Delete?” is displayed. Press Yes to confirm deletion. If you press No you are returned to the previous window. Press and hold the shortcut key that you wish to delete. The Edit window appears for the selected shortcut.
- Page 87 IP P MX-ONE™ HONE FOR The message “Delete Shortcuts?” is displayed. The key indicators of all programmed shortcuts starts flashing slowly. Press Yes to confirm deletion. If you press No, you are returned to the previous window. 6/1553-DBC 444 01 Uen A1 2010-06-10...
-
Page 88: Listening To Voice Mail Messages
ESSAGES Messages When you have new messages waiting, the message icon appears in the display, and the indicator on the messages key flashes. If you receive a message during a call, you are notified with a beep. The messages key indicator keeps flashing until you press the key. 15.1 Voice Mail A voice mail application allows you to record an absence message that... -
Page 89: Manual Message Waiting (Mmw)
IP P MX-ONE™ HONE FOR To enter the voicemail, do the following: Press Select My VoiceMail, and press Call. Follow the recorded instructions. 15.1.3 Programming VoiceMail and My Messages Numbers To program a number for My VoiceMail and/or My Messages, do the following: Press and Settings. - Page 90 ESSAGES After the call, the messages icon still appears in the display, and you have to remove the MMW indication manually. To remove an MMW indication manually, do the following: Press Select . [number or contact that left MMW]. Press Delete. The message “Delete [number or contact that left MMW]?”...
-
Page 91: Group Features
IP P MX-ONE™ HONE FOR Group Features This chapter describes group features, that make use of common group numbers in order to make it easier for others to reach you and your colleagues, and allow you to answer each other’s calls. Group Call Pickup Group Call Pickup enables you to answer calls to you colleagues’... -
Page 92: Picking Up A Call
ROUP EATURES 16.1.2 Picking Up a Call If you are a member of a call pickup group, you can answer calls to any other member (extension) in the group. To answer a call to a call pickup group, do the following: Lift the handset and wait for a dial tone. -
Page 93: Advanced Features
IP P MX-ONE™ HONE FOR Advanced Features This chapter describes advanced features such as Account code, Autho- rization code, Personal number, and Alarm Extension. 17.1 Account Code Account codes allows you to keep track of where different outgoing calls are charged. The account code feature enables you to do the following: •... -
Page 94: Authorization Code
DVANCED EATURES 17.2 Authorization Code Authorization codes are used to control or limit the access to an exten- sion. When an extension is controlled by an authorization code, certain service profiles are not allowed to use certain features, such as making calls to other countries. - Page 95 IP P MX-ONE™ HONE FOR 17.2.1.2 Locking an Extension To lock an extension with a common authorization code, do the following: • Dial *73* authorization code #. When you hear a verification tone and the lock icon appears in the display, the extension is locked.
- Page 96 DVANCED EATURES 17.2.2.1 Dialing From Own Extension To make a authorization code call from your own extension with an indi- vidual authorization code, do the following: Dial *75* authorization code #. Wait for a verification tone. Dial the external number. Note: If the service profile for the dialed external number is too low for the call, the call is rejected.
-
Page 97: Alarm Extension
IP P MX-ONE™ HONE FOR • If you do not enter an authorization code, the default service profile will be used. • If you enter a valid authorization code, the service profile associ- ated with the authorization code will be used. 17.2.2.5 Changing the Authorization Code The individual authorization code can only be changed from your own... -
Page 98: General Deactivation
DVANCED EATURES 17.5 General Deactivation General deactivation enables you to cancel a number of features in one single command. The following features are canceled with the general deactivation feature: • Callback (all callbacks are cancelled) • Follow-me and External follow-me •... -
Page 99: Emergency State
IP P MX-ONE™ HONE FOR tant calls after office hours and wish to get them without delay. Details about external line numbers can be obtained from the operator. 17.6.1.1 Activating Flexible Night Service To activate flexible night service, do the following: Lift the handset and wait for a dial tone. -
Page 100: Malicious Call Tracing
DVANCED EATURES 17.8 Malicious Call Tracing If you are being disturbed by bothersome or malicious external incoming calls, it is possible to request number tracing from the network provider. Tracing can be invoked during or after a call. When malicious call tracing (MCT) is enabled, a signal is sent to the switched telephone network (PSTN) before the malicious call is discon- nected. - Page 101 IP P MX-ONE™ HONE FOR The shortcut displays one of the following status indications: • The indicator lamp is off: The monitored extension is free. • The indicator lamp is flashing fast: The monitored extension has an incoming call waiting to be answered. •...
- Page 102 ETTINGS Settings This chapter describes how to change the phone settings from the My Settings menu which is invoked by pressing the settings key, Note: You can return to the idle menu at any time by pressing 18.1 My Availability Settings In the My Availability menu, it is possible to specify the following settings: •...
- Page 103 IP P MX-ONE™ HONE FOR Note: To cancel an absence reason, press the lit Follow-me shortcut key or select “Disable diversions” in the idle list. The indicator lamp is turned off. 18.1.2 Follow-me To order Follow-me, do the following: Press Select My Availability, and press Select.
- Page 104 ETTINGS 18.1.6 Free On Busy To activate free on busy, do the following: Press Select My Availability, and press Select. Select Free on busy:OFF, and press Select. Select ON, put call through, and press Select. To disable Free on busy, select OFF, send busy on busy. Note: You can enable and disable Free on busy by pressing the Free on busy shortcut key.
-
Page 105: Alert Signal
IP P MX-ONE™ HONE FOR Select Ring Signals and press Select. Default Ring Signals is selected. Press Select. Navigate to the ring signal or melody you wish to use, and press Select. Note: If you wish to listen to a signal or melody before selecting it, press Play. -
Page 106: Setting The Brightness
ETTINGS Periodic The ring signal alerts periodically. Delayed Periodic There is a delay before the first ring signal. The length of the delay can be changed by the system administrator. One Muted The phone rings once, then the signal is muted. Delayed One Muted There is a delay before the ring signal. -
Page 107: Display Menus
IP P MX-ONE™ HONE FOR Press the plus (+) or minus (-) soft keys, or the volume keys, to increase or decrease the intensity and brightness hold time to the desired levels. Switch between the fields with the navigation keys. Press Set for each setting. -
Page 108: Time And Date
ETTINGS A list of available character sets are displayed. Scroll the list with the navigation keys and select the desired desired character set. Press Set. A confirmation message is displayed. Press Yes to confirm, or No to cancel. 18.6 Time and Date This section describes how to change the time and date format in the phone display, and how to set the time and date manually. -
Page 109: Security And Access
IP P MX-ONE™ HONE FOR To modify the option unit settings, do the following: Press Select Option Unit, and press Select. Note: Option Unit is available only when an option unit is installed. Select Busy signal, Extra bell, or Combined Bell/Busy, and press Select. - Page 110 To find this information, do the following: Press Scroll down the list, select Help, and press Select. Select About: Aastra 7444ip and press Select. The current software version is displayed, along with at least one option. Select Phone IP Address and press Select to see the current IP address.
-
Page 111: Web Interface
IP P MX-ONE™ HONE FOR Web Interface This chapter describes how to change the phone settings from a web interface. Note: To access the phone web interface, you need to know the phone web address or IP address, see 18.10 Help on page 110. Using a web interface, you can change the following settings in your phone: •... - Page 112 NTERFACE 19.1 Using the Phone Through the Web To use your phone through the web interface, do the following: Enter the phone web address or IP address in the address field of your web browser. To find out the web address or IP address of the phone, see 18.10 Help on page 110.
- Page 113 IP P MX-ONE™ HONE FOR Expand the folder(s) to start edit data. To exit the web interface of the phone, press Log off. 19.1.1 Contacts Folder Click Contacts to see a list of the contacts stored in your phone. If you expand the Contacts folder, you can add and delete contacts.
- Page 114 NTERFACE 19.1.1.2 Editing or Deleting a Contact To edit or delete a contact, do the following: Click Contacts. Click the name to edit or delete. Do any of the following: • Make the changes and click Save to save. • Click Delete to delete the current contact.
- Page 115 IP P MX-ONE™ HONE FOR • Click Back to exit the edit and delete menu without any changes. 19.1.2.2 Clearing the Call List To delete all names and numbers from the call list, do the following: Expand Call List. Click Delete call list. A confirmation message is displayed.
-
Page 116: Settings - Sounds
NTERFACE 19.1.3.2 Editing a Shortcut To edit a shortcut, do the following: Click the underlined number or code for the key to be changed. Select the characters to be changed. Enter new characters. Click Save. The key table is shown with the edited number or code. 19.1.3.3 Deleting a Shortcut To delete a shortcut, do the following:... - Page 117 IP P MX-ONE™ HONE FOR Note: before you can change the PIN code, the phone must be config- ured by the system administrator to use PIN code. 6/1553-DBC 444 01 Uen A1 2010-06-10...
-
Page 118: Troubleshooting
ROUBLESHOOTING Troubleshooting This chapter contains information on how to solve common operational problems, and warnings you may receive. Go through the following list if you encounter any problems. If this checklist does not cover the problem, contact the system administrator. If others have similar prob- lems, there may be a system error. - Page 119 Most features are activated by either a suffix or a service code. This chapter lists the most common suffixes and service codes available in MX-ONE. Note: The Aastra 7444ip phone has dedicated keys for several of the features listed below. •...
-
Page 120: Service Codes
ELEPHONY UFFIXES AND ERVICE ODES Feature Standard Suffix Alternative Suffix (Cont.) (Cont.) (Cont.) Callback France: 5 New Zealand: 5 Sweden: 5 Common Hold France: 4 New Zealand: 4 Sweden: 6 Individual Call Pick-up France: 4 New Zealand: 4 Sweden: 6 Intrusion France: 8 New Zealand: 8... - Page 121 IP P MX-ONE™ HONE FOR Feature Standard Code Alternative Code (Cont.) (Cont.) (Cont.) Unlock extension #73* authorization North America: #71* code # authorization code # Individual (Regional) Authorization Code, RAC: Dial with RAC *75* authorization code Germany, The Netherlands, Sweden: *72* authorization code Lock extension *76* authorization code...
- Page 122 ELEPHONY UFFIXES AND ERVICE ODES Feature Standard Code Alternative Code (Cont.) (Cont.) (Cont.) Group call pickup Finland: 0 North America: 59 Sweden: 0 CALL WAITING COMMON See your company’s ABBREVIATED list of common NUMBERS abbreviated numbers. CONFERENCE Press soft key or shortcut key CUSTOMER IDENTITYI STORAGE...
- Page 123 IP P MX-ONE™ HONE FOR Feature Standard Code Alternative Code (Cont.) (Cont.) (Cont.) Remote Programming of another extension Order *21*extension number to divert * number of follow-me position# Cancel #21*diverted extension number# Order new #21* A-number # follow-me position Cancel from *21* A-number * answering C-number #...
- Page 124 ELEPHONY UFFIXES AND ERVICE ODES Feature Standard Code Alternative Code (Cont.) (Cont.) (Cont.) MANUAL MESSAGE WAITING Order *31* extension number Cancel #31# Reply *32# NIGHT SERVICE Universal Finland: 0 North America: 59 Sweden: 0 Flexible Order *84* route number * North America: *8* external line number # route number * external...
- Page 125 MX-ONE™ HONE FOR Feature Standard Code Alternative Code (Cont.) (Cont.) (Cont.) SOFTWARE VERSION Press , select Help and About:Aastra 7444ip. The software version appears in the display. TRANSFER Press soft key or shortcut key 6/1553-DBC 444 01 Uen A1 2010-06-10...
Need help?
Do you have a question about the 7444ip and is the answer not in the manual?
Questions and answers