Advertisement
Table of Contents
- 1 Operation
- 2 Installation
- 3 Floor Protection
- 4 Installation on a Concrete Floor
- 5 Venting Systems
- 6 Tools and Supplies Needed
- 7 Chimney Requirements
- 8 Venting Components
- 9 Chimney Systems
- 10 Installing Chimney Components
- 11 Do Not Burn
- 12 Building a Fire
- 13 Glass Care
- 14 Glass Replacement
- 15 Ash Disposal
- 16 Helpful Hints
- Download this manual
See also:
Owner's Manual
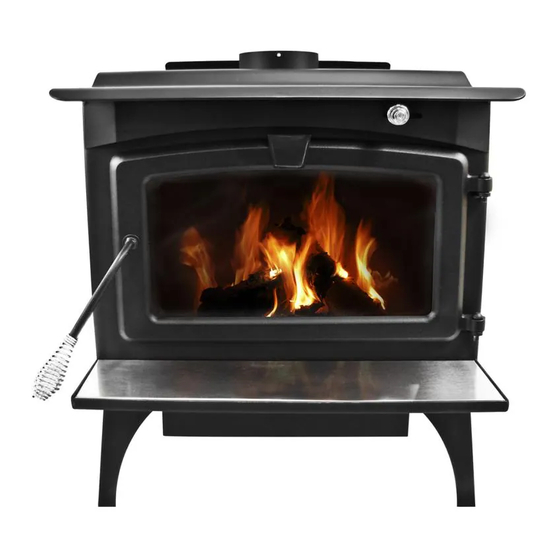
High Efficiency Wood Stove - Large
HWS-230292
SAFETY NOTICE: IF THIS WOOD BURNING APPLIANCE IS NOT PROPERLY INSTALLED,
OPERATED, AND MAINTAINED, A HOUSE FIRE MAY RESULT.
TO REDUCE THE RISK OF FIRE, FOLLOW THE INSTALLATION INSTRUCTIONS. FAILURE
TO FOLLOW THE INSTALLATION INSTRUCTIONS MAY RESULT IN PROPERTY DAMAGE,
BODILY INJURY OR EVEN DEATH. CONTACT LOCAL BUILDING OFFICIALS ABOUT
RESTRICTIONS AND INSTALLATION INSPECTION REQUIREMENTS IN YOUR AREA.
This manual describes the installation and operation of the Model HWS-230292, Model WS-3029,
and Model LWS-130291 non-catalytic wood heater. This heater meets US Environmental Protection
Agency's emission limits for wood heaters. Please read this entire manual before you install and use
your new room heater.
This stove is listed by OMNI-Test Laboratories
of Portland, Oregon to meet UL1482 for the US
and ULC-S627 for Canada.
8280 Austin Avenue
Morton Grove, IL 60053
877-447-4768
W a r m i n g Y o u r H o m e.
Model #:
WS-3029
Do Not Discard This Manual: Retain for Future Use
Questions, problems, missing parts? Before returning to your retailer, call our
customer service department at 877-447-4768 8:30 a.m. - 4:30 p.m. CST,
Monday - Friday or e-mail us at customerservice@ghpgroupinc.com.
W a r m i n g Y o u r H e a r t.
Save These Instructions.
Model #:
LWS-130291
LWS-130291-B
LWS-130291-BCA
6" Flue
required
TESTED TO: UL 1482-1996/ULC-S627-00
REPORT NO. 418-S-01-2
60-10-001
Advertisement
Table of Contents

Related Manuals for pleasant hearth WS-3029


Summary of Contents for pleasant hearth WS-3029
- Page 1 BODILY INJURY OR EVEN DEATH. CONTACT LOCAL BUILDING OFFICIALS ABOUT RESTRICTIONS AND INSTALLATION INSPECTION REQUIREMENTS IN YOUR AREA. This manual describes the installation and operation of the Model HWS-230292, Model WS-3029, and Model LWS-130291 non-catalytic wood heater. This heater meets US Environmental Protection Agency’s emission limits for wood heaters.
-
Page 2: Operation
nearby obstructions, and other factors. Too much draft may CAUTION cause excessive temperatures in the appliance. An uncon- After reading these instructions, if you have any doubt trolled burn or a glowing red part or chimney connector about your ability to complete your installation in a pro- indicates excessive draft. - Page 3 Pedestal base is pre-installed at the factory. No action is required. Model: WS-3029 Large Wood Stove w/Pedestal Base and Legs Remove Ash pan and (4) bolts that secure the stove body to the pedestal as shown in Figure 0.
-
Page 4: Installation
INSTALLATION Figure 2 Contact your local building inspector prior to installation. A permit may be required in your area. Twist spring handle on in a clockwise motion. Spring handle will “thread” 1. Remove all parts from inside the stove body. down to desired location. -
Page 5: Floor Protection
FLOOR PROTECTION Figure 3 INSTALLATION ON A CONCRETE FLOOR An appliance installed on a concrete floor does not require floor protection. If carpeting or any other com- bustible floor covering is installed, a clearance around the stove must be maintained equivalent to the size of the floor protector described in the following section. -
Page 6: Venting Systems
INSPECT APPLIANCE & COMPONENTS AND VENTING SYSTEMS PRE-USE CHECK LIST The venting system consists of a chimney connec- tor (also known as stove pipe) and a chimney. These Place the appliance in a location near the final get extremely hot during use. Temperatures inside the installation area and follow the procedures below: chimney may exceed 2000°F (1100°C) in the event of a creosote fire. -
Page 7: Chimney Requirements
Typical Stove Systems Stove system with masonry chimney consists of: • Stove • Chimney Connector (stove pipe) • Thimble • Masonry Chimney • Hearth Pad Floor Protection Figure 4.1 Masonry Chimney Stove system with prefabricated metal chimney consists of: • Stove •... -
Page 8: Venting Components
CHIMNEY SYSTEMS CHIMNEY REQUIREMENTS Prefabricated Metal Chimney VENTING COMPONENTS • Must be a 6 inch (152mm) diameter (ID) high tempera- Chimney Connector: ture chimney listed to UL 103HT (2100°F) or ULC S627. It is also known as flue pipe or stove pipe. The chimney •... - Page 9 Thimble Site constructed for masonry chimney installation: Components • A minimum length of 12 inches [05mm] (longer for thicker walls) of solid insulated factory-built chimney length constructed to UL 103 Type HT 6 inch (152mm) inside diameter. Chimney needs to extend a minimum of 2 inches (51mm) from the interior wall and a minimum of 1 inch (25mm) from the exterior wall.
-
Page 10: Installing Chimney Components
Solid Pack Chimney with Metal Supports as a Thimble INSTALLING CHIMNEY COMPONENTS (Cont’d) Chimney Connector Single wall connector or stove pipe. This must be at least 24 gauge mild steel. The sections must be attached to the appliance and to each other with the crimped (male) end pointing toward the stove. - Page 11 Chimney Termination Requirements NOTE: Follow manufacturer’s instructions for clearance, • Chimney performance may vary. securing flashing and terminating the chimney. • Trees, buildings, roof lines and wind conditions • Must have an approved and listed cap affect performance. • Must not be located where it will become plugged •...
- Page 12 WOOD STOVE QUICK START GUIDE ITEMS NEEDED FOR FIRST FIRE: • 10 - 15 Wadded Up Pieces of Newspaper • 10 - 20 Pieces of Dry Kindling • A Few Pieces of Seasoned Split Wood OPEN AIR CONTROL ADD NEWSPAPER ADD KINDLING CLOSE OPEN...
-
Page 13: Do Not Burn
OPERATION 1. Remember to Ventilate well. Do not use a grate or elevate fire. Build wood fire directly 2. Allow the stove to cure before burning for long on hearth. When the stove is used for the first time the periods at high temperatures. -
Page 14: Glass Care
NEVER USE GASOLINE, GASOLINE-TYPE LANTERN burn improperly.) FUEL, KEROSENE, CHARCOAL LIGHTER FLUID, OR 5. Attach glass gasket (from GHP Group replacement SIMILAR LIQUIDS TO START OR FRESHEN UP A parts page 18) to new glass and install in door frame. FIRE IN THIS HEATER. -
Page 15: Ash Disposal
CREOSOTE USING THE ASH DRAWER 1. Burn with air control open for several minutes at NOTE: Coals may still be hot even though stove feels numerous intervals throughout the day during the cool to the touch. heating season, being careful not to over-fire unit. This removes the slight film of creosote accumulated 1. - Page 16 two years will be difficult to ignite, if it has become wet. g) Once the kindling has started to burn, start by 6. Why is there always a large quantity of thick black adding some of your smaller pieces of seasoned (dry) smoke present in the firebox? firewood.
- Page 17 Environmental Conditions especially spark arrester regularly, to prevent creo sote build-up, which will significantly reduce chimney High trees, low lying house location such as in a draw and may cause a chimney fire. valley, tall buildings or structures surrounding your 10.
- Page 18 QUICK REFERENCE MAINTENANCE GUIDE Start the first inspection after the first 2 months of use, CAUTION! Allow the appliance or if performance changes, and adjust your schedule to completely cool down before accordingly. Maintenance is required for safe operation performing any cleaning or maintenance. and must be performed to maintain your warranty.
- Page 19 Brick Pattern GHP Group reserves the right to make changes in design, materials, specifications, prices and discontinue colors and products at any time, without notice. Item No. Description Qty. Part No. Door Assembly 75-21-503 2. & 3. Glass (13.00”W x 8.38”H) and Gasket 75-21-514 1/8”...
- Page 20 A suitable cleaner is available at your nearest owner, provided that the purchase was made through an Pleasant Hearth dealer. DO NOT CLEAN GLASS WHILE HOT authorized GHP Group supplier. The serial number must be AND DO NOT USE ABRASIVE CLEANERS.
Need help?
Do you have a question about the WS-3029 and is the answer not in the manual?
Questions and answers