
Related Manuals for baracuda alpha 3


Summary of Contents for baracuda alpha 3
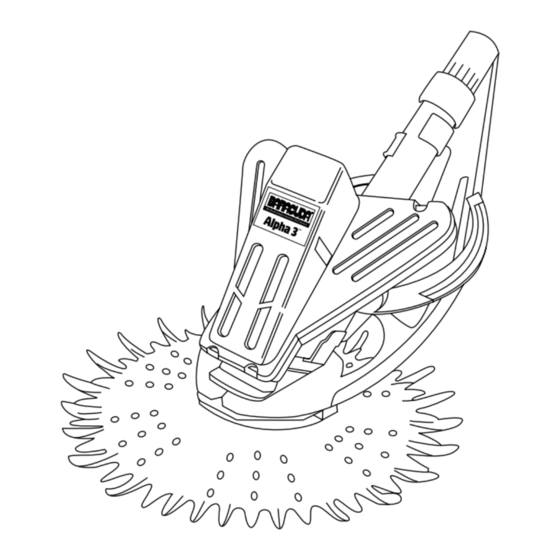
- Page 1 Owner's Manual and Quick Installation Instructions A U T O M A T I C I N G R O U N D P O O L C L E A N E R...
- Page 2 5. The Alpha 3 is designed for use in inground pools only. If unit is used in any other application, the pool owner hereby releases the manufacturer from any and all claims.
-
Page 3: Table Of Contents
Alpha 3 before having a qualified professional perform the necessary repairs. -
Page 4: General Pool Schematic
The return inlets may have directional eyeballs to aim flow and increase pressure. Water flow through your Alpha 3 makes it move, water flow in your pool steers the cleaner. Restrictions in the suction line, damaged pump parts, faulty or improperly set valves, baskets packed with debris and dirty pool filters all affect flow through the cleaner and will reduce its performance. -
Page 5: Disc Installation
Slide the finned disc over the footpad. Be sure it fits properly in the grooves provided. The fins on the disc face upward. POOL PREPARATION For your Baracuda Alpha 3 ™ to operate properly your pool filtration system must be operating at maximum water flow. - Page 6 If the eyeball is difficult to adjust, insert a screwdriver inside the eyeball and gently adjust downward. If the return inlets cannot be pointed downward, then you MUST install Baracuda return line diverters. They are available through your Baracuda dealer (see page 17).
-
Page 7: Assembly
HOSE ASSEMBLY FOR CORNER OR END INSTALLATIONS If your skimmer or wall vacuum fitting is located at the corner or end of your pool, use enough hose sections to reach the farthest point in the pool, plus one (1) section. SKIMMER / WALL VACUUM FITTING SKIMMER / WALL... -
Page 8: Installation
INSTALLATION The next steps vary based on whether your pool has one skimmer, two skimmers or a wall vacuum fitting. Please follow the appropriate instructions for your type of pool. FOR POOLS WITH ONE SKIMMER Turn the filtration system off. Using the parts shown below, choose the fitting combination best suited for your skimmer. - Page 9 Turn on the filtration system. Fill the hose with water by placing the end over a return inlet. ™ Submerge the Alpha 3 pool cleaner head. When bubbles stop coming from the extension pipe, attach the cleaner head to the female end of the hose.
- Page 10 INSTALLATION FOR POOLS WITH ONE SKIMMER HOSE PROTECTOR FLOWKEEPER™ VALVE " CONNECTOR UNIVERSAL VALVE CUFF SKIMMER Remove the skimmer basket, attach the regulator valve combination to the hose and install into the skimmer. Your installation is now complete. FOR POOLS WITH WALL VACUUM FITTINGS FOR POOLS WITH TWO SKIMMERS Insert the cuffed hose end into the wall Remove the skimmer basket from the...
- Page 11 FLOW ADJUSTMENT FOR POOLS WITH WALL VACUUM FITTINGS AND FOR POOLS WITH TWO SKIMMERS Remove the cleaner head. Attach the ™ Pool Pulse to the end of the hose. You MUST keep the Pool Pulse ™ and hose under water. •...
-
Page 12: Pool Pulse
™ your Alpha 3 cleaner. It must be used to properly set the flow on two skimmer or wall vacuum installations and can be used as a diagnostic tool to check the flow on any installation. -
Page 13: Care And Maintenance
If you should develop an algae problem or a chemical imbalance problem, remove the Baracuda Alpha 3 and follow the advice of a qualified pool professional. Reinstall the cleaner when the imbalance is corrected or after a minimum of 4 hours from super chlorinating. - Page 14 (cuts or tears) or debris causing a blockage (fig. 4). Pull or rinse out the debris. Do not use tools that might damage the diaphragm. See your Baracuda dealer for a replacement if necessary. FIGURE 1...
-
Page 15: Balance And Coverage
Even with the proper flow, a hose weight (part number 43260) may be necessary to balance the Alpha 3 cleaner head. If the Alpha 3 will not balance correctly in the deep end of the pool, (as shown below), turn off the pump and add the hose weight approximately 4 to 7 feet, or 1 to 2 hose sections away from the cleaner head. -
Page 16: Troubleshooting
Note: In cold water 60º or less, water flow must be increased to compensate for reduced flexibility of hose and diaphragm (see pg 11) Alpha 3 sticks at steps. Utilize flow as shown in coverage section (see pg 15) Add hose weight 4' to 7' from cleaner head (see pg 15) Reduce flow to low side of “ideal”... -
Page 17: Accessories
ACCESSORIES PART ILLUSTRATION PART NO. DESCRIPTION 1. 24000 Ladder Guard Always use on stainless steel in-pool ladders 2. 24100 Return Line Diverter Use when no other return inlet directional fittings exist. (see page 6) 3A. 90153 Retrofit Eyeball Return Line Diverter (for 1 "... -
Page 18: Parts Diagram
23. 53900 Universal Valve Cuff 24. 33160 Alpha 3 4 " Connector 25. 43260 Alpha 3 Hose Weight 26. 38260 Alpha 3 Hose Section - Aqua -1 Meter 20460 Alpha 3 Hose Kit - Aqua - 12 x 1 Meter... - Page 19 LET US HELP! - If you are having a coverage problem you cannot solve, mail or fax us the following information along with a sketch of your pool shape indicating the location of all skimmers, vacuum lines, inlets, stairs, ladders, swimouts, spas, waterfalls, filter systems or other significant features and a brief description of the problem.
- Page 20 ZODIAC POOL CARE, INC. 2028 NW 25th Avenue Pompano Beach, Florida 33069 1-888-786-7797 http://www.baracuda.com © Copyright 2001 91021...
Need help?
Do you have a question about the alpha 3 and is the answer not in the manual?
Questions and answers