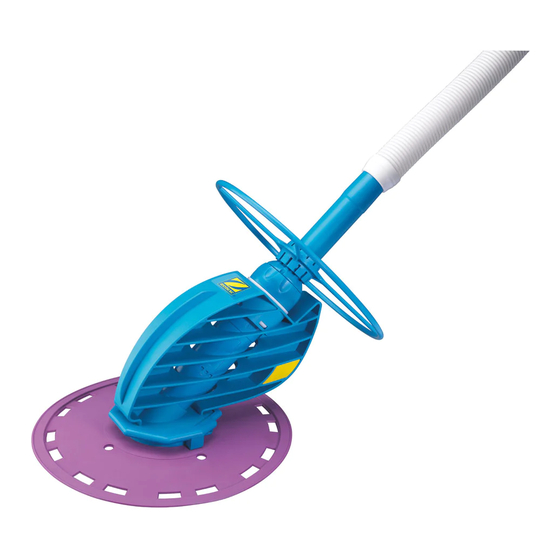
baracuda Ranger Owner's Manual And Quick Assembly Instructions
Automatic aboveground pool cleaner
Hide thumbs
Also See for Ranger:
- Owner's manual and quick assembly instructions (17 pages) ,
- Owner's manual (17 pages) ,
- Quick start manual (2 pages)
Subscribe to Our Youtube Channel
Summary of Contents for baracuda Ranger
- Page 1 Ranger ™ Owner’s Manual and Quick Assembly Instructions Ranger ™ A U T O M A T I C A B O V E G R O U N D P O O L C L E A N E R...
- Page 2 5. The RANGER is designed for use in aboveground pools only. If unit is used in any other application, the pool owner hereby releases the manufacturer from any and all claims.
-
Page 3: Table Of Contents
, examine the interior of your pool carefully. If your vinyl liner is brittle or has stones, wrinkles, roots or metal corrosion in contact with the underside of the liner, or has damage to the base material or supporting walls, do not install the RANGER before having a qualified professional perform the necessary repairs. - Page 4 Note: If your pool is equipped with a main drain, turn it off. ASSEMBLY RANGER Head Unit ™ Slide the disc over the base of the footpad. Be sure it fits properly in the grooves provided.
- Page 5 For Round Pools: Follow the guide shown below. Connect the hose sections, placing the hose deflectors as indicated in the illustrations below. 21’-27’ Diameter (may require extra hose section) To Ranger To Skimmer 15’-18’ Diameter To Ranger To Skimmer 12’ Diameter To Skimmer To Ranger Place the hose connector on the male end of the hose.
-
Page 6: Installation
INSTALLATION Step 1: Turn the filter system off. (Be sure you have turned off the main drain, if your pool has one.) GENERAL POOL SCHEMATIC SKIMMER RETURN FLOW INLET IMPORTANT! Return flow must be POOL directed toward pool bottom as shown. FILTER PUMP Step 2:... - Page 7 Hold one end of the hose over the return inlet until a full stream of water flows from the other end. Step 4: Keep both hose ends underwater and completely submerge the RANGER head. When the bubbles have stopped flowing from the head, connect the female end of the hose to the RANGER...
- Page 8 Step 5: Cover the end of the 4 1/2” hose connector tightly with your hand. Move to the skimmer and connect the hose end to the fitting combination selected in Step 2. Now insert the end of the assembly into the suction port of the skimmer.
-
Page 9: Water Flow Adjustment
Water Flow Adjustment For proper performance, the water flow through the RANGER ™ MUST be regulated. Step 6: Remove the RANGER ™ head from the hose and attach the Pool ™ Pulse (Part No. 44805) to the hose underwater. Adjust regulator valve as shown. - Page 10 When the bubbles have stopped flowing from the head, reconnect the head to the female hose end. MAINTENANCE AND CARE 1. Remove the RANGER from the pool before super chlorinating or other ™ chemical balancing and re-install a minimum of four hours later.
-
Page 11: Maintenance And Care
TROUBLESHOOTING If you experience a problem with your Baracuda Ranger, please review the installation section and ensure all steps have been followed correctly. PROBLEM SOLUTION 1. Machine does not move, or moves sluggishly. • Ensure ideal flow is being attained using pool pulse. -
Page 12: Troubleshooting Guide
ACCESSORIES PART ILLUSTRATION PART NO. DESCRIPTION 1. 24100 Return Line Diverter Use when no other return inlet directional fittings exist. 2. 90155 Eyeball Return Line Diverter Use to replace standard (for 2" return inlet) 90153 directional inlet eyeballs (for 1 1 / 2 " return inle) Leaf Catcher w/ 4 1 / 2 "... -
Page 13: Quick Access Cassette System
Inspect the diaphragm for the blockage or damage. If damage is evident, i.e., a cut or hole on the sides of the diaphragm, return it, along with head of the unit (excluding hoses), to your authorized Baracuda warranty station for replacement. FIGURE 4 If a blockage is apparent, grasp it and remove it. - Page 14 STEP 3. DIAPHRAGM ASSEMBLY Prior to reinstalling the diaphragm, rinse the diaphragm and the inner extension pipe thoroughly to remove any grit or algae. Attach the diaphragm to FIGURE 6 the inner extension pipe using the retaining ring (Figure 6). Slide the inner extension pipe into the diaphram chamber.
-
Page 15: Parts Diagram
RANGER ™ PARTS DIAGRAM PART NO. DESCRIPTION 1. 46055 Wheel Deflector - Medium 2. 72062 Cassette Pipe w/Handnut 3. 74000 Compression Ring 4. 81741 Diaphragm Chamber 5. 44310 Frame Assembly 6. 72855 Footpad 7. 48131 Disc 8. 73406 Threaded Inner Extension 9. -
Page 16: Let Us Help
CARTRIDGE FILTER SIZE (or Model No.)_________________________ Indicate problem: Zodiac Pool Care, Inc. 2028 NW 25th Avenue, Pompano Beach, Florida 33069 1-800-937-7873 Baracuda Canada Limited 1260 Lakeshore Road East, #7 Mississaga, Ontario Canada L5E 3B8 1-888-647-4004 © Copyright 2001 http://www.baracuda.com 95095...


Need help?
Do you have a question about the Ranger and is the answer not in the manual?
Questions and answers