Table of Contents
Advertisement
Advertisement
Table of Contents

Subscribe to Our Youtube Channel
Related Manuals for Hasselblad Stellar


Summary of Contents for Hasselblad Stellar
- Page 1 Instruction Manual...
- Page 2 • Adobe® Photoshop® Lightroom® DVD Owner’s Record The model and serial numbers are located on the bottom. Record the serial number in the space provided below. Refer to these numbers whenever you call your Hasselblad dealer regarding this product. Model No. ____________________________...
- Page 3 WARNING To reduce fire or shock hazard, do not expose the unit to rain or moisture. IMPORTANT SAFETY INSTRUCTIONS -SAVE THESE INSTRUCTIONS DANGER TO REDUCE THE RISK OF FIRE OR ELECTRIC SHOCK, CAREFULLY FOLLOW THESE INSTRUCTIONS If the shape of the plug does not fit the power outlet, use an attachment plug adaptor of the proper configuration for the power outlet.
-
Page 4: Battery Pack
• Be sure to charge the battery pack using a genuine Hasselblad battery charger or a device that can charge the battery pack. • Keep the battery pack out of the reach of small children. • Keep the battery pack dry. -
Page 5: Regulatory Information
The UL Mark on the product means it has been UL Listed. Regulatory Information Declaration of Conformity Trade Name: Hasselblad Model No.: Stellar Responsible Party: Victor Hasselblad AB Address: Utvecklingsgatan 2, 41756 Göteborg Sweden This device complies with Part15 of the FCC Rules. Operation is subject to the following two conditions: (1) This device may not cause harmful interference, and (2) this device must accept any interference received, including interference that may cause undesired operation. - Page 6 For Customers in Europe Notice for the customers in the countries applying EU Directives The manufacturer of this product is Victor Hasselblad AB, Utvecklingsgatan 2, 41756 Göteborg, Sweden. For any service or guarantee matters please refer to the addresses given in separate service or guarantee documents.
- Page 7 If the plug supplied with this equipment has a detachable fuse cover, be sure to attach the fuse cover after you change the fuse. Never use the plug without the fuse cover. If you should lose the fuse cover, please contact your nearest Hasselblad service centre.
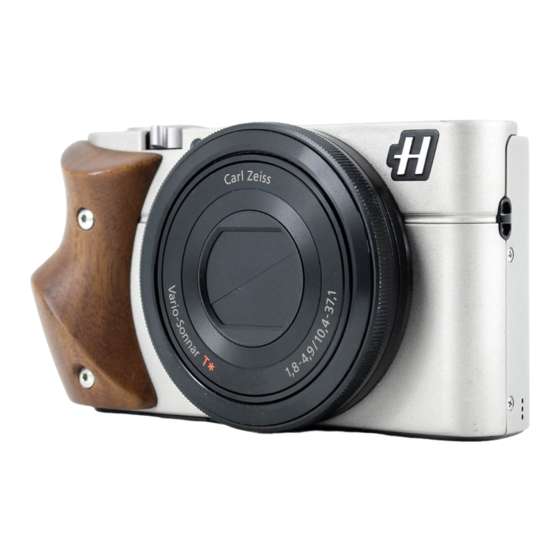
- Page 8 Identifying parts Shutter button Mode dial (Intelligent Auto)/ (Superior Auto)/ (Program Auto)/ (Aperture Priority)/ (Shutter Priority)/ (Manual Exposure)/ (Memory recall)/ (Movie) / (Sweep Shooting) / (Scene Selection) For shooting: W/T (zoom) lever For viewing: Index/Playback zoom lever Self-timer lamp/Smile Shutter lamp/AF illuminator Power/Charge lamp ON/OFF (Power) button Flash...
- Page 9 (Playback) button Access lamp (In-Camera Guide/Delete) button Memory card slot Battery insertion slot HDMI micro jack Battery eject lever Battery/Memory card cover Tripod socket hole • Use a tripod with a screw less than 5.5 mm (7/32 inches) long. Otherwise, you cannot firmly secure the camera, and damage to the camera may occur.
- Page 10 Charging the battery pack Power/Charge lamp Lit: Charging Off: Charging finished Flashing: Charging error or charging paused temporarily because the camera is not within the proper temperature range Use the correct plug for your region Connect the camera to the AC Adaptor (supplied), using the micro USB cable (supplied).
- Page 11 Connect the AC Adaptor to the wall outlet (wall socket). The Power/Charge lamp lights orange, and charging starts. • Turn off the camera while charging the battery. • You can charge the battery pack even when it is partially charged. •...
-
Page 12: Charging By Connecting To A Computer
Charging by connecting to a computer The battery pack can be charged by connecting the camera to a computer using a micro USB cable. Notes • Note the following points when charging via a computer: – If the camera is connected to a laptop computer that is not connected to a power source, the laptop battery level decreases. - Page 13 Battery life and number of images that can be recorded and played back Battery life Number of images Shooting (still images) Approx 165 min. Approx 330 images Viewing (still images) Approx 250 min. Approx 5000 images Shooting (movies) Approx 80 min. –...
-
Page 14: Supplying Power
Supplying power The camera can be supplied with power from the wall outlet (wall socket) by connecting to the AC Adaptor (supplied), using the micro USB cable (supplied). This way, there is no need to worry about draining the battery when shooting over extended periods or when the camera is connected to a TV or computer. -
Page 15: Memory Cards That Can Be Used
Memory cards that can be used Memory card For still images For movies Memory Stick PRO Duo (Mark 2 only) Memory Stick PRO-HG Duo Memory Stick Duo – Memory Stick Micro (M2) (Mark 2 only) SD memory card (Class 4 or faster) SDHC memory card (Class 4 or faster) SDXC memory card... -
Page 16: Control Wheel
Setting the clock ON/OFF (Power) Power/Charge lamp (green) Select items: Control wheel Set the numeric value of date and time: Set: Press the ON/OFF (Power) button. Date & Time setting is displayed when you turn on the camera for the first time. •... -
Page 17: Shooting Still Images
Shooting still images/movie Do not cover the flash. Shutter button W/T (zoom) lever Mode dial : Intelligent Auto W: zoom out : Movie T: zoom in Shooting still images MOVIE Press the shutter button halfway down to focus. When the image is in focus, a beep sounds and the indicator lights. -
Page 18: Deleting An Image
Viewing images W: zoom out T: zoom in Fn (Function) (Playback) Select images: (next)/ (previous) or turn the control wheel (Delete) Set: Press the (Playback) button. • You can switch the display mode between still images and movies by selecting MENU ... - Page 19 Viewing the Guide This camera is equipped with a built-in instruction guide. MENU (In-Camera Guide) In-Camera Guide The camera displays explanations for MENU items and the setting values. Press the MENU button. Select the desired MENU item, then press / (In-Camera Guide) button.
- Page 20 Introduction of other functions Other functions can be operated using the control wheel, MENU button, etc. Control Ring MENU Control wheel Fn (Function) Control wheel DISP (Display Contents): Allows you to change the screen display. (Flash Mode): Allows you to select a flash mode for still images. (Exposure Comp./Photo Creativity): Allows you to adjust image brightness.
-
Page 21: Menu Items
Fn (Function) button Allows you to register seven functions and recall those functions when shooting. Press the Fn (Function) button. Select the desired function using the Fn (Function) button or on the control wheel. Select the setting value by turning the control wheel or Control Ring. Control Ring Your favorite functions can be assigned to the Control Ring;... - Page 22 Adjusts the intensity of flash output. Flash Comp. Adjusts color tones of an image. White Balance Compensates automatically for brightness and contrast. DRO/Auto HDR Selects the desired image processing. Creative Style Shoots still images with a texture unique to the selected effect. Picture Effect Provides a higher-quality zoomed image than with Digital Zoom.
-
Page 23: Custom Menu
Movie shooting menu Selects the movie file format. File Format Selects the size of the recorded movie frame. Record Setting Sets the still image size shot when recording a movie. Image Size(Dual Rec) Sets SteadyShot. SteadyShot Sets whether to record audio when shooting a movie. Audio Recording Reduces wind noise during movie recording. -
Page 24: Playback Menu
Playback menu Select Selects the display format for images. Still/Movie Deletes an image. Delete Shows a slide show. Slide Show Displays multiple images at the same time. Image Index Protects the images. Protect Adds a print order mark to a still image. Specify Printing Adds various textures to images. -
Page 25: Setup Menu
Clock setup menu Sets date and time, and daylight savings. Date/Time Setup Sets the location of use. Area Setting Setup menu Sets the default position of the cursor on the menu to the top item or Menu start the last-selected item. Turns the mode dial guide (the explanation of each Mode Dial Guide shooting mode) on or off. - Page 26 You can shoot or play back images on this camera even if you do not install “PlayMemories Home”, however, “PlayMemories Home” is required to import AVCHD movies to your computer. Insert the Stellar CD-Rom and run “start.exe” Choose Your Language Choose “Downloads”...
- Page 27 Install “Image Data Converter” (Windows) “Image Data Converter” allows you to develop RAW images. Insert the Stellar CD-Rom and run “start.exe” Choose Your Language Choose “Image Data Converter” Click on “Install IDC” and follow the instructions on screen. Install “Image Data Converter” (Mac - English version)
-
Page 28: Still Images
Number of still images and recordable time of movies The number of still images and recordable time may vary depending on the shooting conditions and the memory card. Still images Image Size: L: 20M When [Aspect Ratio] is set to [3:2]* * When the [Aspect Ratio] is Capacity 2 GB... - Page 29 • The recordable time of movies varies because the camera is equipped with VBR (Variable Bit Rate), which automatically adjusts image quality depending on the shooting scene. When you record a fast-moving subject, the image is clearer but the recordable time is shorter because more memory is required for recording.
-
Page 30: Carl Zeiss Lens
Notes on recording/playback • Before you start recording, make a trial recording to make sure that the camera is working cor- rectly. • The camera is neither dust-proof, nor splash-proof, nor water-proof. • Avoid exposing the camera to water. If water enters inside the camera, a malfunction may occur. In some cases, the camera cannot be repaired. - Page 31 Unauthorized recording of such materials may be contrary to the provisions of the copyright laws. No compensation for damaged content or recording failure Hasselblad cannot compensate for failure to record or loss or damage of recorded content due to a malfunction of the camera or recording media, etc.
- Page 32 Specifications Camera Movies (MP4 format): Video: MPEG-4 AVC/H.264 Audio: MPEG-4 AAC-LC 2ch Recording media: “Memory Stick Duo” media, “Memory [System] Stick Micro” media, SD cards, microSD Image device: 13.2 mm × 8.8 mm (1.0 type) Exmor memory cards CMOS sensor Flash: Flash range (ISO sensitivity Total number of pixels: (Recommended Exposure Index) set to Auto):...
- Page 33 AC Adaptor Power requirements: AC 100 V to 240 V, 50 Hz/60 Hz, 0.2 A Output voltage: DC 5 V, 1 500 mA Operating temperature: 0 °C to 40 °C Storage temperature: –40 °C to +85 °C Dimensions: Approx. 75 mm × 33 mm × 45 mm (W/H/D) Mass: Approx.
- Page 34 Customer Support Website. developers or manufacturers. However, the marks are not used in all cases in www.hasselblad.com this manual.
- Page 35 Victor Hasselblad AB www.hasselblad.com...
Need help?
Do you have a question about the Stellar and is the answer not in the manual?
Questions and answers