Table of Contents
Advertisement
Quick Links
Advertisement
Table of Contents

Related Manuals for Hasselblad X1D


Summary of Contents for Hasselblad X1D
- Page 1 User Guide X1D User Guide 2017-01-16 Version v1.3...
-
Page 2: Table Of Contents
X1D Camera and Lenses Features Delivery Check X1D Technical Specifications System Requirements New in this version 1.3 About this User Guide Interactive PDF Search Tools Format and Printing the X1D User Guide Safety Safety and Warnings Cautions Disposal ISED Certification Information Functions... - Page 3 Insert a Memory Card Remove SD Memory Cards Format SD Cards Format Memory Cards via Touch Display 3.14 XCD Lenses Hasselblad XCD 3,5/30mm Lens Hasselblad XCD 3,5/45mm Lens Hasselblad XCD 3,2/90mm Lens 3.15 Remove and Attach a Lens Remove the Lens...
- Page 4 Separate Histogram RBG Mode Histogram Exposure Mode 3.24 Phocus Overview 3.25 Phocus Features in Phocus 3.26 Connect to a Computer Phocus and Hasselblad Capture Files 3.27 Battery Battery Charger Charge the Battery Rechargeable Battery Specification Battery Life and Battery Warning 3.28 Temperature Warning 3.29...
- Page 5 4.15 General Settings Spirit Level Calibrate Spirit Level 4.16 General Settings Language 4.17 General Settings Service 4.18 Update X1D Camera Firmware Update X1D Firmware Procedure 4.19 Update X1D Lens Firmware Update Lens Firmware Procedure 4.20 General Settings About 4.21 General Settings About Certification...
- Page 6 Optional HC Lens Accessories H 13, 26 and 52 Extension Tubes Macro Converter H Optional Accessories Pro Shade V/H 60 – 95 Pro Shade Adapters X1D XCD Lens Filter Dimensions UV Sky Filters Pola Filters Camera Strap H Troubleshooting Error Messages...
-
Page 7: Introduction
INTRODUCTION... -
Page 8: Update X1D Camera Firmware
The X1D Camera system can be updated with improvements and new functions. Before you start to use your new X1D Camera, please visit www.hasselblad.com and download the latest X1D Camera firmware and update the Camera system to make sure you get the latest functionality. -
Page 9: Delivery Check
4 If any items are missing or damaged, write down the Camera Front Protective Cover. product number of that item. If not, proceed to step 6. 5 Contact your Hasselblad dealer or distributor and Lens (if included in purchase). tell them the product number of the item missing or Lens Hood. -
Page 10: X1D Technical Specifications
Metering range Spot: EV2 to 21, Centre Weighted: EV1 to 21, Centre Spot: EV1 to 21 Power Supply Rechargeable Li-ion battery (7.2 VDC/3200 mAh) Customization Some of the X1D’s functions can be customized by the user to suit specific styles or situations through the built-in menu system. www.hasselblad.com... -
Page 11: System Requirements
Exposure Simulation. Update Lens Firmware. ABOUT THIS USER GUIDE The X1D User Guide is designed for on-screen PDF reading to take advantage of the interactivity functions and search tools. INTERACTIVE PDF You can navigate the User Guide by selecting a chapter in the Table of Contents. -
Page 12: Safety
SAFETY... -
Page 13: Safety And Warnings
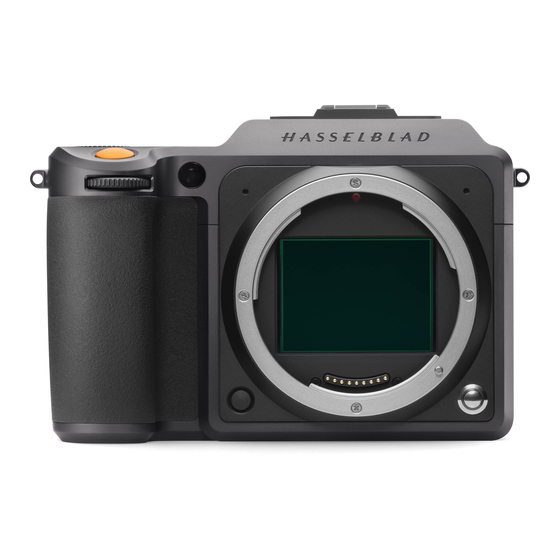
Do not touch the CMOS Sensor with your fingers. This can cause damage to the equipment. Caution! Use a protective case or camera bag when you transport the equipment. This will help prevent damage to the equipment. www.hasselblad.com... -
Page 14: Disposal
Caution! Do not try to remove the glass IR filter from the front of the CMOS (due to dust or similar). This can cause damage to the equipment. Always contact your local Hasselblad Authorized Service Centre. Caution! If you use canned compressed air to clean the glass of IR filter, read the instructions very carefully before use. -
Page 15: Fcc
FCC Radiation Exposure Statement: La valeur SAR la plus élevée pour la X1D-50c lors des tests This equipment complies with FCC radiation exposure limits set était de 0,10 W/Kg contre une limite de 1.6 W/kg. On a mesuré... -
Page 16: Functions
FUNCTIONS... -
Page 17: The X1D Interaction Displays
Touch Display The EVF on the Camera displays ISO, Focus action, Exposure The X1D display is touch sensitive and you can use it in the same way you navigate on a smartphone. For example Swipe, compensation, Aperture, Shutter and Captures remaining. Press the MF/AF and the ISO/WB buttons to change settings. -
Page 18: Touch Display Navigation
USER GUIDE Functions TOUCH DISPLAY NAVIGATION The Touch Display on the X1D Camera is similar to a Phone or Tablet with touch sensitivity. The following gestures can be used to navigate and control the camera: MAIN MENU Action Function Display... -
Page 19: Zoom In And Out On The Touch Display
9 View Mode down to display all Captures in the Folder. Enter 9 View Mode by pressing the soft button with a “star” symbol to the right of the Touch Display, or zoom out with a two finger “pinch”. www.hasselblad.com... -
Page 20: Navigating The Menus
NAVIGATING THE MENUS DESCRIPTION OF THE TOUCH DISPLAY MENU ITEMS The X1D Display Screen is Touch Sensitive and you can click with one finger to select and swipe in different directions to move up, down, forward and backward through the user interface. -
Page 21: Overview Of Menus And Settings On Touch Display
The Menu Button (1) navigates back to Main Menu. To the left of them, the Favourite Settings Short Cuts are displayed. You can add or delete these Short Cuts to access your most used functions directly from the Main Menu. www.hasselblad.com... -
Page 22: Touch Display Main Menu
Quality RAW/JPG. Self Timer. Configuration. Video Quality 1080p. Audio. Custom Modes. Sound. Date & Time. Power & Timeouts. Language. Service. About. See detailed description on how to add and remove functions to your Favourite list on the following page. www.hasselblad.com... -
Page 23: How To Add Short Links To Main Menu
Main Menu Favourites. 4 The Self Timer icon is no longer displayed in the Main Menu Favourites list. You can add the same function back again later at any time. Main Menu with Self Timer added Remove Short link www.hasselblad.com... -
Page 24: Control Screen
Shutter value will be automatic and displayed in grey. A Mode S Mode Control Screen For Shutter priority (S) you can change the Shutter value and the Aperture value will be automatic and S Mode displayed in grey. www.hasselblad.com... -
Page 25: Settings On The Control Screen
- Tungsten. - Flourescent. - Flash. - Manual WB. AF Focus AF Focus - MF Manual Focus. - AF-S Auto Focus Single. - Select ISO value. Aperture - Select Aperture value. This Chapter continues on the next page. Aperture www.hasselblad.com... - Page 26 Custom Program 2. Custom Program 3. Video Video Mode. Rectangle Automatic Mode (ISO are also automatically set). Metering Mode Exposure Mode - Centre Weighted. - Spot Weighted. - Centre Spot Weighted. This Chapter continues on the next page. Metering Mode www.hasselblad.com...
- Page 27 - Continuous Drive Mode. Remaining Captures - Displays the number of remaining Captures. Memory Card - 1 for SD 1 or 2 for SD 2 Card. Remaining Captures Memory Card 1 - SD 1 Card. 2 - SD 2 Card. www.hasselblad.com...
-
Page 28: Parts, Components, Buttons And Controls
3 Rear Scroll Wheel 4 Browse Button 5 Soft Button 6 Select Button 7 Delete Image / Soft Button 8 Menu Button 1 Electronic Viewfinder EVF 2 Speaker 3 Strap Lug 4 Eye Sensor 5 Touch Display 6 Status LED www.hasselblad.com... - Page 29 5 Shutter Release Button 6 Mode Dial 7 On / Off Button 8 Strap Lug 1 Microphone Right 2 Microphone Left 3 Strap Lug 4 Image Plane Mark 5 SD Cards Slot Lid 6 Connectors Slot Lid 7 Lens Release Button www.hasselblad.com...
- Page 30 USER GUIDE Functions ADJUST DIOPTRE 1 Dioptre Adjustment Wheel. 2 Rotate the Dioptre Adjustment Wheel to adjust to desired setting. 1 Tripod Thread 1/4” 2 Battery Release Lever 3 Battery www.hasselblad.com...
-
Page 31: Grip Buttons And Controls
The AF/MF button toggles between Autofocus and Manual Press the button for 1 second to turn on the camera. The Focus. X1D start up logo will appear and then the main screen. After a few seconds (customizable) the camera will enter 2 ISO/WB button Display Off mode. -
Page 32: Camera Body Buttons And Controls
The aperture will close according to the setting and remain closed as long as the pressure is maintained. You can alter the aperture at the same time to see the changes taking place. www.hasselblad.com... -
Page 33: Mode Dial
How to lock the Mode Dial When in locked mode, push once to unlock the Mode Dial The Mode Dial Selector can be locked by pushing it down (2). Selector (3). Mode Dial Mode Dial Locked (Down) Unlocked (Up) www.hasselblad.com... -
Page 34: Exposure Program Modes
In Manual Mode, Aperture is set by the Front Scroll Wheel and the Shutter Speed by the Rear Scroll Wheel. In the Automatic Modes, the Aperture and Shutter Speed settings are controlled by the Camera, either partially or completely according to setting. Within this mode there are four choices. www.hasselblad.com... -
Page 35: Manual Exposure Mode
Note! Full-stops, half-stops and third-stops are also displayed, according to setting (see increment setting). For example, a setting between f/8 and f/11 will appear as f/9,5 if half-stop is chosen. www.hasselblad.com... -
Page 36: Manual Quick Exposure Mode
MANUAL QUICK EXPOSURE MODE Mq mode is a Manual mode for quick photography. This mode works best when the X1D Camera is used on a fixed Tripod. 1 First set the Focus and Image Composition in another Program mode like Manual mode (M) for example. Mq mode does not support Live View. -
Page 37: Automatic Exposure Mode
EV and the Rear Scroll Wheel alters the amount of exposure compensation. The compensation appears as a +/- symbol on the Control Screen and Viewfinder Display. Note! Aperture and shutter speed settings can both be changed even while the red “busy light” on Touch Display is flashing. www.hasselblad.com... -
Page 38: Custom Modes
9 Turn the Mode Dial to select C1 (B). 10 You can now use the Camera with all the specific settings made in stage 2 of this instruction. Repeat the step 1 to 10 to create and use your 3 different Custom Modes, C1, C2 and C3. www.hasselblad.com... -
Page 39: Ae-L Button
AE-L button. You can then recompose the picture with the metering zone positioned over an area much brighter or darker while still retaining the original exposure setting and choose a new combination of aperture and shutter speed settings. www.hasselblad.com... -
Page 40: Fixed Exposure Compensation Setting
‘plus’ scale, 4 Press AE-L Button (A) to reset any compensation back to zero. 5 The settings are saved. 6 A ‘±’ symbol is then displayed between the aperture and shutter speed setting as confirmation of the setting. www.hasselblad.com... -
Page 41: Exposure Compensation / Quick Adjust
2 Select Exposure Adjust (B). Exposure Adjust. 3 Adjust sliders to the left or right to change values (C). 4 Close the Exposure Adjust pop up by clicking outside of it. 5 Swipe Up to exit Control Screen and return to Main Menu. www.hasselblad.com... -
Page 42: Light Meter Exposure Mode
2.5% of the image area (the central spot on the viewfinder screen). Any parts of the image outside of this area will not affect the exposure reading. This provides a very accurate measurement of specific tones. Also excellent for tonal comparison measurements. www.hasselblad.com... -
Page 43: Video Recording
6 Stop the Recording by pressing the Shutter Release Button (A) or by pressing the grey stop icon on the Touch Display. Video Display when capturing video Note! For best Video result, use a stable tripod with the X1D Camera when recording Video. www.hasselblad.com... -
Page 44: Connector Ports
Connector for Mini HDMI plug. 4 Audio in Connector for Audio In Microphone 3.5 mm stereo plug. 5 USB 3 Tethering plug Connector for USB 3 plug. 6 Audio Out Connector for external 3.5 mm Stereo Audio Out Plug. www.hasselblad.com... -
Page 45: Memory Cards
Functions 3.13 MEMORY CARDS The X1D camera uses SD cards only. There are two SD Card slots on the X1D Camera, slot no 1 and slot no 2. When using a SD card, the X1D is completely self contained. No additional wires or connectors need to be attached. -
Page 46: Insert A Memory Card
SD card in the SD card slot no 1 (A) or no 2 (B). 3 Close the slot cover by rotating it back and pushing it in place towards the front of the camera (C) to lock it into position. www.hasselblad.com... -
Page 47: Remove Sd Memory Cards
SD card slot. 3 Grab the card and pull it away from the Camera. 4 Close the slot cover (D) by rotating it back and pushing it in place towards the front of the camera to lock it into position. www.hasselblad.com... -
Page 48: Format Sd Cards
Format Card 5 Confirm by pressing OK (Display button). Format SD 1 Note! The X1D Camera is capable of writing 78 MB/s to SD cards. Format SD 2 Note! Destination All SD Memory Cards should be formatted in the X1D Camera... -
Page 49: Xcd Lenses
A unique feature is that the lens will with a beautiful smooth bokeh. keep its amazing performance even when shooting at close distance. You can download technical data sheets from the Hasselblad website, www.hasselblad.com. www.hasselblad.com... -
Page 50: Remove And Attach A Lens
6 Attach a lens protection lid on the detached lens to prevent damage. 7 Store the lens with both lens protection lids on and the lens hood inverted over the lens instead of in front of the lens. www.hasselblad.com... -
Page 51: Attach The Lens
(D) on the camera body. 3 Mount the lens (E) into the camera body (F) and then turn the lens clockwise to lock its position. 4 Make sure the lens is locked to the camera body before using or moving the camera. www.hasselblad.com... -
Page 52: Remove The Lens Cap
3 Remove the front lens cap. ATTACH THE LENS CAP 1 Insert thumb and index finger into the recesses (A). 2 Pinch the recesses (A) together. 3 Attach the front lens cap on the lens until it snaps into place. www.hasselblad.com... -
Page 53: Remove The Lens Shade
1 Place the lens shade on the lens. 2 Make sure that the index on the lens shade (A) aligns with the index on the front of the lens (B). 3 Turn the lens cap clockwise until it snaps into place. www.hasselblad.com... -
Page 54: Filters
This is particularly useful when using polarizing or graduated filters where the orientation is critical. Hasselblad XCD 30 Lens, 77 mm filter Hasselblad XCD 45 Lens, 67 mm filter Hasselblad XCD 90 Lens, 67 mm filter... -
Page 55: Display Information
Aperture setting ISO (100) Shutter speed Aperture (f/5.6) Exposure method Shutter (1/125) EV (12.0) White Balance Exposure Compensation Flash indication (+1.0) Focus Exposure Mode, Aperture Drive priority (A) Focus Setting (Centre Spot) Focus Method (Single) Capture Counter Storage medium (SD1) www.hasselblad.com... -
Page 56: Touch Display And Controls
USER GUIDE Functions 3.17 TOUCH DISPLAY AND CONTROLS When shooting, the X1D Touch Display with Live View displays the information most often required for a quick settings check. The Front and Rear Scroll Wheels and Camera Buttons together with the Touch Display are used to navigate the Main Menu and change settings. -
Page 57: Electronic Viewfinder Display Evf
3.18 ELECTRONIC VIEWFINDER DISPLAY EVF TYPICAL VIEWFINDER DISPLAY Touch Display Electronic Viewfinder Display EVF visual user interface Focus Area Indicator ISO Setting Battery indicator Aperture setting Exposure compensation Shutter speed setting Remaining frames (f/11) setting (0.0 EV) (1/1000 sec) counter (621 left) www.hasselblad.com... -
Page 58: Viewfinder Display Settings
Aperture setting Displays the selected Aperture Setting (f/11). Shutter Speed setting Green AF indicator. AF set correct. Displays the selected Shutter Speed setting (1/1000 sec). Frames Counter Displays remaining Frames (621 left). Red AF indicator. AF analysis failed to focus. www.hasselblad.com... -
Page 59: Camera Live View
Rotate the Focus Ring on the Lens to adjust Focus. Press the star button again to exit Zoom. Exposure information, ISO, Battery and Time will be displayed during Video Recording. This Chapter Continuous on the next page. www.hasselblad.com... -
Page 60: Live View
100% view after Focusing to Zoom out to Display the entire Capture. Note! Live View demands higher power consumption than normal operation. Working with Live View will shorten the usage time of the Camera when on battery only power supply. www.hasselblad.com... -
Page 61: Live View With Hdmi External Screen
Connect an external Video Screen to the HDMI connector socket (1). On the Main Menu select LV Live View. Note! Live View demands higher power consumption than normal operation. Working with Live View will shorten the usage time of the Camera when on battery only power supply. www.hasselblad.com... -
Page 62: Focus
Functions 3.19 FOCUS FOCUS ASSIST The X1D camera features automatic focus assist. A white rectangle marked green in the middle of the view provides confirmation of a precision focus setting and are a useful aid when making a setting with Auto Focus. -
Page 63: Manual Focus
AUTO / MANUAL FOCUS SETTING 1 Press AF Button (B). 2 Turn the Front Scroll Wheel (A) to select Manual or AF S Single Shot. 3 Press AF Button (B) or Shutter Release to Save. www.hasselblad.com... -
Page 64: Autofocus
Nikon SB 600, for example) can also be used. This feature can be altered in settings. AF Assist light AF assist light (A) is automatically activated if selected. The operative distance is approximately up to 4 metres from the camera. White AF indicator. Green AF indicator. AF set correct. www.hasselblad.com... -
Page 65: Single Shot Focus
(A) and pressing again (half-press) would now change the focus setting to the distance of the object within the focusing zone. See Manual override in autofocus mode for a useful way of working with manual and autofocus settings combined. AF Focus www.hasselblad.com... -
Page 66: Move Autofocus Point
(K) Main Menu > Camera Settings > Focus > Reset Focus Point. marked with an x. Photo A, B, C and D by Damien Demolder. www.hasselblad.com... -
Page 67: Stop Down Button
5 The depth-of-field (at that particular aperture and focus setting) is the area included between these two distances. Note! Depth-of-field is not absolute. Perception of it depends on several factors and so it should be seen only as a rough guide. www.hasselblad.com... -
Page 68: Change Settings On The Grip
This results in the shortest possible reaction time as well as saving battery time. Custom Modes C3, C2, and C1 are Custom Modes that can save the complete Camera settings in the Camera Memory for quick access to favourite settings. www.hasselblad.com... -
Page 69: To Adjust Shutter And Aperture On Grip
Rear wheel = Quick exposure adjustment of Shutter speed. In Shutter priority (S) mode: Front wheel = Shutter Speed. Rear wheel = Quick exposure adjustment of Aperture. In P mode: Front wheel = Aperture/shutter speed combination. Rear wheel = Quick exposure adjustment. www.hasselblad.com... -
Page 70: Iso And White Balance
White Balance setting. Note! ISO and White Balance settings are made either on the Camera Grip or the Touch Display. The settings are automatically updated on both the Touch Display and the Electronic Viewfinder. www.hasselblad.com... -
Page 71: Browsing, Preview And Histogram
Press Menu button (E) to return to Main Menu. SELECT CARD TO BROWSE Select Card to Browse You can select SD 1 Card or SD 2 Card to Browse Captures. BROWSE: MEMORY CARDS Select Card to Browse SD 1 SD 2 www.hasselblad.com... -
Page 72: Standard Preview
Browse Mode. In this Mode you can see an overview of up to 9 captures. If you have more than 9 captures, swipe down at the right side of the Display to scroll through all captures. Select one capture for further information. www.hasselblad.com... -
Page 73: Histogram Types
The Red R channel first, the Green G channel in (60), ISO (200), EV Settings (+/- 0.0), Mode (M), Focus Method the middle and the Blue B channel below the Red and Green (Spot), White Balance (Daylight) and Lens info (45mm). channels. www.hasselblad.com... -
Page 74: Histogram Exposure Mode
Overexposure Histogram display concentrated on the right with few pixels elsewhere indicates a likely overexposure. Many details will be lost in the highlights. www.hasselblad.com... -
Page 75: Phocus Overview
Apple App Store. www.apple.com. single computer. Phocus Mobile also allows users to remotely operate and trigger a tethered camera, giving control of many Phocus Mobile will soon be updated with X1D User Interface. www.hasselblad.com... -
Page 76: Phocus
You can browse, handle, adjust, and process all Note! kinds of RAW and non-RAW formats. Phocus Mobile will soon be updated with X1D User Interface. Phocus supports RAW files from more than 150 cameras, including Canon, Nikon, Leica, Sony, Fuji, Olympus **. The most common file formats can be processed for example TIFF, JPEG, DNG, and PNG. -
Page 77: Connect To A Computer
3 Connect the USB 3 cable to the USB port on the camera. When initiating a shot from Phocus, the Computer sends a signal to the X1D Camera, which triggers the shutter (and strobe/flash, if any). The Camera then sends the capture over... -
Page 78: Phocus And Hasselblad Capture Files
USER GUIDE Functions PHOCUS AND HASSELBLAD CAPTURE FILES The X1D can capture files and store them as Hasselblad RAW format files or Hasselblad RAW + JPEG formats simultaneously. Hasselblad RAW files are initially stored in the 3FR format which is a proprietary Hasselblad format for the temporary storage of captures. -
Page 79: Battery
Rechargeable Battery The environmentally approved Battery (Li-ion 3054752) is the standard Power Source for the X1D Camera (1 and 7. It is advisable to keep an extra fully recharged battery at hand. As is the case with most batteries, problems might be encountered when used in very low temperatures. -
Page 80: Battery Charger
It can take about 6 hours to charge the battery completely up to 100% the first time. Note! You can still charge the battery when the protective cover is attached by lifting the lid. See next page for more details and precautions. www.hasselblad.com... -
Page 81: Rechargeable Battery Specification
If you do not intend to use the battery for a while, it is best to store it at room temperature with an approximate 30 to 40% charge. You can check the percentage level on the status screen. www.hasselblad.com... -
Page 82: Battery Life And Battery Warning
Keep camera and equipment away from moisture. If your camera becomes wet, disconnect from electric power and let camera dry before further use. This will help prevent damage to the equipment. Caution! Store the equipment in a dry environment. This will help prevent damage to the equipment. www.hasselblad.com... -
Page 83: Settings
SETTINGS MAIN MENU Display Wi-Fi Exposure Power & Quality Focus Timeouts Storage Service... -
Page 84: Camera Settings Menu
1 Press the Camera icon on the Touch Display. 2 The Camera Settings Menu appears. 3 Press the Exposure Settings Menu. Swipe right or press Menu / EXIT button to get back to Main Menu. Increment Step Size Exposure Select between 1, 1/2 and 1/3 stop increments. www.hasselblad.com... -
Page 85: Exposure Adjust
True Exposure: Flash Increment Step Size Low Flash Warning: Sync: Normal Exposure Adjust Select between 1, 1/2 and 1/3 stop Exposure Lock increments. Flash Ready: Out of Range: AE-L / Quick Adjust Reset after Exposure: Image Orientation Orientation: Auto www.hasselblad.com... -
Page 86: True Exposure
Reset after Exposure: or 1/1000 shutter speed (depending on lens type), remember to turn off the True Exposure option. Image Orientation Orientation: Auto Note! The True Exposure feature is designed to keep shutter speed unaffected by aperture value. See next page. www.hasselblad.com... - Page 87 At slow shutter speeds the effect is minimal but at faster You can download a complete explanation of this situation from speeds, 1/500s, the effect becomes clearly visible. Automatic www.hasselblad.com. compensatory measures in speed setting adjustments are employed. As compensation can only be put into effect where speeds can be adjusted, this prevents the possibility of adjusting the fastest speed of 1/800s.
-
Page 88: Flash Settings
Swipe right or press Menu / EXIT button to get back to Main Exposure Mode Menu. True Exposure: Flash Important information! Read the complete Chapter about flash before attaching a Flash Low Flash Warning: to the X1D Camera. Sync: Normal Exposure Lock Flash Flash Ready: Low Flash Warning Out of Range: Select On or Off. -
Page 89: Flash And Strobe Settings
Settings FLASH AND STROBE SETTINGS Notes and WARNINGS! The X1D Camera can be used together with the following Nikon Only Nikon Flash units listed above and specially adapted for Flashes in TTL mode: use with the X1D or Nikon compatible flashes can be connected to the hot-shoe of the camera. -
Page 90: Exposure Lock
Select On or Off. The check box will be marked with a v Reset after Exposure: when On and the check box will be empty when it is Off. Controls if an exposure is blocked if aperture, and/or shutter Image Orientation speed, is outside the possible range. Orientation: Auto www.hasselblad.com... -
Page 91: Ae-L (Ae-Lock) / Quick Adjust
√ when On and the check box will be empty when Off. Flash Ready: Out of Range: Controls if an exposure adjustment or AE-Lock state is reset by an exposure or not. AE-L / Quick Adjust Reset after Exposure: Image Orientation Orientation: Auto www.hasselblad.com... -
Page 92: Image Orientation
Out of Range: can be locked. AE-L / Quick Adjust Optional Settings Auto. Reset after Exposure: Lock at 0 degrees. Lock at 90 degrees. Image Orientation Lock at 180 degrees. Orientation: Auto Lock at 270 degrees. www.hasselblad.com... -
Page 93: Image Quality Settings
Swipe right or press Menu / EXIT button to get back to Main Menu. Configuration Quality Settings Menu Contents Image Format - RAW. - RAW + JPG. JPG Quality - High. - Normal. Colour Profile - sRGB. - Adobe RGB. www.hasselblad.com... -
Page 94: Camera Focus Settings
- After Exposure. - Never. Autofocus Point can be reset to center position after every exposure. If you need the Autofocus Point to remain in the specific position, select Never. See section Move Autofocus Point for more indepth information. www.hasselblad.com... -
Page 95: Camera Self Timer Settings
The check box will be marked with a √ when Active and the check box will be empty when Self Timer is Off. Time 2, 3, 4, 5 and so on in steps of one second up to 60 seconds. www.hasselblad.com... -
Page 96: Camera Configuration Settings
Exposure Quick Adjust On or Off. Controls if an exposure adjustment or AE-Lock state is reset by an exposure or not. The check box will be marked with a √ when On and the check box will be empty when Off. www.hasselblad.com... -
Page 97: Video Settings Menu
1 Press the Video icon on the Touch Display. 2 The Video Settings Menu appears. 3 Select the Video Settings Menu. Swipe right or press Menu / EXIT button to get back to Main Menu. VIDEO SETTINGS Resolution Video Quality Resolution Setting 1080p or 720p. www.hasselblad.com... -
Page 98: General Settings Menu
Main Menu. Wi-Fi MODES GENERAL SETTINGS WI-FI The Wi-Fi mode allows the Hasselblad Phocus The Wi-Fi function has one mode of operation – Direct Access. Mobile application on an Apple iPhone, iPad or iPod to function in the same way as when a camera is Direct Access is when the camera creates a new Wi-Fi network tethered to a computer. -
Page 99: General Settings Display
As an example, a Quick Exposure Simulation is automatically low underexposure for the actual Adjust of +1.0 steps results in a clearly light conditions, the Live View activated again. lighter photo exposure. www.hasselblad.com... -
Page 100: General Settings Custom Modes
2 A pop up dialogue will display "Save About Custom Modes Menu Save to C1 to C1?" 3 Select "Save" to save settings to C1 Save program or select "Exit" to exit without saving settings. Save to C1? Previous settings will be overwritten! Exit www.hasselblad.com... -
Page 101: General Settings Storage
Format 1 Select Card to Format, SD 1 or SD 2, on the Storage Menu. Format SD1? 2 A new Format Card Dialogue will be All content will be erased! displayed. 3 Select Exit to Exit without Exit formatting. www.hasselblad.com... -
Page 102: Image And Video Destination
Service Image Destination - Primary slot: SD 1 or SD 2. About - Secondary slot usage: - None. - Overflow. If Overflow is selected the camera will automatically switch to the secondary card when the primary card is full. www.hasselblad.com... -
Page 103: General Settings Date And Time
Power & Timeouts Spirit Level Date and Time Menu Settings Language Date Service Set Date by changing year, month and day using the pop up menus. About Time Set Time by changing hour and minute using the pop up menus. www.hasselblad.com... -
Page 104: General Settings Power And Timeouts
Power and Timeouts Menu POWER AND TIMEOUTS GENERAL SETTINGS GENERAL SETTINGS: POWER & TIMEOUTS Wi-Fi The X1D Camera can be set to Display Off: automatically turn off the Touch 10 sec Display Display or Power Off after a set amount of seconds to save battery for... -
Page 105: General Settings Spirit Level
Swipe right or press Menu / EXIT button to get back to Main Menu. Camera tilted to the left. Camera aligned horizontally and vertically. Camera tilted to the right. Camera tilted up. Camera aligned vertically. Camera tilted down. www.hasselblad.com... -
Page 106: Calibrate Spirit Level
6 Press the Factory settings icon (C). 7 The Factory settings icon (D) is now displayed and the Spirit Level is reset to Calibrate Factory calibration settings. Swipe right or press Menu / EXIT button to get back to Main Menu. www.hasselblad.com... -
Page 107: General Settings Language
3 Navigate to Language. 4 Select Language. 5 Close the pop up Menu by a click outside the pop up. Note! If the Camera has been set to a language you do not understand, see Chapter Troubleshooting for a solution. www.hasselblad.com... -
Page 108: General Settings Service
The Storage Deactivation is only active 5 Press the Save button. until the camera is restarted. 6 Save Log Data saves a log file on the SD 1 card or SD 2 card. 7 Save the chosen selection by pressing EXIT (MENU button). www.hasselblad.com... -
Page 109: Update X1D Camera Firmware
1 Download the latest X1D Firmware from www.hasselblad.com. Check for Update Firmware Update 2 Save the Firmware file to a SD Card. 3 Insert the SD Card in the X1D Camera. GENERAL SETTINGS: SERVICE FIRMWARE UPDATE 4 Select Settings from the Main Menu. -
Page 110: Update X1D Lens Firmware
X-Lens_v0_5_1.cim 3 Save the Firmware file to a SD Card. X-Lens_v0_5_2.cim 4 Insert the SD Card in the X1D Camera. No Updates available 5 Select Settings from the Main Menu. 6 Select Service / Firmware Update / Cancel... -
Page 111: General Settings About
Lens Firmware The Lens Firmware (v0.5.2) is displayed in the About menu. Serial Number The serial number is also displayed in case Hasselblad Support needs to know it for problem solving. Licenses Displays the available Licenses. Certification Displays the available Certification. -
Page 112: General Settings About Certification
Certification E-label Depending on region certification information in addition to what is engraved on the camera bottom can be found on an E-label. From the Main Menu this label is reached by pressing General Settings > About > Certification. www.hasselblad.com... -
Page 113: Accessories
ACCESSORIES... -
Page 114: Xcd Lens Range
XCD 30 LENS The XCD 30 is a fixed 30 mm Lens that has Autofocus and Manual Focus capabilities. Hasselblad XCD 30 Lens, 30 mm XCD 45 LENS The XCD 45 is a fixed 45 mm Lens that has Autofocus and Manual Focus capabilities. -
Page 115: Xcd Hc Lens Adapter
The Extension tubes attach between the lens and the body to reduce the close focusing distance for close up photography. They are available in three sizes: 13 mm, 26 mm and 52 mm. As the X1D has a TTL light metering system, exposure compensation is automatic. MACRO CONVERTER H... -
Page 116: Optional Accessories
Also features a filter holder for glass, gelatin, or plastic filters. PRO SHADE ADAPTERS (3043415, 3043417, 3043419) 67mm, 77mm and 95mm adapters with bayonet mount for HC lenses. Features lock to provide positive and secure attachment. www.hasselblad.com... -
Page 117: X1D Xcd Lens Filter Dimensions
USER GUIDE Accessories X1D XCD LENS FILTER DIMENSIONS XCD 30 77 mm. XCD 45 67 mm. XCD 90 67 mm. UV SKY FILTERS (3053470, 3053474 and 3053478) Absorbs UV radiation and reduces blue haze without affecting colours. Also protects the front lens surface. Particularly recommended when the camera is used in harsh conditions. -
Page 118: Troubleshooting
TROUBLESHOOTING... - Page 119 This can in combination with high ambient temperature result in noise in the image files. At around 60 °C a warning dialogue appears notifying that the sensor is temporarily shutting down to allow the Camera to cool. www.hasselblad.com...
-
Page 120: Error Messages
1 Remove the battery. 2 Wait 10 seconds. 3 Attach the battery again. The Camera processor is now reset. If the error message is still displayed 1 Write down the error message. 2 Contact your closest authorized Hasselblad dealer. www.hasselblad.com... -
Page 121: Change From Unknown Language
Globe icon (number 8 on the list from the top, Language). Date & Time 4 Scroll down to select your MARCH Language. Power & Timeouts Swipe right or press Menu / EXIT Spirit Level button to get back to Main Menu. Language Service About www.hasselblad.com... -
Page 122: Clean The Lens Glass
If there is smear on the lens glass, do as follows: 1 If you are not sure how to remove the smear, contact your local Hasselblad Authorized Service Centre. 2 Clean the lens glass with a high quality lens cleaning solution on a tissue. -
Page 123: Clean The Sensor Filter
11 Capture a number of images. 12 Inspect the images. If you still see spots on your images, you may have dust either on the inside of the IR filter or on the CMOS itself, please contact your Hasselblad dealer. www.hasselblad.com... - Page 124 Victor Hasselblad AB. The X1D Product Images in this User Guide were not taken with a Hasselblad X1D. They are produced in 3D as visualization.
Need help?
Do you have a question about the X1D and is the answer not in the manual?
Questions and answers