Table of Contents
Advertisement
Quick Links
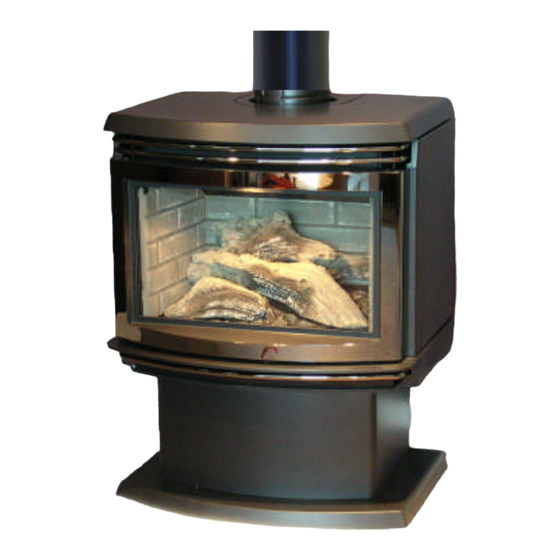
The torino
U
SERS'
I
NSTALLATION
O
PERATION &
M
AINTENANCE
M
ANUAL
WARNING: If the information in this manual is not
followed exactly, fire or explosion may result causing
property damage, personal injury or loss of life.
— Do not store or use gasoline or other flammable
vapors and liquids in the vicinity of this or any other
appliance.
— WHAT TO DO IF YOU SMELL GAS
· Do not try to light any appliance.
· Do not touch any electrical switch; do not use any
phone in your building.
· Immediately call your gas supplier from a
neighbor's phone. Follow the gas supplier's
instructions.
· If you cannot reach your gas supplier, call the fire
department.
— Installation and service must be performed by a
qualified installer, service agency or the gas supplier.
INSTALLER: PLEASE LEAVE THIS MANUAL WITH THE CUSTOMER
CUSTOMER: PLEASE KEEP MANUAL FOR FUTURE REFERENCE
Pour la version française de nos manuels S.V.P. vous référez à notre site web :
THE TORINO
FREESTANDING D
Rear V
TOP OR
For use with natural gas or propane
V
IRECT
G
Room Heater
ENT
AS
This appliance may be installed in an
af t ermarket
permanent ly
manufactured (mobile) home, where not
prohibited by local codes.
This appliance is only for use with the type
of gas indicated on the rating plate. This
appliance is not convertible for use with
other gases, unless a certified kit is used.
www.blazeking.com
Page 1
ENTED
locat ed,
Version 1.08
Oct2010
Advertisement
Table of Contents

Related Manuals for Blaze King The Torino


Summary of Contents for Blaze King The Torino
- Page 1 Page 1 The torino THE TORINO FREESTANDING D IRECT ENTED Rear V Room Heater TOP OR For use with natural gas or propane SERS’ NSTALLATION PERATION & AINTENANCE ANUAL WARNING: If the information in this manual is not followed exactly, fire or explosion may result causing...
-
Page 2: Table Of Contents
Page 2 The torino CONTENTS Introduction Copy of certification label General Information & Specifications Appliance Dimensions Installation Clearances Assembly Instructions 8 - 9 Installation Instructions 10 - 19 Rigid Venting Parts List 20 - 22 Intermittent Pilot & Valve Information... -
Page 3: Introduction
INTRODUCTION Thank you for purchasing the The Torino Freestanding Fireplace Gas Heater. The Torino is one of the most advanced direct vented freestanding fireplace gas heaters on the market. It is designed using the latest technology and manufactured to the highest quality. - Page 4 Page 4 The torino Note: A copy of the certification label is provided here for your review. Due to constant up-grades it is possible that the information shown here may not coincide with the label as attached to the unit.
-
Page 5: General Information & Specifications
- ANSI Z21.88b-2007 / CSA 2.33b-2007 Vented Gas Fireplace Heaters, - CAN/CGA-2.17-M91 Gas-Fired Appliance fo Use at High Altitudes - CSA P.4.1-02 Testing Method for Measuring Annual Fireplace Efficiency Please contact Valley Comfort or Blaze King, if you have any questions regarding the certification of this appliance. INSTALLATION CODES This appliance must be installed by a qualified gas appliance installer. -
Page 6: Appliance Dimensions
Page 6 The torino APPLIANCE DIMENSIONS... -
Page 7: Installation Clearances
Page 7 The torino INSTALLATION CLEARANCES CLEARANCES TO COMBUSTIBLES Figure 2 MODEL - The Torino Alcove Width min. 46-3/8” (1178 mm) Alcove Height min. 48” (1219 mm) Top of Unit to Alcove Ceiling min. 12-1/2” (318 mm) Side of Unit to Sidewall min. -
Page 8: Assembly Instructions
- If the glass door is damaged, it must be replaced with another glass door certified with this appliance only. - Replacement glass doors are available through your Blaze King dealer (See Replacement Parts page 46) Replacing the Glass Door - Check the condition of the glass and the gasket before installing door. - Page 9 Page 9 The torino ASSEMBLY INSTRUCTIONS Cont... PLACEMENT OF LOGS AND TWIGS Step 1: Place rear log on log on Step 2: Install pins in holes pins near the rear center of the “arrows” and place next log on burner.
-
Page 10: Installation Instructions
Page 10 The torino INSTALLATION INSTRUCTIONS PRECAUTIONS This appliance must be installed by a qualified gas installer and the installation conform to the installation codes. This appliance needs fresh air for safe operation and must be installed so there are provisions for adequate ventilation air. - Page 11 Page 11 The torino INSTALLATION INSTRUCTIONS Cont... GAS CONNECTIONS Have your gas supplier or a qualified gas fitter run a gas supply line into the gas fireplace. The line must be properly sized and fitted according to the installation codes. Upstream of the supply connection, the fitter shall provide a manual shut-off valve.
- Page 12 Page 12 The torino INSTALLATION INSTRUCTIONS Cont... WARNING: A minimum clearance of 1” to combustibles must be maintained on vertical pipe runs and 2” for horizontal pipe runs (sides and bottom 1”) The rigid vent systems use twist lock connections. The adaptor attached to the unit connects to the approved venting system.
- Page 13 Page 13 The torino INSTALLATION INSTRUCTIONS Cont... Vertical Installations Always maintain the 1” clearance around the vent pipe (vertical), when passing through ceilings, walls, roofs, enclosures, attic rafters or any combustible surfaces. DO NOT PACK AIR SPACES WITH INSULATION. Refer to the vent chart for maximum allowable vertical and horizontal installations.
- Page 14 Page 14 The torino INSTALLATION INSTRUCTIONS Cont... Through Roof Framing Termination Above Roof Maintain 10” opening relative to the pitch of Consult local codes for minimum vent cap the roof. height above the roof, vent must be a minimum 2’ from any wall.
- Page 15 Page 15 The torino INSTALLATION INSTRUCTIONS Cont... VENTING - Rear Vent This appliance will not function without being connected to a proper venting system. This unit can be used with Selkirk (Direct-Temp), American Metal, Security Chimneys or Simpson Duravent 4" x 6-5/8" venting, but for the snorkel only the American Metal can be used.
- Page 16 Page 16 The torino INSTALLATION INSTRUCTIONS Cont... For best venting performance, here are some general venting rules: 1. Use only vent systems and components certified for use with this appliance 2. Maintain a minimum of 1” (26 mm) clearance to combustibles from the outside surfaces of vertical vents and minimum of 1”...
- Page 17 Page 17 The torino INSTALLATION INSTRUCTIONS Cont... TOP VENT VERTICAL VENTING Example 1 V Value = 3A (12') + 1C (3') = 15' H Value = 2B (4') =4' V Value = Total length of all vertical sections in feet.
- Page 18 Page 18 The torino INSTALLATION INSTRUCTIONS Cont... Vent Restrictor (P/N 1748) Due to the extra flow produced by certain venting configurations a vent restrictor must be placed in the vent to maintain performance. All top vent installations over 20' require the use of a 60% restrictor. The restrictor is installed in the exhaust of the appliance as shown in Figure's 4 &...
- Page 19 Page 19 The torino INSTALLATION INSTRUCTIONS Cont... CHART IV Typical vent Installation High Wind Vertical Termination Cap Flashing Alternate 45° pipe requiring strap support Twist Lock Joints Wall Thimble or Fire-Stop...
- Page 20 Page 20 The torino SIMPSON DURAVENT DIRECTVENT PRO / GS SYSTEM PARTS LIST SIMPSON DURAVENT GS SYSTEM PARTS LIST Description Part # Old Part # Description Part # Horizontal Termination Kit - In Canada—Mandatory to add a wall thimble 46DVA-KHA Horizontal Termination Kit - In Canada—Mandatory to add a wall thimble.
- Page 21 Page 21 The torino SELKIRK PARTS LIST PART NUMBER DESCRIPTION 4" x 6 " LENGTHS 1604006 4DT- 6 DIRECT-TEMP 6" PIPE LENGTH 1604006B 4DT- 6B DIRECT-TEMP 6" PIPE LENGTH BLACK 1604009 4DT- 9 DIRECT-TEMP 9" PIPE LENGTH 1604009B 4DT- 9B DIRECT-TEMP 9"...
- Page 22 Page 22 The torino AMERICAN METAL PRODUCTS COMPONENTS LIST Description Part # 7” Pipe Length 12” Pipe Length 4D12 2’ Pipe Length 3’ Pipe Length 4’ Pipe Length 4” - 10” Adjustable Length 4D12A 45° Elbow 4D45L 90° Elbow 4D90L...
-
Page 23: Intermittent Pilot & Valve Information
Page 23 The torino INTERMITTENT PILOT & VALVE SIT 885 Proflame Valve Outlet pressure tap Stepper motor Pilot Connection (green) Inlet pressure tap Pilot Flame adjustment Main valve Connection (red) Ground connection... - Page 24 Page 24 The torino INTERMITTENT PILOT & VALVE WIRING DIAGRAMS Optional Wall thermostat (interrupt green wire)
-
Page 25: Wiring Diagram
Page 25 The torino WIRING DIAGRAM 120 V AC... -
Page 26: Lighting Instructions
Page 26 The torino LIGHTING INSTRUCTIONS - Intermittent Pilot... - Page 27 Page 27 The torino HANDHELD THERMOSTAT REMOTE CONTROL-operation instructions Fig. 3: Receiver body...
- Page 28 Page 28 The torino HANDHELD THERMOSTAT REMOTE CONTROL-operation instructions...
- Page 29 Page 29 The torino HANDHELD THERMOSTAT REMOTE CONTROL-operation instructions...
- Page 30 Page 30 The torino HANDHELD THERMOSTAT REMOTE CONTROL-operation instructions...
- Page 31 Page 31 The torino HANDHELD THERMOSTAT REMOTE CONTROL-operation instructions Continuous pilot The pilot on this unit will light automatically when turning the unit on. If a standing pilot is preferred (especially in cold weather) , the pilot can be run continuously by switching the continuous pilot switch to the ON position.
-
Page 32: Maintenance
Page 32 The torino MAINTENANCE CAUTION :Do not conduct maintenance on the appliance while it is operating or while it is still hot. Make sure switch on the Battery pack / Receiver is in OFF position. Turning the electric supply off will not prevent unexpected ignition !! - Page 33 This appliance is supplied with high temperature 5mm high temperature ceramic glass that will easily withstand the heat your unit was designed to produce. In the event the glass breaks, contact your dealer or BLAZE KING to arrange for your glass to be replaced / repaired. IMPORTANT - GLASS CLEANING - WHITE MINERAL DEPOSITS One of the byproducts of the combustion process in a gas appliance, is a mineral which can show up as a white film on the ceramic glass of the viewing door.
-
Page 34: Servicing
SERVICING SERVICING UNDER WARRANTY Before servicing, read the terms and conditions of the Blaze King warranty at the back of this manual. Contact the Blaze King authorized dealer which you purchased the appliance from and provide him with details of the problem and the installation information which the installer filled out at the back of the manual. - Page 35 Page 35 The torino SERVICING Cont... REPLACING MAJOR GAS COMPONENTS If any of the major gas components need to be replaced, such as the pilot or the gas valve, we recommend replacing the complete gas component assembly. The assembly is designed to be quickly and easily replaced with minimal inconvenience to the customer.
-
Page 36: Fuel Conversion
Page 36 The torino FUEL CONVERSION “WARNING” This conversion kit shall be installed by a qualified service agency in accordance with the manufacturer’s instructions and all applicable codes and requirements of the authority having jurisdiction. If the information in these instructions is not followed exactly, a fire, explosion or production of carbon monoxide may result causing property damage, personal injury or loss of life. - Page 37 Page 37 The torino FUEL CONVERSION...
-
Page 38: Burner Tray Removal & Installation
Page 38 The torino BURNER TRAY REMOVAL AND INSTALLATION To remove the burner tray from the firebox, follow these steps: 1. Disconnect the gas and electricity to the appliance 2. Open door 3. Take out logs and brick panels 4. Unscrew the two screws holding the burner in place (see fig 10b) 5. -
Page 39: Valve Removal & Installation
Page 39 The torino VALVE REMOVAL AND INSTALLATION The easiest way to remove the valve is: 1. Disconnect the gas and electricity to the appliance. 2. Remove pedestal front cover and rear cover (4 screws) including fan (fig. 10c). 3. Undo the gas lines (one in, two out and pilot). -
Page 40: Fan Removal & Installation
Page 40 The torino FAN REMOVAL AND INSTALLATION To remove the fan, for maintenance or replacement, is easily accomplished by the fol- lowing steps: 1. Disconnect electrical power to the appliance. 2. Remove the 4 screws holding the rear pedestal fan bracket to the appliance (Figure 11). -
Page 41: Allowable Termination Locations
Page 41 The torino ALLOWABLE TERMINATION LOCATIONS Canadian Installations US Installations ____________________________________________________________________________________________________ A= Clearance above grade, veranda *(min. 12”/30 cm) *(min. 12”/30 cm) porch, deck or balcony ____________________________________________________________________________________________________ B= Clearance to window or door *(min. 12”/30 cm) *(min. 12”/30 cm) -
Page 42: Troubleshooting
Page 42 The torino TROUBLESHOOTING Please check to make sure the instructions are followed exactly before attempting trouble shooting of the appliance. WARNING: Troubleshooting and servicing of gas and electrical devices of the appliance should only be conducted by a qualified service technician. - Page 43 Page 43 The torino TROUBLESHOOTING Cont... SYMPTOM ACTION The main burner shuts off 1. This may be the normal operation of a wall thermostat installed to when the appliance is warm. appliances. 2. Check for good pilot flames on the flame sensor (see fig.3 page 9).
-
Page 44: Top/Rear Vent Conversion
Page 44 The torino TOP/REAR VENT CONVERSION Figure 15 The appliance is easily converted from top vent to rear vent. The steps for converting are as follows: 1. Remove the flue collar plate (# 2. Remove the stove top (# 2). - Page 45 Blaze King will inspect the product to determine that there is indeed a defect and that the defect is covered by warranty. Blaze King will either repair or replace the product at its' discretion. Under no condition whatsoever does Blaze King provide or imply warranty coverage for venting components used in the installation of our products.
-
Page 46: Replacement Parts
Page 46 The torino Replacement Parts list for The Torino Item # Description Unit Expl. View OM1605 OWNERS MANUAL, THE TORINO DVT/DVR Z0755P CONVERSION KIT-NATURAL GAS TO PROPANE 0-4,500ft Z0756P CONVERSION KIT-NATURAL GAS TO PROPANE 4,500-6,500ft Z0757P CONVERSION KIT-NATURAL GAS TO PROPANE 6,500-8,500ft... - Page 47 Page 47 The torino...
- Page 48 Page 48 The torino NOTES SERVICE HISTORY DATE CORRECTIVE ACTION (INCLUDE REPLACEMENT PARTS)
Need help?
Do you have a question about the The Torino and is the answer not in the manual?
Questions and answers