Table of Contents
Advertisement
Quick Links
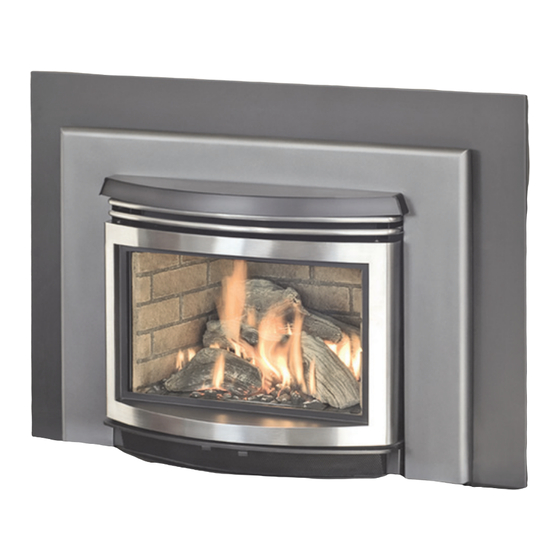
TORINO II INSERT 1607
OPERATION & INSTALLATION
Installer: Please complete the details on the back cover
and leave this manual with the homeowner.
Homeowner: Please keep these instructions for future reference.
WARNING: If the information in these
instructions are not followed exactly, a fire
or explosion may result causing property
damage, personal injury or loss of life.
—
Do not store or use gasoline or other
flammable vapors and liquids in the vicinity
of this or any other appliance.
—
WHAT TO DO IF YOU SMELL GAS
• Do not try to light any appliance.
• Do not touch any electrical switch; do not
use any phone in your building.
• Immediately call your gas supplier from a
neighbor's phone. Follow the gas supplier's
instructions.
• If you cannot reach your gas supplier, call
the fire department.
—
Installation and service must be performed
by a qualified installer, service agency or
the gas supplier.
Pour la version française de nos manuels S.V.P. vous référez à notre site web: www.blazeking.com
G:\InDATA\manuals\OM-1607 E V1.02
DIRECT VENTED GAS ROOM HEATER
for use with natural gas or LPG
MANUAL
This appliance may be installed in
an aftermarket, permanently located,
manufactured (mobile) home, where not
prohibited by local codes.
This appliance is only for use with the type
of gas indicated on the rating plate. This
appliance is not convertible for use with other
gases, unless a certified kit is used.
November 19, 2012
Advertisement
Table of Contents

Subscribe to Our Youtube Channel
Related Manuals for Blaze King Torino II Insert 1607


Summary of Contents for Blaze King Torino II Insert 1607
- Page 1 TORINO II INSERT 1607 DIRECT VENTED GAS ROOM HEATER for use with natural gas or LPG OPERATION & INSTALLATION MANUAL Installer: Please complete the details on the back cover and leave this manual with the homeowner. Homeowner: Please keep these instructions for future reference.
-
Page 2: Table Of Contents
TORINO II Insert 1607 Page 2 Table of Contents _____________________________________________________________ 3 INTRODUCTION ________________________________________________________ 4 CERTIFICATION LABEL ______________________________________________________ 5 GENERAL INFORMATION ______________________________________________________ 7 APPLIANCE DIMENSIONS _________________________________________________ 8 INSTALLATION INSTRUCTIONS ..........................9 CLEARANCES ............................11 VENTING ________________________________________________ 16 INTERMITTENT PILOT & VALVE... -
Page 3: Introduction
Disregarding inspection and code requirements may jeopardize your homeowner's insurance. Since some insurance carriers require notification of a stove installation, contact your insurance agent. We want your Blaze King to give you a lifetime of trouble-free operation. -
Page 4: Certification Label
TORINO II Insert 1607 Page 4 CERTIFICATION LABEL Listed Vented Gas Fireplace Heater / Foyer chauffé au gaz avec évent Torino II Insert W/N #16959 Serial No. - This stove is factory equipped for 0-1370 m (0-4500 ft) Certifi ed for U.S. and Canada Ce foyer est manufacturée et équipé... -
Page 5: General Information
• CAN/CGA-2.17-M91 Gas-Fired Appliance for Use at High Altitudes • CSA P.4.1-02 Testing Method for Measuring Annual Fireplace Efficiency Please contact Valley Comfort or Blaze King, if you have any questions regarding the certification of this appliance. • The installation must conform with the local codes or, in the absence of local codes, with the current National Fuel Gas Code, ANSI Z223.1/ NFPA 54, in the US or Installation Code, CSA-B149.1, in Canada. - Page 6 TORINO II Insert 1607 Page 6 GENERAL INFORMATION cont. CAUTION • Due to high temperatures, the appliance should be located out of traffic and away from furniture and draperies. • Children and adults should be alerted to the hazards of high surface temperature and stay away to avoid burns or clothing ignition.
-
Page 7: Appliance Dimensions
TORINO II Insert1607 Page 7 APPLIANCE DIMENSIONS Fig. 1 G:\InDATA\manuals\OM-1607 E V1.02 November 19, 2012... -
Page 8: Installation Instructions
TORINO II Insert 1607 Page 8 INSTALLATION INSTRUCTIONS PRECAUTIONS • This appliance must be installed by a qualified gas installer and the installation conform to the installation codes. • Provide adequate clearances for proper operation and servicing of the appliance. -
Page 9: Clearances
TORINO II Insert1607 Page 9 INSTALLATION INSTRUCTIONS cont. CLEARANCES CLEARANCES TO COMBUSTIBLES: MODEL - Torino II Insert Side Unit (Shroud) to Side wall min. 3” (76 mm) Floor in front of unit min. 12” (304 mm) Top shroud to 6” Mantle min. - Page 10 TORINO II Insert 1607 Page 10 INSTALLATION INSTRUCTIONS cont. The clearance from top of shroud to bottom of mantle increases 1” for every 1” depth increase beyound a 6” mantle. Shroud cannot touch a combustible material. Non-combustible material. Fig. 4 • Refractory material, glass doors, screen rails, screen mesh and log grates can be removed from the fireplace...
-
Page 11: Venting
TORINO II Insert1607 Page 11 INSTALLATION INSTRUCTIONS cont. VENTING Please follow the venting instructions as strictly as possible to obtain the best performance from the appliance. Only use listed 3” flex liner for correct installation Minimum vertical rise 8Ft. Maximum rise 32 Ft. Duravent • This gas appliance must not be connected to a chimney flue serving a separate solid-fuel burning appliance. - Page 12 TORINO II Insert 1607 Page 12 INSTALLATION INSTRUCTIONS cont. The exhaust and air intake pipe must be securely fastened to the appliance and terminal and all joints must be secured using a minimum of 3 screws evenly spaced around the pipe.
- Page 13 TORINO II Insert1607 Page 13 INSTALLATION INSTRUCTIONS cont. SHROUD INSTALLATION After the unit has been installed it is time to install the shroud. The shroud exist of two parts, the bigger piece gets attached to the unit permanently and covers the fireplace opening, see fig. 9 below. The smaller piece (outer shroud) can be installed and removed for servicing.
- Page 14 TORINO II Insert 1607 Page 14 INSTALLATION INSTRUCTIONS cont. REMOVAL OUTER SHROUD To remove the smaller outer shroud undo 2 screws and lift and pull the shroud off (see fig. 11). This removal is required to access and service the unit. Make sure to reinstall the screws after servicing to prevent the shroud from falling off and cause property damage, personal injury or loss of life.
- Page 15 TORINO II Insert1607 Page 15 INSTALLATION INSTRUCTIONS cont. PLACEMENT OF LOGS Step 3: Install pins in holes “arrows” Step 1: Place rear log on log on pins and place final log on pins as shown. near the rear center of the burner. Step 2: Install pins in holes “arrows”...
-
Page 16: Intermittent Pilot & Valve
TORINO II Insert 1607 Page 16 INTERMITTENT PILOT & VALVE SIT 885 Proflame Valve Outlet pressure tap Stepper motor Pilot Connection (green) Inlet pressure tap Pilot Flame adjustment Main valve Connection (red) Ground connection Fig. 13 G:\InDATA\manuals\OM-1607 E V1.02 November 19, 2012... - Page 17 TORINO II Insert1607 Page 17 INTERMITTENT PILOT & VALVE cont. Fig. 14 G:\InDATA\manuals\OM-1607 E V1.02 November 19, 2012...
-
Page 18: Wiring Diagram
TORINO II Insert 1607 Page 18 WIRING DIAGRAM Fig. 15 WARNING Electrical Grounding Instructions This appliance is equipped with a three prong (grounding) plug for your protection against shock hazard and should be plugged directly into a properly grounded three prong receptacle . -
Page 19: Lighting Instructions
TORINO II Insert1607 Page 19 LIGHTING INSTRUCTIONS G:\InDATA\manuals\OM-1607 E V1.02 November 19, 2012... -
Page 20: Thermostat Remote Control
TORINO II Insert 1607 Page 20 THERMOSTAT REMOTE CONTROL OPERATING PROCEDURE Initializing the System for the first time Install the 4 AA batteries into the receiver battery bay. Note the polarity of battery and insert into the battery bay as indicated on the Battery cover (+/-). Place the 3 position slider switch in the “Remote” position (Fig. - Page 21 TORINO II Insert1607 Page 21 THERMOSTAT REMOTE CONTROL cont. Remote Flame Control The proflame GTMF has six (6) flame levels. With the system on, and the flame level at the maximum in the appliance, pressing the Down Arrow Key once will reduce the flame height by one step until the flame is turned off.
- Page 22 TORINO II Insert 1607 Page 22 THERMOSTAT REMOTE CONTROL cont. Smart Thermostat (Transmitter Operation) The Smart Thermostat function adjusts the flame height in accordance to the difference between the set point temperature and the actual room temperatures. As the room temperature gets closer to the set point the Smart Function will modulate the flame down.
- Page 23 TORINO II Insert1607 Page 23 THERMOSTAT REMOTE CONTROL cont. Remote Actuated 120V Auxiliary Outlet The auxiliary function controls the AUX power outlet on the Fan Control Module. To activate this function use the Mode Key (Fig. 1) to index to AUX Icon (Fig. 16 & 17). Pressing the Up Arrow Key will activate the outlet.
- Page 24 TORINO II Insert 1607 Page 24 THERMOSTAT REMOTE CONTROL cont. MANUAL BYPASS OF THE REMOTE SYSTEM If the batteries of the Receiver or Transmitter are low or depleted, the appliance can be turned on manually by sliding the three position slider switch on the Receiver to the ON position. This will bypass the remote control feature of the system and the appliance main burner will come on if the gas valve is in the “On”...
-
Page 25: Maintenance
• This appliance is supplied with high temperature 5mm high temperature ceramic glass that will easily withstand the heat your unit was designed to produce. In the event the glass breaks, contact your dealer or BLAZE KING to arrange for your glass to be replaced / repaired. G:\InDATA\manuals\OM-1607 E V1.02... - Page 26 POLISH PLUS by KEL KEM c) COOK TOP CLEAN CREME by ELCO d) WHITE OFF by RUTLAND NOTE: This is a problem beyond Blaze King’s control and is not covered under warranty. NOTICE: COLD WEATHER OPERATION When using any gas appliance (LPG or NAT Gas) water is a by product of the combustion process. Under normal conditions this moisture is expelled through the vent into the atmosphere and does not cause any harm.
-
Page 27: Servicing
SERVICING UNDER WARRANTY Before servicing, read the terms and conditions of the Blaze King warranty at the back of this manual. Contact the Blaze King authorized dealer which you purchased the appliance from and provide him with details of the problem and the installation information which the installer filled out at the back of the manual. - Page 28 6. If the glass door is damaged, it must be replaced with another glass door certified with this appliance only. 7. Replacement glass doors are available through your Blaze King dealer, see “REPLACEMENT PARTS” on page 35 Replacing the Glass Door 1.
-
Page 29: Fuel Conversion
TORINO II Insert1607 Page 29 FUEL CONVERSION WARNING: This conversion kit shall be installed by a qualified service agency in accordance with the manufacturer’s instructions and all applicable codes and requirements of the authority having jurisdiction. If the information in these instructions is not followed exactly, a fire, explosion or production of carbon monoxide may result causing property damage, personal injury or loss of life. - Page 30 TORINO II Insert 1607 Page 30 FUEL CONVERSION cont. G:\InDATA\manuals\OM-1607 E V1.02 November 19, 2012...
-
Page 31: Burner Tray Removal And Installation
TORINO II Insert1607 Page 31 BURNER TRAY REMOVAL AND INSTALLATION To remove the burner tray from the firebox, follow these steps: 1. Disconnect the gas and electricity to the appliance 2. Open door 3. Take out logs and brick panels 4. -
Page 32: Fan Removal And Installation
TORINO II Insert 1607 Page 32 FAN REMOVAL AND INSTALLATION To remove the fan, for maintenance or replacement, is easily accomplished by the following steps: 1. Disconnect electrical power to the appliance. 2. Remove outer shroud, see “INSTALLATION INSTRUCTIONS cont. ” on page 14 3. -
Page 33: Troubleshooting
TORINO II Insert1607 Page 33 TROUBLESHOOTING Please check to make sure the instructions are followed exactly before attempting trouble shooting of the appliance. WARNING: Troubleshooting and servicing of gas and electrical devices of the appliance should only be conducted by a qualified service technician. SYMPTOM ACTION The pilot will not stay lit. - Page 34 TORINO II Insert 1607 Page 34 TROUBLESHOOTING cont. SYMPTOM ACTION Sooty deposits on the glass door. If the flame is yellow and lazy, check for lint etc. around primary air shutter. Increase primary air by opening the primary air shutter if necessary, see “SERVICING” on page 27.
-
Page 35: Replacement Parts
Page 35 REPLACEMENT PARTS Expl. Item # Description Unit View OM1607 OWNERS MANUAL, TORINO II Insert 1607 Z0712 CONVERSION KIT-NATURAL GAS to PROPANE 0-4,500ft Z0713 CONVERSION KIT-NATURAL GAS to PROPANE 4,500-6,500ft Z0714 CONVERSION KIT-PROPANE to NATURAL GAS 0-4,500ft Z0715 CONVERSION KIT-PROPANE to NATURAL GAS 4,500-6,500ft... - Page 36 TORINO II Insert 1607 Page 36 REPLACEMENT PARTS cont. G:\InDATA\manuals\OM-1607 E V1.02 November 19, 2012...
-
Page 37: Warranty
Blaze King and its respective brands extend the following warranty for gas appliances purchased from an authorized Blaze King dealer and installed in the United States of America or Canada. Warranty starts with date of purchase by the original owner (End User) except as noted for replacement parts. - Page 38 Blaze King is the manufacturer of the Blaze King line of heating products. At Blaze King, our commitment to the highest level of quality and customer service is the most important thing we do. Each Blaze King stove is built on a tradition of using only the finest materials and is backed by our limited lifetime warranty to the original purchaser.
- Page 39 WARRANTY cont. If you are not satisfied with the service provided by the Blaze King dealer, write to Blaze King at the address listed on the last page of the Owner’s Manual. Include a copy of the original purchase invoice and a description of the problem.
- Page 40 Labor rates are set per component and as such total labor costs may not be covered. 26. If a defect or problem is determined by Blaze King to be non warrantable, Blaze King will not be liable for travel costs for service work.
-
Page 41: Notes
TORINO II Insert1607 Page 41 NOTES G:\InDATA\manuals\OM-1607 E V1.02 November 19, 2012...
Need help?
Do you have a question about the Torino II Insert 1607 and is the answer not in the manual?
Questions and answers