Advertisement
Quick Links
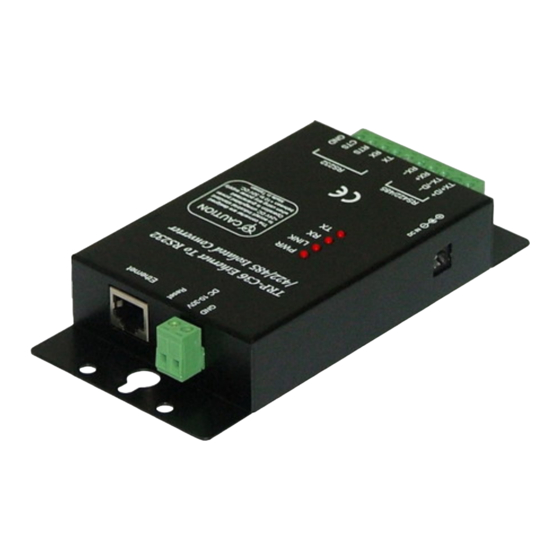
TRP-C36
User's Manual
Ethernet to RS232/422/485 Isolated Converter
Printed Feb. 2006 Rev 1.1
Trycom Technology Co.,Ltd
1F, No.2-11,Sihu street ,Yingge Township, Taipei, Taiwan ROC
Tel: 886-2-86781191 , Fax: 886-2-86781172
Web: www.trycom.com.tw
Copyright
Copyright Notice: The information in this manual is subject to change without prior notice in order t o improve
reliability, design and function and dosed not represent a commitment on the part of the manufacturer. No part of this
manual may be reproduced, copied, or transmitted in any form without the prior written permission of manufacturer.
Acknowledgment Products mentioned in this manual are mentioned for identification purpose only. Products manes
appearing in this manual may or may not be registered trademarks or copyright of their respective companies
Advertisement

Related Manuals for Trycom Technology TRP-C36


Summary of Contents for Trycom Technology TRP-C36
- Page 1 TRP-C36 User’s Manual Ethernet to RS232/422/485 Isolated Converter Printed Feb. 2006 Rev 1.1 Trycom Technology Co.,Ltd 1F, No.2-11,Sihu street ,Yingge Township, Taipei, Taiwan ROC Tel: 886-2-86781191 , Fax: 886-2-86781172 Web: www.trycom.com.tw Copyright Copyright Notice: The information in this manual is subject to change without prior notice in order t o improve reliability, design and function and dosed not represent a commitment on the part of the manufacturer.
- Page 2 COM port and existing network infrastructure the device allow you to link together a distant serial peripheral. You can reach TRP-C36 from Windows and Linux without the need to modify existing software. TRP-C36 support 10/100Mbps auto-detecting, and auto RS-485 data...
-
Page 3: Hardware Description
2. Hardware Description 2-1.TRP-C36 Panel Layout 2-2.Block Diagram... - Page 4 3. Install TRP-C36 3-1. Power Connection Connect power source with TRP-C36. The TRP-C32 has a two pins terminal block and power jack. Power can apply on either terminal block or the power jack. It supports +10-+30V DC/500mA power supply. When power is properly supplied the PWR LED will run indicating the power is up reading.
-
Page 5: Install Software
4. Install software “STOEC” is the tool for user to configure the on-line TRP-C36. User may find the utility in the TRP-C36 support CD. Double click STOEC, the install Shield Wizard will appear and guide you to complete installation. - Page 6 4-3. Introduction of ETM utility.. Run STOEC utility...
- Page 7 Detect Click [Detect] button to search the on-line TRP-C36 status. If TRP-C36 was properly installed it will be detected and found. If TRP-C36 was improperly installed it will not be found or detected. Notice: To assure STOEC utility run detecting process it is highly recommended user close XP firewall...
- Page 8 User can set IP address here. Suppose user set IP address to be 192.168.0.112, Press [OK] The IP address change to 192.168.0.112 Warning : ***.***.***.0 and ***.***.***.255 are invalid IP address for TRP-C36. If we input these IP address TRP-C36 will be locked...
- Page 9 Set Mask Click [Set Mask] button User can set Subnet Mask, the process is same as Set IP Click [IE] button If the IP address same as TRP-C36 IP address, then Press [OK] into the login page. .
- Page 10 NOTICE: TRP-C36 hardware Gateway address must be same as the computer Gateway address, or the Login frame will not be found. Ping Click [Ping] button Press [OK], if ping successfully following page will be shown.
- Page 11 Press [EXIT] button to stop setting 5. How to configure TRP-C36 Setup of TRP-C36 is as easy as surfing on WWW, no special software will be required. The setup process can be easily done by popular Browsers, such as IE, or Netscape. In the browser...
- Page 12 [Day Hour: Minute: Second] format. This information can be useful in identifying the reliability of system. Firmware release date: TRP-C36 firmware is identified by date code. This information will be required by original manufacturer when technical support. Ethernet address: This is an unique MAC (Media Access Control) address used by Ethernet in hex format, 6 digits.
- Page 13 IP Address The IP address of TRP-C36 device is 4 digits, separated by '.' (xxx.xxx.xxx.xxx). If DHCP client mode is enabled and there's DHCP server on the network, this field will be assigned by DHCP server automatically. Subnet mask Subnet mask of the network which TRP-C36 device connected to, 255.255.255.0 is usually used for small network, 255.255.0.0 for larger network.
- Page 14 Change this field may move HTTP port to 81, and leave port 80 for user's own Web. If HTTP port is changed to 81, the URL used for setup of TRP-C36 should be changed to "http://x.x.x.x:81", where x.x.x.x is the device IP address.
- Page 15 Half duplex RS-485 interface, RTS for driver enable/disable RS-422 (Full duplex) Full duplex RS-422 interface. TRP-C36 can auto detect interface of serial I/O, Select “Auto’ user may neglect others selections. 5-1-11 Console command control This feature will be available soon. The default value is “disable”...
-
Page 16: Firmware Upgrade
Connect TRP-C36 device to LAN. Firmware upgrade of TRP-C36 will not work on Internet. Set the target TRP-C36 device to have IP address in the same subnet as your host computer. In the DOS Prompt environment of Windows, execute the upgrade software you received with target TRP-C36 device IP address as the optional parameter. -
Page 17: Paired Mode
TRP-C36 and the LAN. Two TRP-C36 are configured with one setup as a TCP or UDP client and the other to TCP/UDP server. When setting up the Server, the Remote IP address section must contain the address of the Client. -
Page 18: Virtual Com Mode
2. Configure TRP-C36 Client. IP address: 192.168.0.109 (for example) “TRP-C36 Client IP address must be different from TRP-C36 Server IP address” Socket port of serial I/O : 1001, TCP Client. Socket port of digital I/O: 101, TCP Client Destination IP address/Socket port (TCP client and UDP): 192.168.0.106, port 1001. - Page 19 COM port. The virtual COM port converts the application’s data into IP packet destined for the TRP-C36, which in turn converts the IP packet back to serial data. Point # 9 will guide you setup Virtual COM mode.
- Page 20 VSerPortConsole_XP for Windows XP TRP-C36 Virtual COM software do not support Windows 98/Me How to set Virtual COM port Run the “VserPortConsolem2000” utility. ** If user’s operating system is Win XP or XP sp2 , it is strongly recommended to disable XP firewall before running VserPortConsole,** Fig.1...
- Page 21 Fig.2 .Select “ Add Port”,wait for a while , you will see Fig.3.。 Fig.3 Click you will see Fig.4 Fig.4 go to Fig.5 , you will find there is a Virtual RS-232 port 。 Click...
- Page 22 Fig.5 Move your mice cursor to the RS-232 port that you want to use (for example COM 11), and click the mice right button, you will see Fig.6. t Fig.6 Select Add Net , you will see Fig.7. You can start the RS-232 port’s TCP server、TCP xlient or UDP setting。...
- Page 23 Fig.7 Example: We select COM6 and COM10 for data communication by UDP protocol. COM6. Go to Fig.6, select COM6. for Add Net setting Select UDP. (Fig.8) Set Local port=30000,IP=127.0.0.1,Remote port=31000。 COM10 Go to Fig.6, Select COM10 for Add Net setting. Select UDP.
- Page 24 Fig.8 After COM6 and COM10 setting , you will see the Fig.9。 Fig.9 Use TRPCOM utility to open the com port that you had already assigned. You are able to proceed with data communication. See Fig 10.
- Page 25 Fig.10 .Click [Terminal] then input the command to RS-485 device or Test loop back, you’ll get response. 11.. Fig 11 User can directly link TRP-C36 to Trycom Remote IO Modules by RS-485 , The basic wiring...
- Page 26 connect See Fig 12 Fig 12...
Need help?
Do you have a question about the TRP-C36 and is the answer not in the manual?
Questions and answers