SCIFIT ISO7000R Service Manual
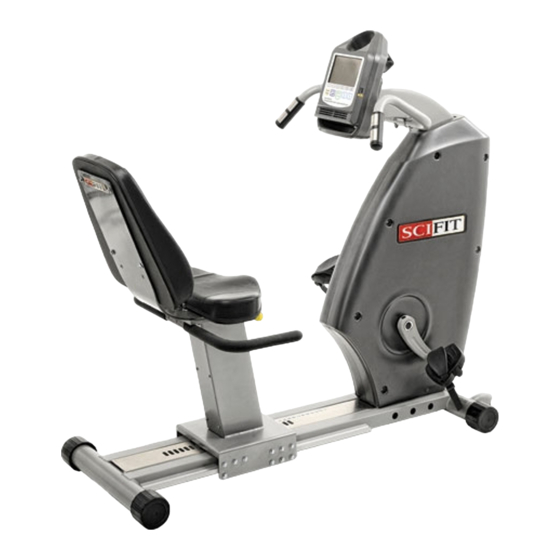
Recumbent bike
Hide thumbs
Also See for ISO7000R:
- Service manual (82 pages) ,
- Owner's operation manual (38 pages) ,
- User's operation manual (32 pages)

Subscribe to Our Youtube Channel
Related Manuals for SCIFIT ISO7000R


Summary of Contents for SCIFIT ISO7000R
- Page 1 Service Manual ISO7000R Recumbent Bike Before Using this product, read this manual and follow all safety rules and operating instructions.
- Page 2 Maintenance UNITED STATES CUSTOMER SERVICE The ISO7000R is virtually maintenance free. After For assistance in the service of SCIFIT products; exercising always wipe down your SCIFIT exercise phone : +1 (918) 359-2000 product. Perspiration that continuously settles on the fax : +1 (918) 359-2045 frame, upholstery, covers and console may eventually e-mail: service@scifit.com...
-
Page 3: Table Of Contents
1 - 3 IDLER REPLACEMENT 4 - 6 LOWER TORQUE BOARD REPLACEMENT 7 - 10 BI-DIRECTIONAL ASSEMBLY REPLACEMENT 11 - 15 JACK SHAFT ASSEMBLY REPLACEMENT 16 - 19 ELECTRONIC TROUBLESHOOTING GUIDE 20 - 22 ISO7000R EXPLODED VIEW 23 - 25... -
Page 4: Battery Replacement Instructions
ISO7000R SERVICE MANUAL BATTERY REPLACEMENT INSTRUCTIONS PG. 1 STEP 1: Starting on the left side, Use a 5/16 Hex Bit here use a 5/16 (8mm) hex bit to loosen the set screw enough to allow the crank to be removed. -
Page 5: Battery Replacement
ISO7000R SERVICE MANUAL BATTERY REPLACEMENT INSTRUCTIONS PG. 2 STEP 5: Use a phillips screwdriver to remove the two bracket screws USE A PHILLIPS securing the bracket to the SCREWDRIVER OR frame. CORDLESS DRILL TO REMOVE STEP 6: Carefully pull the... - Page 6 ISO7000R SERVICE MANUAL BATTERY REPLACEMENT INSTRUCTIONS PG. 3 STEP 7: Remove the bad battery from the bracket and replace it with a new one placing it in the same position on the bracket as the old one. STEP 8: Reconnect the battery cable wires to the new battery as follows: 1.
-
Page 7: Idler Replacement
ISO7000R SERVICE MANUAL IDLER REPLACEMENT INSTRUCTIONS PG. 4 STEP 1: Follow steps 1 thru 4 of the “BATTERY REPLACEMENT” instructions. STEP 2: Starting on the right side use a 3/16” (5mm) hex bit to loosen the two screws securing the brake in place. -
Page 8: Idler Replacement
ISO7000R SERVICE MANUAL IDLER REPLACEMENT INSTRUCTIONS PG. 5 STEP 5: Hold on to the idler assembly inside the frame, then use a 9/16” (14mm) socket to remove the securing screw, lock washer and flat washer. IDLER USE A 9/16” (14mm) -
Page 9: Idler Replacement
ISO7000R SERVICE MANUAL IDLER REPLACEMENT INSTRUCTIONS PG. 6 STEP 8: Starting on the right side tighten the brake screws that were loosened in step 2, then do the same on the left side. USE 3/16 (5mm) HEX BIT TO TIGHTEN... -
Page 10: Lower Torque Board Replacement
ISO7000R SERVICE MANUAL LOWER TORQUE BOARD REPLACEMENT PG. 7 STEP 1: Loosen the set screw of Use a 5/16 Hex Bit here the left crank using a 5/16 (8mm) hex to allow the crank to be removed. STEP 2: Remove the... -
Page 11: Lower Torque Board Replacement
ISO7000R SERVICE MANUAL LOWER TORQUE BOARD REPLACEMENT PG. 8 STEP 3: Disconnect the six cables attached to the torque board PC. 1. 3-pin brake cable 2. 2-pin brake cable 3. Comm. cable 3-PIN BRAKE 4. Main cable CABLE COMM. BATTERY 5. -
Page 12: Step
ISO7000R SERVICE MANUAL LOWER TORQUE BOARD REPLACEMENT PG. 9 STEP 5: Replace the thermal pads Thermal pads on the heatsink. Heatsink STEP 6: Attach the new heatsink/pads to the new lower torque board directly behind the transistors on the top side... -
Page 13: Step
ISO7000R SERVICE MANUAL LOWER TORQUE BOARD REPLACEMENT PG. 10 STEP 7: Use a phillips screwdriver or cordlless drill to secure the lower torque PC board with the screws and lock washers previously removed to the frame. STEP 8: Reconnect the six cables previously removed in step 3. -
Page 14: Step
ISO7000R SERVICE MANUAL BI-DIRECTIONAL ASSEMBLY REPLACEMENT PG. 11 STEP 1: Follow steps 1 thru 4 of the “BATTERY REPLACEMENT” instructions. STEP 2: Using a 1/2” (13mm) socket start on the left side and loosen BUT DO NOT REMOVE the screws securing the bi-directional assembly. -
Page 15: Bi-Directional Assembly Replacement
ISO7000R SERVICE MANUAL BI-DIRECTIONAL ASSEMBLY REPLACEMENT PG. 12 STEP 4: Slide the bi-directional assembly backward to loosen the chain tension. SLIDE BOTH LEFT AND RIGHT SIDE BEARING BLOCKS BACKWARD TO LOOSEN THE CHAIN TENSION STEP 5: Slowly rotate the short and... -
Page 16: Step
ISO7000R SERVICE MANUAL BI-DIRECTIONAL ASSEMBLY REPLACEMENT PG. 13 STEP 6: Return to the bi-directional securing hardware and remove them, allowing the assembly to slide out. STEP 7: Place a new bi-directional assembly on the frame and loosely secure the assembly with the screws removed in step 6. - Page 17 ISO7000R SERVICE MANUAL BI-DIRECTIONAL ASSEMBLY REPLACEMENT PG. 14 STEP 9: Slide the bi-directional assembly forward to tighten the chain tension. NOTE: A 1/4” chain deflection is recommended for proper tension. SLIDE BOTH LEFT AND RIGHT SIDE BEARING BLOCKS FORWARD TO...
- Page 18 ISO7000R SERVICE MANUAL BI-DIRECTIONAL ASSEMBLY REPLACEMENT PG. 15 STEP 11: Connect the power entry cable to the lower torque PC board, then secure the right side cover with the phillips screws that were removed. STEP 12: Secure the left side cover with the phillips screws that were removed.
-
Page 19: Jack Shaft Assembly Replacement
ISO7000R SERVICE MANUAL JACK SHAFT ASSEMBLY REPLACEMENT PG. 16 STEP 1: Follow steps 1 thru 4 of the “BATTERY REPLACEMENT” instructions. STEP 2: Follow steps 2 thru 5 of the “BI-DIRECTIONAL ASSEMBLY REPLACEMENT” instructions. STEP 3: Remove the Poly-V belt from the jack shaft pulley . -
Page 20: Jack Shaft Assembly Replacement
ISO7000R SERVICE MANUAL JACK SHAFT ASSEMBLY REPLACEMENT PG. 17 STEP 5: Slide the poly-V belt onto the pulley of the new jack shaft assembly, then loosely secure it to the frame with the four mounting screws. STEP 6: Reattach the short and... -
Page 21: Jack Shaft Assembly Replacement
ISO7000R SERVICE MANUAL JACK SHAFT ASSEMBLY REPLACEMENT PG. 18 STEP 7: Slide the bi-directional assembly forward to tighten the chain tension. NOTE: A 1/4” chain deflection is recommended for proper tension. SLIDE BOTH LEFT AND RIGHT SIDE BEARING BLOCKS FORWARD TO... - Page 22 ISO7000R SERVICE MANUAL JACK SHAFT ASSEMBLY REPLACEMENT PG. 19 STEP 9: Connect the power entry cable to the lower torque PC board, then secure the right side cover with the phillips screws that were removed. STEP 10: Secure the left side cover with the phillips screws that were removed.
-
Page 23: Electronic Troubleshooting Guide
ISO7000R SERVICE MANUAL ELECTRONIC TROUBLESHOOTING GUIDE PG. 20 Intelli-Fit Console Troubleshooting Guide - 10/5/2012 1. Complaint: Display does not light up Does the console beep with three short beeps (when cranked or plugged in)? _____ yes, replace battery ____ No, continue below... -
Page 24: Electronic Troubleshooting Guide
ISO7000R SERVICE MANUAL ELECTRONIC TROUBLESHOOTING GUIDE PG. 21 Intelli-Fit Console Troubleshooting Guide - 10/5/2012 6. Complaint: Start up resistance is too high (while not in constant work program) Does the resistance decrease to normal at higher RPMs (50 or above)? ____Yes check and or charge battery. - Page 25 ISO7000R SERVICE MANUAL ELECTRONIC TROUBLESHOOTING GUIDE PG. 22 Intelli-Fit Console Troubleshooting Guide - 10/5/2012 12. Complaint: No resistance Is comm. cable connected securely? _____ yes, replace lower board ______ No, reconnect comm cable _____ inadequate resistance, call Product Support and provide details.
-
Page 26: Iso7000R Exploded View
ISO7000R SERVICE MANUAL ISO7000R EXPLODED VIEW PG. 23... -
Page 27: Iso7000R Exploded View
ISO7000R SERVICE MANUAL ISO7000R EXPLODED VIEW PG. 24... -
Page 28: Iso7000R Exploded View
ISO7000R SERVICE MANUAL ISO7000R EXPLODED VIEW PG. 25... - Page 29 Model Number: Serial Number: Date of Purchase: Supplied By: SCIFIT Systems Inc. Service Manual: #P5389A (10/2012)
- Page 30 Order online 24/7 at www.SCIFIT.com...
Need help?
Do you have a question about the ISO7000R and is the answer not in the manual?
Questions and answers