USAutomatic PATRIOT RSL Installation & Owner's Manual
High quality low voltage vehicular slide gate operator solar or ac charged
Hide thumbs
Also See for PATRIOT RSL:
- Installation & owner's manual (44 pages) ,
- Installation & owner's manual (60 pages) ,
- Installation & owner's manual (60 pages)

Related Manuals for USAutomatic PATRIOT RSL


Summary of Contents for USAutomatic PATRIOT RSL
- Page 1 PATRIOT RSL USAutomatic High Quality Low Voltage Vehicular Slide Gate Operator Solar or AC Charged PATRIOT RSL Slide Gate Operator Installation/Owners Manual PROUDLY MADE IN THE USA WWW.USAUTOMATIC.COM...
-
Page 3: Introduction
Do not ever install any control device where a user will be tempted to reach through the gate or fence to activate a gate. © USAutomatic, Inc., 2001 rev N/C All rights reserved. No part of this may be reproduced by any means... -
Page 4: Table Of Contents
Table Of Contents Page Introduction..................1 Table of Contents................2 General Requirements/Gate Qualifications & Applications ...3 Importance of a Properly Designed Gate.........4 Mounting Site Review ..............4 Parts Included List ................5 Operator Illustration/Description.............6 Mounting Operator................7 Mounting Operator /Post Mount Installation........8 Pad Mount Installation..............9 Mounting Chain Brackets/Connecting Chain.........10 Installation of Charging Source ............11 Installation of Secondary Entrapment Siren/Safety Placards ..11... -
Page 5: General Requirements/Gate Qualifications & Applications
GENERAL REQUIREMENTS General hand/tools such as wrenches [7/16, 3/4], tape measure, level, clamps, chain cutter, etc. are required. Your particular installation may require a drill, welder or other hardware not provided. Concrete pad mounting by a qualified installer is the recommended method of securing the operator. -
Page 6: Importance Of A Properly Designed Gate
IMPORTANCE OF A PROPERLY DESIGNED GATE As a general rule, a gate, which is to be automatically operated, must be stronger and smoother than one, which will be manually operated. Since the gate is a major component of the system, great care and concern must be given to the gate design. A GATE OPERATOR CANNOT OVERCOME A POORLY DESIGNED GATE. -
Page 7: Parts Included List
PARTS INCLUDED The Patriot RSL slide gate operator is shipped in two separate boxes. One box contains the operator chassis and cover. The second box contains charging device (with bracket for solar), secondary entrapment siren, chain brackets, chain, transmitter, chain adjustment bolts, emergency release access cover and the installation/user manual with safety placards. -
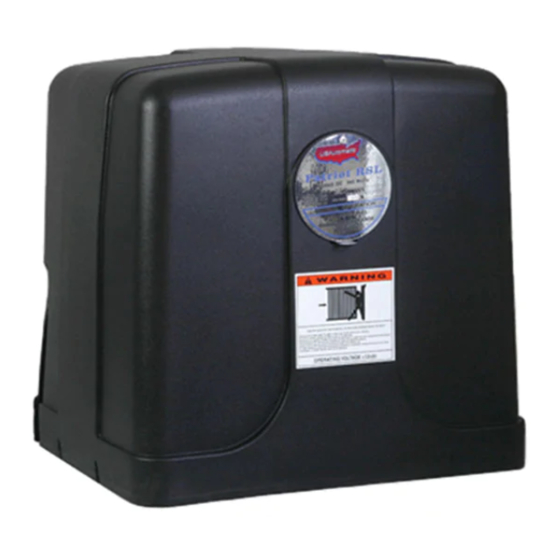
Page 8: Operator Illustration/Description
4 plcs Post mount sleeve Illustration 2 REAR VIEW Output drive sprocket Battery Compartment Chain rollers Chain Pad mounting holes Illustration 3 Note: USAutomatic is not responsible for failure to comply with UL325 standards, local building codes or improper installations. -
Page 9: Mounting Operator
Mounting Operator NOTE: Do not mount in areas by automatic sprinklers, or flood-prone areas. It is important that the control board, control devices, and the battery compartment remain dry. Correct Installation Incorrect Installation GATE GATE Illustration 4 Illustration 5 Correct Installation Incorrect Installation Illustration 6 Illustration 7... -
Page 10: Mounting Operator /Post Mount Installation
Mounting Operator PAD MOUNT: The operator base has four predrilled holes and four access holes, which are covered with press in hole plugs. These holes are sized to accommodate ½ anchor bolts and the plugged hole will accept a standard size ¾ inch socket. Keep the operator parallel with the gate while securing. -
Page 11: Pad Mount Installation
This hole is for ¾ electrical conduit use dimensions shown 20” MINIMUM 12 inches 3.3 inches 20 inches 1 inch Illustration 14 28” MINIMUM Note: USAutomatic is not responsible for failure to comply with UL325 standards, local building codes or improper installations. -
Page 12: Mounting Chain Brackets/Connecting Chain
STEP 2 Mounting of Chain Brackets to Gate With the operator securely mounted use the following procedure to locate and install gate brackets to gate ends. Install the chain adjustment bolt into the chain bracket as shown in illustration 15 below. 2. -
Page 13: Installation Of Charging Source
A licensed electrician per local building codes should install the receptacle. Note: USAutomatic recommends an AC surge protector on the 110-volt line especially in lightning prone areas. STEP 5 Installing Secondary Entrapment Siren The secondary entrapment siren connects to the control board (see page 30). -
Page 14: Current Sense Adjustment
The red battery lead goes to the positive + terminal on the battery and the black lead goes to the negative - terminal on the battery. Current Sense Adjust USAutomatic MADE IN USA PATRIOT CONTROL BOARD Timer... -
Page 15: Limit Switches/Installing Cover
17 to 21. STEP 8 Installing Cover Locate the emergency release access cover (round cover with USAutomatic logo), the shoulder screw and nut. Install screw through emergency release access cover and install onto operator cover using the supplied nut. -
Page 16: Circuit Board & Terminal Description
Circuit Board & Terminal Description Patriot Control Board USAutomatic MADE IN USA PATRIOT CONTROL BOARD Timer Sensitivity CURRENT SENSE TIMER TO CLOSE ADJUSTMENT ADJUSTMENT DS1 SWITCH SETTINGS FACTORY SETTINGS SW-1 AUTO CLOSE TIMER DISABLE SW-2 TIMER TO CLOSE WILL ACTIVATE ON LIMIT ONLY ON... -
Page 17: Function Of Programming Switch Settings
DS1 Programming Switches USAutomatic MADE IN USA PATRIOT CONTROL BOARD Timer Sensitivity CURRENT SENSE TIMER TO CLOSE ADJUSTMENT ADJUSTMENT DS1 SWITCH SETTINGS FACTORY SETTINGS SW-1 AUTO CLOSE TIMER DISABLE SW-2 TIMER TO CLOSE WILL ACTIVATE ON LIMIT ONLY ON SW-3... -
Page 18: Emergency Manual Release
DS2 Programming Switches USAutomatic MADE IN USA PATRIOT CONTROL BOARD Timer Sensitivity CURRENT SENSE TIMER TO CLOSE ADJUSTMENT ADJUSTMENT DS1 SWITCH SETTINGS FACTORY SETTINGS SW-1 AUTO CLOSE TIMER DISABLE SW-2 TIMER TO CLOSE WILL ACTIVATE ON LIMIT ONLY ON SW-3... -
Page 19: Safety Section
SAFETY SECTION USAutomatic gate operators are certified to UL325 Vehicular Class I and Class II slide gate standards. UL325 identifies four different classes of gate operators. These classes are listed below: Class I: Residential vehicular gate operator- a vehicular gate operator (or system) intended for use in a home of one to four single family dwellings or a garage or parking area associated therewith. - Page 20 SAFETY SECTION INSTALLATION Install the gate operator only when: The operator is appropriate for the construction of the gate and the usage class of the gate, All openings of a horizontal slide gate are guarded or screened from the bottom of the gate to a minimum of 4 feet (1.2m) above the ground to prevent a 2 ¼...
- Page 21 SAFETY SECTION All safety features required by UL 325 are incorporated in the capabilities of all USAutomatic Control boards and should be utilized, including but not limited to, safety edges, photo electric eyes, reverse sensing, and motion sensing. Cautions - Very Important !"...
- Page 22 SAFETY SECTION Remedies for Safety Concerns Zone 1 Safety edges and photo electric eyes are the most common types of protection available. Direction of Gate Travel Contact Safety Edge Photo Eye Beam Zone 2 A safety edge may also be utilized here but the best remedy is to eliminate pinch points when designing the gate.
-
Page 23: Safety Section
SAFETY SECTION Remedies for Safety Concerns Zone 4 This area is best protected with a photo eye or contact edge wired to the secondary entrapment input or safety loop input depending on the desired function of the safety device. The beam should be installed parallel to the gate and extend across the drive area to prevent the gate from closing or opening on an object in the path of the gate. -
Page 24: Troubleshooting Introduction
Time to open or close the gate, this will be first indication of a battery or charging problem. Troubleshooting Introduction The USAutomatic control board is equipped with three unique features to assist in troubleshooting a gate system. 1. The first and most helpful is the series of LED indicating lights. These lights will help to identify problems with the limit switches and all control circuits. -
Page 25: Troubleshooting Guide
TROUBLESHOOTING GUIDE SYMPTOM POSSIBLE CAUSE REMEDY 1. Gate stops and reverses Current sense feature may be set too Readjust- see page 12. direction in mid-travel. sensitive. Listen for on board beeper to CAUTION: Sensitivity should be sensitive verify. Beep indicates current sense enough to avoid injury. - Page 26 TROUBLESHOOTING GUIDE SYMPTOM POSSIBLE CAUSE REMEDY Gate will not open with Use on board open/close command button, if Check receiver wiring and receiver remote control transmitter. gate operates. Improper code settings or wiring. Check the code switches in the transmitter & receiver.
- Page 27 TROUBLESHOOTING GUIDE Gate began to operate Battery has one or more dead cells. Replace battery. increasingly slower and does not operate at all now. If AC charged, circuit breaker has tripped or Check circuit breaker. Check for power at power to charger is interrupted. charger receptacle.
-
Page 28: Accessory Wiring Diagrams
Accessory Wiring Diagrams NOTE: Ensure that battery power is disconnected from the control board before wiring accessories to the control board. Single Button Station to Open/Close 10 11 12 3 Button Station Wiring Note: Program function switch DS1 #8 must be in the on position for stop button control 10 11 12 Open Close... - Page 29 Radio Receiver Multi-Code 1099-40/Linear DRG-LV 10 11 12 Gray DRG-LV or 1099-40 Black 12 volt 8’ Coax extension Gray Radio receiver Red (+12vdc to receiver) Radio Receiver Allister 9931-LV 3 wire with F Connector NOTE: On 4 wire Allister receiver the Remaining black wire connects 10 11 12 To terminal #2.
- Page 30 Keypad (12 Volt D.C.) Card reader (Momentary Contact Signal) 10 11 12 Keypad N/O relay Common relay contact -12 volt or ground +12 volt NOTE: The N/O relay can also be wired to pin # 3. The keypad would act exactly like a push button transmitter when code was entered.
- Page 31 Safety Edge Wiring (Wireless Type) Secondary Entrapment Device (Safety Edge Transmitter & Radio Receiver) 10 11 12 Gray Gray Wireless Black Radio Receiver This receiver is for Safety edge only. Another receiver is required if a Wireless transmitter Transmitter is used to open the gate connected to gate NOTE: Transmitter battery will be drained if contact edge.
- Page 32 Siren Secondary Entrapment / Indicating Light For Gate Position Light illuminates anytime gate is not closed (4 second delay) USAutomatic MADE IN USA 10 11 12 PATRIOT CONTROL BOARD Timer Sensitivity CURRENT SENSE TIMER TO CLOSE ADJUSTMENT ADJUSTMENT DS1 SWITCH SETTINGS...
-
Page 33: Magnetic Wire Sensing Loops
Loops Safety and Exit Loop Position Diagram 6 X 12 SAFETY LOOP Loop located 4 feet from gate track GATE IN OPEN POSITION Gate track Loop located 4 feet Operator from gate track 6 X 12 SAFETY LOOP 8 feet 6 X 12 EXIT LOOP Drive 20 feet Proper wiring of two loops performing the same function... - Page 34 Loops Loop Size Chart The loop size is based on the width of the driveway. If the driveway is 14' wide, the loop would be a 6'x6', the minimum. This is determined by subtracting 4' off of each side of the drive, which would leave you 6'. See chart below for number of turns per loop size, plus lead in.
- Page 35 Limited 5 Year Warranty The PATRIOT RSL Slide Gate Operator is warranted to be free of defects in materials or workmanship for a period of 5 years from date of purchase on the electronic control board and 12months on all other components.
Need help?
Do you have a question about the PATRIOT RSL and is the answer not in the manual?
Questions and answers