USAutomatic Patriot I Installation & Owner's Manual
Single/dual swing gate operator
Hide thumbs
Also See for Patriot I:
- Installation and owner's manual (44 pages) ,
- Installation & owner's manual (72 pages) ,
- Installation & owner's manual (72 pages)
Table of Contents
Advertisement
Available languages
Available languages
Advertisement
Table of Contents

Related Manuals for USAutomatic Patriot I


Summary of Contents for USAutomatic Patriot I
- Page 1 PATRIOT USAutomatic High Quality Low Voltage Vehicular Swing Gate Operator Solar or AC Charged PATRIOT I Single Swing Gate Operator PATRIOT II Dual Swing Gate Operator Installation/Owners Manual PROUDLY MADE IN THE USA (800) 878-7829 www.USAutomaticGateOpeners.com...
- Page 2 (800) 878-7829 www.USAutomaticGateOpeners.com...
-
Page 3: Introduction
Entrapment zones on page 23-25 and be aware of these areas not only during use but also during any adjustments to the unit. The USAutomatic battery charger is designed to operate with +12 vdc battery rated at 33-amp hour minimum. Maintenance free lead acid, Gel type or AGM batteries are recommended. -
Page 4: Table Of Contents
Table Of Contents Page Introduction ..................... 1 Table of Contents ..................2 General Requirements/Gate Qualifications & Applications ....3 Importance of a Properly Designed Gate ..........4 Mounting Site Review ................4 Parts Included List ................... 5 Hinge Mount Tube Installation/Pull to Open .......... 6 Hinge Mount Tube Installation/Push to Open/Vertical Height .... -
Page 5: General Requirements/Gate Qualifications & Applications
33-amp hours. The actuator harness is equipped with 3/8” ring terminals designed to connect to bolt type battery posts. The USAutomatic charger is designed for this type of battery. Using a smaller amp hour battery may cause damage to the charging system. -
Page 6: Importance Of A Properly Designed Gate
IMPORTANCE OF A PROPERLY DESIGNED GATE As a general rule, an automatically operated gate must be stronger and smoother than a manually operated gate. Since the gate is a major component of the system, great care and concern must be given to the gate design. A GATE OPERATOR CANNOT OVERCOME A POORLY DESIGNED GATE. -
Page 7: Parts Included List
PARTS INCLUDED 41 ½” *Actuator Arm with 8 foot of Cable 18” Cabinet with Control Board and Receiver 8 ½” 18” Solar Panel with Bracket and hardware Solar Panel Battery Charger Sun Guard Charge Controller One 4-Button visor mount and two * 2”... -
Page 8: Hinge Mount Tube Installation/Pull To Open
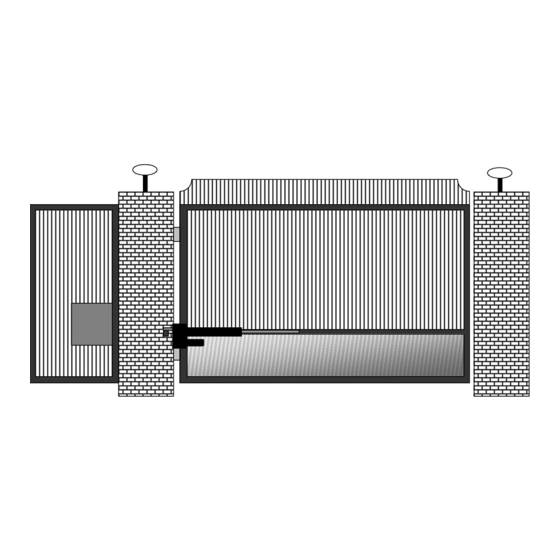
STEP 1 Hinge Mount Tube Installation Use the diagrams in Figure 1 below to determine the type of installation and gatepost required. These diagrams show left hand installation - reverse for right hand installation. Figures 2 and 3 show installation for thick wall posts. -
Page 9: Hinge Mount Tube Installation/Push To Open/Vertical Height
STEP 2a Hinge Mount Tube Installation (Push to Open Installation Top View) Use dimensions in figure 3 to determine mounting location of Hinge mount tube, cut hinge mount tube as necessary to achieve correct mounting dimension. OPEN DIRECTION Gatepost 4” steel shown ¼”... -
Page 10: Gate Bracket Installation/Pull To Open
STEP 4 Gate Bracket Installation (Prepare Actuator for Installation) NOTE: Do not operate the actuator before performing all installation steps. There is no need to extend the actuator before all installation steps are complete. If you must operate the actuator, ensure that the extension screw does not rotate while operating to avoid possible actuator damage. -
Page 11: Gate Bracket Installation/Push To Open/Diagrams
STEP 4c Gate Bracket Installation (PUSH to Open Only) The actuator is adjusted to the fully retracted or closed position from the factory. Once the actuator is connected to the hinge mount tube, swing the gate to the desired closed position and block in place to secure the gate. -
Page 12: Mounting The Control Box/Splicing Actuator Cable
STEP 5 Mounting Control Box When deciding where to mount the control box remember the actuator cable for the master gate is 8 feet in length. If possible mount the control box in a location that will allow the cable to be neatly routed. Do not splice cable for additional length unless absolutely necessary. -
Page 13: Installation Of Charging Device
Modifying the charger power cord will void the charger warranty. Note: USAutomatic recommends an AC surge protector on all 110-volt AC installations, especially in lightning prone areas. Do not modify the AC cord on the charger. -
Page 14: Connecting Actuator Cable To Control Board
Verify that nothing is in the path of the gate, if by chance it begins to move when power is applied. Be prepared to disconnect the actuator cable, if needed to stop the gate if it begins to move. Patriot I Locate the master actuator cable and plug it into the “Master” actuator connector (see figure 15) on the control board. -
Page 15: Control Board Dipswitch Setting Verification
Locate the dipswitches on the Patriot Control board (see page 17). Factory default dipswitch settings are 2 and 3 on. Identify you installation below and verify dipswitch settings: Patriot I (Pull to Open) Patriot I (Push to Open) Dipswitches 2, 3 should be in the on position. -
Page 16: Making Final Adjustments
CAUTION: To reduce the risk of injury, USAutomatic strongly recommends the installation of safety devices such as Photo Eye Sensors, Safety Loops, Safety Edges. Consult an authorized installing dealer or the factory for a complete explanation of options and see the Safety Section of this manual on pages 22 to 25. -
Page 17: Limit Switch Adjustment
Limit Switch Adjustment The limit switch adjustments are located on the bottom of the actuator. Remove the dust plug to make adjustments. A flat blade screwdriver is included with the operator for adjustment purposes. If soft stop is going to be used turn dipswitch 6 or 7 (see page 17) on at this time. Prior to operating the gate the actuator extension tube needs to be turned 6 turns in the counter clockwise direction. -
Page 18: Control Board Terminal Description For Accessories
Circuit Board Terminal Description For Accessories Patriot Control Board MASTER SLAVE Timer USAutomatic MADE IN USA Sensitivity Sensitivity PATRIOT CONTROL BOARD CURRENT SENSE CURRENT SENSE TIMER TO CLOSE ADJUSTMENT ADJUSTMENT ADJUSTMENT ADJUSTMENT DS1 SWITCH SETTINGS FACTORY SETTINGS SW-1 AUTO CLOSE TIMER ENABLE... -
Page 19: Function Of Programming Switch Settings Ds1
FUNCTION OF PROGRAM SWITCH SETTINGS – DS1 DS1 Programming Dipswitches MASTER SLAVE Timer USAutomatic MADE IN USA Sensitivity Sensitivity PATRIOT CONTROL BOARD CURRENT SENSE CURRENT SENSE TIMER TO CLOSE ADJUSTMENT ADJUSTMENT ADJUSTMENT ADJUSTMENT DS1 SWITCH SETTINGS FACTORY SETTINGS SW-1 AUTO CLOSE TIMER ENABLE... -
Page 20: Function Of Programming Switch Settings Ds2
FUNCTION OF PROGRAM SWITCH SETTINGS – DS2 DS2 Programming Dipswitches MASTER SLAVE USAutomatic Timer MADE IN USA Sensitivity Sensitivity PATRIOT CONTROL BOARD CURRENT SENSE CURRENT SENSE TIMER TO CLOSE ADJUSTMENT ADJUSTMENT ADJUSTMENT ADJUSTMENT DS1 SWITCH SETTINGS FACTORY SETTINGS SW-1 AUTO CLOSE TIMER ENABLE... -
Page 21: Programming Remote/Transmitter And Receiver
STEP 16 RADIO EQUIPMENT INSTALLATION AND PROGRAMMING STEP 16a Oracle Enabled Operators Location of parts in Oracle Dual Frequency Gate Control Unit (“DFGCU”) Programming Dipswitch Learn Button LED Light Black Antenna Wire 4-Wire Harness (Connects to J5 on Patriot Control Board) DFGCU Programming Dipswitches All dipswitches should remain in the off position. - Page 22 Total Remote/Transmitter Memory Deletion for Key Fob or Futura – 315 MHz • On the DFGCU, press and hold the learn button down until the LED is on solid • Release the learn button and press the learn button again •...
- Page 23 STEP 16c LCR Remote/Transmitter & Receiver Programming (model 433DSR2LC) The Transmitter and Receiver provided operate at 433 MHz. Receiver can store up to 22 unique transmitter codes. Transmitter Setup: (It is recommended that the dipswitches be changed from the default setting) 1.
-
Page 24: Safety Section
Patriot I and Patriot II gate operators are intended to be installed as Class I or Class II vehicular gate operators, and the maximum load of each gate leaf should not exceed 650 pounds with a length not to exceed sixteen feet. - Page 25 10. SAVE THESE INSTRUCTIONS SAFETY SECTION All safety features required by UL-325 are incorporated in the capabilities of all USAutomatic Control boards and should be utilized, including but not limited to, safety edges, photo electric eyes, reverse sensing, and motion sensing.
- Page 26 SAFETY SECTION Remedies for Safety Concerns Zone 1 Safety edges and photo electric eyes are the most common types of protection available. Reflector Photo Eye Unit wired to Safety Loop input Catch Post U shaped Safety Edge wire to Secondary Entrapment Input Zone 2 A safety edge may also be utilized here, but the best remedy is to eliminate pinch points when designing the hinges.
- Page 27 SAFETY SECTION Remedies for Safety Concerns Zone 3 Safety edges are the best protection. A photo eye may also be used. For vehicle traffic, magnetic vehicle detectors and wire sensing loops are preferred. Reflector Beam Photo Eye Unit 1 wire to Safety Loop input Catch Post U-Shaped Safety Edge Wired Safety Edges on bottom rail of gate.
-
Page 28: Periodic Service
The third feature to assist in troubleshooting is the on board “Open / Close Command” pushbutton. This button makes it possible to operate the gate with the twelve terminal wiring plug removed, without having to short across terminal pins. MASTER SLAVE USAutomatic Timer MADE IN USA Sensitivity Sensitivity... - Page 29 TROUBLESHOOTING SECTION OUTLINE 1 Single gate will not operate. 2 Dual gate will not operate. 3 Single or Dual gate opens or closes slowly. 4 Gate will not automatically close. 5 Gate begins to open or close, but stops and reverses after a couple of seconds. 6 Single Gate opens correctly then closes immediately or single Gate closes correctly and then opens immediately.
- Page 30 My single gate will not operate Patriot I: STEP 1 Remove control box cover. Locate the “Open/Close Command” push button and press it to operate the gate. STEP 2 Press the “Reset” push button located above the “Open/Close Command” button, then push the “Open/Close command”...
- Page 31 110 VAC receptacle. Inspect charger and wires for damage. NOTE: The USAutomatic multi stage charger does not output any voltage or current when disconnected from the battery. You cannot check charger by disconnecting from battery and measuring voltage output.
- Page 32 STEP 2 Verify that DS1 switch 1 is on. If not, turn it on and recheck gate operation. If gate remains open, continue with step 3. STEP 3 If your installation is a single gate, then only DS1 switch 3 or 4 can be on. If both are on the gate will not automatically close.
- Page 33 STEP 4 Once adjusted correctly, the open LED should be on when the gate is opened and the close LED should be on when the gate is closed. STEP 5 If the LED’s will not come on contact the factory. Dual Gate opens or closes correctly then immediately reverses direction: STEP 1 This is most likely caused by an incorrect limit switch adjustment.
- Page 34 STEP 2a If the “Push Button Input” LED did not come on in step 1 then make sure that the green J2 connector on the control board is securely connected, replace the battery in the transmitter and verify that the transmitter is programmed to operate the receiver (refer to page 21 “LCR Remote/Transmitter Programming .”) STEP 3 If the “Push Button Input”...
- Page 35 Gate opens using transmitter, but will not close using transmitter (Low Current Receiver only) STEP 1 The problem is most likely the programming of the Low Current Receiver (P2 relay is programmed to latch mode) STEP 2 On the Patriot control board locate press and hold the “LED Indicator” pushbutton. STEP 3 Look in the lower left corner of the Patriot control board and note any LED’s that are on.
-
Page 36: Accessory Wiring Information
Accessory Wiring Information USAutomatic Patriot gate operators are +12 vdc powered. Solar charged operators do not require 110 VAC for proper operation. Accessories that operate at +12 vdc can be connected directly to the control board or the battery. Proper accessory selection must be made so that the accessories installed do not drain the solar charged operator battery. -
Page 37: Accessory Wiring
Types of Accessories USAutomatic Patriot control boards are designed to operate with all accessories. Understanding the control board inputs and the desired operation of each accessory is essential when designing the gate operator system. Solar friendly accessories are essential in designing a proper solar gate operator. Contact USAutomatic for information on recommended solar friendly accessories for your solar gate operator. -
Page 38: Solar Friendly Photo Eye Wiring Diagram
Security Shunt – This a dry contact switch that is closed anytime the gate is not closed. A proximity switch such as the type installed in a security system to activate an alarm if the contact is broken could be wired here. If the gate is opened by an intended signal the security shunt switch closes and prevents the alarm system from activating. - Page 39 (800) 878-7829 www.USAutomaticGateOpeners.com...
- Page 40 PATRIOT I USAutomatic PATRIOT II Limited 5 Year Warranty The PATRIOT Gate Operator is warranted to be free of defects in materials or workmanship for a period of 5 years from date of purchase on the electronic control board and 36 months on all other components. Any part, parts, or complete unit found to be defective within this period would, at the manufacturer's option be repaired or replaced at no charge if returned freight prepaid.
- Page 41 PATRIOT I PATRIOT II USAutomatic Garantía Limitada de 5 Anos El operador de portón PATRIOT tiene garantía de no tener defectos en los materiales o fabricación por el periodo de 5 años desde la fecha de compra en el tablero de control y 36 meses en todos los demás componentes.
- Page 42 (800) 878-7829 www.USAutomaticGateOpeners.com...
- Page 43 Programando el transmisor y el receptor (modelo 433 DSR2LC) El transmisor y el receptor operan en 433 MHz. El receptor puedo guardar hasta 22 códigos únicos para el transmisor. Disposición del transmisor: (Es recomendado cambiar el ajuste del valor por omisión del conmutador DIP.) 1.
- Page 44 Borrado completo de la memoria del control remoto/transmisor para el llavero a control remoto o Futura - 315 MHz • En la DFGCU, presione y mantenga presionado el botón de aprendizaje hasta que la luz LED tenga un color sólido. •...
- Page 45 INSTALACIÓN Y PROGRAMACIÓN DE UN EQUIPO DE RADIO Operadores permitidos por Oracle Ubicación de la piezas de la unidad de control de portones de frecuencia doble [Dual Frequency Gate Control Unit (“DFGCU”, por sus siglas en inglés] de Oracle Interruptor de programación Botón de aprendizaje Luz LED Cable negro de antena...
- Page 46 Alambres Adicionales La potencia +12vdc está protegido con un fusible de 1.5 amp de reajuste automático. Candado Solenoide - Este es de potencia de +12 voltios que puede producir +12 voltios de dos formas diferentes. 1. El interruptor 1 del DS2 esta “ENCENDIDO” y el interruptor 5 del DS1 esta “APAGADO” los +12 voltios se encenderán medio segundo antes que el portón se empiece a abrir después de ser activado.
- Page 47 Alambres del accesorio Antes de conectar los accesorios al tablero de control Patriot quite el enchufe del activador del tablero de control, esto desconectará energía de la unidad mientras que instala los alambres. Vea las instrucciones de instalación incluidas con el accesorio instalado. El accesorio tendrá...
- Page 48 Tipos de Accesorios Los tableros de control Patriot de USAutomatic son diseñados para funcionar con todos tipos de accesorios. Entender las entradas del tablero de control y el funcionamiento deseado de cada accesorio es esencial al diseñar el sistema del operador del portón.
- Page 49 generalmente tiene que ver con los alambres, conexión de enchufe del activador malo en el tablero de control Patriot o demasiados ajustes fueron hechos durante la instalación. PASO 4 Si hay un problema en los alambres debe de concentrarse en los alambres anaranjado, blanco, y el verde. Revise todos los empalmes y verifique que este conectado el enchufe del activador al tablero de control.
- Page 50 incorrectas, el portón tocando la tierra; el portón no esta a nivelo el brazo del activador conectado al portón hasido doblado. Identifique y corrija el problema. Portón Sencillo se abre o cierra correctamente e inmediatamente se va a la dirección contraria: PASO 1 Esto es causado muy probablemente por un ajuste incorrecto del interruptor de limite.
- Page 51 defectuoso. Si ninguno de los de arriba estaban malos quite la batería y lleve la a una tienda de baterías para que le prueben la carga. Reemplázala si es necesario. Cargador AC, asegúrese que tenga instalada una batería de ciclo profundo clasificado con un mínimo de 33 amp por hora.
- Page 52 Mi portón sencillo no opera el Patriot I: PASO 1 Quite la cubierto de la caja de control y ubique el botón “Para Abrir o Cerrar” y presiónelo para operar el portón. PASO 2 Presione el botón de “Reajuste” localizado arriba del botón para abrir, y luego presione el botón “Para Abrir / Cerrar” para operar el portón.
- Page 53 Sección de Problemas Resumen El portón sencillo no funciona. El portón doble no funciona. El portón sencillo o doble se abre o se cierra muy despacio. El portón no se cierra automáticamente. El portón comienza a abrirse o a cerrarse, pero después de unos cuantos segundos se para y se regresa. El portón sencillo se abre correctamente y se cierra inmediatamente o el portón sencillo se cierra correctamente y se abre inmediatamente.
- Page 54 MASTER SLAVE Timer USAutomatic MADE IN USA Sensitivity Sensitivity PATRIOT CONTROL BOARD Beeper de Sensor Actual...
- Page 55 SECCION DE SEGURIDAD Remedios para Preocupaciones de Seguridad Zona 3 Los bordes de seguridad son el mejor tipo de protección. También puede usar un ojo foto-electrónico. Para trafico de vehículos, son preferibles los detectores magnéticos de vehiculo y alambres de lazos sensores. Reflector Rayo Unidad 1 de ojo foto-electrónico conectado al Lazo de Seguridad...
- Page 56 SECCION DE SEGURIDAD Remedios para Preocupaciones de Seguridad Zona 1 Los bordes de seguridad y los ojos foto-eléctricos son los tipos más comunes de protección disponible. Reflector Unidad de ojo foto-eléctricos unido la entrada de Lazo de Seguridad Viga Poste de reten Alambre de borde de seguridad en forma de “U”...
- Page 57 LEA Y SIGA TODAS LAS INSTRUCCIONES. Nunca deje que niños operen o jueguen con los controles del portón. Mantenga el control remoto alejado de los niños. Siempre mantenga personas y objetos alejados del portón. NADIEN DEBE CRUZAR EL CAMINO DE UN PORTON MOVIL. Pruebe el operador del portón cada mes.
- Page 58 Operadores de portón Patriot I y Patriot II son hechos para ser instalados como operadores de portón de vehículo Clase I o Clase II, y la carga máxima de cada lado del portón no debe exceder 320 kilo (650 libras) ni exceder 5 mt. (16 pies) Sección de Seguridad...
- Page 59 Interruptores de Programación DS2 MASTER SLAVE Timer USAutomatic MADE IN USA Sensitivity Sensitivity PATRIOT CONTROL BOARD CURRENT SENSE CURRENT SENSE TIMER TO CLOSE ADJUSTMENT ADJUSTMENT ADJUSTMENT ADJUSTMENT DS1 SWITCH SETTINGS FACTORY SETTINGS SW-1 AUTO CLOSE TIMER ENABLE SW-2 TIMER TO CLOSE WILL ACTIVATE ON LIMIT ONLY...
- Page 60 Interruptores de Programación DS1 MASTER SLAVE Timer USAutomatic MADE IN USA Sensitivity Sensitivity PATRIOT CONTROL BOARD CURRENT SENSE CURRENT SENSE TIMER TO CLOSE ADJUSTMENT ADJUSTMENT ADJUSTMENT ADJUSTMENT DS1 SWITCH SETTINGS FACTORY SETTINGS SW-1 AUTO CLOSE TIMER ENABLE SW-2 TIMER TO CLOSE WILL ACTIVATE ON LIMIT ONLY...
- Page 61 Tablero de Control y Descripción de las Terminales Tablero de Control PATRIOT MASTER SLAVE Timer USAutomatic MADE IN USA Sensitivity Sensitivity PATRIOT CONTROL BOARD CURRENT SENSE CURRENT SENSE TIMER TO CLOSE ADJUSTMENT ADJUSTMENT ADJUSTMENT ADJUSTMENT DS1 SWITCH SETTINGS FACTORY SETTINGS...
- Page 62 Interruptores de Límite Los ajustes del interruptor de límite se encuentran en el fondo del activador. Para hacer ajustes, quite el enchufe de plástico. Los ajustes normales de la fábrica permiten que recorra ½ mt. (aproximadamente 70% abierto.) Probablemente, usted tendrá que ajustar el límite extendido cerrar para su instalación. En el enchufe de plástico, los ajustes están marcados “Extender”...
- Page 63 Conecte los cables de la batería antes de que enchufe el activador al tablero de control. Sentido Actual / Ajuste de Sensibilidad El tablero de control tiene dos ajustes de sensibilidad MASTER SLAVE USAutomatic Timer MADE IN USA Sensitivity Sensitivity el PRINCIPAL y AUXILIAR.
- Page 64 Instalación del cargador PASO 6 PANEL SOLAR Y CONTROLADOR DE CARGA SOLAR Ubique y monte el soporte del panel solar de manera que el panel mire al suroeste y mantenga el ángulo de 45 grados. El cable es de 3 mt. de largo y debe meterse por debajo de la caja de control. Ponga atención a la distancia cuando esté determinando la localización del montaje.
- Page 65 Empalme para el Cable del Activador PARTIOT I Cables del Portón Sencillo (Solamente si es Requerido) Si el cable del activador va a ser añadido, entones debe usar una caja de unión para, prevenir que se le meta el agua. El alambre que use para la añadidura debe ser más chico que el cable del activador que va incluido.
- Page 66 PASO 3 Montaje del Soporte del Portón (Solamente HALAR para Abrir) Sujete el soporte al portón con una mordaza en el punto que fué determinado anteriormente y suéldelo al portón. Asegúrese que su portón no se mueva mientras que lo sujeta. La localización del portón, determinará hasta dónde se va abrir.
- Page 67 PASO 1 Preparación para la Instalación del Activador Arme el activador al poste del portón como está mostrado en la figura 3A Perno de lanzamiento manual de ½ pulgada 2 Rondanas de 1/2” Soporte de portón El perno de lanzamiento manual debe girar libremente Figura 3A PASO 2...
- Page 68 PASO 1 Instalación del Tubo de Montaje de la Bisagra (Parte 3) POSICIÓN VERTICAL Refiera se a las figuras 2B-2F para determinar la mejor posición para el activador del portón. Y luego use la figura 2A para determinar la altura del tubo de montaje y el soporte del portón. Otros puntos posibles para su instalación son la parte de arriba y la parte de abajo del portón.
- Page 69 PASO 1 INSTALACION DEL TUBO DE MONTAJE (PARTE 1) HALAR PARA ABRIR/ VISTO DE ARRIBA (VEA MAS ABAJO PARA EMPUJAR PARA ABRIR) (Instalación de mano izquierda es mostrada. Voltee al revés para ver la instalación de mano derecha) Las medidas del centro de la bisagra Un poste de acero PORTON mínimo 4 pulgadas...
- Page 70 PARTES INCLUIDAS 41 ½” *Brazo del Activador con 8 pies de cable Caja de Control 18” con Tablero de control y Receptor 8 ½” *Cable del Activador Abrazadera del retenedor de cable 18” Broche de presión Soporte para panel solar con Cargador de tormillos de montaje Batería...
- Page 71 LA IMPORTANCIA DE UN PORTON DISEÑADO CORRECTAMENTE Como regla general, un portón, que será operado automáticamente, debería ser más fuerte y suave que uno que será operado manualmente. El portón es el componente mayor del sistema y por esta razón se debe poner mucho cuidado en el diseño del portón.
- Page 72 El cargador USAutomatic está diseñado para este tipo de batería y al usar una batería con menos amperaje por hora puede dañar el sistema de carga.
- Page 73 TABLA DE CONTENIDO Página Introducción ........................1 Tabla de Contenido......................2 Requerimientos Generales/ Características y Aplicaciones del Portón......3 La Importancia de un Portón diseñado Correctamente ............4 Revisión del Sitio de Montaje ..................... 4 Lista de Partes Incluidas ..................... 5 Instalación del Tubo de Montaje/Halar para Abrir/Empujar para Abrir ......
- Page 74 17-20 y esté consciente de estas áreas no solamente durante uso, sino también durante cualquier ajuste a la unidad. El cargador de batería USAutomatic es designado para operar con batería de 12 vdc que son calculadas de tener un mínimo de 33-amp por hora. Tipo gel son recomendadas.
- Page 75 (800) 878-7829 www.USAutomaticGateOpeners.com...
- Page 76 Operador de Portón de Bisagra Para Vehículos de Alta Calidad Bajo Voltaje Cargado Solarmente o por Corriente Eléctrica PATRIOT I Operador de Portón Sencillo de Bisagra PATRIOT II Operador de Portón Doble de Bisagra Manual de Instalación / del Propietario ORGULLOSAMENTE HECHO EN LOS E.E.U.U.
Need help?
Do you have a question about the Patriot I and is the answer not in the manual?
Questions and answers