Table of Contents
Advertisement
Advertisement
Table of Contents

Related Manuals for IBM T541A


Summary of Contents for IBM T541A
-
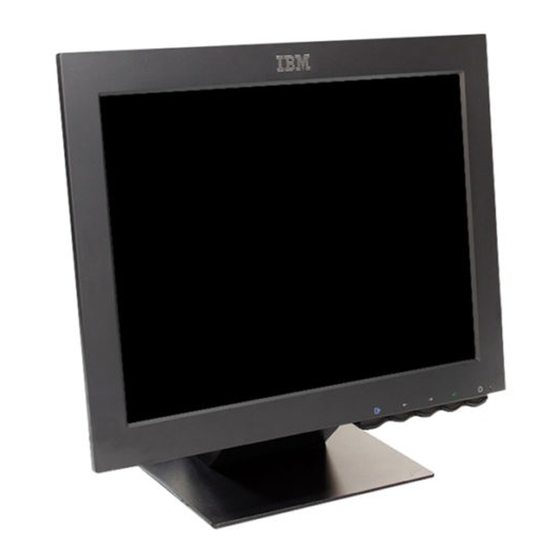
Page 1: Color Monitor
Color Monitor T541A User's Guide English... - Page 2 First Edition (Feb/2002) Note: For important information, refer to the Monitor Safety and Warranty manual that comes with this monitor.
-
Page 3: Table Of Contents
Safety(Read first) ............2 Setting up the monitor . -
Page 4: Safety(Read First)
Ennen kuin asennat tä mä n tuotteen, lue turvaohjeet kohdasta Safety Information. Pred instalací tohoto produktu si prectete prírucku bezpecnostních instrukcí. -
Page 5: Setting Up The Monitor
The IBM T541A Color Monitor works with a computer with a suitable on- board sub-system or Video Card that supports XGA1024 x 768, SVGA 800 x 600, or VGA 604 x 408 resolutions at 60Hz. -
Page 6: Workplace Preparation
Workplace Preparation Height This section gives advice on what you should Position the monitor so that the top of the screen is slightly below your eye consider before you set up your monitor. level when you sit at your workstation. Orientation Choose a position that gives the least reflection from lights and windows, usually at a right angle to any windows. -
Page 7: Screen Settings
Back Sit back in your chair and use the backrest. Hands Adjust the seat height so that your forearms are approximately horizontal and your wrists are straight when using the keyboard. Your upper arms should be relaxed with your elbows near your body. Use a light touch on the keyboard, keeping your hands and fingers relaxed. -
Page 8: Connecting Your Monitor
Connecting your Monitor Be sure to read the Monitor Safety and Warranty manual that comes with your monitor before carrying out this procedure. The ac adapter and signal cable are connected to your monitor. If you wish to change these or to fit a different stand, see the Further help section (page 19). -
Page 9: Device Driver Installation
Device driver installation Installing the Windows XP device driver Installing the Windows Me device driver Use the User’s Guide and Installation Files CD that comes with your monitor to install the appropriate device driver for your operating system. To manually install or update the device driver for the Microsoft XP operating system, perform the following steps: 1. -
Page 10: Windows 2000 Windows 98
Installing the Windows 2000 device driver To manually install or update the device driver for the Microsoft Windows 2000 Professional operating system, perform the following steps: 1. Click Start 2. In the Display Properties window, click the Settings tab, and then click 3. -
Page 11: Windows 95
Installing the Windows 95 device driver Right-click the My Computer icon on the computer desktop and then select Prop- erties -> System to view the version number listed in the System window. Perform the steps below for the appropriate version. If you have Windows 95 Version 4.00.950A, use the following steps to manually install or update the device driver: 1. -
Page 12: Windows 98 Windows 95
Auto Setup Auto Setup When you first use your monitor you must perform Auto Setup. This The Setup Utility included on the setup procedure sets up your monitor to process the video signals from your diskette is for displaying do computer without image discoloration or smearing. -
Page 13: Auto Setup For Dos
Auto Setup for DOS If the monitor is in standby mode (STANDBY ON), it may automatically turn off while you are waiting for it to warm up. If this happens, switch off the monitor and switch it on again after a few seconds. If you are using PC-DOS/ V, change to U.S. -
Page 14: Windows Nt, Windows Me Or Windows Xp
Auto Setup for Windows 3.1, Windows 95, Windows 98, Windows NT or Windows 2000, Windows Me or Windows XP If the monitor is in standby mode (STANDBY ON), it may automatically turn off while you are waiting for it to warm up. The size and diversity of the dot pattern varies with the screen resolution. - Page 15 When finished, the OSD main menu returns. Press the Exit button once to exit from the OSD. 10. Press the key to return to Windows. You have completed the monitor setup for Windows. If you use other operat- ing systems, perform the appropriate Auto Setup for DOS.
-
Page 16: Adjusting Your Lcd Monitor
Adjusting Your LCD Monitor User controls User control features Operation • The image is already optimized for many display • modes; however, the user controls can be used to adjust the image to your liking. Icon Control Displays the OSD main menu Exit Exits from menus and sub-menus Exits the OSD... -
Page 17: Osd Lock/Unlock
The settings are saved after adjustment and when exiting the OSD and will be effective thereafter. • Press the Exit button to move backwards through the sub-menus and exit from the OSD. Note: After making adjustments, the Power indicator LED will briefly turn amber to indicate that the new value has been saved. -
Page 18: On-Screen Display (Osd) Controls
On-screen display (OSD) controls The settings adjustable with the user controls are viewed through the On- Screen Display (OSD). Press any of the OSD buttons to activate the OSD. Initial appearance of OSD The LCD monitor needs time to become thermally stable the first time you turn it on each day. - Page 19 OSD Icon IMAGE LOCK (continued) IMAGE POSITION COLOR Description Moves the screen left and right or up and down. Select the Color Mode you find most comfortable and then fine tune the colors using the User Color Mode menu, if necessary. Controls and Sub-menu(s) Adjustments...
- Page 20 OSD Icon Description Resets the Brightness, Contrast and Color settings. RESET Resets the Image position settings Shows information about the addressability and the horizontal and vertical frequencies of the images received from the computer or video INFORMATION board. The language chosen affects only the language of the OSD.
-
Page 21: Further Information
Display modes The display mode the monitor uses is controlled by the computer. Therefore, you should refer to your computer documentation for details on how to change display modes. The image size, position and shape may change when the display mode changes. -
Page 22: Power Management
The fluorescent lamp in the liquid crystal display contains a small amount of mercury. Dispose of it as required by local ordinances and regulations. ® Partner, IBM has determined that this product meets the NERGY ® guidelines for energy efficiency. -
Page 23: Troubleshooting
If you have a problem setting up or using your monitor, you may be able to solve it yourself. Before calling your retailer or IBM, try the suggested actions that are appropriate to your problem. Possible Problem Cause Screen is blank... - Page 24 Possible Problem Cause The monitor is not receiving Screen is blank a video signal and power indicator is flashing green Display mode every 0.5 of the second computer is outside the range of the monitor Screen is blank The monitor is and power in the Power indicator is...
-
Page 25: Further Help
During the warranty period, assistance for replacement or exchange of defective components is available. In addition, if your IBM option is installed in an IBM computer, you might be entitled to service at your location. Your technical support representative can help you determine the best alternative. -
Page 26: Changing Cables
For the support telephone number and support hours by country, refer to the following table. If the number for your country or region is not listed, contact your IBM reseller or IBM marketing representative. Response time may vary depending on the number and nature of the calls received. - Page 27 To obtain the correct cables and/or to get further instructions on installing them, call the IBM HELPCENTER at the above numbers or contact your dealer, retailer, or other IBM authorized Servicer.
-
Page 28: Specifications
Specifications This color monitor (Type-model 9512-Ax0) uses a 15-inch TFT LCD Dimensions Weight Tilt Image Power Input Power Consumption Video Input Communications Supported Display Modes Environment Width: 365.2 mm (14.38 in.) Depth: 202.1 mm ( 7.96 in.) Height: 344.8 mm (13.57 in.) Unpackaged: 4.1 Kg (9.03 lb) Packaged:... -
Page 29: Service Information
The following parts are for use by IBM service, or IBM authorized dealers, to support the customer warranty. Parts are for service use only Flat Panel Monitor, Type 9512 31P7164 9512-AB0 31P7165 9512-AW0 31P7166 9512-DB0 31P7167 9512-DW0 31P7168 9512-AB0/9512-DB0 31P7169... -
Page 30: Notices And Trademarks
Web sites. The materials at those Web sites are not part of the materials for this IBM product, and use of those Web sites is at your own risk. - Page 31 Properly shielded and grounded cables and connectors must be used in order to meet FCC emission limits. Proper cables and connectors are available from IBM authorized dealers. IBM is not responsible for any radio or television interference caused by using other than recommended cables and connectors or by unauthorized changes or modifications to this equipment.
- Page 32 Power Cords For your safety, IBM provides a power cord with a grounded attachment plug to use with this IBM product. To avoid electrical shock, always use the power cord and plug with a properly grounded power outlet.
- Page 33 power cord part number 13F9959 Antigua, Aruba, Bahamas, Barbados, Belize, Bermuda, Bolivia, Brazil, Caicos Island, Canada, Cayman Islands, Costa Rica, Columbia, Dominican Republic, Guam, Ecuador, El Salvador, Guatemala, Haiti, Honduras, Jamaica, Japan, Mexico, Netherlands Antilliles, Nicaragua, Panama, Peru, Phillipines, Saudi Arabia, Thailand, Taiwan, United States, Venezuela 1838576 Antigua, Aruba, Bahamas, Barbados, Belize, Bermuda, Bolivia, Brazil, Caicos Island, Canada, Cayman...
- Page 34 Cet appareil numérique de la classe B respecte toutes les exigences du Réglement sur le matériel brouilleur du Canada. Avis de conformité à la réglementation d'Industrie Canada Cet appareil numérique de classe B est conforme à la norme NMB-003 du Canada.
- Page 35 TCO Compliances Section Congratulations! You have just purchased a TCO’95 or TCO’99 approved and labeled product! Your choice has provided you with a product developed for professional use. Your purchase has also contributed to reducing the burden on the environment and also to the further development of environmentally adapted electronics products.
-
Page 36: Environmental Requirements
Approval requirements cover a wide range of issues: environment, ergonomics, emission of electric and magnetic fields, energy consumption and electrical safety. Environmental criteria impose restrictions on the presence and use of heavy metals, brominated and chlorinated flame retardants, CFCs (freons) and chlorinated solvents, and other materials . The product must be prepared for recycling and the manufacturer is obliged to have an environmental policy which must be adhered to in each country where the company implements its operational policy. - Page 37 The relevant TCO’99 demand requires that plastic components weighing more than 25 grams must not contain flame retardants with organically bound bromine or chlorine. Flame retardants are allowed in the printed circuit boards since no substitutes are available. Cadmium** Cadmium is present in rechargeable batteries and in the colour-generating layers of certain computer displays.
- Page 38 NERGY performance and networking needs of customers while reducing energy use, saving you money and improving the environment. IBM is a recognized leader in providing energy efficient office products. In 1998 and 1999, IBM received the E NERGY category and in 2001, IBM received the first E award.
-
Page 39: Electronic Emission Notices
89/366/ECC on the approximation of the laws of the Member States relating to electromagnetic compatibility IBM can not accept responsibility for any failure to satisfy the protection requirements resulting from a non-recommended modification of the product, including the fitting of non-IBM option cards. - Page 40 États membres en matière de compatibilité électromagnétique. IBM ne peut accepter aucune responsabilité pour le manquement aux exigences de protection résultant d’une modification non recommandée du produit, y compris l’installation de cartes autres que les cartes IBM.
- Page 41 Anmerkung: Um die Einhaltung des EMVG sicherzustellen sind die Geräte, wie in den IBM Handbüchern angegeben, zu installieren und zu betreiben. Declaración de la Unión Europea (UE) Este producto satisface los requisitos de protección del Consejo de la UE, Directiva 89/ 336/ CEE en lo que a la le gislatura de los Estados Miembros sobre compatibilidad electroma gnética se refiere.
- Page 42 Dieses Gerät ist berechtigt in Übereinstimmung mit dem deutschen EMVG vom 9.Nov.92 das EG-Konformitätszeichen zu führen. Der Aussteller der Konformitätserklärung ist die IBM UK, Greenock. Dieses Gerät erfüllt die Bedingungen der EN55024:1998 Klasse B. VCCI Class B Notice (Japan Only)
- Page 43 Japanese statement of compliance for products less than or equal to 20 A per phase:...
- Page 44 Trademarks The following terms, used in this publication, are trademarks or service marks of the IBM Corporation in the United States, other countries, or both: HelpCenter ENERGY STAR is a U.S. Govt. registered trademark. Microsoft, Windows, and Windows NT are trademarks of Microsoft Corporation in the United States, other countries, or both.
Need help?
Do you have a question about the T541A and is the answer not in the manual?
Questions and answers