
Related Manuals for IBM 6656HG2 - T 560 - 15" LCD Monitor


Summary of Contents for IBM 6656HG2 - T 560 - 15" LCD Monitor
- Page 1 MODEL: T560 (6656-HW2) T560 (6656-HG2) COLOR MONITOR SERVICE MANUAL CAUTION BEFORE SERVICING THE UNIT, READ THE SAFETY PRECAUTIONS IN THIS MANUAL.
-
Page 2: Lcd Characteristics
SPECIFICATIONS ........... 2 ADJUSTMENT ............13 PRECAUTIONS ............5 TROUBLESHOOTING GUIDE ......14 TIMING CHART ............6 PRINTED CIRCUIT BOARD........18 OPERATING INSTRUCTIONS .........7 EXPLODED VIEW...........20 WIRING DIAGRAM ..........8 EXPLODED VIEW PARTS LIST......21 DISASSEMBLY ............9 REPLACEMENT PARTS LIST .......23 BLOCK DIAGRAM .......... -
Page 3: Adjusting The Monitor Position
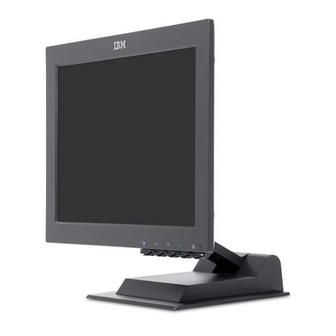
Adjusting the Monitor Position Tilt Range : -37° ~ 145° You can tilt the screen backward and forward as shown below(Figure A). +145 (Figure A) Height Range You can adjust height of the screen(Figure B). Maximum: 4.87 inch(123.8 mm) (Figure B) Landscape &... -
Page 4: Vesa Wall Mounting
7. Attach the monitor to the place you selected in the step 6, and then reconnect the signal cable and the power cord to the monitor. To obtain the correct cables and/or to get further instructions on installing them, call the IBM HELPCENTER at the above numbers or contact your dealer, retailer, or other IBM authorized Servicer. - Page 5 If the wires are pressed cause short and may • Do not modify original design without obtaining written burn or take fire. permission from IBM Inc. or you will void the original parts and labor guarantee. TAKE CARE DURING HANDLING THE LCD MODULE WITH BACKLIGHT UNIT.
-
Page 6: Timing Chart
TIMING CHART VIDEO SYNC Total Video Blanking Sync Back Front Sync Frequency MODE H / V Resolution Period Active Time Duration Porch Porch Polarity Clock ( E ) Time ( A ) ( B ) ( D ) ( F ) ( C ) 25.175 31.468 KHz... -
Page 7: Front View
OPERATING INSTRUCTIONS FRONT VIEW REAR VIEW DVI Port DSub signal Front Control Panel Adapter Jack Front Control Panel 1. Power Indicator Arrow Key This indicator lights up green when the monitor Moves the cursor to highlight icons or make operates normally; In DPMS(Energy Saving) mode, adjustments. -
Page 8: Wiring Diagram
WIRING DIAGRAM Module link Cable : 6631T11012M P704 P703 Inverter Cable : 6631T11012L - 8 -... -
Page 9: Back Cover Removal
DISASSEMBLY 1. TILT SWIVEL REMOVAL Cover Hinge (1) Remove the Cover Hinge. (2) Remove two screws (a). (3) Remove the Cover Piece Back. Cover Piece Back (4) Remove two connectors (c). (5) Remove the Module Link Cable connector. (6) Remove the screw (b). (7) Remove the Tilt Swivel. -
Page 10: Lcd Module Removal
4. LCD MODULE REMOVAL 5. INVERTER ASS’Y REMOVAL (1) Remove Inverter Connector. (1) Disconnector the CN3, CN4. (2) Remove eight Screws (a). (2) Remove the Inverter Ass’y. (3) Remove the Metal Frame from the LCD MODULE. LCD Module Inverter Connector Inverter Ass’y 6. - Page 11 - 11 -...
-
Page 12: Description Of Block Diagram
DESCRIPTION OF BLOCK DIAGRAM 1. Genesis Chip (Scaler chip) GM5020 (U201) is one chip IC which it supports six function block of Video pre amp, PLL, A/D converter OSD IC, TMDS receiver and scaler. Video signal (0.7Vp.p) clamped through C204, 210, 211 inputs to U201. These R, G, and B analog signals converted to 8bit digital signals through pre amp’s amplifying(1/0.7 time) to match AD converter’s operation range from 0V to 1V and AD converter’s converting analog to 8 bit digital. - Page 13 EEPROM. 1. Adjustment for Factory Preset Mode 8) Select PRESET EXIT command and Enter. 1) Run alignment program for LI561G on the IBM compatible PC. 3. DDC Data Write Procedure 2) Select EEPROM all clear command and Enter.
-
Page 14: Troubleshooting Guide
TROUBLESHOOTING GUIDE 1. NO POWER NO POWER (POWER INDICATOR OFF) CHECK ADAPTER, AND FIND OUT CHECK J801’S SHORT POINT OF VOLTAGE EACH DC LINE OF (12V) ? 2.5V AND 3.3V CHECK X501’S WAVEFROM CHECK X501. OSCILLATE AS 24MHZ ? CHECK CHECK U803 AND U803 PIN 2, 3 L805’S OPEN... - Page 15 2. NO RASTER (OSD IS NOT DISPLAYED) – INVERTER NO RASTER (OSD IS NOT DISPLAYED) J703 PIN10 CHECK ADAPTER 12V? CHECK MICOM INV J703 PIN5 ON/OFF PORT. 1. CONFIRM BRIGHTNESS OSD CONTRL STATE. J703 PIN1 2. CHECK MICOM DIM-ADJ PORT CHECK PULSE AS CONTACTING SCOPE...
-
Page 16: White Screen
3. WHITE SCREEN (OSD IS NOT DISPLAYED) WHITE SCREEN (OSD IS NOT DISPLAYED) U821 POWER PINS CHECK U801, U821 3.3V, 2.5V? 1. CHECK PIN34, 35 X201 SOLDERING CONDITION OSCILLATE AS 24M? 2. CHECK X201 3. TROUBLE IN U201 Input 1024x768@60Hz Signal. U401 CHECK U201 OR U401’S PIN12 IS 65MHz CLOCK? - Page 17 4. RAINBOW SCREEN RAINBOW SCREEN (OSD IS NOT DISPLAYED) CHECK CMF 401, 402, CHECK U401 403, 404’S WAVEFORM? CHECK J703’S SOLDERING CONDITION - 17 -...
-
Page 18: Printed Circuit Board
PRINTED CIRCUIT BOARD 1. MAIN BOARD (Component Side) ZD501 C536 R551 ZD502 L720 R738 R552 C711 R553 L710 R711 CMF401 CMF402 R736 L711 C818 Q704 R737 C712 L712 C837 D504 ZD704 U802 L705 L403 Q705 CMF403 CMF404 C819 R401 C430 C401 R406 C820... - Page 19 2. MAIN BOARD (Solder Side) C715 C714 C839 C407 C406 R810 C838 C403 C410 C413 C850 C402 C409 C412 R403 R708 C254 C248 C244 C411 R405 C253 C247 C243 C503 R707 C252 C246 C242 C405 C504 C843 C251 C245 C241 C408 C404 C419...
- Page 20 - 20 -...
-
Page 21: Exploded View Parts List
6304FLP002A BACK COVER ASSEMBLY, LI561G 3808TKL020A (PEARL WHITE) 3809TKL018B BACK COVER ASSEMBLY, LI561G 3808TKL020A (STEALTH BLACK) 3809TKL018A TILT SWIVEL ASSY, LI561G . IBM(T565) (PEARL WHITE) 3043TKK075B TILT SWIVEL ASSY, LI561G . IBM(T565) (STEALTH BLACK) 3043TKK075A LENS, POWER LED LI561G 3680TKP060A... - Page 22 HOLDER, CABLE DAMB-05 4930TKK035A COVER LI561G STAND BOTTOM (LIGHT SAGE GRAY) 3550TKK199B COVER LI561G STAND BOTTOM (RAVEN BLACK) 3550TKK199A MAIN TOTAL ASSEMBLY, LI561G IBM CL-25 3313TL5032A METAL SHIELD MAIN LI561G 4950TKK321A COVER LI561G STAND TOP (PEARL WHITE) 3550TKK198B COVER LI561G STAND TOP (STEALTH BLACK)
-
Page 23: Replacement Parts List
REPLACEMENT PARTS LIST CAUTION: BEFORE REPLACING ANY OF THESE COMPONENTS, READ CAREFULLY THE SAFETY PRECAUTIONS IN THIS MANUAL. * NOTE SAFETY Mark AL ALTERNATIVE PARTS MODEL: T560(6656-HW2)/ T560(6656-HG2) DATE: 2001. 8. 17. MODEL: T560(6656-HW2)/ T560(6656-HG2) DATE: 2001. 8. 17. *S *AL LOC. NO. PART NO. - Page 24 MODEL: T560(6656-HW2)/ T560(6656-HG2) DATE: 2001. 8. 17. MODEL: T560(6656-HW2)/ T560(6656-HG2) DATE: 2001. 8. 17. *S *AL LOC. NO. PART NO. DESCRIPTION / SPECIFICATION *S *AL LOC. NO. PART NO. DESCRIPTION / SPECIFICATION C505 0CC101CK41A 100PF 1608 50V 5% R/TP NP0 C836 0CK104CK56A 0.1UF 1608 50V 10% R/TP X7R...
- Page 25 MODEL: T560(6656-HW2)/ T560(6656-HG2) DATE: 2001. 8. 17. MODEL: T560(6656-HW2)/ T560(6656-HG2) DATE: 2001. 8. 17. *S *AL LOC. NO. PART NO. DESCRIPTION / SPECIFICATION *S *AL LOC. NO. PART NO. DESCRIPTION / SPECIFICATION L701 6210TCE001K HB-1H2012-260JT CERATEC 2012MM R509 0RJ1000D677 100 OHM 1/10 W 5% 1608 R/TP L702 6210TCE001K HB-1H2012-260JT CERATEC 2012MM...
- Page 26 MODEL: T560(6656-HW2)/ T560(6656-HG2) DATE: 2001. 8. 17. *S *AL LOC. NO. PART NO. DESCRIPTION / SPECIFICATION R727 0RJ1002D677 10K OHM 1/10 W 5% 1608 R/TP R728 0RJ1801D677 1.8K OHM 1/10 W 5% 1608 R/TP R734 0RJ0000D677 0 OHM 1/10 W 5% 1608 R/TP R735 0RJ0000D677 0 OHM 1/10 W 5% 1608 R/TP...
-
Page 27: Pin Configuration
PIN CONFIGURATION L4973V3-L4973V5 3.5A STEP DOWN SWITCHING REGULATOR L4973D3-L4973D5 Pin Configuration SYNC SYNC V5.1 V5.1 COMP COMP BOOT BOOT D94IN162A D94IN163A DIP18 SO20 PIN FUNCTIONS PIN DIP-18 PIN SO-20 NAME DESCRIPTION COMP E/A output to be used for frequency compensation A logic signal (active high) disables the device (sleep mode operation). -
Page 28: Schematic Diagram
SCHEMATIC DIAGRAM 1. VIDEO PROCESSOR (GM5020) - 28 -... - Page 29 2. PANEL-LINK - 29 -...
- Page 30 3. MICOM - 30 -...
- Page 31 4. DC/DC CONVERTER - 31 -...
- Page 32 5. CONNECTOR & JACKS - 32 -...
- Page 33 6. KEY PART - 33 -...
- Page 34 Aug. 2001 Printed in Korea P/NO : 3828TSO018G...
Need help?
Do you have a question about the 6656HG2 - T 560 - 15" LCD Monitor and is the answer not in the manual?
Questions and answers