Table of Contents
Advertisement
Advertisement
Table of Contents

Subscribe to Our Youtube Channel
Related Manuals for IBM T750


Summary of Contents for IBM T750
-
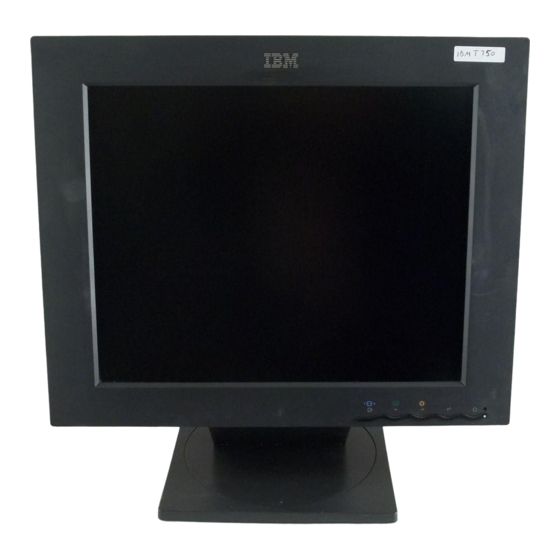
Page 1: Color Monitor
Color Monitor User's Guide English... - Page 2 First Edition (June/2002) Note: For important information, refer to the Monitor Safety and Warranty manual that comes with this monitor.
-
Page 3: Table Of Contents
Contents Safety (Read first) ............2 Setting up the monitor . -
Page 4: Safety (Read First)
í í í... -
Page 5: Setting Up The Monitor
Setting up the monitor Product Description The IBM T750 Color Monitor works with a computer with a suitable on-board sub-system or Video Adapter card that can support SXGA 1280 x 1024, XGA 1024 x 768, SVGA 800 x 600, or VGA 640 x 480 at 60 Hz. -
Page 6: Workplace Preparation
Workplace Preparation Height This section gives advice on what you should Position the monitor so that the top of the screen is slightly below your eye consider before you set up your monitor. level when you sit at your workstation. Orientation Choose a position that gives the least reflection from lights and windows, usually at a right angle to any windows. -
Page 7: Caring For Your Monitor
Gently wipe the device covers and the screen with a soft cloth. • Remove finger marks and grease with a damp cloth and mild detergent; do not use solvents or abrasives • Never use flammable cleaning material to clean your IBM monitor or any other electrical apparatus. -
Page 8: Connecting Your Monitor For Analog
Connecting your Monitor for Analog Turn off your computer and all attached devices. Be sure to read the ‘Safety Information’ at the front of Connect the signal cable to the video port on the back of your computer. this User Guide before This port might be directly attached to your computer (figure A), or it carrying out this procedure. -
Page 9: Connecting Your Monitor For Digital
Connecting your Monitor for Digital Purchase an industry standard DVI-D cable from your local computer supply store. Turn off your computer and all attached devices. forward tilt Tilt monitor all the way forward. Squeeze the sides of the hinge cover (b) and pull it off. The cable cover (a) will also come off. -
Page 10: Switching On Your Monitor
Connect the DVI connector at the other end of the signal cable to the DVI port located on the back of the graphics adapter. See picture below. graphics adapter Signal Cable Replace the rear covers. Connect the power cord to the power adapter first, then insert the plug into a properly grounded electrical outlet. -
Page 11: Device Driver Installation
Device Driver Installation Use the User's Guide and Installation Files CD that comes with your monitor to install the appropriate device driver for your operating system. Installing the Windows XP device driver To manually install or update the device driver for the Microsoft Windows XP operating system, perform the following steps: Insert the User’s Guide and Installation Files CD into the computer CD- ROM drive. -
Page 12: Windows 2000
Click Next>, Next>, and then Finish to complete the installation. Close the Display Properties window. Remove the User’s Guide and Installation Files CD from the computer CD-ROM drive. Installing the Windows 2000 device driver To manually install or update the device driver for the Microsoft Windows 2000 Professional operating system, perform the following steps: Click Start Settings... - Page 13 Click Start Settings Control Panel and then double-click Display. In the Display Properties window, click the Settings tab, and then click Advanced. Click the Monitor tab, and then click Change. When the Update Device Driver Wizard window opens, follow the steps in the previous paragraph.
- Page 14 In the Select Device window, click Have Disk. Insert the User’s Guide and Installation Files CD into the computer CD- ROM drive, type d:\ (change the drive letter to match your CD-ROM drive if it is not drive D) in the Copy manufacturer's files from: box, and click OK.
-
Page 15: Windows 95
Auto Setup (Analog Only) Auto Setup When you first use your monitor you must perform Auto Setup. This The Setup Utility procedure sets up your monitor to process the video signals from your included on the setup computer without image discoloration or smearing. After you perform Auto diskette is for displaying dot Setup, the settings are stored and used each time you turn on the monitor. -
Page 16: Auto Setup For Dos
Auto Setup for DOS Turn on the monitor first; then turn on the computer. If the monitor is in standby mode (STANDBY ON), it If the message CHECK SIGNAL CABLE is displayed, or if nothing is may automatically turn off while you are waiting for it to warm up. -
Page 17: Windows Nt, Windows Me Or Windows Xp
Auto Setup for Windows 3.1, Windows 95, Windows 98, Windows NT, Windows 2000, Windows Me or Windows XP If the monitor is in standby Turn on the monitor first; then the computer. mode (STANDBY ON), it If the message CHECK SIGNAL CABLE is displayed, or if nothing is may automatically turn off while you are waiting for it to warm up. - Page 18 When finished, the OSD main menu returns. Press the Exit button once to exit from the OSD. 10. Press the key to return to Windows. You have completed the monitor setup for Windows. If you are using the DOS operating system, go to Auto Setup for DOS on page 14.
-
Page 19: Manual Setup
Manual Setup Normally, you can complete the setup procedure using ; however, ETUP if your screen image is still distorted after you perform or the ETUP Installation CD does not run on your system, perform ANUAL ETUP Have your monitor turned on for about 15 minutes, until the monitor If the monitor is in standby mode (STANDBY ON), it warms up. -
Page 20: Adjusting Your Lcd Monitor
Adjusting Your LCD Monitor User controls User control features Icon Control Description Input Change Switches the video input source. Inactive Exits from menus and sub-menus Exit Active Exits the OSD. Activates automatic setup and Auto Setup Inactive adjustment. Moves the cursor to highlight icons Left Arrow Active and other options. - Page 21 • Use the Arrow buttons to move among the icons. Select an icon and press OSD Enter to access that function. If there is a sub-menu, you can move between options using the Arrow buttons, then press OSD Enter to select that function.
-
Page 22: On-Screen Display (Osd) Controls
On-screen display (OSD) controls The settings adjustable with the user controls are viewed through the On- Screen Display (OSD). Press the OSD Enter button to activate the OSD. Initial appearance of OSD The LCD monitor needs time to become thermally stable the first time you turn it on each day. - Page 23 Sub- Controls and Controls and OSD Icon Description menu(s) Adjustments(Analog) Adjustments(Digital) Use the Arrow buttons to MANUAL - adjust away the interference. If • Fine IMAGE LOCK satisfactory results are • Coarse (continued) not obtained using the Fine adjustment, use the Coarse adjustment and Controls Locked then use Fine again.
- Page 24 Sub- Controls and Controls and OSD Icon Description menu(s) Adjustments(Analog) Adjustments(Digital) Changes the position of the OSD H-POSITION on the screen. OSD MENU Same as Analog POSITION V-POSITION This monitor can accept video 1 - selects D-SUB signals through two different (Analog) connectors.
-
Page 25: Further Information
Further Information Display modes The display mode the monitor uses is controlled by the computer. Therefore, refer to your computer documentation for details on how to change display modes. The image size, position and shape might change when the display mode changes. - Page 26 Factory Set Display Modes For image problems, you may want to run AUTO Setup again before consulting to Horizontal Addressability Refresh Rate Analog Digital this section. In most cases, Frequency AUTO SETUP can fix the problems. See Auto Setup for 640 ×...
-
Page 27: Power Management
There are several states as described in the table below. may need to re-attach the CRT monitor temporarily ® As an Partner, IBM has determined that this product meets the until you have re-configured NERGY ® the computer, preferably to guidelines for energy efficiency. -
Page 28: Troubleshooting
Troubleshooting If you have a problem setting up or using your monitor, you might be able to solve it yourself. Before calling your retailer or IBM, try the suggested actions that are appropriate to your problem. Possible Problem Suggested Action... - Page 29 Possible Problem Suggested Action Reference Cause User Screen is blank Brightness and power and Contrast controls Adjust brightness and indicator is may be too section on contrast. steady green page 18 Press any key on the keyboard or move the Power The monitor is mouse to restore...
- Page 30 Possible Problem Suggested Action Reference Cause The LCD contains over 3,900,000 thin- A few dots are film transistors (TFTs). A small number of missing, missing, discolored, or lighted dots may be discolored, or present on the screen, which is an intrinsic inappropriately characteristic of the TFT LCD technology lighted.
-
Page 31: Further Help
Call the IBM HelpCenter(R). In the US call 1-800-772-2227 In Canada (Toronto Only) call 416-383-3344 In Canada (all others) call 1-800-565-3344 In other countries contact your dealer, retailer, or other IBM authorized If possible, stay by your computer. Your Technical Servicer. -
Page 32: Specifications
1024 lines (max) Clock Frequency: 106 MHz Communications VESA DDC: Supported Display VESA Standard modes between IBM, VESA, HP, Sun, Mac Modes Horiz. Frequency: 31 kHz - 81 kHz (Digital & Analog) Vert. Frequency: 55 Hz - 75 Hz Environment... -
Page 33: Service Information
Service Information The following parts are for use by IBM service, or IBM authorized dealers, to support the customer warranty. Parts are for service use only Model Type 6657 22P6760 6657-HG2 Monitor - Stealth Black 22P6761 6657-HW2 Monitor - Pearl White... -
Page 34: Notices And Trademarks
Web sites. The materials at those Web sites are not part of the materials for this IBM product, and use of those Web sites is at your own risk. - Page 35 Trademarks The following terms, used in this publication, are trademarks or service marks of the IBM Corporation in the United States, other countries, or both: HelpCenter ® is a U.S. Govt. registered trademark. NERGY Microsoft, Windows, and Windows NT are trademarks of Microsoft Corporation in the United States, other countries, or both.
Need help?
Do you have a question about the T750 and is the answer not in the manual?
Questions and answers