Advertisement
Available languages
Available languages
Quick Links
I
MPORTANT
CAUTION: Disconnect the phone cord from the wall outlet before installing
or replacing the batteries.
•
Never install telephone wiring during a lightning storm.
•
Never touch non-insulated telephone wires or terminals, unless the
telephone line has been disconnected at the network interface.
•
Use caution when installing or modifying telephone lines.
•
Never install telephone jacks in wet locations unless the jack is specifically designed
for wet locations
I
NSTALLING THE
IMPORTANT: You will have approximately 60 seconds to replace the batteries before the
memories stored in the handset are lost. Please read the instructions before replacing
Telephone
the batteries and have the batteries ready to be inserted beforehand. As a precaution,
you may want to write down any stored information you do not want erased.
User's Guide
Your Caller ID phone uses 3 AA-size alkaline batteries for receiving and storing
Caller ID records and for the numbers you use for memory dialing.
1.
If both the straight and coiled line cords are already connected, disconnect them
from the base unit. Place the handset aside.
2.
Use a ballpoint pen or other tool to open the battery compartment door.
3.
Insert 3 AA-size alkaline batteries (not included) as shown on the diagram inside
the compartment.
4.
Replace the battery compartment door.
5.
Re-attach the line cords to the unit and check your memory locations. If
installation takes longer than 60 seconds, you should re-set your memory
locations.
IMPORTANT: If you're not going to use the telephone for more than 30 days, remove
the batteries because they can leak and damage the unit.
Battery compartment
I
NSTALLING THE
Choose the best location to install your telephone. Your telephone should be placed on a
level surface, such as a desk or table top, or you may mount it on the wall.
I
NTRODUCTION
Your Caller ID phone stores and displays specific information, provided by your local
telephone company, to subscribers of Caller ID or similar caller identification services.
Your Caller ID phone enables you to:
•
Identify callers before you answer the phone.
•
View the time and date of each incoming call.
•
Record up to 60 Caller ID messages sequentially.
•
Know who called while you were away.
To get the most from your new phone, we suggest that you take a few minutes right now
to read through this user's guide.
B
Y
B
EFORE
OU
EGIN
C
ONNECTING THE
P
C
1.
Plug the coiled cord into the jack on the handset.
ARTS
HECKLIST
2.
Plug the long straight line cord into a modular wall telephone jack.
Make sure your package includes the following items:
3.
Set the RINGER switch on the base to HI.
4.
Place the handset in the cradle.
NOTE: The unit is properly installed if you pick up the handset and hear the dial tone.
Otherwise, recheck all the installation steps.
W
Wall plate
ALLMOUNTING THE
Base
Handset
Your telephone may also be mounted on the wall (wall plate not included).
T
J
R
NOTE: To prevent the handset from falling out of the cradle while the phone is
ELEPHONE
ACK
EQUIREMENTS
Telephone
hanging on the wall, you must reverse the handset hook (located on the base).
To use this phone, you need an RJ11C type modular
line jack
telephone jack, which might look like the one pictured
1.
Push the handset hook up and out with your thumb,
here, installed in your home. If you don't have a modular jack,
turn it over, and replace it in the slot on the base.
call your local phone company to find out how to get one
2.
Feed the line cord through the groove and wrap the
installed.
cord around the track on the bottom of the base.
3.
Feed the line cord through the groove on the opposite
side of the track, and plug the end into the modular
telephone jack.
ATLINKS
4.
Slip the mounting holes (on the bottom of the base)
Model Temporis 05-EX
22 quai Gallieni
00030413 (Rev.2 E/S)
over the wall plate posts and firmly slide the unit down
92150 Suresnes
12-29
into place.
France
Printed in China
www.atlinks.com
Alcatel logo and Alcatel name are trademarks of Alcatel and used under license by Thomson Telecom.
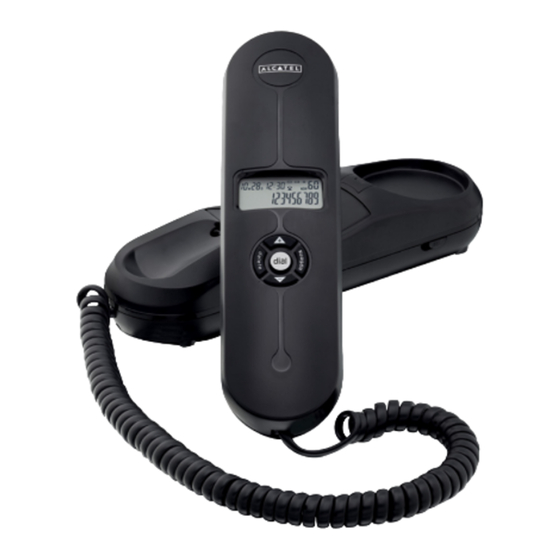
I
I
H
L
NSTALLATION
NFORMATION
ANDSET
AYOUT
.
B
ATTERIES
store button
mem button
S
U
C
ETTING
P THE
ALLER
IMPORTANT: Do not plug the telephone into the wall jack while setting up the
Caller ID menu because an incoming call may invalidate the information not yet
saved.
1.
Place the handset in the cradle on the base.
2.
Press the options button. SET 1 DATE appears in the display.
Press either ▲(+) or ▼(-) button to scroll among the 5 menu screens, which are:
3.
SET 1 DATE
SET 2 CODE (default is ----)
SET 3 T-P
SET 4 FLASH (default is 600)
SET 5 LCD (default is 3)
NOTE: You may press delete button anytime to exit the Set Up menu. If no
buttons are pressed within 20 seconds, the phone automatically exists the Set
Up menu and returns to the NO CALLS summary screen.
P
HONE
S
D
ETTING
ATE/TIME
This adjustment the Caller ID date/time.
1.
To enter the options menu, press the options button. SET 1 DATE appears.
2.
Press the options key to show the current setting of year.
3.
Press the ▲(+) or ▼(-) keys to adjust the 1st digit, then press options to advance
to next digit.
4.
After set year, press the options key to set the month.
5.
If you are adjusting 1
adjustment. If you are adjusting 10
▼(-) key (after the adjustment of year setting) and sudden first digit of 10
th
month will appear and flashing, then adjust the second digit of month with ▲(+)
or ▼(-) key.
6.
Repeat step 3 and 4 to set the day, hour and minute.
7.
Press options button again to store the value.
The date and time will be updated, every time a FSK Caller ID message has
T
L
ELEPHONE
INE
been received
If a DTMF Caller ID has been received, then it will get the date and time from
the system clock of the phone.
NOTE: The phone return idle mode if no key has been pressed for 20 seconds or
= HI - Sound will be loudest.
press DELETE before the completion of the current operation, the phone will time
= LOW - Sound will be lower.
out and return to the idle mode without changing the current time.
= OFF - Telephone will not ring.
S
L
A
ETTING THE
OCAL
REA
The Caller ID unit uses the programmed area code to determine the number
format to display when a valid Caller ID signal is received.
1.
To enter the options menu, press the options button. SET 1 DATE appears.
2.
Press the ▲(+) or ▼(-) arrow button until SET 2 CODE appears.
P
HONE
3.
Press the options button to show the current local area code. The default is----.
The first digit flashes, indicating it is ready to accept the area code entry.
4.
Press ▲(+) or ▼(-) arrow button to choose 0-9 for the first digit.
5.
When the desired number is flashing, press the option button to advance to the
next digit.
6.
Repeat steps 4 and 5 until all the digits for your area code are correct.
7.
Press options again to store the local area code.
NOTE: If you make a mistake, you can simply repeat the previous steps until your
area code is set.
S
ETTING THE DIALING MODE
1.
To enter the options menu, press the option button SET 1 DATE appears.
2.
Press ▲(+) and ▼(-) arrow button until SET 3 T-P
3.
Press the option button to show (
4.
Press the ▲(+) and ▼(-) arrow button to change PULSE mode.
5.
Press options button again to store the value.
T
F
O SET THE
LASH TIME
You can set the FLASH time from: 100ms / 300ms / 600ms .
It allows to adjust the flash time. The default setting is 600ms.
volume
1.
To enter the options menu, press the options button, SET 1 DATE appears.
switch
2.
Press the ▲(+) or ▼(-) arrow button until SET 4 FLASH appears.
3.
Press the options button to show FLASH 600(Default Selfing).
4.
Press the ▲(+) or ▼(-) arrow button to change the value (600ms, 300ms or
dial button
100ms).
5.
Press options button again to store the value.
display
S
LCD C
ETTING THE
ONTRAST
This adjustment allows you to adjust the contrast and viewing angle of the display.
options
delete button
button
1.
To enter the options menu, press the options button. SET 1 DATE appears.
2.
Press the ▲(+) or ▼(-) arrow button until SET 5 LCD appears.
3.
Press the options button to show the current contrast setting. There are 5 levels of
redial button
contrast, with the default set to 3.
To decrease the contrast, press the ▼(-) arrow button. To increase, press the ▲(+)
4.
arrow button.
arrow buttons
flash button
5.
Press options again to store the contrast setting.
ID M
ENU
T
B
ELEPHONE
ASICS
A
V
DJUSTING THE
OLUME
You may control the listening level with the VOLUME switch, which has three levels (HI,
MI,LO). It remains at the last level set until you change it.
R
N
EDIALING A
UMBER
If you want to call the last number you dialed again (up to 32 digits), use the
redial feature.
1.
Pick up the handset.
2.
Press the redial button.
3.
The last number called is automatically redialed.
M
EMORY
Before you store a telephone number in memory, make sure the dialing mode is
correctly set for the type of service you have. The default dialing mode is tone
(touch-tone), so if you have pulse (rotary) service, you must first change the dialing
mode. See "To Set the Dial Mode." The following buttons can be stored into any memory
location: 0-9.
S
F
C
N
TORING
REQUENTLY
ALLED
UMBERS
1.
Pick up the handset.
2.
Press the store button.
3.
Use the handset number keys to enter the telephone number (up to 16 digits).
4.
Press the store button.
st
to 9
th
month straightaway press options key after year
5.
Push the desired memory location button and press the store button.
th
to 12
th
month (two digit month), first press
6.
Hang up the handset.
th
to 12
NOTE: If you make a mistake, use the delete button to delete wrong digits.
C
S
N
HANGING A
TORED
UMBER
Repeat the storage sequence above. The new number replaces the old number at the
memory location.
E
S
N
RASING A
TORED
UMBER
1.
Press the Dial Button.
2.
Press ▲(+) or ▼(-) button to choose the memory location to be erased.
3.
Press delete key and LCD show "DELETE". Press DELETE to confirm.
D
F
C
N
IALING
REQUENTLY
ALLED
UMBERS
C
1.
Pick up the handset and press the mem button or press the dial button.
ODE
2.
Press 0-9 for the memory location. The number dials automatically.
OR
1.
Press dial button while the handset is still in the cradle.
2.
Press the review button for the desired memory location, lift the handset and the
number dials automatically.
R
N
S
M
EVIEWING
UMBERS
TORED IN
EMORY
1.
Press the dial button.
2.
Press ▲(+) or ▼(-) for the memory location. The number shows on the display.
C
C
ID M
U
M
OPY
ALLER
EMORY TO
SER
1.
Pickup the handset.
2.
Press the store button.
3.
Press either ▲(+) or ▼(-) to display the number you want to copy.
4.
Press the store button.
5.
Press 0-9 for the memory location. The display flashes if the memory location is
occupied.
6.
Press store to save.
7.
Press the hook switch to exit.
)
S
P
M
TORING A
AUSE IN
EMORY
The redial button has dual functionality. It becomes a pause button if the store button is
pressed first. It is valid only when storing a number into memory. Use the redial button
to insert a pause when a delay is needed in an automatic dialing sequence.
For example, when you must dial a 9 to get an outside line, or when you enter codes to
access your long distance company.
You may need to adjust the length of the pause. It can be adjusted from 1 to 9 seconds.
The default setting is 4 seconds.
1.
Pickup the handset.
2.
Press the store button.
3.
Press the redial button.
4.
Press 1-9 (1 = 1 second, 2 = 2 seconds, etc.)
5.
Press store again.
6.
Press the flash button or the hook switch to exit.
U
F
SING
LASH
This feature is used to activate customer calling services available through your local
phone company, such as Call Waiting. If you subscribe to any of these services, please
refer to the phone company's instructions on how to use flash.
To answer an incoming call while having a conversation:
•
After you hear the Call Waiting tone, press and release the flash button. The first
call is placed on hold while the second call can be answered.
To return to your first call and put the second call on hold:
•
Press and release flash again. The first call can continue while the second call is
put on hold.
U
T
T
D
SING
EMPORARY
ONE
IALING
If you have pulse service, you can temporarily change from pulse to tone service. After
dialing the telephone number, press and release the *TONE button on the telephone. This
allows access to phone services that require a tone, such as banking and long-distance
services. After you hang up the handset, the telephone automatically returns to pulse
service.
C
ID (CID) F
ALLER
EATURES
Visual message waiting indicator
Current date
Current time
S
S
UMMARY
CREEN
The Summary Screen shows the current time, current date, and number of new calls to
be reviewed. It displays until any button is pressed. Within 60 seconds of receiving a new
call, the Summary Screen displays.
R
S
CID R
ECEIVING AND
TORING
ECORDS
This unit receives and displays CID information transmitted by your local phone com-
pany. This information can include the phone number, date, and time. The unit stores up
to call records for later review. When the memory is full, a new call record automatically
replaces the oldest call record in memory. NEW shows in the display for call records
received which have not been reviewed.
R
CID R
EVIEWING
ECORDS
•
Press either the ▲(+) or ▼(-) down button to view the newest call record.
•
Press the ▼(-) button to scroll through the call records from the most recent to the
oldest.
•
Press the ▲(+) button to scroll through the call records from the oldest to the
newest.
•
When all of the messages have been viewed, appears --End-- in the display.
D
C
R
T
D
I
ELETING
ALL
ECORDS
O
ELETE AN
NDIVIDUAL
When reviewing calls, you may delete an individual call by pressing the delete button
once. The display will show "DEL ONE" Press delete button again fo confirm the delete.
T
D
A
C
O
ELETE
LL
ALLS
EMORY
1.
When reviewing calls, you may delete all calls by pressing and holding the delete
button for more than 4 seconds. DEL ALL? appears in the display.
2.
Press delete again to confirm.
D
B
IALING
ACK
When reviewing Caller ID records, you may dialback the phone numbers shown on the
display by pressing the dial button.
I
F YOU PROGRAMMED YOUR LOCAL AREA CODE IN THE SETUP MENU
1.
Use the ▲(+) and ▼(-) buttons to scroll to the number you want to dial.
•
If you see a number with 7 digits (i.e. 555-1234), then the call was received from
within your area code. However, this does not guarantee the call is a local call.
•
If you see a number with 11 digits (i.e. 1-234-555-1234), then the call received was
not from your area code.
2.
Press the dial button, a 10 second timer also starts in the upper right side of the
display, letting you know the time remaining until the unit returns to the Summary
Screen. If you adjust the number to be dialed, the timer automatically resets itself.
3.
To adjust the phone number.
4.
To dial the displayed number, pick up the handset before the timer reaches 0.
I
F YOU DID NOT PROGRAM YOUR LOCAL AREA CODE IN THE SETUP MENU
1.
Use the ▲(+) and ▼(-) buttons to display the number you want to dial. You will only
see digit numbers (i.e. 234-555-1234).
2.
See steps 2 through 4 in the above section to complete the dialback sequence.
NOTE: IF PICKUP PHONE shows on the display, no other changes to the number can
be made. The information sent from the telephone company is known to be a valid
number to dial back (available only in limited areas). Once you pickup the phone, the
number is automatically dialed.
V
M
W
I
ISUAL
ESSAGE
AITING
NDICATOR
When you have a message in the centralized voice mail system, this indicator will be lit.
you need to contact your services provider for more details.
C
ID D
M
ALLER
ISPLAY
ESSAGES
The following special messages indicate the status of a message or the unit:
Battery power level is low. Please replace the batteries as soon as
possible in order to maintain Caller ID operation.
T
T
ROUBLESHOOTING
IPS
N
O DIAL TONE
•
Check all cabling to make sure that all connections are secure and not damaged.
•
Check the hook switch: Does it fully extend when handset is lifted from cradle?
N
O DISPLAY
•
Replace batteries.
New calls
•
Make sure the batteries are properly installed.
N
O INFORMATION IS SHOWN AFTER THE PHONE RINGS
•
In order to receive Caller ID records, you must subscribe to the standard name and
number Caller ID service available through your local telephone company.
•
Be sure to wait until the second ring before answering.
P
HONE DOES NOT RING
•
Make sure ringer switch is set to HI.
•
You may have too many extension phones on your line. Unplug some extension
phones.
•
Check for a dial tone. If there is no dial tone see solutions for "No dial tone."
O
THER PARTY CANNOT HEAR YOU
•
Make sure phone cord is securely plugged in.
•
Make sure extension phones are on the hook at the same time you're using the
Caller ID number
phone. It is normal for the volume to drop when additional extension phones are
used at the same time.
C
ANNOT DIAL OUT
•
Make sure the T/P dialing mode is set to the type of phone service you are
subscribed to.
Used equipment must be disposed of in compliance with current
environmental protection regulations. You should return it to your
reseller or dispose of it in an approved recycling centre.
C
ALL
Advertisement

Related Manuals for Alcatel Temporis 05


Summary of Contents for Alcatel Temporis 05
- Page 1 If you see a number with 11 digits (i.e. 1-234-555-1234), then the call received was to insert a pause when a delay is needed in an automatic dialing sequence. Alcatel logo and Alcatel name are trademarks of Alcatel and used under license by Thomson Telecom.
- Page 2 Pulse el botón ▲(+) y ▼(-) para cambiar al modo de pulsos (PULSE). Cuando revisa las llamadas, puede borrar todas las llamadas pulsando y Pulse el botón OPTIONS otra vez para guardar la configuración. Alcatel logo and Alcatel name are trademarks of Alcatel and used under license by Thomson Telecom.
Need help?
Do you have a question about the Temporis 05 and is the answer not in the manual?
Questions and answers