Advertisement
INTRODUCTION
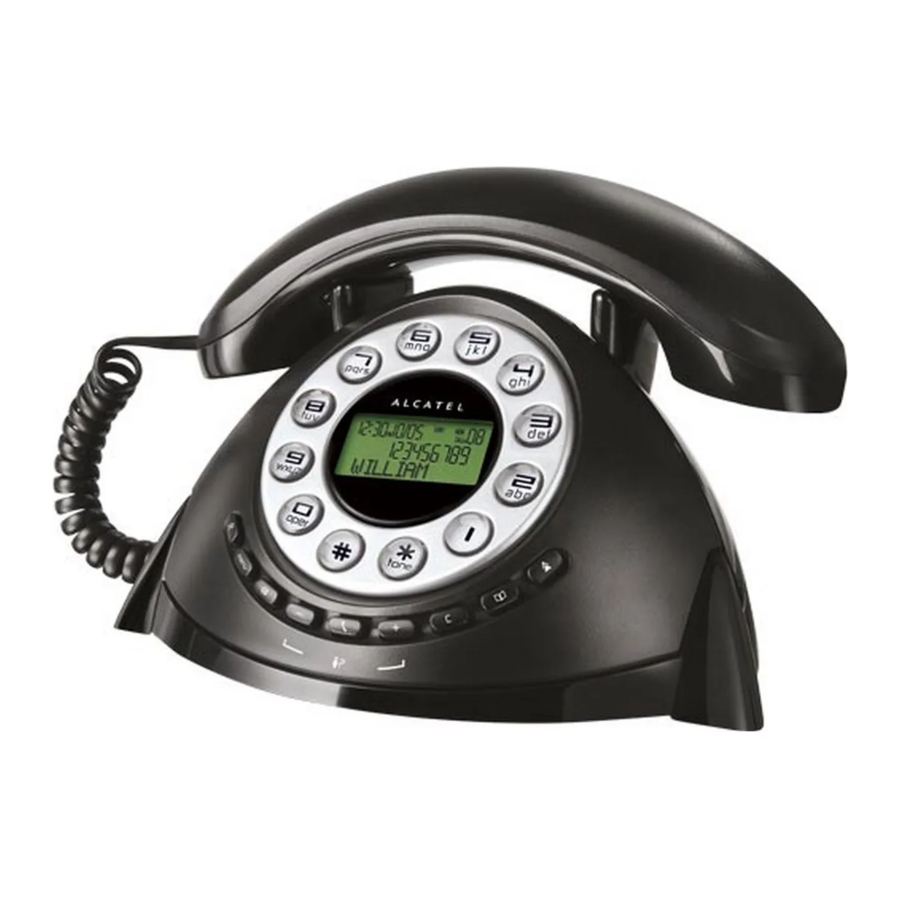
This product, Retro phone with Dual Mode Caller ID Type 2, can provide a features to store and display the FSK type 1 & 2 / DTMF Caller ID information that provided by your local telephone company. Your Caller ID phone enables you to:
- Identify callers before you answer the phone.
- View the time and date of each incoming call.
- Record up to 70 Caller ID messages.
- 10 two-touch memories.
In order to use the Caller ID function on this unit, you must subscribe the Caller ID services from your telephone company.
To get the most from your new phone, you are suggested to take a few minutes right now to read through this user guide.
SHORT GLOSSARY OF TERMINOLOGY USED IN THIS MANUAL
Hook switch. The part of the phone that pops up to activate the phone line when the handset is lifted from the base.
Off-hook. A term used to describe the phone in its active mode when the handset is off of the base cradle.
On-hook. A term used to describe the phone in an inactive mode.
BEFORE YOU BEGIN
PARTS CHECKLIST
Make sure your package includes the following items:
- a base and handset.
- a telephone cord.
- a spiral cord.
TELEPHONE JACK REQUIREMENTS
Wall plate

To use this phone, you need an RJ11C type modular telephone jack, which might look like the one pictured here, installed in your home. If you don't have a modular jack, call your local phone company to find out how to get one installed.
IMPORTANT INSTALLATION INFORMATION

Disconnect the phone cord from the wall outlet before installing or replacing the batteries.
- Never install telephone wiring during a lightning storm.
- Never touch uninsulated telephone wires or terminals, unless the telephone line has been disconnected at the network interface.
- Use caution when installing or modifying telephone lines.
- Never install telephone jacks in wet locations unless the jack is specifically designed for wet locations.
- Temporarily disconnect any equipment connected to the phone, such as faxes, other phones, or modems.
INSTALLING AND REPLACING THE BATTERIES
Your Caller ID phone uses 3 AA-size alkaline batteries for receiving and storing Caller ID records and for storing the numbers you use for memory dialing, pulse dialing, and redial.

You will have approximately 60 seconds to replace the batteries before the memories stored are lost. Please read the instructions before replacing the batteries and have the batteries ready to be inserted beforehand.
If you are not going to use the telephone for more than 30 days, remove the batteries because they may leak and damage the unit.
- If the telephone line cord is connected, disconnect it from the base unit.
- Open the battery compartment located under the phone.
- Insert 3 AA-size alkaline batteries (not included) as shown on the diagram inside the compartment.
- Replace the battery compartment door.
- Re-attach the line cords to the unit and check your memory. If installation takes longer than 60 seconds, you should re-set your memory.
INSTALLING THE PHONE
Your phone should be placed on a level surface, such as a desk or table top.
CONNECTING THE HANDSET
- Connect one end of the coiled handset cord to the jack on the handset.
- Plug the other end of the coiled handset cord to the jack on the base.
- Place the handset in the cradle.
CONNECTING THE TELEPHONE LINE
- Connect one end of the straight telephone line cord to the jack on the back of the base.
- Connect the other end to a wall phone jack.

NOTE: The unit is properly installed if you pick up the handset and hear the dial tone. Otherwise, recheck all installation steps.

SETUP MENU

When applying power for the first time, the summary screen appears.
NOTE: Proceed immediately to change any of the following factory preset settings as required.
- To enter the setup menu, press the MENU button. DATE / TIME appears.
- At this point you can press either arrow button to scroll through 5 menu screens:
- DATE / TIME
- LANGUAGE (Default: English)
- CONTRAST (Default: 3)
- LOCK (Call Lock '0')
- CHANGE PIN (Default Password: 0000)
- You have 10 seconds following any key press before the unit automatically return to the summary screen.
NOTE: You can exit the setup menu by pressing the  button.
UNIT'S DATE / TIME
The Unit's Date / Time will NOT be shown after the Batteries installed. It can be set by incoming FSK type I / II Caller ID or Date / Time set menu.
If you set the system clock by Date / Time set menu, it will never be updated by incoming Caller ID. unless the battery power to be removed.
If the system clock is firstly set by incoming Caller ID after the power up, it will be automatically updated by each Caller ID received.
If a DTMF Caller ID is received, the receiving date / time for that Caller ID will be recorded as the system clock.
SETUP MENU
- DATE / TIME SET
- To enter the setup menu, press the MENU button. The display shows DATE / TIME.
- Press the MENU button again, the hour's digit will flashing. You can change it by using the - or + arrow button.
- Press the MENU button to move to minute's digit. You can press the - or + arrow button to change the digits.
- Press the MENU button to move to month's digit and use the - or + arrow button to change the value.
- Press the MENU button to move to day's digit and use the - or + arrow button to change the value.
- Afterward, press the MENU button again, the display shows 24H. You can change the clock in 12 hours format by press - or + arrow button.
- To save the date / time setting and go to the language set menu, press MENU button again.
- SETTING THE LANGUAGE
You may select the language of the user interface from this menu.- To enter the setup menu, press the MENU button. The display shows LANGUAGE.
- Press the MENU button again to enter the language set. There are six language to be selected. The default is English.
- Press the - or + arrow button to cyclically change to ENGLISH, FRENCH, SPANISH, GREEK, PORTUGUESE, POLISH.
- After the selection, press the MENU button to confirm the setting.
- SETTING THE LCD CONTRAST
This adjustment allows you to adjust the contrast and viewing angle of the display.- To enter the setup menu, press the MENU button.
- Press the - or + arrow button until the display shows 'CONTRAST'.
- Press the MENU button the digit will be flashing. There are 5 levels of contrast, with the default set to 3.
- To decrease the contrast, press the - arrow button. To increase, press the + arrow button.
- Press MENU again to store the contrast setting.
- ACTIVATE OR DEACTIVATE CALL LOCK '0'
- To enter the setup menu, press the MENU button.
- Press the - or + arrow button until the display shows 'LOCK'.
- Press MENU button to activate or deactivate the call lock '0' function. If the call lock '0' function is deactivated, it will activate the call lock '0' function. If the call lock '0' function is activated, it will prompt the user to enter the password to deactivate call lock. If the password has not been entered before, it defaults 0000.
If the password is incorrect, the display will show 'INCORRECT PIN!'.
- CHANGE PASSWORD FOR CALL LOCK '0' FUNCTION
- To enter the setup menu, press the MENU button.
- Press the - or + arrow button until the display shows 'CHANGE PIN?'.
- Press MENU button to change the password of call lock '0'.
- It prompts the user to enter the old password in first.
- Afterwards, it will prompt the user to enter the new one and then re-enter again for confirmation.
EXITING THE SETUP MENU
You can abort the current operating and exit by going off-hook, or by pressing ' ' button.
OPERATION
CALLER ID FEATURES
Caller ID (CID) is a service available from your local telephone company. For Caller ID to work on this system, you must subscribe to Caller ID service. This unit can receive the FSK type 1 & 2 and DTMF caller ID without any setting. This information may include the phone number, date and time; The unit stores up to 70 calls for later review.
RECEIVING AND STORING CALLS
When you receive a call, the information is transmitted by the phone company to your caller ID telephone.
When the memory is full, a new call automatically replaces the oldest call in memory. NEW appears in the display for calls received that have not been reviewed.
If a FSK Caller ID is received, it will automatically update the date/time on this unit. If the DTMF Caller ID is received, the record date/time will copy from the unit Date/Time. However, it must be set before.
REVIEWING CALL RECORDS
- When the NEW indicator is ON, you have received new incoming calls. Press the - or + arrow button to review the stored calls. After the new call records are reviewed, the indicator turns Off.
- If the incoming caller ID indicator is received in previous, the repeat indicator 'REP' will turn On.
- When you reach the end of the call records, the display shows START/END.
- You can exit the caller ID review by pressing the
![]() button.
button.
TRANSFERRING CID RECORD TO MEMORY
You may transfer a Caller ID record to your phone's memory.
- Press the REVIEW - or + to select the CID record while the phone is in On-hook mode.
- Press the STORE then digit 0... 9 or REVIEW - / + to select the memory location.
- Press the
![]() button to confirm the location then you can edit the displayed number if necessary.
button to confirm the location then you can edit the displayed number if necessary. - Press the
![]() button to confirm the number then you can edit the displayed name if necessary.
button to confirm the number then you can edit the displayed name if necessary. - Finally, press the
![]() button to confirm the entry. If the memory has content, it will be replaced by new entry.
button to confirm the entry. If the memory has content, it will be replaced by new entry.
 button to confirm the location then you can edit the displayed number if necessary.
If the name is longer than 12 characters, only the first 12 characters will be stored into the memory. If the number is longer than 14 digits, the operation will be ignored.
DELETING CALL RECORDS TO DELETE AN INDIVIDUAL CALL
When reviewing calls, you may delete an individual call by pressing the  button.
The contents of the display will be erased and the remaining Caller ID records are renumbered.
TO DELETE ALL CALLS
When reviewing calls, you may delete all calls by pressing and holding the button for more than 3 seconds. DELETE ALL? appears in the display.
Press delete button again to confirm.
DIALING A CALLER ID NUMBER
Dialing from On-hook:
- Press the - or + arrow button to select the CID record.
- Press the
![]() button, the display will show 'PICK UP or ADJ'.
button, the display will show 'PICK UP or ADJ'. - If necessary, press the '#' button to remove a digit or press a numeric button to insert a digit from left hand side of the displayed number, until the correct number of digits show in the display.
- Pick up the handset, the number will be automatically dial out after 3 second.
 button, the display will show 'PICK UP or ADJ'.
Dialing in Off-hook:
- Pick up the handset to make the phone in Off-hook first.
- Use the - or + arrow button to select the CID record. Press the
![]() button to dial out the displayed number.
button to dial out the displayed number.
CALLER ID MESSAGE
If the part or all of the Caller ID information are blocked by the calling party, the display will show 'BLOCKED CALL', 'BLOCKED NUMBER' or 'BLOCKED NAME'.
If the part or all of the Caller ID information does not available from the calling party due to the out of area, the display will show 'UNKNOWN CALLER', 'UNKNOWN NUMBER' or 'UNKNOWN NAME'.
If the part of the Caller ID information is incorrect, the display will show 'INCOMPLETE DATA'.
TELEPHONE BASICS
RECEIVING A PHONE CALL
- Lift the handset to answer the call.
- Replace the handset in the cradle to hang up.
MAKING A PHONE CALL
- Lift the handset. Wait for a dial tone.
- Dial the telephone number you want to call.
- Replace the handset in the cradle to hang up.
HEARING VOLUME
You may adjust the receiver volume from a switch located at the rear side of the unit.
3 levels are available: Low (Lo), medium (Mid), High (Hi)
You may adjust the ringer volume from a switch located at the rear side of the unit.3 levels are available: OFF, low (lo), High (Hi)
REDIAL (OUT GOING CALLLOG)
In On-hook mode:
You can press " " key and then the - or + button to review the outgoing call up to last 5 times redial number.
Lift the handset to dial out the outgoing call.
In Off-hook mode:
You can press the button to redial out the last number.
If the line is detected in busy before redial, the unit will perform a flash then try to redial the number.
DELETE REDIAL RECORD
During the redial record review in On-hook, press the button to delete the displayed record. If press and hold the button for 3 sec, the display will show 'DELETE ALL'. Press button again, all the redial record will be deleted.
TEMPORARY TONE DIALING
If you have pulse (rotary) service and want to access customer calling services (such as telebanking and long distance services) that require tone dialing, you can use this feature to temporarily change from pulse to tone service.
After dialing the telephone number and connecting to the customer calling service,
- Press and release the TONE (*) button.
- When you hang up, the telephone automatically returns to pulse dialing mode.
PRE-DIALING
- With the handset on the cradle, enter the telephone number wish to call (max 32 digit). The telephone number shows in the display.
- Lift the handset, the number will be automatically dialed out.
PRE-DIALING
- With the handset on the cradle, enter the telephone number wish to call (max 32 digit). The telephone number shows in the display.
- Lift the handset, the number will be automatically dialed out.
NOTE: Use the button to delete an incorrectly entered number.
MEMORY
Store up to ten, 16-digit 12 char, name & numbers in memory for quick dialing. This memory feature is in addition to the 70 Caller ID records that can be stored in the Caller ID memory log.
STORING A NAME AND NUMBER IN MEMORY
- Press the
![]() button to enter the program mode.
button to enter the program mode. - Press the digit 0... 9 to select the memory location.
- Press the
![]() button then enter the phone number up to 16 digits.
button then enter the phone number up to 16 digits. - Press the
![]() button to store the number.
button to store the number. - Use the dialing button to enter the name up to 12 character and press the
![]() to save. More than one letter is stored in each of button. For example, press the '2' button twice to input the letter 'b'. Press the '9' button 4 times to input the letter 'z'.
to save. More than one letter is stored in each of button. For example, press the '2' button twice to input the letter 'b'. Press the '9' button 4 times to input the letter 'z'. - Use the REVIEW+button to move the next position or REVIEW - to backward one position.
- If the input is incorrect, press the
![]() button to delete the current character.
button to delete the current character. - Press the
![]() button to store the entry.
button to store the entry.
DELETE MEMORY
- Press the
![]() button to enter the program mode.
button to enter the program mode. - Press the digit 0... 9 or - / + to select the memory location.
- Press the
![]() button, the display will show 'ERASE MEM?'.
button, the display will show 'ERASE MEM?'. - Press the
![]() button again to confirm the deletion.
button again to confirm the deletion. - If you press and hold the
![]() button for 3 second in step 3, the display will show 'ERASE ALL MEM?' to delete all memories.
button for 3 second in step 3, the display will show 'ERASE ALL MEM?' to delete all memories.
COPY REDIAL NUMBER TO MEMORY
- Press the
![]() button while the phone is in On-hook mode. The display shows 'PICKUP PHONE'.
button while the phone is in On-hook mode. The display shows 'PICKUP PHONE'. - Press REVIEW - / + to select redial record.
- Press
![]() button to enter the program mode.
button to enter the program mode. - Press the digit 0... 9 to select the memory location then press the
![]() button to confirm.
button to confirm. - You can edit the displayed number if necessary. Afterwards, press the
![]() button to confirm.
button to confirm. - You can edit the displayed name right now if necessary.
- Finally, press the
![]() button to confirm the entry. If the memory has content, it will be replaced by new entry.
button to confirm the entry. If the memory has content, it will be replaced by new entry.
 button while the phone is in On-hook mode. The display shows 'PICKUP PHONE'.
MEMORY DIALING
In On-hook mode:
- Press
![]() button.
button. - Press [0 ]... [ 9 ] or - / + arrow button to select memory location.
- Pickup the handset to dial out the numbers.
In Off-hook mode:
- Press
![]() button.
button. - Press - / + button to select memory location.
- Press
![]() button to directly dial out the number.
button to directly dial out the number.
OR
Press  button then digit [0]... [9] to directly dial out the number.
HANDSET MICROPHONE MUTE
You can press the  button to mute the microphone during the conversation. When the Mute function is activated, the display will show "Muting...". You can press the button again to release the mute function.
VISUAL MESSAGE WAITING INDICATOR
The VMWI will blank if there have a message in the centralized voice mail system. You need to contact your services provider for more details.
BATTERY LOW INDICATION
When the LCD display shows the battery low icon, you need change a new battery (3 x AA) to ensure the unit is properly to operate.
TROUBLESHOOTING TIPS
No Dial Tone
- Check all cabling to make sure that all connections are secure and not damaged.
- Check hook switch: Does it fully extend when handset is lifted from cradle?
No Display
- Replace the batteries.
- Check for proper battery installation.
No Information is Shown After the Phone Rings
- Are you subscribed to Caller ID service from your local telephone company?
- Be sure to wait until the second ring before answering.
Phone Dials in Pulse with Tone Service
- Make sure T/P DIAL MODE is set to TONE DIAL.
Phone Won't Dial Out with Pulse Service
- Make sure T/P DIAL MODE is set to PULSE DIAL.
Phone Does Not Ring
- You may have too many extension phones on your line. Try unplugging some extension phones.
- Check that ringer volume is not OFF (see RINGER VOLUME).
Incoming and Outgoing Voice Volume Low
- Are other phones off hook at same time? If so, this is normal condition as volume drops when additional phones are used at once.
- Check the handset receiver volume.

Documents / ResourcesDownload manual
Here you can download full pdf version of manual, it may contain additional safety instructions, warranty information, FCC rules, etc.
Advertisement


Need help?
Do you have a question about the Temporis Retro and is the answer not in the manual?
Questions and answers