Onkyo LS-T10 Instruction Manual
Tv speaker system
Hide thumbs
Also See for LS-T10:
- Brochure & specs (2 pages) ,
- Specifications (2 pages) ,
- Instruction manual (2 pages)
Advertisement
Table of Contents
- 1 Package Contents
- 2 Mount the Unit
- 3 Connections
- 4 Using Main Unit Controls
- 5 Basic Operation
- 6 Using Remote Controller
- 7 How to Use Remote Controller
- 8 Mute Button
- 9 Playing Via Bluetooth Connection
- 10 Start Playback
- 11 Using TV Remote Controller
- 12 Troubleshooting
- 13 Remote Controller
- 14 Playing USB Memory
- 15 Warranty Period
- 16 Scope of Warranty
- Download this manual
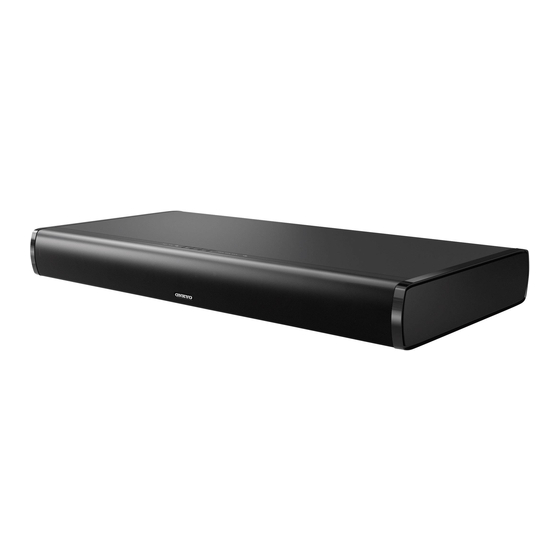
LS-T10
TV Speaker System
Instruction Manual
Thank you for purchasing an Onkyo product. Please read this manual thoroughly before
making connections and plugging in your new Onkyo product.
Following the instructions in this manual will enable you to obtain optimum performance and
listening enjoyment from your new product.
Please retain this manual for future reference.
Trademarks and Licensing
AuraSphere is a listening experience technology developed by Onkyo
Corporation and Sonic Emotion ag.
Manufactured under license from Dolby Laboratories.
Dolby and the double-D symbol are trademarks of Dolby
Laboratories.
The Bluetooth® word mark and logos are registered
trademarks owned by Bluetooth SIG, Inc. and any use of such
marks by Onkyo is under license. Other trademarks and trade
names are those of their respective owners.
AuraSphere™ is a trademark of Onkyo Corporation.
* 2 9 4 0 1 5 4 1 *
E
n
D1308-0
Advertisement
Table of Contents

Related Manuals for Onkyo LS-T10


Summary of Contents for Onkyo LS-T10
- Page 1 TV Speaker System Instruction Manual Thank you for purchasing an Onkyo product. Please read this manual thoroughly before making connections and plugging in your new Onkyo product. Following the instructions in this manual will enable you to obtain optimum performance and listening enjoyment from your new product.
-
Page 2: Package Contents
PACKAGE CONTENTS Make sure you have the following items before use. ‡ The number in parenthesis indicates the quantity. ‡ In catalogs and on packaging, the letter at the end of the product name indicates the color. Main unit (1) AC adapter (1)/ Power cord (1) Remote controller (RC-877S) (1) - Page 3 PREPARATION Placement Select an appropriate placement for your environment. ‡ To enjoy the best sound, do not place an object on both sides of the unit. Furthermore, mount this unit carefully since the subwoofer unit is housed on its bottom face. ‡...
-
Page 4: Mount The Unit
1. Attach the supplied cushions to the feet of the TV stand. ‡ Be very careful when attaching the cushions. Depending on the size and weight of the TV in particular, be sure to have at least two people do the job to prevent injury. - Page 5 3. Connect all cables to the unit. (o See 7 to 8 pages) 4. Mount the TV on the center of the top face of this unit. ‡ Mount the unit correctly by referring to the figure below. Mountable range of the TV Stand ‡...
- Page 6 If the TV protrudes from any of the mountable range, the TV may tip over and cause injury. ‡ For TV tip-over/fall prevention measures, see the TV owner’s manual. ‡ Onkyo is not responsible for accidents or damage caused by improper installation, improper cushion attachment, improper use or natural calamity, etc.
-
Page 7: Connections
Connections ‡ Connect the TV and this unit using one of the possible connection cables. COAXIAL jack USB port Connect a separately sold cable to Connect a USB flash drive. input the sound. OPTICAL jack Connect the supplied optical digital audio cable to input audio. ANALOG jack Connect the supplied stereo mini plug cable to input audio. - Page 8 Listening to TV Turn on the TV. ‡ For details on operation, see the "BASIC OPERATION" (o P.11). ‡ The unit can be operated with your existing TV remote controller. For details on operation, see the “Using TV Remote Controller” (o P.17). 1.
-
Page 9: Using Main Unit Controls
BASIC OPERATION Using Main Unit Controls Regarding the buttons on the main unit: The buttons on this unit are touch sensitive switches. Therefore, they may respond poorly depending on how they are pressed or not respond when pressed fast and consecutively. - Page 10 (ON/STANDBY) button/INPUT button Switches the power on/standby. Also, switches the input source. To turn the power on: Press once when this unit is turned off. To turn the standby: Press and hold for 3 seconds. The indicators go off. To input the source: Press once to switch. Switches in the order of TV o USB o Bluetooth each time the button is pressed.
-
Page 11: Using Remote Controller
5. SOUND MODE indicators Lights according to the selected sound mode. ‡ MUSIC Lights in the music mode. ‡ NEWS Lights in the news mode. ‡ MOVIE Lights in the movie mode. ‡ Lights when the input signal is Dolby Digital. 6. -
Page 12: Mute Button
1. z (ON/STANDBY) button Switches the power on/standby. (Mute) button Turns the audio off temporarily. Press again to cancel muting. ‡ The Status indicator flashes when the audio is muted. ‡ Muting will also be canceled when the volume is changed or the power is turned off and on. - Page 13 3. INPUT buttons Switches the input source. ‡ To play the TV sound: Turns the TV on and press the button. ‡ To play music from a USB flash drive: Connect the USB flash drive and press the button. ‡ To play music from a Bluetooth device: Press the button.
-
Page 14: Playing Via Bluetooth Connection
‡ The pairing will end in about 30 seconds and the indicator starts flashing slowly. 3. On the Bluetooth device, select the unit (Onkyo LS-T10) to make a connection. ‡ For details on operation, see the instruction manual of the Bluetooth device. -
Page 15: Using Tv Remote Controller
Using TV Remote Controller Preprogrammed functions: This unit has been preprogrammed so that it can be operated with your existing TV remote controller. The functions that can be operated are volume control (+/–) and muting ( ). If you want to use other functions or cannot operate with your TV remote controller, you can use the learning function as below to enable the operation. -
Page 16: Troubleshooting
‡ hour. After that, reconnect the power The unit will automatically enter standby cord and turn the power on. If the unit mode when Auto Standby launches. turns off again, unplug the power cord (oP.12) and contact your Onkyo dealer. -
Page 17: Remote Controller
Do not bind the power cord, connection wall outlet immediately and contact your cables and other audio cables with a band. ‡ Onkyo dealer. An audio cable may be picking up interference. Try repositioning your cables. Audio ‡... -
Page 18: Playing Usb Memory
Playing USB Memory Onkyo is not responsible for damages The unit supports USB memory formatted (such as CD rental fees) due to using FAT12, FAT16 and FAT32 file system. ‡ unsuccessful recordings caused by The unit is compatible with MP3 the unit’s malfunction. - Page 19 Tel: 86-21-52131366 Fax: 86-21-52130396 http://www.cn.onkyo.com/ Asia, Oceania, Middle East, Africa Please contact an Onkyo distributor referring to Onkyo SUPPORT site. http://www.intl.onkyo.com/support/ The above-mentioned information is subject to change without prior notice. Visit the Onkyo web site for the latest update.
Need help?
Do you have a question about the LS-T10 and is the answer not in the manual?
Questions and answers