
Summary of Contents for smartvue S8
- Page 1 Smartvue S8 User Guide Smartvue Corporation 102 Woodmont Boulevard Nashville, TN USA 27205 www.smartvue.com Patents Granted and Pending in USA, EU, and China. ©1996-2009 Smartvue Corporation, All Rights Reserved.
- Page 2 Notwithstanding the term of any limited warranty or any warranty implied by law, or in the event that any limited warranty fails of its essential purpose, in no event will Smartvue's entire liability exceed the purchase price of this product.
-
Page 3: Table Of Contents
Go Remote ......................................11 Suggestions & Guidelines..............................11 Technical Support ..................................11 HARDWARE OVERVIEW..................................12 Smartvue S8C4000 Network Camera (Indoor).....................12 Smartvue S8NVR1000 Network Video Recorder ....................13 Smartvue S8CD5000 Network Video Dome Camera (Outdoor)............14 LOGIN..........................................15 Forgot Password ...................................15 ADDING & REMOVING CAMERAS............................16 Add Cameras.....................................16 Remove Cameras...................................16 Change Camera Order................................17... - Page 4 Video Tour ......................................33 Combined Tour ....................................33 Motion Detection During Tours............................33 MY PROFILE......................................34 Alert Methods ....................................34 MULTI-VIEW......................................35 Add Multi-view ....................................35 Edit Multi-View ....................................36 FULL SCREEN......................................37 Recorded Video Full Screen..............................37 SETTINGS DASHBOARD................................38 NVR SETTINGS......................................39 NVR settings ......................................39 Interface Skins ....................................39 Tours ........................................39 Multi-View......................................40 MANAGE CAMERAS..................................42 Add Cameras.....................................42...
- Page 5 External SATA Drive ..................................59 NAS Drive ......................................60 NETWORK SETTINGS..................................61 Primary NIC......................................61 Secondary NIC ....................................62 STATUS........................................63 System Date and Time ................................63 Camera Status....................................63 User Status......................................63 Software Upgrade..................................64 Network Status ....................................64 InsightServer Status ...................................64 Storage Status ....................................65 View Logs ......................................65 Reboot NVR ......................................65 MANAGE USERS....................................66 Add New User ....................................66 Alert Methods ....................................67...
- Page 6 TECHNICAL SUPPORT..................................90 INDEX...........................................91...
-
Page 7: Introducing Smartvue S8
INTRODU CIN G S MARTVU E S 8 CO NGRAT ULAT IO NS You are about to see the world in a brand new way. Smartvue S8 was uniquely designed to make professional network video surveillance smart, simple, and elegant. - Page 8 NAS. Built for Windows, Mac, iPhone. View Smartvue S8 in your web browser from almost any Apple or Windows PC, iPhone or other cell phone - with no software to install.
-
Page 9: Quickstart
LEFT ethernet port) and the other end into your network. Press the power switch on the back of the NVR to turn it ON. Place the Smartvue S8 cameras into location (the included shelf stand also can be used as a wall mount) and power them up. The cameras can also be used in wired mode by connecting them to your network using an Ethernet cable. -
Page 10: Get Set
GET SET The LCD on the front of the NVR displays its IP address. Type this address into your web browser (IE on PC or Safari on MAC). When prompted to log in, enter the user name “admin” and the password “admin” then click LOG IN. -
Page 11: Go Remote
Smartvue S8 network video recorders only work with Smartvue S8 network video cameras. Each Smartvue S8 network video recorder can support up to 10 wireless plus 10 wired or 20 wired Smartvue S8 network video cameras. If you are placing cameras in an outdoor environment, purchase the Smartvue S8 model S8CD5000 or place the camera into an IP66 rated housing. -
Page 12: Hardware Overview
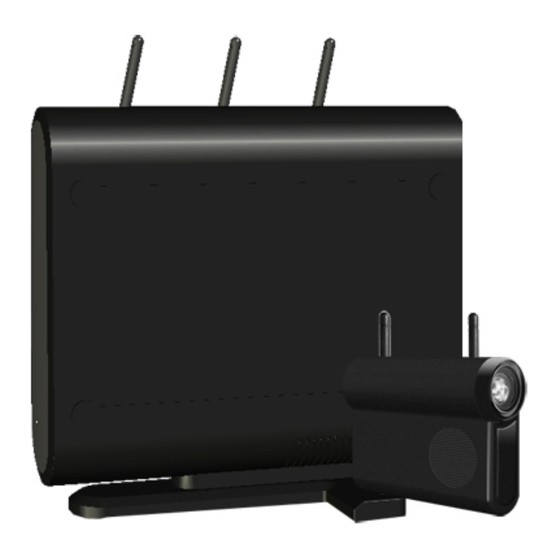
H ARDWARE OVERVIEW SMART V UE S8 C4 0 0 0 NET W O RK CAMERA ( INDO O R) -
Page 13: Smartvue S8Nvr1000 Network Video Recorder
SMART V UE S8 NV R1 0 0 0 NET W O RK V IDEO RECO RDER... -
Page 14: Smartvue S8Cd5000 Network Video Dome Camera (Outdoor)
SMART V UE S8 CD5 0 0 0 NET W O RK V IDEO DO ME CAMERA ( O UT DO O R) -
Page 15: Login
NVR (in the LCD display) into your IE or Safari Internet browser on almost any Windows or Apple computer. The Smartvue S8 Login page will appear. The Login page provides the option to enter the username and password as shown below. -
Page 16: Adding & Removing Cameras
Once Add Cameras is clicked, the NVR will search for available cameras using the Smartvue wireless or any Smartvue cameras connected wired to the same network the NVR is connected to or any camera that is connected to either of the two ethernet ports on the back of the NVR. -
Page 17: Change Camera Order
A dialog will appear and prompt you to select the camera or cameras to remove from the system. Select to delete all video or images associated with that camera as well. Important – if you select to delete all images or videos from that camera when it is removed, you will not longer be able to view them. -
Page 18: Viewing Live Video
VIEWING LIVE VIDEO Live Video is the first screen to be displayed when you log into Smartvue S8. From this point you can view video from any connected camera. The Preview Flow at the top of the screen displays the preview of the active cameras connected to the NVR. -
Page 19: Main Menu Buttons
Record Video Click on Record Video to start or stop video recording manually. Click again to stop. SnapShot Click on Snap Shot to take a high-resolution (1600x1200) image snapshot. The image is saved in the Image Gallery. TalkBack Click on TalkBack to being a two-way conversation. Click again to stop. Zoom Click on Zoom to pan, tilt, and zoom the camera view. -
Page 20: Live Video
LIV E V IDEO Click on the Live Video button to view the live video screen and access live video from all the cameras. Live Video Button V IDEO GALLERY Click on the Video Gallery button to search for and view recorded video. Video Gallery Button IMAGE GALLERY Click on the Image Gallery button to search for and view recorded video. -
Page 21: Multi-View
MULT I-V IEW Click on the Multi-View button to view and edit multiple camera views. Multi-View Button FULL-SCREEN Click on the Full Screen button to view the currently playing video full screen. Full Screen Button SET T INGS DASHBO ARD Click on the Settings Dashboard button to view and edit system settings. -
Page 22: Video Gallery
VIDEO G ALLERY Video Gallery enables users to search through and play recorded videos. It also offers features to flag, make notes, download, upload, and delete recorded videos. SEARCH RECO RDED V IDEO Recorded video search can be done based on various options such as date and time, camera, video type, flag, and comments. - Page 23 Flag Flag sets the flags to search for. The flagged videos search can be for any video clips that have been flagged by any of red, yellow, or green flags. Videos have no flag by default. Comment Comments are the comments to search for. The commented videos search can be for any video clips that have comments added to them.
- Page 24 List View The result tab also enables the user to browse the all videos in a list format. Double click on any video in the list to play the video. Result Tab The list view displays the date and time of the recording as well as the camera name and flag if applied.
-
Page 25: Play Recorded Video
Click on the check box to the left of any one or more video clips and then make a selection at the bottom for the following functions. Add Flag Click on the Add Red, Add Green, or Add Yellow to add a flag to one or more video clips. - Page 26 The Play Video screen offers the following functions. Play/Pause Click on the Play/Pause button to play or pause the video. Volume Control Click on the Volume Control and drag the volume to the desired level. Slider Bar Navigation Drag the Slider Bar to any location in the video clip to go to that specific view. Upload Video Uploads the Video to YouTube or another video services web site if available.
-
Page 27: Image Gallery
IMAG E G ALLERY Image Gallery enables users to search through and view recorded snapshots. It also offers features to flag, make notes, download, and delete snapshots. SEARCH SNAPSHO T S Image search can be done based on various options such as date and time, camera, type of recording, flag, and comments. - Page 28 Flag Flag sets the flags to search for. The flagged images search can be for any images that have been flagged by any of red, yellow, or green flags. Images have no flag by default. Comment Comments are the comments to search for. The commented images search can be for any snapshots that have comments added to them.
- Page 29 List View The result tab also enables the user to browse the all images in a list format. Double click on any video in the list to play the video. Result tab The list view displays the date and time of the recording as well as the camera name and flag if applied.
-
Page 30: View Recorded Snapshots
Click on the check box to the left of any one or more images and then make a selection at the bottom for the following functions. Add Flag Click on the Add Red, Add Green, or Add Yellow to add a flag to one or more video clips. -
Page 31: Zoom Recorded Snapshots
The View Image screen offers the following functions. Next/Back Click on the Next or Back button in the upper corners to navigate to the next image or back an image in the list. Zoom Image Click on the Zoom button to open the Zoom screen. View Image Full Screen Click on the Full Screen button to see the image full screen. - Page 32 SnapShot Zoom...
-
Page 33: Tours
TOU RS A Tour (similar to a Guard Patrol) is an automated display of video and images from selected live cameras, each for a specified time. There are three types of tours. IMAGE T O UR In an Image Tour, the images in the preview flow will be rotating automatically with the tour time set for those particular cameras. -
Page 34: My Profile
MY PROFILE The My Profile screen displays the information about the currently logged in user. If enabled, the profile information can be edited. My Profile Screen ALERT MET HO DS Alert methods are used to send alerts to the users based on the alert type and alert details specified by users. -
Page 35: Multi-View
MU LTI- VIEW Multi-view enables users to view multiple cameras all on the same screen. Select a Multi-view from the drop down list. The Multi-view screen displays images from each camera that are upgraded every few seconds. Double click on any image to view video from that camera. -
Page 36: Edit Multi-View
Add Multi-View EDIT MULT I-V IEW Click on the Information button next to the Multi-View drop down list to edit any custom Multi-View. -
Page 37: Full Screen
FU LL S CREEN To view live video from any camera full screen, click on the Full Screen button while the live video is playing. RECO RDED V IDEO FULL SCREEN To play recorded video full screen, click on the recorded video Full Screen button. -
Page 38: Settings Dashboard
S ETTING S DAS H BOARD Click on the Settings Dashboard button to view and edit system settings and preferences. The Settings Dashboard displays the following functions. -
Page 39: Nvr Settings
INT ERFACE SKINS Interface Smartvue S8 offers alternative interface appearances. Selected a skin style from the drop down below, then click on Save. The default blue skin is “Default.” T O URS A Tour (similar to a Guard Patrol) is an automated display of video and images from selected live cameras, each for a specified time. -
Page 40: Multi-View
Combined Tour In a combined tour, both the images and video from the selected camera will display for the designated times. To set the tour preferences, check the box next to the cameras desired for the tour, select the time to display each camera (can be set individually), select the tour type, then click on Save. - Page 41 Add Multi-View Edit Multi-View Click on the Information button next to the Multi-View drop down list to edit any custom Multi-View. There are two types of views, system view and user view. The system view is the default view and commonly used for all users. Only an administrator can modify it. User view is created by that particular logged in user.
-
Page 42: Manage Cameras
Once Add Cameras is clicked, the NVR will search for available cameras using the Smartvue wireless or any Smartvue cameras connected wired to the same network the NVR is connected to or any camera that is connected to either of the two ethernet ports on the back of the NVR. -
Page 43: Change Camera Order
A dialog will appear an prompt you to select the camera or cameras to remove from the system. Select to delete all video or images associated with that camera as well. Important – if you select to delete all images or videos from that camera when it is removed, you will not longer be able to view them. -
Page 44: Camera Settings
CAMERA S ETTING S Camera Settings defines the settings for any specific camera. There are General and Advanced camera settings. General Camera Settings GENERAL CAMERA SET T INGS Select any camera from the drop down list to edit its settings. Camera Name Enter a new camera name here and click on the cursor icon to save the new name. -
Page 45: Advanced Camera Settings
Adjusts the video contrast between light and dark. This can also be changed on live video to see immediate results by clicking on Live Preview (below). Brightness Adjusts the brightness of the video. This can also be changed on live video to see immediate results by clicking on Live Preview (below). - Page 46 For high quality at reduced bitrates, consider also reducing the frame rate. To find out how much video you can store on your NVR use the video storage calculator at the Smartvue website: http://www.smartvue.com/html/network_video_storage_calculat.html. Camera Speaker Volume Controls the internal speaker volume in the camera and the volume for any external speaker connected to the camera.
- Page 47 Deselect the Automatic setting to manually control the camera’s iris (or the amount of light that is permitted to enter to the sensor). This will over ride any automatic sensor settings. Reboot Camera Reboots the camera. Reset to Default Resets the camera to its defaults settings. All saved changes will be lost. Revert Video Angle Flips the video vertically to enable a camera to be mounted upside down.
-
Page 48: Motion Detection
MOTION DETECTION Motion Detection enables the user to configure actions the camera and system will perform when motion is detected in a specific area of the video at specific days and times. To set the motion detection settings, select a camera from the drop down list. - Page 49 Motion Detection Alert Settings Clicking on Add Alert button will display the Add Alert screen. Add Alert Description The description defines this alert. Send Alerts with Image Attached Check this box to have the Snapshot image attached to the email alert. Select User(s) Select the user or users to receive this alert.
-
Page 50: Setting The Motion Detection Region Of Interest
SET T ING T HE MO T IO N DET ECT IO N REGIO N O F INT EREST Click on the Set Motion Area hyperlink to set the region of interest to monitor for motion. To draw a region of interest, click on the pencil, then drag and drop the region of interest on the screen (there can only be one region of interest). -
Page 51: Alerts
ALERTS Alerts settings are used configure and manage alerts for users. Alerts may include motion being detected, user logins or even system status among others. Alerts List The screen shows all alerts with the event type, alert method and user details. Hover over the alert to see the assigned users are. -
Page 52: Test Alert
ADV ANCED O PT IO NS - SMT P SET T INGS Click on the Advanced Options below to access the SMTP settings. Smartvue offers free SMTP alert service but any custom SMTP service settings may be entered by selecting Custom from the Type drop down list. -
Page 53: Schedules
S CH EDU LES Schedules enable a user to create custom daily schedules for recording, motion detection, backups, or alerts. V IEW SCHEDULE To view a schedule, select it from the drop down list. Select Schedule to View ADD SCHEDULE Click on the Add New Schedule link to add a new schedule. -
Page 54: Assign Schedule
ASSIGN SCHEDULE Assign schedule is used for assigning the schedule for schedule event type like schedule recording, motion detection, backup, or alerts. To assign a schedule, click on the Assign Schedule link. Select the Event Type, the Options, and the Schedule then click on Assign Schedule to complete the assignment. -
Page 55: Security Settings
S ECU RIT Y S ET T IN G S The configuration of the wireless network interface is provided by the security page. The wireless network interface runs a DHCP server. Wireless Security Settings There are two types of modes to set the SSID and the key, they are Default and Custom. -
Page 56: Analog Tv Out
AN ALOG TV OU T The NVR offers the capability of supporting analog TV out by connecting a TV to the back of the NVR and then setting which camera(s) to display. To connect a TV to the NVR, use the attached cable (mini-jack to RCA) and connect one end to the NVR TV OUT and the other end to the RCA in jack on the TV. -
Page 57: Storage Settings
S TORAG E S ETTIN G S The STORAGE screen enables the configuration and management of media (video and images) storage. MAIN ST O RAGE Main Storage The MAIN STORAGE is the internal primary place where all the videos, images, and settings data for the NVR and cameras is stored. -
Page 58: Disk Cleanup
The user can automate the backup process by selecting one of the two backup types from the dropdown list. These are two modes of backup SCHEDULED BACKUP and AUTOMATIC BACKUP. The scheduled backup takes backups according to the user created schedule, whereas the automatic backup takes periodic backups every hour. Clicking BACKUP NOW will perform an immediate backup of the videos, images and logs. -
Page 59: Online Video Services
O NLINE V IDEO SERV ICES Using the Video Gallery, video files can be uploaded to video services sites for easy file sharing. Select one of the available services (YouTube is the default) then click on SAVE. Online Video Services (YouTube) To upload a video to the video service site, select the video clip from the Video Gallery and click on the UPLOAD button. -
Page 60: Nas Drive
eSATA Connector The user can set external SATA drive as the main storage for the NVR system using the set as main drive control. Once the ESATA drive is set as the main storage drive, all the videos and images will be stored on the external SATA drive. The user can format and connect or disconnect the external SATA drive with the NVR system. -
Page 61: Network Settings
N ET WORK S ET T IN G S Network Settings manages the wired network connections for the NVR. The NVR provides two wired 1GB network interfaces, primary and secondary. Primary and Secondary Network Interfaces PRIMARY NIC Primary NIC Configuration The Primary NIC can be configured as Static IP or Dynamic IP. -
Page 62: Secondary Nic
SECO NDARY NIC Secondary NIC Configuration The Secondary NIC can be enabled or disabled by the user using the Enable Secondary NIC checkbox. The secondary NIC can be configured with Static IP or Dynamic IP. If the Secondary NIC fails to communicate with a DHCP server, the IP address will be defaulted to 192.168.21.1. -
Page 63: Status
S TATU S The Status screen displays users and camera status and offers general system maintenance such as date and time settings, firmware upgrades, rebooting, and log access. SYST EM DAT E AND T IME System Date and Time Settings Click on the CLOCK icon to access date and time settings. -
Page 64: Software Upgrade
User Status lists all users registered to the NVR and their current status of either LOGGED IN or LOGGED OUT and whether they are logged in locally indicated by NVR of logged in remotely through the InsightServer indicated by IS. SO FT W ARE UPGRADE Firmware Upgrade The Software Upgrade section displays the current software version and the latest... -
Page 65: Storage Status
The InsightServer sections displays the status of the NVR’s connection to the InsightSever for remote access. Clicking on CHECK SPEED will check the speed of the connection to the InsightServer. ST O RAGE ST AT US Storage Status Storage Status displays the status of all storage devices connected to the NVR. V IEW LO GS View Logs Icon Click on the View Logs icon to view NVR logs. -
Page 66: Manage Users
MANAG E U S ERS The MANAGE USERS screen enables the management of user and roles. Roles are the specific privileges of a user and can be customized as needed. For example, a GUEST role can only allow a user to view video and not delete or change settings. Users List ADD NEW USER To add a new user, click on the ADD USER icon. -
Page 67: Alert Methods
CUSTOM QUESTION PASSWORD RECOVERY (OPTIONAL) Click on the question mark button to enable the Custom Question Password Recovery feature. The custom question dialog will appear. Enter a custom question and answer for the user to be prompted in case of a lost password. This is an optional feature. -
Page 68: Edit User
Edit User Alert DEL ETE U SER AL ERT Select any alert or alerts from the list by clicking the check box, then click on the DELETE icon. EDIT USER To edit a user, double click on any user name in the user list and the detailed information will appear below. -
Page 69: Delete User
DELET E USER To delete a user or users, select the user or users from the list above and click on the DELETE USER icon. Only users with ADMINISTRATOR roles can delete other users. RO LES The ROLES feature allows administrators to grant permissions and privileges based on specific features in the product. - Page 70 After selecting cameras for the role, a list of every screen and every feature in the NVR will appear. Select which screens to make available to the user and which specific features to enable. Add New Role Role Feature Selection...
-
Page 71: Edit Role
EDIT RO LE Double click on any role in the list to edit that role. The role details will appear below and can be edited. Edit Role All users with that role will be affected by any changes. The ADMINISTRATOR and GUEST roles cannot be edited. DELET E RO LE Select any role or roles from the roles list and then click on the DELETE ROLE icon to delete. -
Page 72: Remote Viewing
IP address for the NVR with the /smartvue/iphone path at the end. For example, if the IP address of the NVR is 192.168.1.20, the address for the iPhone and cellular interface would be 192.168.1.20/smartvue/iphone. -
Page 73: Insightserver
Camera View INSIGHT SERV ER InsightServer is a free service that enables simple remote access from almost any PC or cell phone. See the section in this manual titled INSIGHTSERVER for more information on how to register with and use the InsightServer service. -
Page 74: Insightserver
InsightServer incorporates the most comprehensive implementation of the IETF standards STUN, TURN and ICE for 100% firewall and NAT traversal with more than 95% of remote access completed peer-to-peer in UDP-enabled networks. Smartvue S8 traverses simple NATs, nested NATs, UPnP gateways, firewalls, and web-proxies using UDP, TCP or HTTP. -
Page 75: Using Insightserver
InsightServer is a FREE service for one user. Additional users can be purchased separately. Contact your dealer or visit www.smartvue.com for more details. USING INSIGHT SERV ER To remotely manage and access your NVRs and cameras, from almost any PC or Apple computer, go to www.insightserver2.com... - Page 76 Click on any video recorder in InsightServer and be connected instantly with full administration control. Search and playback recorded video, view any camera, edit users, change camera settings and add schedules as needed. InsightServer is not required for remote access to any Smartvue S8 NVR.
-
Page 77: Analog In
AN ALOG IN The Smartvue S8 NVR supports up to two analog video and audio inputs and the Smartvue S8 cameras support one analog input for existing analog video surveillance cameras or other video sources. USING ANALO G CAMERAS W IT H T HE NV R Using the cables provided with the NVR, plug the analog cameras into the back of the NVR at the ANALOG IN jacks. - Page 78 ADVANCED SETTINGS. Check the ENABLE ANALOG VIDEO INPUT option and then click on SAVE. The analog camera will now appear in place of the Smartvue S8 camera. Enable Analog Video Input – Camera...
-
Page 79: Audio/Speaker Out (Camera)
AU DIO/ S PEAK ER OU T (CAMERA) The Smartvue S8 camera enables speaker attachment for audio out. Using the cable provided with the camera, plug one end into the Audio Out jack and the other end to the speaker. -
Page 80: Reset
RES ET To reset the Smartvue S8 NVR and all connected cameras to their original factory settings and last valid software installation, insert a paper clip into the small hole on the back and press for 10 seconds. Reset Point IMPORTANT: Resetting the NVR will DELETE all videos and images and REMOVE all settings, including network settings. -
Page 81: Security Lock
S ECU RITY LOCK The Smartvue S8 NVR supports hardware locking to prevent theft. The steel loop that sticks out from the back of the NVR is part of the internal metal frame and can be connected to any stationary item to prevent moving or theft. -
Page 82: Logs
LOG S The LOGS screen tracks NVR activity and enables reporting on specifics such as users and login times. To access the LOGS screen, from the bottom of the STATUS screen, click on the VIEW LOGS icon at the bottom, the LOGS screen will appear. Logs List Select a log type from the drop down list. -
Page 83: Advanced Log Options
U SER L OG The user log reports on features from the user interface as well as user logins. SYSTEM L OG The system log reports on hardware features such as a power outage. APPL ICATION L OG The application log reports on all NVR software features. ADV ANCED LO G O PT IO NS In the advanced log options, the user can configure the log category, audit level and SCP options for log file downloads. - Page 84 Enable SCP Select ENABLE SCP and complete the details required. Click the SAVE button to transfer the log file to the designated path.
-
Page 85: Safety Instructions And Notices
It may fall, causing serious injury to a child or adult, and damage to the product. Power Source – The Smartvue camera power adaptor should be operated only from the type of power source indicated on the label. If you are not sure of the type of power supply, consult the dealer or local power company. - Page 86 No one is permitted to disassemble or modify this product without the express permission of Smartvue Corporation. Alteration of this product will void the warranty and may void the user’s authority to operate this equipment under FCC guidelines.
-
Page 87: Wireless Range & Interference
GHz frequency subject to local regulations. The modulation is IEEE 802.11n (OFDM). Smartvue S8 cameras have been tested to a range of over 1,000 feet line of sight. Walls, trees, objects, and metal of any sort as well as certain environments will affect wireless range and may cause interference. -
Page 88: Warranty
Neither Smartvue nor its affiliates shall be liable for damages, losses, costs, or expenses incurred by purchaser or third parties as a... -
Page 89: Power Requirements
POWER REQU IREMEN TS Every Smartvue product comes with its own power supply unit. The power requirements for each product are as follows: Smartvue S8C4000 Network Camera – 12V DC 1.25A Smartvue S8CD5000 Network Dome Camera – 12V DC 1.25A... - Page 90 TECH N ICAL S U PPORT Smartvue is committed to helping you make your world a safer place. For the most personal attention, please contact your authorized Smartvue dealer for technical support. For 24-hour technical support, visit www.smartvue.com and click on SUPPORT.
- Page 91 INDEX 1600x1200, 47 Auto Low Light Mode, 45 1-Click Surveillance™, 2 AUTOMATIC BACKUP, 57 320x280, 46, 47 available disk space, 56 5.150 ~ 5.850, 86 Backup, 56 720x480, 46 BACKUP NOW, 57 Accessories, 84 Backup Storage, 56 Add Alert, 50 Be There®, 2 Add Cameras, 16 Bit Rate, 46...
- Page 92 D1, 46 ENABLE TV OUT, 55 Damage Requiring Service, 84 Enable Video Recording, 45 Date and Time, 62 Environment Settings, 45 default gateway, 60 eSATA, 58 DELETE ALL IMAGES, 56 estimated duration in hours, 56 DELETE ALL VIDEOS, 56 Ethernet cable, 9 Delete Comment, 25 Exit, 21 Delete Flag, 25...
- Page 93 Image Gallery, 20, 27 MANage Users, 65 Image Tour, 33 MeshCam™, 2 InsightServer, 73 mini-jack, 55 InsightServer Camera Interface, 74 MOTION DETECTION, 47 InsightServer Registration, 74 Motion Detection during tours, 33 InsightServer Status, 63 Motion Detection Region of Interest, 49 InsightServer™, 2 MPEG4, 46 Intellectual Property Notice, 2...
- Page 94 Revert Video Angle, 46 Smart Surveillance™, 2 ROLE DESCRIPTION, 68 SmartIP™, 2 Role Feature, 69 SmartMesh™, 2 ROLE NAME, 68 Smartvue S8C4000, 12 Roles, 68 Smartvue S8CD5000, 14 Safari Web Browser, 9 Smartvue S8NVR1000, 13 safety instructions, 84 Smartvue®, 2...
- Page 95 SnapShot, 19 UNIX, 82 Software Upgrade, 63 upload a video, 58 SSH, 82 Upload Video, 26 SSID, 54 UPnP gateway, 73 Static IP, 60 User Log, 82 STATUS, 62 User Name, 65 Storage Management, 58 User Status, 62 STORAGE SETTINGS, 56 Using InsightServer, 74 Storage Status, 64 VBI™, 2...
- Page 96 ©1996-2009 Smartvue Corporation, all rights reserved. No part of this publication may be reproduced, stored, in a retrieval system, or transmitted in any form or by any means, electronic, mechanical, photocopying, recording, or otherwise, without the prior written permission of Smartvue Corporation. The information contained herein is designed only for use with this Smartvue product.
Need help?
Do you have a question about the S8 and is the answer not in the manual?
Questions and answers