
Related Manuals for Fanimation The Zonix


Summary of Contents for Fanimation The Zonix
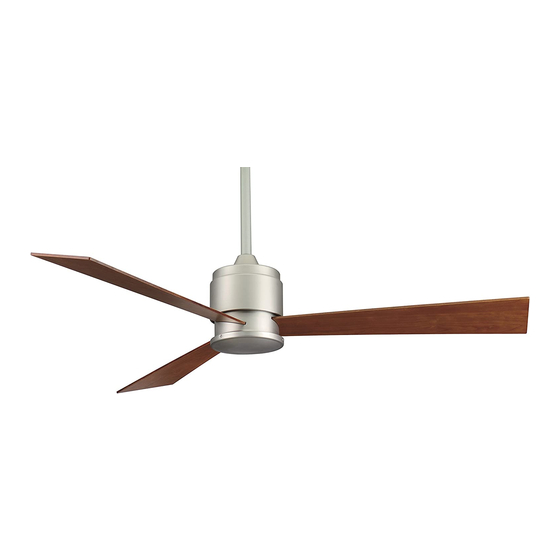
- Page 1 The Zonix ™ Wet Location Ceiling Fan Net Weight 6.7 kg (14.6 lbs) Model No. FP4640**-220 OWNER’S MANUAL READ AND SAVE THESE INSTRUCTIONS...
-
Page 2: Table Of Contents
Important Safety Instructions WARNING: To avoid fire, shock and serious personal injury, follow these instructions. 1. Read your owner’s manual and safety information before installing your new fan. Review the accompanying assembly diagrams. 2. Before servicing or cleaning unit, switch power off at service panel and lock service panel disconnecting means to prevent power from being switched on accidentally. -
Page 3: Tools Needed For Assembly
• Canopy Screw Cover designated specifically for use with this product by • Motor Coupling Cover Fanimation. Substitution of parts or accessories not • Switch Cup Cover Assembly designated for use with this product could result in •... -
Page 4: U P N C A I K G N N I R T S C U Energy Effi Cient Use Of Ceiling Fans
2.4-2.7 m above the floor for optimal airflow. Consult your down into the occupied space. Remember to adjust your Fanimation Retailer for optional mounting accessories. air conditioner when using your ceiling fan-additional energy and dollar savings could be realized with this simple step! Turn Off When Not in the Room Ceiling fans cool people, not rooms. -
Page 5: How To Assemble This Ceiling Fan
How to Assemble This Ceiling Fan 1. Remove the hanger ball by loosening the setscrew in the hanger ball until the ball falls freely down the Hanger downrod. Remove the pin from the downrod, then Ball remove the hanger ball. Retain the pin and hanger ball for reinstallation in Step 5. -
Page 6: How To Hang This Ceiling Fan
How to Assemble This Ceiling Fan 6. Before installing fan, measure up approximately 15-25 cm above top of downrod/hanger ball assem- bly. Cut off excess wire and strip back insulation 1 cm from end of wire. (Figure 6) NOTE: All set screws must be checked and retightened where necessary before installation. -
Page 7: How To Wire This Ceiling Fan
How to Wire This Ceiling Fan Ceiling fans must be installed by a licensed electrician. WARNING To avoid possible fire or shock, be sure electricity is MAIN FUSE BOX turned off at the main fuse box before wiring. (Figure 11) Securely connect the green/yellow earth wires from the Figure 11 hanger ball and the hanger bracket and the supply... -
Page 8: Installing The Canopy Housing
Installing the Canopy Housing 1. Remove one of the two shoulder screws in the hanger bracket. Loosen the second shoulder screw without fully removing it. Assemble canopy by rotating key slot in canopy over shoulder screw in hanger bracket. Tighten shoulder screw. Fully assemble and tighten second shoulder screw that was previously removed. -
Page 9: Maintenance
Mounting the Fan Blades and Switch Cup Cover Assembly (cont’d) 5. Assemble the switch cover assembly onto the support cover switch cup with three screws provided. (Figure 20) Reverse Switch Information Season Rotation Direction Switch Position Summer Counter-Clockwise Left Winter Clockwise Right Reverse Switch... -
Page 10: Parts List
Parts List Model FP4640**-220 Ref. # Description Part # Hanger Bracket Assembly with Screws AP255BL-220 Downrod/Hanger Ball Assembly ADR1-45** P464001** Ceiling Canopy Canopy Screw Cover AP260** Motor Coupling Cover AP801202** AMA4640**AU-220 Fan Motor Assembly c t i p Cover Assembly AP464010** Blade Set (3) AP464005**... -
Page 11: Exploded-View Illustration
The Zonix ™ Model FP4640**-220 Exploded-View Figure 1 NOTE: The illustration shown is not to scale or its actual confi guration may vary. Product/parts are subject to change without notice. -
Page 12: Trouble Shooting
Trouble Shooting WARNING For your own safety, turn off power at fuse box or circuit breaker before trouble shooting your fan. Some suggested remedies require the attention of a licensed electrician. Trouble Probable Cause Suggested Remedy 1. Fuse or circuit breaker blown. 1. - Page 13 for Australian purchasers MyFan Warranty Our goods come with guarantees that cannot be excluded under the Australian Consumer Law. You are entitled to a refund or replacement for a major failure and for compensation for any other reasonably foreseeable loss or damage. You are also entitled to have the goods repaired or replaced if the goods fail to be of acceptable quality and the failure does not amount to a major failure.
- Page 14 Distributed in Australia by MyFan Pty Ltd www.myfan.com.au Copyright 2012 Fanimation 2012/04 V.01...
Need help?
Do you have a question about the The Zonix and is the answer not in the manual?
Questions and answers