BIXOLON SRP-500 User Manual
Hide thumbs
Also See for SRP-500:
- Driver installation manual (31 pages) ,
- Command manual (29 pages) ,
- Installation manual (8 pages)
Table of Contents
Advertisement
Advertisement
Table of Contents

Subscribe to Our Youtube Channel
Related Manuals for BIXOLON SRP-500


Summary of Contents for BIXOLON SRP-500
- Page 1 User’s Manual SRP-500 Inkjet Printer Rev. 1.05 http://www.bixolon.com...
-
Page 2: Safety Precautions
SRP-500 ■ Safety Precautions In using the present appliance, please keep the following safety regulations in order to prevent any hazard or material damage. WARNING Violating following instructions can cause serious injury or death. Do not plug several products in one multi-outlet. - Page 3 SRP-500 CAUTION Violating following instructions can cause slight wound or damage the appliance. If you observe a strange smoke, odor or noise from Keep the desiccant out of children’s reach. the printer, unplug it before taking following measures. • If not, they may eat it.
- Page 4 Neither BIXOLON nor its affiliates shall be liable to the purchaser of this product or third parties for damages, losses, costs, or expenses incurred by purchaser or third parties as a result of : accident, misuse, or abuse of this product or unauthorized modifications, repairs, or alterations to this product, or (excluding the U.S) failure to strictly comply with...
-
Page 5: Emc And Safety Standards Applied
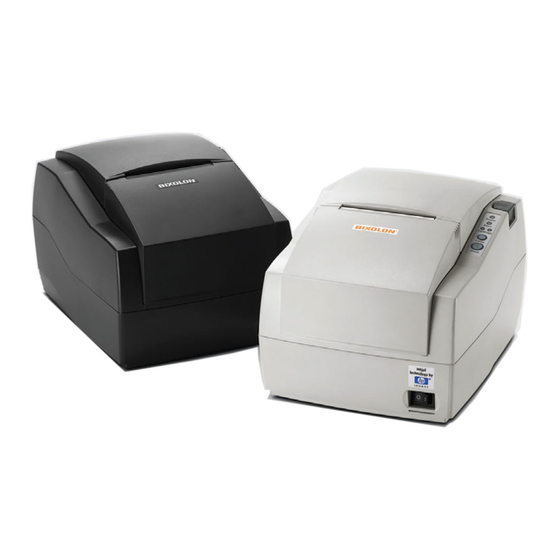
SRP-500 ■ EMC and Safety standards Applied Product Name : SRP-500 The following standards are applied only to the printers that are so labeled. Europe : CE marking, TUV/GS : EN60950 ; 1999 North America : EMI : FCC Class A Safety standards : UL / C-UL : UL60950-3rd. - Page 6 SRP-500 ■ Introduction * Front view * Rear view - 6 - Rev. 1.05...
- Page 7 SRP-500 * Dimension The SRP-500 is a high-quality inkjet POS printer. This one-station printer has the following features. 1. Compact design and light-weight. 2. High-speed printing using logic-seeking. 3. Easy to use : clamshell mechanism. 4. High reliability and long life due to the use of stepping motors for both carriage return and paper feeding.
-
Page 8: Table Of Contents
SRP-500 ■ Table of Contents 1. Setting Up the Printer ....................9 1-1 Unpacking........................9 1-2 Choosing a place for the printer................10 1-3 Using the control panel .................... 11 2. Connecting the cables....................12 2-1 Connect the AC adapter according to the following procedure........ 12 2-2 Connecting the interface cable ................ -
Page 9: Setting Up The Printer
SRP-500 1. Setting Up the Printer 1-1 Unpacking Your printer box should include the items shown in the illustration below. If any items are damaged or missing, please contact your dealer. - 9 - Rev. 1.05... -
Page 10: Choosing A Place For The Printer
SRP-500 1-2 Choosing a place for the printer 1-2-1 Avoid locations that are subject to direct sunlight or excessive heat. 1-2-2 Avoid using or storing the printer in a place subject to excessive temperature or moisture. 1-2-3 Do not use or store the printer in a dirty location. -
Page 11: Using The Control Panel
SRP-500 1-3 Using the control panel Most of the functions of this printer are governed by software, but you can monitor the printer’s status by looking at the lights on the control panel and for some procedures you will use the buttons. -
Page 12: Connecting The Cables
SRP-500 2. Connecting the cables CAUTION ※ Before connecting the printer to the power supply, make sure that the voltage and power specifications match the printer's requirements. Using an incorrect power supply can cause serious damage to the printer. 2-1 Connect the AC adapter according to the following procedure 2-1-1 Make sure the printer is turned off. -
Page 13: Connecting The Interface Cable
SRP-500 2-2 Connecting the interface cable Connect the printer to the host ECR (host computer) though an interface cable matching the specification of the printer and the host ECR (host computer). Be sure to use a drawer that matches the printer's specification. -
Page 14: Setting The Dip Switches
SRP-500 3. Setting the Dip Switches Although the factory settings are best for almost all users, if you have special requirements, you can change the DIP switch. If you need to change settings, follow the steps below to make your changes. -
Page 15: Serial Interface (Rs232C)
SRP-500 3-1 Serial Interface (RS232C) Switch Function Default Emulation Selection Refer to the following table Auto cutter Enable Disable Cartridge one cartridge two cartridges Density Bold Normal Special Function Enable Disable Near end sensor Enable Disable Undefined DIP switch Setting 1 Function... -
Page 16: Parallel / Usb Interface (Parallel-Ieee1284)
SRP-500 3-2 Parallel / USB Interface (Parallel-IEEE1284) Switch Function Default Emulation Selection Refer to the following table Auto cutter Enable Disable Cartridge one cartridge two cartridges Density Bold Normal Special Function Enable Disable Near end sensor Enable Disable Undefined DIP switch Setting 1 Function... -
Page 17: Setting The Memory Switches
SRP-500 4. Setting the memory switches 4-1 Setting methods 1) Memory switch setting utility (Please check out our bundle CD) 2) Control from emulation command (refer to command manual) 4-2 Memory switch description SW no. Description remark MSW1 Selection for the default code page... -
Page 18: Star Emulation
SRP-500 4-3 Star emulation 4-3-1 Setting methods 1) Memory switch setting utility (Please check out our bundle CD) 2) Control from emulation command (refer to command manual) Memory Switches are from MSW 0 to MSW 8. They are stored in non-volatile memory (flash memory). - Page 19 SRP-500 4-3-2 Memory switch description SW no. Description remark MSW0 Selection for the default code page MSW1 Reserved MSW2 Reserved MSW3 Reserved MSW4 Selection for Carriage return MSW5 Reserved MSW6 Reserved MSW7 Reserved MSW8 Reserved Default SW no. Factory Setting (n1 n2 n3 n4) MSW 0 “0000”...
- Page 20 SRP-500 MSW1 details Character Table Page 0 (PC437 : U.S.A) Page 2 (PC850 : Multilingual) Page 3 (PC860 : Portuguese) Page 4 (PC863 : Canadian-French) Page 5 (PC865 : Nordic) Page 16 (WPC1252 : Latin I) Page 17 (PC866 : Cyrillic #2)
-
Page 21: Installing New Ink Cartridge(S)
SRP-500 5. Installing new Ink cartridge(s) 5-1 Remove new ink cartridge from sealed pouch. (Hold cartridge by round plastic tab to avoid contamination) 5-2 Remove Mylar from face of new cartridge. ※ CAUTION Do not touch ink cartridge's metallic connector surface with your fingers. - Page 22 SRP-500 5-5 Take out old ink cartridge(s). Place new cartridge(s) into carriage. Hold plastic tab to ensure clean installation. Black cartridge goes into the left carriage. The color cartridge goes into right carriage. (tab faces front of printer.) 5-6 Close cartridge holder.
-
Page 23: Installing Or Replacing Paper Roll
SRP-500 6. Installing or replacing paper roll ※ CAUTION Notice the caution label and do not touch the auto cutter blade when you open rear cover. 6-1 To prevent data loss, make sure that the printer is not receiving data. - Page 24 SRP-500 6-3 Remove the used paper roll core if there is one. 6-4 Insert the paper roll as shown. 6-5 Be sure to note the correct direction that the paper should come off the paper roll. 6-6 Pull out small amount of paper as shown.
-
Page 25: Self Test
SRP-500 7. Self Test The self test lets you know if your printer is operating properly. It checks the control circuits, printer mechanisms, print quality, ROM version, and DIP switch settings. The test is independent of any other equipment or software, so it is a good idea to run it when you first set up the printer or if you have any trouble. -
Page 26: Hexadecimal Dumping
SRP-500 8. Hexadecimal Dumping This feature allows experienced users to see exactly what data is coming to the printer. This can be useful in finding software problems. When you turn on the hexadecimal dump function, the printer prints all commands and other data in hexadecimal format along with a guide section to help you find specific commands. -
Page 27: Specification
SRP-500 9. Specification Printing Printing method Serial ink jet matrix method Printing direction Bidirectional(logic seeking) with friction feed Resolution 104 x 96(dpi): Text 208 x 96(dpi): Graphic Characters per line Max 42(characters) Printing speed 6.5 LPS (Lines Per Second) at 40 columns Printing Width 61.5mm... -
Page 28: Appendix - Troubleshooting
SRP-500 10. Appendix - Troubleshooting This chapter gives solutions to some printer problems you may have. 10-1 The printer does not start printing 10-1-1 Are any of the control panel lights on? If no control panel lights are on, check the following: - Make sure that the printer is turned on. -
Page 29: You Want To Check The Operation Of The Printer By Itself
SRP-500 10-3 You want to check the operation of the printer by itself Try to run the self test to check that the printer works properly. See the self test instructions in Chapter 7 to run the self test. If the self test does not work, contact your supervisor or a service person.
Need help?
Do you have a question about the SRP-500 and is the answer not in the manual?
Questions and answers