BIXOLON SRP-500 Installation Manual
Hide thumbs
Also See for SRP-500:
- Driver installation manual (31 pages) ,
- User manual (29 pages) ,
- Command manual (29 pages)
Advertisement
Available languages
Available languages
Table of Contents
KN06-00002A (Rev.1.9)
◈ Information
This Installation Guide includes a brief outline of information necessary for
product installation. For more detailed installation information, please refer to the
user manual in the enclosed CD. The contents of the CD include the following.
1. Manual: User Manual, Code Chart, Control Commands
2. Drivers: Windows Drivers, OPOS Drivers
3. Utilities: a logo download tool
We at BIXOLON maintain ongoing efforts to enhance and upgrade the functions
and quality of all our products. In following, product specifications and/or user
manual content may be changed without prior notice.
◈ Components
Cable Cover
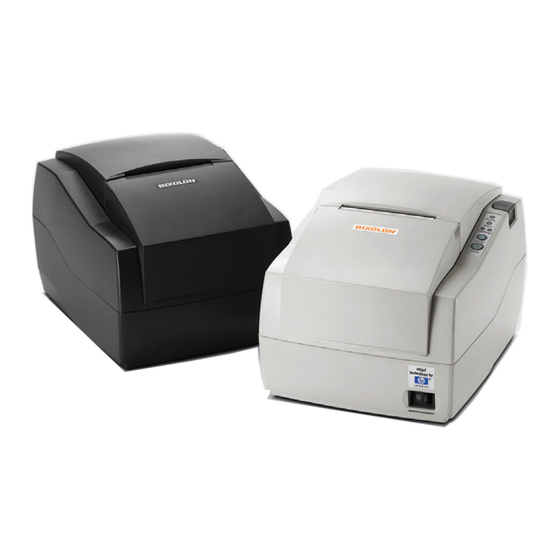
SRP-500
AC/DC Adaptor
◈ Connecting the cables
1. Plug the power cord into the AC Adaptor, and then plug the AC Adaptor into
the power connector of the printer
2. Turn off the printer and the host ECR (host computer).
3. Check the interface cable (Serial, Parallel, USB), and connect the interface
connector cable accordingly.
4. Plug the drawer kick-out cable into the drawer kick-out connector on the
printer.
※ Do not use an adapter that was not supplied with the printer.
Interface
connector
Interface cable
(Serial/Parallel/USB)
◈ Installing the Ink Cartridge
1. Turn on the printer.
2. Remove new ink cartridge from the pouch and remove the tape affixed to the
front side.
3. Open front cover of the printer and pull the cartridge holder forward.
4. Take out old ink cartridge(s) and place new cartridge(s) into carriage. Hold
round tab to ensure clean installation.
Black cartridges go into left carriage, and color cartridges go into right
carriage. Tab faces front of printer.
5. Close cartridge holder(s) and front cover.
Tab
Tape
Metallic connector
area
Paper Roll
Ink Cartridge
Power cord
Installation Guide
Drawer kick-out
connector
Power connector
Adaptor
Power cord
Drawer kick-
out cable
Front cover
Cartridge holder
Printer Installation Guide
INKJET PRINTER
◈ Installing the Paper Roll
◈ Using the Operation Panel
• Power (LED)
Procuct Installation CD
Procuct Installation CD
Procuct Installation CD
When turning on the power, a green LED will be lit.
CD
• Error (LED)
When an error occurs, a red LED will be lit. (e.g. no paper,
cover ajar, etc.)
• Cartridge (LED)
Check the status of the right cartridge with the right LED, and
the left cartridge, with the left LED. For monochrome, the left
LED is used. The left cartridge is black, and the right cartridge is
color.
• Clean (Button)
Use this button to clean the ink cartridge heads.
• Feed (Button)
Press the FEED button once to discharge extra paper. Holding
down the FEED button will discharge paper continuously until
the button is released.
◈ Setting the DIP Switches
Changing Dip Switch settings must be done when the printer is off. Any changes
done while the printer is on will not be processed.
1. Serial Interface
• DIP Switch 1
SW
Function
1-1
Emulation
1-2
1-3
Auto Cutter
1-4
Cartridge
1-5
Density
1-6
Special Function
1-7
Near-End Sensor Status
1-8
Undefined
• DIP Switch 2
SW
Function
2-1
Data Receive Error
2-2
2-3
Handshaking
2-4
Data Length
2-5
Parity Check
2-6
Parity Selection
2-7
Baud Rate Selection
2-8
2. Parallel / USB Interface
• DIP Switch 1
SW
Function
1-1
Emulation
1-2
1-3
Auto Cutter
1-4
Cartridge
1-5
Density
1-6
Special Function
1-7
Near-End Sensor Status
1-8
Undefined
SRP-500
1. Open the rear cover.
2. Insert a new paper roll, making sure to
align it properly.
3. Pull out a small amount of paper, and
close the rear cover.
※ Note
Printing quality may not be optimum if
recommended paper is not used.
(Refer to the User's Manual.)
ON
OFF
Refer to the following table 1
Enable
Disable
One cartridge
Two cartridges
Bold
Normal
Enable
Disable
Enable
Disable
Undefined
ON
OFF
Print ?
Ignore
Reserved
DTR/DSR
XON/XOFF
7 bits
8bits
Enable
Disable
EVEN
ODD
Refer to the following table 2
ON
OFF
Refer to the following table 1
Enable
Disable
One cartridge
Two cartridges
Bold
Normal
Enable
Disable
Enable
Disable
Undefined
Default
OFF
OFF
ON
OFF
OFF
OFF
ON
OFF
Default
OFF
OFF
OFF
OFF
OFF
OFF
OFF
OFF
Default
OFF
OFF
ON
OFF
OFF
OFF
ON
OFF
Advertisement
Table of Contents

Related Manuals for BIXOLON SRP-500


Summary of Contents for BIXOLON SRP-500
- Page 1 3. Utilities: a logo download tool ※ Note We at BIXOLON maintain ongoing efforts to enhance and upgrade the functions Printing quality may not be optimum if and quality of all our products. In following, product specifications and/or user recommended paper is not used.
-
Page 2: Specifications
Auto Line Feed Enable Disable 1. After running the product installation CD, run the Inkjet Printer > SRP-500 > Drivers > Windows Driver > Drivers Folder > Win SRP-500_Vx.x.x.exe file. 2. In the opening installation window, click on Next. 3. In the Ready to Install the Program window, click on Install. - Page 3 3. Utilitaires : Un outil de téléchargement de logo ※ Remarque La qualité d'impression peut ne pas être Nous, BIXOLON, poursuivons sans cesse nos efforts afin d’améliorer et de optimale si un papier autre que celui mettre à jour les fonctions et la qualité de tous nos produits.
-
Page 4: Caractéristiques
6. Dans la fenêtre Question, sélectionner Oui puis l’ordinateur redémarrera. Jeu de caractères Caractère international : 32 7. Après le redémarrage, ouvrir Démarrer > Paramètres > Imprimantes et Fax > Icône BIXOLON Graphique étendu : 128 x 12 page SRP-500 > Clic droit > Propriétés. - Page 5 3. Programas utilitarios: herramienta para descarga de logos ※ NOTA En BIXOLON mantenemos esfuerzos continuos para mejorar y actualizar las La calidad de la impresión puede no ser funciones y la calidad de todos nuestros productos. En lo sucesivo, las óptima si no se utiliza el papel...
-
Page 6: Especificaciones
Activar Desactivar APAGADO 1. Luego de ejecutar el CD de instalación del producto, ejecute el archivo Impresora de automática chorro de tinta > SRP-500 > Controladores > Controladores de Windows > Carpeta APAGADO de Controladores > Win SRP-500_Vx.x.x.exe. APAGADO APAGADO 2. - Page 7 3. Utilitários: uma ferramenta para transferência de logótipos ※ Nota A qualidade de impressão pode não ser Nós, na BIXOLON tentamos melhorar constantemente e actualizar as funções e otimizada se o papel recomendado não for qualidade dos nossos produtos. Deste modo, as especificações do produto e/ou o utilizado.
-
Page 8: Teste Automático
Predefinição ACTIVADA DESACTIVADA fixa (RS-232C) série: SRP-500C,CG (IFC-S TYPE) Alimentação 1. Depois de executar o CD de instalação do produto, execute Inkjet Printer > SRP-500 > Activar Desactivar DESACTIVADA automática de linha Drivers > Windows Driver > Drivers Folder > Ficheiro Win SRP-500_Vx.x.x.exe.
Need help?
Do you have a question about the SRP-500 and is the answer not in the manual?
Questions and answers