BIXOLON SRP-330II User Manual
Hide thumbs
Also See for SRP-330II:
- User manual (36 pages) ,
- Installation and safety manual (16 pages) ,
- Command manual (125 pages)
Table of Contents
Advertisement
Advertisement
Table of Contents

Related Manuals for BIXOLON SRP-330II


Summary of Contents for BIXOLON SRP-330II
- Page 1 User’s Manual SRP-330II/332II Thermal Printer Rev. 1.00 http://www.bixolon.com...
-
Page 2: Safety Precautions
SRP-330II/332II ■ Safety Precautions In using the present appliance, please keep the following safety regulations in order to prevent any hazard or material damage. WARNING Violating following instructions can cause serious injury or death. Do not plug several products in one multi-outlet. - Page 3 SRP-330II/332II CAUTION Violating following instructions can cause slight wound or damage the appliance. Keep the desiccant out of children’s reach. If you observe a strange smoke, odor or noise from the printer, unplug it before taking following • If not, they may eat it.
- Page 4 SRP-330II/332II ■ Warning - U.S.A This equipment has been tested and found to comply with the limits for a Class A digital device pursuant to Part 15 of the FCC Rules. These limits are designed to provide reasonable protection against harmful interference when the equipment is operated in a commercial environment.
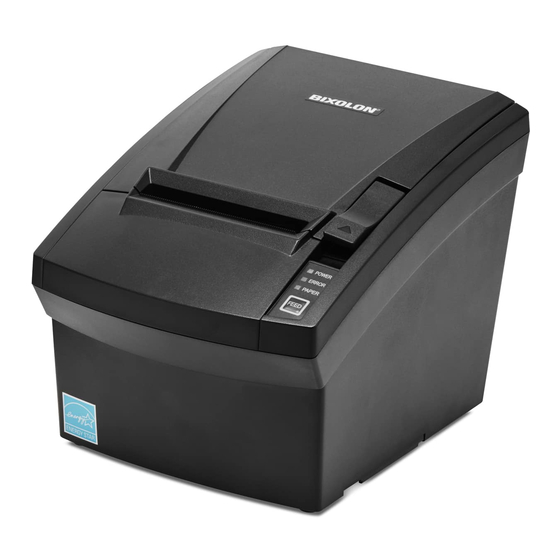
- Page 5 SRP-330II/332II ■ Introduction The SRP-330II/332II Roll Printer is designed for use with electronic instruments such as system ECR, POS, banking equipment, computer peripheral equipment, etc. The main features of the printer are as follows: 1. Print at a max. speed of 220mm/s.
-
Page 6: Table Of Contents
SRP-330II/332II ■ Table of Contents 1. Setting Up the Printer ....................7 1-1 Unpacking ........................7 1-2 Connecting the Cables ....................8 1-2-1 Serial Interface(RS-232C) ................8 1-2-2 Parallel Interface(IEEE1284) ................ 10 1-2-3 USB Interface ....................11 1-2-4 Ethernet Interface ..................11 1-3 Drawer Cable ...................... -
Page 7: Setting Up The Printer
SRP-330II/332II 1. Setting Up the Printer 1-1 Unpacking Your printer box should include these items. If any items are damaged or missing, please contact your dealer for assistance. SRP-330II/332II Cover Cable Paper Roll Manual AC/DC Adapter 2” Partition Power Cord... -
Page 8: Connecting The Cables
SRP-330II/332II 1-2 Connecting the Cables Connect the printer to the host computer using the right interface cable that complies with the specifications of the interface. The drawer to be used with the printer should meet the specifications of the printer. - Page 9 SRP-330II/332II 1-2-1-2 Dual Serial Interface RJ45 DSUB 9P Signal Name Direction Function Pin No. Pin No. Output Transmit Data Input Receive Data Input Data Set Ready Signal Ground Output Data Terminal Ready Input Clear To Send Output Ready To Send ※...
-
Page 10: Parallel Interface(Ieee1284)
SRP-330II/332II 1-2-2 Parallel Interface(IEEE1284) Compatibility Source Nibble Mode Byte Mode Mode Host nStrobe HostClk HostClk Host / Printer Data 0(LSB) Data 0(LSB) Host / Printer Data 1 Data 1 Host / Printer Data 2 Data 2 Host / Printer Data 3... -
Page 11: Usb Interface
White Brown Brown * If you push the function key, IP and MAC information can be obtained. * Refer to the Network User Manual that is available from the BIXOLON website for more detailed information. - 11 - Rev. 1.00... -
Page 12: Drawer Cable
SRP-330II/332II 1-3 Drawer Cable Connect the cash drawer connecting cable to the cash drawer connector located in the back of the printer. ※ Warning Use a cash drawer that meets the printer specifications. Using an improper cash drawer may cause faults in the cash drawer and the printer. -
Page 13: Setting The Dip Switches
SRP-330II/332II 1-4 Setting the Dip Switches 1-4-1 Serial / Dual Serial Interface Settings • DIP Switch 1 Switch Function Default Auto Cutter Control Disable Enable Flow Control XON/XOFF DTR/DSR Data Length 7 bits 8 bits Parity Check Parity Selection EVEN... -
Page 14: Installing Or Replacing The Paper Roll
SRP-330II/332II 1-5 Installing or Replacing the Paper Roll ※ Caution Use the paper rolls in supported sizes only. The printer may not recognize the availability of the paper correctly if the paper roll is stuck to the tube. 1-5-1 Make sure that the printer is in standby mode and that no data is sent before replacing the paper as it can lead to data loss. - Page 15 SRP-330II/332II 1-5-5 Check the orientation of the roll paper when inserting it into the printer. 1-5-6 Pull out a small amount of paper as shown in the picture, and close the cover. ※ Caution When closing the cover, hold down the center of printer cover firmly so that paper roll is loaded correctly.
-
Page 16: Recommended Papers
SRP-330II/332II 1-6 Recommended Papers - TF50KS-E(Paper Thickness: 65μm): Nippon Paper Industries Co., Ltd. - PD 150R(Paper Thickness: 75μm): New Oji Paper Mfg. Co., Ltd. - PD 160R(Paper Thickness: 75μm): New Oji Paper Mfg. Co., Ltd. - P350(Paper Thickness: 62μm): Kansaki Specialty Paper, Inc.(USA) - P220AG(Paper Thickness: 65μm): Mitsubishi Paper Mills Limited... -
Page 17: Mounting 2" Partition
SRP-330II/332II 1-7-2 Mounting 2” Partition Hang the partition at the front and press down the rear to mount the 2” partition as shown in the picture. ※ Caution After using 2"(58mm) paper roll, do not replace it with 3"(79.5±0.5mm) paper roll. -
Page 18: Removing Paper Jam
SRP-330II/332II 1-8 Removing Paper Jam 1-8-1 When a paper jam occurs, turn the printer OFF and then back ON, open the cover, and remove the jammed paper. ※ In case of a minor jam, it may be possible that the operating blade returns to the original position and cover can be opened simply by turning the printer OFF and then back ON. -
Page 19: Connecting The Computer
SRP-330II/332II 1-9 Connecting the computer Use the cable that comes with the printer to connect the printer to computers. 1-9-1 Plug the cable connector securely into the printer’s interface connector located in the back of the printer. 1-9-2 Tighten the screws on the cable connector.(Only Serial Interface) (Serial Cable Sample Image) 1-9-3 Connect the other end of the cable to the COM port of the PC. -
Page 20: Self Test
SRP-330II/332II 2. Self Test The self-test checks whether the printer has any problems. If the printer does not function properly, contact your dealer. The self-test procedure is as follows: 2-1 Check whether the paper is inserted correctly. 2-2 Turn on the printer while depressing the Feed button. Self-diagnostics will begin. - Page 21 SRP-330II/332II 2-5-2-2 Make sure to press the FEED button to perform the above functions. 2-5-2-2-1 Step 1: The number indicates the number of times the FEED button needs to be pressed. Make sure to press it for less than 1 second.
-
Page 22: Hexadecimal Dumping
SRP-330II/332II 3. Hexadecimal Dumping This function allows experienced users to see exactly what data is coming to the printer. This can be useful in finding software problems. When you turn on the hexadecimal dump function, the printer prints all commands and data in hexadecimal format along with a guide section to help you find specific commands. -
Page 23: Specification
3 inches 72 mm Printing Width 2 inches 48 mm Paper Width 79.5±0.5 mm SRP-330II: 42(Font A), 56(Font B), 56(Font C) Characters Per Line(Default) SRP-332II: 48(Font A), 64(Font B), 64(Font C) Printing Speed Max. 220 mm/sec Receive Buffer Size 4Kbytes ※... -
Page 24: Appendix
SRP-330II/332II 5. Appendix 5-1 Cleaning Printer Paper dust inside the printer may lower the print quality. In this case clean the printer as follows: 5-1-1 Open the printer cover and remove any paper. 5-1-2 Clean the print head with a cotton swab moistened with alcohol solvent.
Need help?
Do you have a question about the SRP-330II and is the answer not in the manual?
Questions and answers