Advertisement
INSTRUCTIONS AND RECOMMENDATIONS
FOR THE USE, INSTALLATION AND
MAINTENANCE OF BUILT-IN GAS
Dear Customer
Thank you for purchasing a Blanco Cooktop.
Before we continue telling you about this cooktop, we cordially invite you to become part of the Blanco family by
subscribing to ongoing information and invitations. Please visit our website where you can subscribe and request
such things as invitations to future cooking classes and gourmet recipes. Go to www.blanco-australia.com and fill
in the subscription details.
You will find that the clean lines and modern look of your Blanco Cooktop blends perfectly with your kitchen décor.
It is easy to use and performs to a high standard.
Blanco also makes a range of products that will enhance your kitchen such as ovens, rangehoods, dishwashers,
microwaves, sinks and taps.
There are models to complement your new Blanco Cooktop.
Of course we make every effort to ensure that our products meet all your requirements, and our Customer
Relations department is at your disposal, to answer your questions and to listen to all your suggestions (see back
cover of manual).
Please complete the warranty section of this manual and keep your receipt as proof of purchase. Retain all
documents relating to the purchase of this products.
Blanco is committed to providing increasingly efficient products that are easy to use, respect the environment and
are attractive and reliable.
BLANCO
We ask that you carefully read the instructions within this booklet to enable you to abtain quality results from the outset.
The appliance must be installed only by an authorised person in compliance with the instructions provided. The manufacturer
declines all responsability for improper installation which may harm persons and animals and damage property.
The appliance must be used for the purpose for which it was expressly designed. Any other use (eg heating rooms) is considered to
be improper and consequently dangerous. The manufacturer declines all responsability for damage resulting from improper and
irresponsible use.
The manufacturer shall not be held responsible for any inaccuracies in this handbook due to printing or transcription errors. The
designs in the figures are purely indicative.
The manufacturer also reserves the right to make any modifications to the products as may be considered necessary, useful or in
the interests of the user, without jeopardizing the main functional and safety features on the products themselves.
If your cooktop requires service, please contact your local customer service centre or your nearest Blanco agent listed at the back of
this booklet.
TOUCH CONTROL
MODEL: CGG905WTFFC
COD. 04068GGB - 02.02.2011
Advertisement
Table of Contents

Subscribe to Our Youtube Channel
Related Manuals for Blanco CGG905WTFFC


Summary of Contents for Blanco CGG905WTFFC
- Page 1 If your cooktop requires service, please contact your local customer service centre or your nearest Blanco agent listed at the back of this booklet.
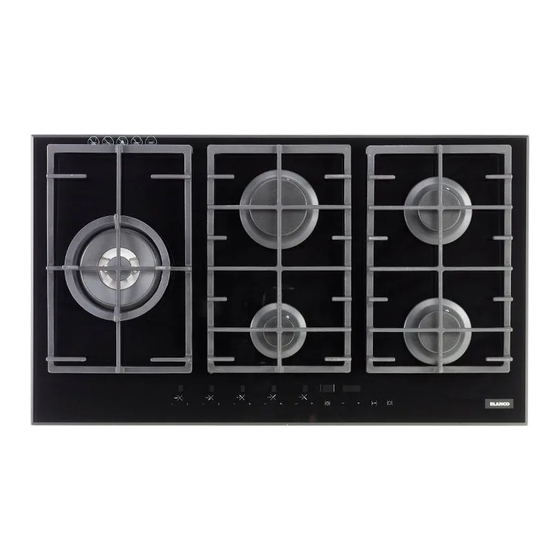
- Page 2 DESCRIPTION OF HOBS Natural Propane 1 Ultra rapid burner/WOK 15.2 MJ/h 16.2 MJ/h 2 Rapid burner 10.8 MJ/h 10.4 MJ/h 3 Right front semirapid burner reduced 5.4 MJ/h 4.86 MJ/h 4 Right back semirapid burner 7.1 MJ/h 6.3 MJ/h 5 Auxiliary burner 4.1 MJ/h 3.6 MJ/h 6 1F cast iron trivet...
- Page 3 1 - Burner 1 – button 2 - Burner 1 + button 3 - Burner 5 – button 4 - Burner 5 + button 5 - Burner 2 – button 6 - Burner 2 + button 7 - Burner 4 – button 8 - Burner 4 + button 9 - Burner 3 –...
- Page 4 1) IGNITING AND ADJUSTING The burner indicator above each burners touch controls indicates which burner (s) are in use. The power level for each burner can be set to 7 heat levels. Switching on Touch and hold the On/Off button for 2 seconds to switch on the hob. The hob switches on and the display for each cooking zone will show 0 to indicate that none of the burners is ignited.
-
Page 5: Programmable Timer
Switching off one burner Touch the + and the - button of the burner you want to switch off simultaneously for 2 seconds or use the - button to set the burner to 0. The burner switches off and above the touch control a blinking ‘H’ appears for some minutes to indicate that the burner is still hot. -
Page 6: Child Lock
CHILD LOCK Your hob is equipped with a childproof lock that lets you lock the appliance for cleaning or to prevent unintended switching on by children. Switching on the child lock ● Be sure that the hob is switched off. ●... - Page 7 - Do not use the hob as a work surface. Power ratings Pan Ø - Do not place pans with an unstable or deformed Burners in cm bottom on the burner, as these may tip or spill Natural Propane their contents, causing accidents. Ultrarapid/ WOK 15.2 MJ/h 16.2 MJ/h 24 ÷...
- Page 8 Notes: use of a gas cooking appliance produces heat and moisture in the room in which it is installed. The room must therefore be well ventilated by keeping natural air vents clear and by activating a mechanical aeration device (suction hood or electric fan). Intensive and lengthy use of the appliance may require additional ventilation.
- Page 9 CLEANING CAUTION: WARNINGS: always disconnect the appliance from the gas when reassembling the components, observe and electricity mains before carrying out any the following recommendations: cleaning operation. - check that the holes in the burner heads “M” (fig. 1) are not blocked by foreign bodies. - Ensure that the enamelled covers “C”...
-
Page 10: Installation
INSTALLATION TECHNICAL INFORMATION FOR THE INSTALLER This appliance shall be installed only by authorised personnel and in accordance with the manufacturer’s installation instructions, local gas fitting regulations, municipal codes, electrical wiring regulations, AS 5601 - Gas Installation and any other statutory regulations. Ventilation must be in accordance with AS 5601 - Gas Installation. - Page 11 INSTALLATION 3) INSERTING THE HOB 4) FITTING THE HOB After removing the outer and inner packing of the The hob is equipped with a special seal to avoid various mobile parts, ensure that the hob is any infiltration of liquid into the unit. To apply this undamaged.
-
Page 12: Gas Connection
INSTALLATION 5) GAS CONNECTION Natural Gas Natural Gas installations require the connection of The gas connection is located in the rear and on the a gas regulator at the appliance. This regulator is underside of the appliance 100 mm from the right supplied with the appliance on purchase. -
Page 13: Electrical Connection
INSTALLATION 6) ELECTRICAL CONNECTION The appliance is supplied with a 1800 mm long flexible supply lead. The point of attachment for this lead is located at the rear and on the underside of the appliance 380 mm from the right hand side. The voltage and power consumption are detailed on the underside of the appliance. - Page 14 REGULATION AND TRANSFORMATION REGULATION The regulation operations listed below are reserved to qualified fitters only. After carrying out any regulation or pre-regulation operations, any seals must be replaced by the technician. The regulation of primary air to our burners is not necessary. A duplicate Data Label is supplied to adhere in an accessible area next to the hotplate.
- Page 15 CONVERSION 8) PROPANE GAS TO NATURAL GAS CONVERSION PROCEDURE Appliance models: Gas stainless steel hotplate models: CGG905WTFFC 5 Burners 1. Remove each burner cap and burner skirt. 2. Remove the Propane Gas main injector with a tubular spanner “B” 7 mm/VF to unscrew the nozzle “A”...
- Page 16 CONVERSION 9) NATURAL GAS TO PROPANE GAS CONVERSION PROCEDURE Appliance models: Gas stainless steel hotplate models: CGG905WTFFC 5 Burners 1. Remove each burner cap and burner skirt. 2. Remove the Propane Gas main injector with a tubular spanner “B” 7 mm/VF to unscrew the nozzle “A”...
- Page 17 REGULATION AND TRANSFORMATION CONVERSION 10) REPLACING NOZZLES regulation or pre-regulation organs and apply the label corresponding to the new gas The burners can be adapted to suit different types regulation carried out on the appliance in place of gas by fitting the nozzles that correspond to the of that previously applied.
- Page 18 REGULATION AND TRANSFORMATION Display of the temperature inside the hob There is a temperature sensor inside the electronic card with which it is possible to show the temperature inside the hob directly on the timer display. The display is activated by pressing the + and - buttons of burner 1 together with buttons 12 and 13 continuously for at least 3 seconds.
-
Page 19: Maintenance
MAINTENANCE WARNING: servicing should be carried out only by authorised personnel. 11) REPLACING COMPONENTS NOTE: BEFORE ANY MAINTENANCE REQUIRING REPLACEMENT OF A COMPONENT IS UNDERTAKEN ENSURE THAT THE ELECTRICAL LEAD HAS BEEN ISOLATED AND REMOVED FROM THE POWER POINT. To replace the components housed inside the hob it is necessary to remove the flanges by loosening the screws (fig. - Page 20 MAINTENANCE POWER CABLE TYPES AND SECTIONS TYPE OF HOB TYPE OF POWER CABLE MONOPHASE Gas hob H05 RR - F Section 3 x 0.75 mm ATTENTION!!! If the power supply cable is replaced, the installer should leave the ground wire longer than the phase conductors (fig.
- Page 21 MAINTENANCE MEASUREMENTS (electronic card)
-
Page 22: Technical Data
TECHNICAL DATA DESCRIPTION The electronic card enables the management of a gas hob with 5 burners. This device works in conjunction with the Brahma VPC01 valves, which allow the regulation of the capacity of each individual burner powered by methane gas or lpg. The device is also made up of a user interface with display in seven segments and a touch panel. -
Page 23: Technical Assistance And Spare Parts
TECHNICAL ASSISTANCE AND SPARE PARTS BLANCO CUSTOMER SERVICE 1300 739 033 www.meaappliances.com.au SALES OFFICES AND SHOWROOMS SERVICE AND SPARE PARTS NEW SOUTH WALES. QUEENSLAND. Head Office, Sales and Marketing Brisbane. 104 Vanessa Street. Endeavour Refrigeration and Appliance Service. Kingsgrove. Telephone: 07 3137 3633 NSW 2208. -
Page 24: Warranty Section
3. Should service be required under this Warranty, the good order and working condition, the purchaser shall be purchaser should contact an approved BLANCO Service liable for a service fee charged by BLANCO/MEA or one Provider during their normal business hours. of its’ Service Providers.
Need help?
Do you have a question about the CGG905WTFFC and is the answer not in the manual?
Questions and answers