Briggs & Stratton ELITE Series Operator's Manual
Hide thumbs
Also See for ELITE Series:
- Operator's manual (92 pages) ,
- Owner's manual (22 pages) ,
- Quick start manual (2 pages)

Related Manuals for Briggs & Stratton ELITE Series


Summary of Contents for Briggs & Stratton ELITE Series
- Page 1 Operator’s Manual BRIGGS & STRATTON POWER PRODUCTS GROUP, LLC JEFFERSON, WISCONSIN, U.S.A. Manual No. 200079GS Revision A (06/20/2007)
- Page 2 Thank you for purchasing this quality-built Briggs & Stratton generator. We are pleased that you’ve placed your confidence in the Briggs & Stratton brand. When operated and maintained according to the instructions in this manual, your Briggs & Stratton generator will provide many years of dependable service. This manual contains safety information to make you aware of the hazards and risks associated with generator products and how to avoid them.
-
Page 3: Table Of Contents
Table of Contents Operator Safety ....... . . 4 Equipment Description......... 4 Safety Rules. -
Page 4: Operator Safety
SAVE THESE INSTRUCTIONS Operator Safety Safety Rules This is the safety alert symbol. It is used to alert Equipment Description you to potential personal injury hazards. Obey all safety messages that follow this symbol to avoid Read this manual carefully and become familiar possible injury or death. - Page 5 DANGER WARNING Starter cord kickback (rapid retraction) can result Storage batteries give off explosive hydrogen in bodily injury. Kickback will pull hand and arm gas during recharging. toward engine faster than you can let go. Hydrogen gas stays near battery for a long time Broken bones, fractures, bruises, or sprains after battery has been charged.
- Page 6 WARNING WARNING Generator produces hazardous voltage. Failure to isolate generator from power utility Unintentional sparking can result in fire or can result in death or injury to electric utility electric shock. workers due to backfeed of electrical energy. • When using generator for backup power, notify utility company. Use approved transfer equipment to isolate generator from WHEN ADJUSTING OR MAKING REPAIRS TO YOUR GENERATOR electric utility.
-
Page 7: Assembly
Assembly Install Wheel Kit NOTE: Wheel kit is not intended for over-the-road use. Your generator requires some assembly and is ready for use You will need the following tools to install these after it has been properly serviced with the recommended oil components: and fuel. - Page 8 7. Tip generator so that engine side is up. Attach Negative Battery Cable 8. Using a 9/16” or 14 mm socket wrench, remove one Your unit is equipped with electric start capability but can be existing hex nut (E) and lock washer (F) from engine started manually.
-
Page 9: Add Engine Oil
Add Engine Oil WARNING 1. Place generator on a flat, level surface. 2. Clean area around oil fill and remove yellow oil fill cap. Fuel and its vapors are extremely flammable and NOTE: See the section Oil to review oil recommendations. explosive. -
Page 10: System Ground
System Ground Generator Location The generator has a system ground that connects the Clearances and Air Movement generator frame components to the ground terminals on the AC output receptacles. The system ground is connected to WARNING the AC neutral wire (the neutral is bonded to the generator frame). -
Page 11: Features And Controls
Features and Controls Read this Operator’s Manual and safety rules before operating your generator. Compare the illustrations with your generator, to familiarize yourself with the locations of various controls and adjustments. Save this manual for future reference. A - Battery Float Charger Jack — Use battery float charger G - Engine Identification —... - Page 12 A - Idle Control Switch — Use this switch to turn the idle H - 120 Volt AC, 20 Amp Locking Receptacle — May be control feature on and off. used to supply electrical power for the operation of 120 Volt AC, 20 Amp, single phase, 60 Hz electrical B - Run/Stop Switch —...
-
Page 13: Cord Sets And Receptacles
Cord Sets and Receptacles 120/240 Volt AC, 30 Amp, Locking Receptacle Use only high quality, well-insulated, grounded extension Use a NEMA L14-30 plug with this receptacle. Connect a cords with the generator’s 120 Volt duplex receptacle. 4-wire cord set rated for 250 Volt AC loads at 30 Amps (or Inspect extension cords before each use. -
Page 14: Battery Charger
120 Volt, 20 Amp Locking Type Receptacle 12 Volt DC, 10 Amp Receptacle Use a NEMA L5–20 plug with this receptacle. Connect a This receptacle allows you to recharge a 12 Volt automotive 3–wire cord set rated for 125 Volt AC loads at 20 Amps to or utility style storage battery with the battery charge cables the plug. -
Page 15: Operation
Operation 6A. For electric starting, push and hold the start switch in “Start” position until generator starts. To prolong the life of starter components, DO NOT hold start switch in Starting the Engine “Start” position for more than 15 seconds, and pause IMPORTANT: Always unplug the battery float charger before for at least 1 minute between starting attempts. -
Page 16: Connecting Electrical Loads
Stopping the Engine WARNING 1. Turn OFF and unplug all electrical loads from generator panel receptacles. NEVER start or stop engine with Contact with muffler area can result in serious electrical devices plugged in and turned ON. burns. 2. Move idle control switch to “Off” position. Exhaust heat/ gases can ignite combustibles, structures or damage fuel tank causing a fire. -
Page 17: Charging A Battery
Charging a Battery Cold Weather Operation Your generator has the capability of recharging a discharged Under certain weather conditions (temperatures below 40°F 12 Volt automotive or utility style storage battery. [4°C] combined with high humidity), your generator may experience icing of the carburetor and/or the crankcase •... - Page 18 7. Remove shelter when temperatures are above 40°F WARNING [4°C]. Running engine gives off carbon monoxide, an 8. Turn engine OFF and let cool two (2) minutes before odorless, colorless, poison gas. refueling. Let any spilled fuel evaporate before starting Breathing carbon monoxide can cause headache, engine.
-
Page 19: Don't Overload Generator
Don’t Overload Generator Rated* Additional Tool or Appliance (Running) Surge (Starting) Capacity Watts Watts You must make sure your generator can supply enough Essentials rated (running) and surge (starting) watts for the items you Light Bulb - 75 watt will power at the same time. Follow these simple steps: Deep Freezer 1. -
Page 20: Maintenance
Maintenance Maintenance Schedule Follow the hourly or calendar intervals, whichever occurs first. More frequent service is required when operating in adverse conditions noted below. Maintenance Schedule - Fill in Dates as You Complete Regular Service Service Intervals Maintenance Task Service Dates Before Every 25 Hours Every 50 Hours... -
Page 21: Generator Maintenance
Generator Maintenance Battery Maintenance Generator maintenance consists of keeping the unit clean Other than float charging, described elsewhere, no and dry. Operate and store the unit in a clean dry maintenance is required for the starting battery. Keep the environment where it will not be exposed to excessive dust, battery and terminals clean and dry. -
Page 22: Engine Maintenance
Engine Maintenance Checking Oil Level Oil level should be checked prior to each use or at least WARNING every 8 hours of operation. Keep oil level maintained. 1. Make sure generator is on a level surface. 2. Clean area around oil dipstick, remove oil dipstick and Unintentional sparking can result in fire or wipe dipstick with clean cloth. - Page 23 Changing Engine Oil and Filter To service the air cleaner, follow these steps: Change the oil after the first 8 hours of operation. Change oil 1. Unhook latches (A) on both sides of cover (B) and and filter every 100 hours or yearly, whichever comes first, remove cover.
- Page 24 4. Replace spark plugs if electrodes are pitted, burned or Clean Cooling System porcelain is cracked. Use the recommended Over time debris may accumulate in cylinder cooling fins and replacement spark plugs. See Specifications. cannot be observed without partial engine disassembly. For 5.
-
Page 25: Storage
Storage Change Oil While engine is still warm, drain oil from crankcase. Refill The generator should be started at least once every seven with recommended grade. days and allowed to run at least 30 minutes. If this cannot be done and you must store the unit for more than 30 days, use Oil Cylinder Bore the following guidelines to prepare it for storage. -
Page 26: Troubleshooting
Troubleshooting Problem Cause Correction 1. One of the circuit breakers is open. 1. Reset circuit breaker. 2. Fault in generator. 2. Contact authorized service facility. Engine is running, but no AC 3. Poor connection or defective cord set. 3. Check and repair. output is available. -
Page 27: Warranties
Warranties As the small off-road engine owner, you should however be aware that B&S may deny you warranty coverage if your small off-road engine or a part has failed due to abuse, Emissions Control System Warranty neglect, improper maintenance or unapproved modifications. Briggs &... - Page 28 2. Length of Coverage Emission Information B&S warrants to the initial owner and each subsequent Engines that are certified to meet the California Air purchaser that the Warranted Parts shall be free from Resources Board (CARB) Tier 2 Emission Standards must defects in materials and workmanship which caused the display information regarding the Emissions Durability failure of the Warranted Parts for a period of two years...
-
Page 29: Generator Owner Warranty
BRIGGS & STRATTON POWER PRODUCTS GROUP, LLC PORTABLE GENERATOR OWNER WARRANTY POLICY Effective February 1, 2006 replaces all undated Warranties and all Warranties dated before February 1, 2006 LIMITED WARRANTY Briggs & Stratton Power Products Group, LLC will repair or replace, free of charge, any part(s) of the portable generator that is defective in material or workmanship or both. -
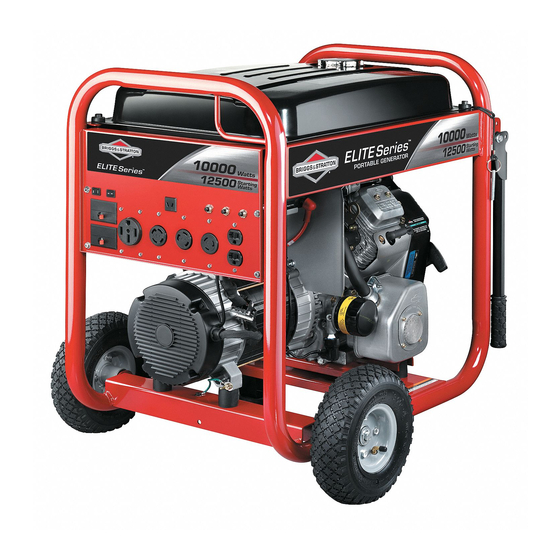
Page 30: Specifications
Portable Generator Product Specifications Starting Wattage ..... . .12,500 Watts Wattage ......10,000 Watts AC Voltage .
Need help?
Do you have a question about the ELITE Series and is the answer not in the manual?
Questions and answers
I have a 10HP OHV Elite Series 550Watt-8550 Starting Watts Generator- What parts do I need in order to do a fresh Service/tune-up?