
Subscribe to Our Youtube Channel
Related Manuals for LevelOne KVM-0211


Summary of Contents for LevelOne KVM-0211
-
Page 1: User Manual
LevelOne KVM-0211/KVM-0411 KVM-0212/KVM-0412 2/4-Port PS/2 KVM Switch User Manual Ver. 1.0.0-0711... - Page 2 Safety This equipment has been tested and found to comply with Part 15 of the FCC Rules. Operation is subject to the following two conditions: (1) This device may not cause harmful interference (2) This device must accept any interference received, including interference that may cause undesired operation.
-
Page 3: Table Of Contents
Table of Contents INTRODUCTION..............................1 ............................1 EATURE OVERVIEW ............................2 ACKAGE ONTENTS HARDWARE INSTALLATION ..........................3 ..........................3 TEP BY NSTALLATION ............................. 4 PERATION HOTKEY COMMAND TABLE ..........................6 TECHNICAL SPECIFICATION .......................... 7... -
Page 4: Introduction
By entering the hotkey combinations from the keyboard. There is no better way to access your multiple computers than with LevelOne KVM switch. By allowing a single console to manage all of the computers, the KVM switch eliminates the expense of purchasing a separate keyboard, monitor and mouse for each one. -
Page 5: Package Contents
KVM switch or to any other devices on the installation. Note 2-Port PS/2 KVM Switch KVM-0211 and KVM-0212 contains with 2 cable sets in the package. 4-Port PS/2 KVM Switch KVM-0411 and KVM-0412 contains with 4 cable sets... -
Page 6: Hardware Installation
2. Hardware Installation The default setting of the KVM-0211/KVM-0411/KVM-0212/KVM-0412 is appropriate for most systems. The KVM Switch is a Plug-and-Play device for installation. In fact, user does not need to configure the KVM Switch before installation. For the first time installation of the KVM Switch, please follow the instructions below for... -
Page 7: Easy Operation
4. Power up the connected computers one by one. After your computers are powered up, the keyboard and mouse will be recognized and now you can begin operating the KVM switch. 2.2 Easy Operation There are two methods to control the KVM Switch for PC switching: using the Face-Panel Push Buttons or Hotkey Commands. - Page 8 * User-definable = SCROLL LOCK, CAPS, ESC, F12 or NUM LOCK Hotkey preceding sequence configuration: For users who want to use a preceding sequence other than two consecutive Scroll Locks, there are convenient ways to configure 1. Hit Scroll Lock + Scroll Lock + H, then the KVM switch will be ready for new preceding sequence selection.
-
Page 9: Hotkey Command Table
3. Hotkey Command Table Command Hotkey Scroll Lock + Scroll Lock + (X) PC Channel Selection (X) = 1 ~ 2 or 1 ~ 4 for PC channel Binding PC and Audio/Mic Switching Scroll Lock + Scroll Lock + Q (Default value) Unbind PC and Scroll Lock + Scroll Lock + W... -
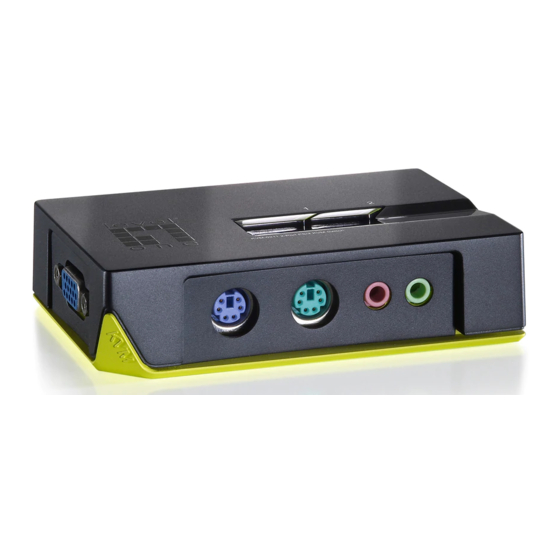
Page 10: Technical Specification
1 x PS/2 Keyboard 6-pin Mini Din-F 1 x PS/2 Mouse 6 pin Mini Din-F Local Console Port (All Female Types) 1x HDB 15-pin-F 1 x 3.5 mm audio/mic jack (KVM-0211/0411) PC selection HotKeys, Push Button PC Port LED 2 (Green)
Need help?
Do you have a question about the KVM-0211 and is the answer not in the manual?
Questions and answers