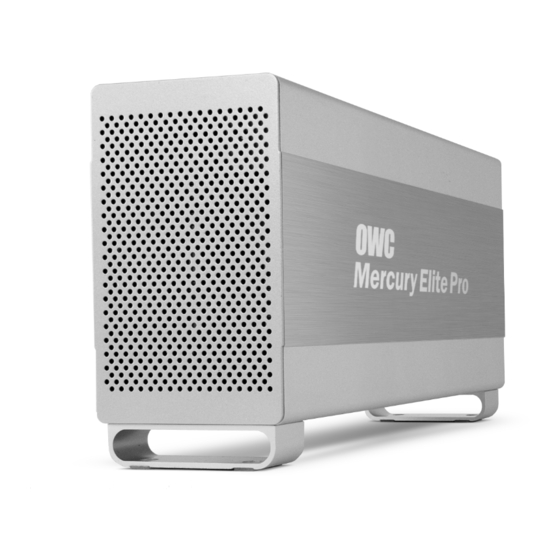
OWC Mercury Elite-AL 800 Pro Assembly Instructions Manual
Dual drive firewire 800/400
Hide thumbs
Also See for Mercury Elite-AL 800 Pro:
- Owner's manual (20 pages) ,
- Owner's manual (2 pages)

Related Manuals for OWC Mercury Elite-AL 800 Pro


Summary of Contents for OWC Mercury Elite-AL 800 Pro
- Page 1 OWC Mercury Elite-AL 800 Pro RAID Dual Drive FireWire 800/400 Assembly Instructions...
-
Page 2: Table Of Contents
Table of Contents 1. Assembling your new OWC Mercury Elite-AL Dual 2. Initializing your new OWC Mercury Elite-AL Dual 3. Customizing your new OWC Mercury Elite-AL Dual 4. Troubleshooting 5. Tips 6. Contacting Customer Service Important Notes Back Cover Warnings... -
Page 3: Assembling Your New Owc Mercury Elite-Al Dual
Assembling your new OWC Mercury Elite-AL Dual Chapter 1 Begin by opening your OWC Mercury Elite-AL RAID box. Set the contents out in front of you and familiarize yourself with your new drive enclosure and it’s components. Page 2... - Page 4 Slave; you will need one of each for the drives that you install into the enclosure. Shown above is the jumper configura- tion sheet included with Western Digital drives that ship here at OWC; we have instructions available for all brands we sell at: http://eshop.macsales.com/tech_center/index.cfm?page=data_ inthdd.html...
- Page 5 Take the hard drive that you have configured as a MASTER drive and set it into the hard drive enclosure as shown. Plug the IDE cable into the drive (the yellow ribbon cable), and the power cable (the yellow, black and red cable), into the drive. Turn the drive enclosure on it’s side so you can access the bot- tom screws as shown.
- Page 6 Turn the hard drive enclosure back over and insert the hard drive jumpered as SLAVE. Insert the power and IDE cables into it, as you did with the bottom drive. Turn the drive on it’s side, and insert the top screws into the drive as shown.
- Page 7 Slide the drive enclosure back into the outer shell, port end first into the case with the logo on the outer shell facing you, as shown in the picture. Turn the unit on it’s side and insert the 4 Phillips screws to secure the enclosure to the outer shell.
- Page 8 (not shown), and power the unit on. You should hear the drives spin up, and click a couple of times. After 10 or so seconds, the following dialog box should appear on your screen. Initializing your new Continue on to Page 8; Chapter 2 - OWC Mercury Elite-AL Dual. Page 7...
-
Page 9: Initializing Your New Owc Mercury Elite-Al Dual
Click on the “Initialize” button. Select the device with no volumes attached to it; in this picture, that would be the 465.8GB OWC Mercury drive. Click once on the picture of the drive icon next to the text. Page 8... - Page 10 Once you’ve selected the OWC Mercury drive, you’ll notice the above change in the Disk Utility program. Click on the “Erase” tab, next to the highlighted blue “First Aid” tab in this picture. Once on the Erase tab, you need to name the volume you want to format, and erase it.
- Page 11 Confirm that you want to erase the volume. After a few moments, the erase command will complete, and the volume will mount on your desktop. You can quit Disk Utility, and you’re all set! Page 10...
-
Page 12: Customizing Your New Owc Mercury Elite-Al Dual
Striping, Spanning, Mirroring, and Single Drive Mode: The previous section instructing you on how to format your new OWC Mercury Elite-AL Dual is specifically written to use the drive as it ships from our factory; Striping 2 hard drives together for maximum performance. -
Page 13: Troubleshooting
Troubleshooting Chapter 4 If your OWC Mercury Elite-AL is not functioning properly, begin by checking some basic possibilities, such as: • Are all cables tightly attached to the computer and drive? • Is the power supply plugged in firmly, and is the LED lit on... -
Page 14: Tips
After installing MacDrive, your HFS+ Macintosh volume will mount as if the drive were formatted in a native Windows format. MacDrive allows you to use your OWC Mercury hard drive on either platform without having to reformat or re-initialize the volume. -
Page 15: Contacting Customer Service
Contacting Customer Service Chapter 6 Before contacting Customer Service: • Read the manuals and review Chapter 5: Troubleshooting • Try and confirm the problem is with the hard drive. If you have a second Macintosh computer, move the drive to that system and verify that the drive does not function with that machine. - Page 16 Copyrights Copyright © 2006 Other World Computing, Inc. All rights reserved. No part of this publication may be reproduced, stored in a retrieval system, or transmitted in any form or by any means, electronic, mechanical, photocopying, recording or otherwise, without the prior written consent of Other World Computing. Changes The material in this document is for information only and subject to change without notice.
Need help?
Do you have a question about the Mercury Elite-AL 800 Pro and is the answer not in the manual?
Questions and answers