Table of Contents
Advertisement
Quick Links
Download this manual
See also:
User Manual
Advertisement
Table of Contents

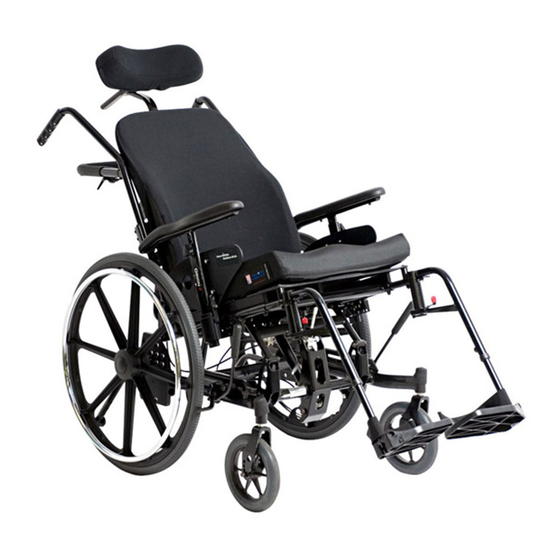
Summary of Contents for Future Mobility Healthcare Orion II
-
Page 1: Operating Instructions
Operating Instructions Innovative seating and mobility solutions Canadian Manufacturer of Class I Medical Devices Page 1... -
Page 2: Operating Safety Warnings
Orion Operating Instructions NOTE: Check all parts for shipping damages before using. In case of damage, do NOT use the equipment. Contact the Equipment Supplier for further instructions. WARNING DO NOT install this equipment without first reading and understanding this instruction booklet. If you are unable to understand these instructions, contact a healthcare professional, dealer or technical personnel before attempting to install this equipment - otherwise, injury or damage may occur. -
Page 3: Standard Features
ORION STANDARD FEATURES Tilt Function (45 Degrees) 15” – 22” wide 15” – 19” depth Push Bar with Push Handles or Stroller Push Bar Adjustable Height Full-Length Arms T-Style Height of 9 ½” – 14” ... -
Page 4: Overall Maintenance
OVERALL MAINTENANCE 1. Make sure all nuts and bolts are tight before operating the wheelchair 2. Make adjustments to the wheel locks to coincide with tire wear. 3. Inspect gas cylinders for leaks or wear and replace if required. 4. Inspect all cables and insure they are free from kinks and operate freely. 5. - Page 5 OPERATING INSTRUCTIONS T-Style Arm Rests (refer to Figure 1a) Installing and removing T-style Armrest 1. Push armrest into arm socket until lock is engaged into slot. 2. For removal, push and hold release lever (`A'), while lifting armrest from arm socket. Frame Adjustment Position 1.
- Page 6 Flip-up Arm Rests (refer to Figure 1b) Engaging and Disengaging Flip-up style armrest 1. To engage, push armrest into arm socket until release lever (‘A’) is engaged into slot. 2. For flip-up, push and hold release lever (`A'), while lifting armrest from arm socket. Arm Height Adjustment 1.
- Page 7 Footrest Pin-Style (refer to Figure 2) 1. Position swing-away leg rest tabs onto pins (‘A’) ensuring footplate is facing inward. Footplate Adjustment 1. Remove footrest bracket bolt (‘B’). Slide footrest extension tube up or down to desired height. 2. "Re-tighten" bolt. Figure 2 Footrest Pin-Style Upgraded (refer to Figure 2a)
- Page 8 Footplate Angle Adjustment 1. Loosen bolt (‘D’) to adjust footplate angle and horizontal postion. 2. "Re-tighten" bolt after final adjustment. Figure 2a Page 8...
- Page 9 Chair Back (refer to figure 3) Adjustable Angle Fold-Down Option To adjust angle Manufacturer's setting is 90 degrees, with each hole representing 7 degree increments (holes range from 83 degrees to 111 degrees). 1. Remove nut and bolt (`a') on both sides of the back post. 2.
- Page 10 Rear Wheel Positioning (refer to figure 4) 1. To adjust wheelbase to maintain stability when altering seating system, remove rear wheel from axle plate and reinstall bushing in desired location (`a'). 2. Replace axle and nut and tighten ensuring wheel spins freely without excessive lateral movement.
-
Page 11: Warranty
This warranty is extended only to the original purchaser/user of our products. Future Mobility Healthcare Inc. warrants its Orion II Wheelchair to be free from defects in materials and workmanship for one (1) year from the date of purchase. The frame is warranted for the lifetime of the original purchaser/user. - Page 12 Future Mobility Healthcare Inc. 3223 Orlando Drive Mississauga, ON L4V 1C5 905 671-1661 – 1 888 737-4011 Fax: 905 671-3377 e-mail: customersupport@future-mobility.com www.future-mobility.com Innovative seating and mobility solutions Page 12...


Need help?
Do you have a question about the Orion II and is the answer not in the manual?
Questions and answers