Table of Contents
Advertisement
Quick Links
Advertisement
Table of Contents

Related Manuals for Future Mobility Healthcare AQUA NT600


Summary of Contents for Future Mobility Healthcare AQUA NT600
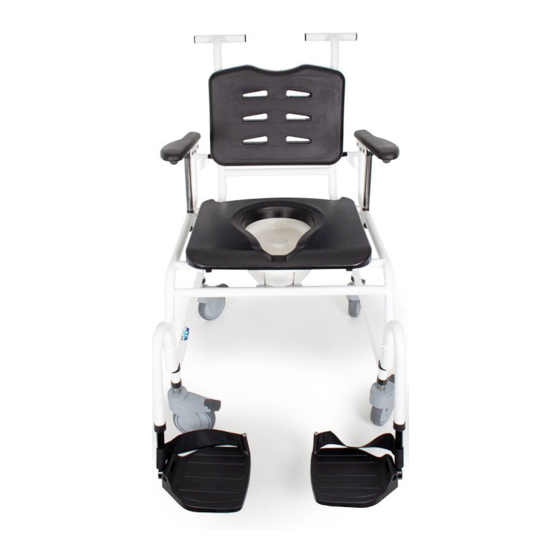
- Page 1 610 REV03 REV DATE: 12/31/2018REV12/17/2018...
-
Page 2: Contact Information
Future Mobility Healthcare Inc. Customer Service Canada 6750 Professional Court Mississauga ON L4V 1X6 Phone: (888) 737-4011 or (905) 671-1661 Fax: (905) 671-3377 E-mail: orderdesk@futuremobility.ca www.futuremobility.ca 610 REV03 REV DATE: 12/31/2018 AQUA NT600... -
Page 3: Table Of Contents
ATTENDANT WARNINGS ............8 WARRANTY ................. 26 ............8 ................... 26 ..............8 ..............27 ................ 8 ................27 ..............9 ................27 COMPONENT WARNINGS ............9 ............27 ................. 9 ................10 ................10 610 REV03 REV DATE: 12/31/2018 AQUA NT600... -
Page 4: Notice - Read Before Use
Before using this chair you, and each person who may assist you, should read this entire manual and make sure to follow all instructions. Review the warnings often. 610 REV03 REV DATE: 12/31/2018 AQUA NT600... -
Page 5: General
“pop out” fully. may occur and cause severe injury to the rider or others. 610 REV03 REV DATE: 12/31/2018 AQUA NT600... -
Page 6: Center Of Gravity
The position of the rear wheels. The more you move the rear wheels forward, the more likely your chair will tip over backward. The position of the carriage. The Center Of Gravity Is Also Affected By: 610 REV03 REV DATE: 12/31/2018 AQUA NT600... -
Page 7: Reaching Or Leaning
Anti-tip tubes may not prevent a fall or tip-over. Make sure to keep pneumatic tires properly inflated. Low tire Do not use your chair on a slope steeper than 10%. pressure may allow the rear wheel locks to slip. 610 REV03 REV DATE: 12/31/2018 AQUA NT600... -
Page 8: Attendant Warnings
Lift and roll the rear wheels to the upper level. Stay at the rear of the chair. Several feet before your reach the edge of the curb or step, turn the chair around and pull it backward. 610 REV03 REV DATE: 12/31/2018 AQUA NT600... -
Page 9: Component Warnings
Use anti-tip tubes until you times, make sure anti-tip tubes are up, out of the way. adapt to the change, and are sure you are not at risk to tip over. 610 REV03 REV DATE: 12/31/2018 AQUA NT600... - Page 10 The belts must be snug, but must not be so tight that they If bolts or screws become loose, tighten them as soon as you interfere with breathing. You should be able to slide your open can. hand, flat, between the belt and the rider. 610 REV03 REV DATE: 12/31/2018 AQUA NT600...
- Page 11 A change in set-up of the rear wheels will affect the center of balance of your chair. The farther you move the rear axles FORWARD, the more likely it is that your chair will tip over backward. 610 REV03 REV DATE: 12/31/2018 AQUA NT600...
- Page 12 70 or 60 Degree Swing-away Front Rigging with Footplate Choice of 2 colors ( White or Electro polished natural Stainless Steel ) Back Support: Foam skinned rectangular shaped back easy to remove and clean. 610 REV03 REV DATE: 12/31/2018 AQUA NT600...
- Page 13 Inspect cane and hand grips for wear/looseness TIRES Inspect for flat spots, cracks and wear Caution: as with any vehicle, the wheels and tires should be checked periodically for cracks and wear and should be replaced. REAR WHEELS 610 REV03 REV DATE: 12/31/2018 AQUA NT600...
- Page 14 Adjust bearing system if wheel wobbles or binds to a stop. Ensure wheel bearings are clean and free of moisture. Check stem caster journal and lock nut for tightness Inspect casters for cracks and wear Inspect for cracked, bent or broken spokes CLEANING Clean upholstery and armrests 610 REV03 REV DATE: 12/31/2018 AQUA NT600...
- Page 15 Solutions Check for loose nuts and bolts Check angle adjustable caster assembly Check that rear wheels are equally spaced away from seat frame. 610 REV03 REV DATE: 12/31/2018 AQUA NT600...
-
Page 16: Arms
3. In order to bring the arm assembly down to the horizontal position grasp the top portion of the arm assembly and rotate the arm downwards to the position shown in the lower left corner until the arm comes to a stop. 610 REV03 REV DATE: 12/31/2018 AQUA NT600... - Page 17 ARM ASSEMBLY ARM ASSEMBLY ARM ASSEMBLY IN HORIZONTAL POSITION ARM ASSEMBLY IN VERTICAL POSITION 610 REV03 REV DATE: 12/31/2018 AQUA NT600...
-
Page 18: Back
1. Remove the six (6) 1/4-20 x 1/2” screws from the back frame which holds the foam skinned backrest in place. 2. Fasten the new foam skinned backrest with six (6) 1/4-20 x 1/2” screws. FRAME BACKREST 610 REV03 REV DATE: 12/31/2018 AQUA NT600... - Page 19 BACK 1. Remove the two (2) safety snap clips by pulling back from the back 2. Lift the frame up SAFETY SNAP CLIP PIN 610 REV03 REV DATE: 12/31/2018 AQUA NT600...
- Page 20 SADDLES ON BOTH SIDES HAS TO FULLY SEAT ON THE SADDLE PINS ON THE MAIN BASE FRAIM SAFETY SNAP CLIP PIN REINSERTED SAFETY SNAP CLIPS HAS TO BE FULLY INSERTED ON BOTH SIDES 610 REV03 REV DATE: 12/31/2018 AQUA NT600...
-
Page 21: Casters
Casters engaging For engaging the dual lock, step on the end until it latches In the ON position For disengage step on the raised end until caster lock latches in the OFF position 610 REV03 REV DATE: 12/31/2018 AQUA NT600... -
Page 22: Seat Installation
2. Lower the front of the seat until the front seat brackets snap and nestle onto the front support cross tubes. Check to make sure that all brackets are engaged SNAP IT HOOK IT 610 REV03 REV DATE: 12/31/2018 AQUA NT600... - Page 23 SEAT INSTALATION 1. Removal of the Potty is achieved by sliding the Commode outside from back 2. Reinserting Potty is achieved by pushing inside into wire slider until is fully positioned and engaged 610 REV03 REV DATE: 12/31/2018 AQUA NT600...
-
Page 24: Footrest
Slide the footrest stem up or down to desired height. There should be approximately 2-3/8” of range for the footrest extension. 3. Re-tighten socket head button screw. Repeat this procedure with the other footplate assembly. 610 REV03 REV DATE: 12/31/2018 AQUA NT600... -
Page 25: Maintenance
2. Paint Finish If any of the following conditions are observed, the wheelchair Clean the painted surfaces with mild soap at least must be serviced at Future Mobility: once a month 610 REV03 REV DATE: 12/31/2018 AQUA NT600... -
Page 26: Warranty
Warranty Future Mobility Healthcare Inc. guarantees the frame and cross brace against defects in material and workmanship for life or for as long as the original purchaser owns the chair. 610 REV03 REV DATE: 12/31/2018 AQUA NT600... - Page 27 If within this warranty period the product shall be proven to be defective, such product shall be repaired or replaced, at FMHI discretion. FMHI’s sole obligation and your exclusive remedy under this warranty shall be limited to the repair and/or replacement of the product or its parts. 610 REV03 REV DATE: 12/31/2018 AQUA NT600...
- Page 28 FMHI shall not be liable for any consequential or incidental damages whatsoeve 610 REV03 REV DATE: 12/31/2018 AQUA NT600...
- Page 29 Cut below this line # Warranty Registration Form To validate your Future Mobility HealthCare warranty, please complete the below form and return it the address at the end of this form. Visit online at www.futuremobility.ca for more Future Mobility Products. Name: ____________________________ Street Address: ____________________________________________________ City/Country/Postal Code: ________________________________________________...
Need help?
Do you have a question about the AQUA NT600 and is the answer not in the manual?
Questions and answers