Table of Contents
Advertisement
CA
EN Instructions for use
FICA1202I145
Weight limits:
• Do not install or use this
booster seat until you read and
18 – 54 kg
understand all the instructions
(40 – 120 lbs)
in this manual and the labels.
To avoid serious injuries to your
child, follow the instructions
Height limits:
carefully. Keep the instruction
manual
in
the
dedicated
99 – 140 cm
pocket for future reference.
(39 - 55 inches)
Advertisement
Table of Contents

Related Manuals for Peg-Perego VIAGGIO HBB 120


Summary of Contents for Peg-Perego VIAGGIO HBB 120
- Page 1 EN Instructions for use FICA1202I145 WARNING: Weight limits: • Do not install or use this booster seat until you read and 18 – 54 kg understand all the instructions (40 – 120 lbs) in this manual and the labels. To avoid serious injuries to your child, follow the instructions Height limits: carefully.
-
Page 2: Table Of Contents
Installing the booster seat in the vehicle ....18 Securing the child in the booster seat ....22 Headrest height adjustment ........25 Backrest angle adjustment ........26 Using Viaggio HBB 120 without backrest .....27 Cleaning and maintenance ........31 Replacement Parts ............38 © 2012 Peg Perego. All rights reserved. -
Page 3: Introduction
As with every booster seat, Viaggio HBB 120 is used with a child inside a vehicle, travelling fast on highways or slow in the chaotic traffic of today’s cities. This means that you need to use this... - Page 4 Peg Perego Customer Service @ 1-800-661-5050 for help. Now that you know your new Viaggio HBB 120 , you are ready to enjoy safe and happy journeys with your family and your children.
-
Page 5: Warning
Refer to the dedicated section in this manual for further details. • Viaggio HBB 120 can be secured to your vehicle by means of lower universal anchorage system (LUAS) for added stability. Refer to the dedicated section in this manual for installation details and check your vehicle owner’s manual for further details. - Page 6 Warning facing vehicle seats only. Never use on seats looking sideways or rearward facing. Do not use in cars with door-mounted or motorized shoulder belts. Read your vehicle owner’s manual for additional information. • According to accident statistics, children are safer when properly restrained in the rear seating positions.
-
Page 7: Safety Information
Safety Information • Use Viaggio HBB 120 in forward facing mode with children weighing in the range 18 – 54 kg (40 - 120 lbs) and whose height is between 39 and 55 inches ( 99 – 140 cm ). -
Page 8: Registration Form
Registration Form Important! Child restraints could be recalled for safety reasons. You must register this restraint to be reached in a recall. Send your name, address and the restraint's model number and manufacturing date to: Peg Perego CANADA, Inc. 585 Granite Court Pickering Ontario Canada L1W3K1 Or call 1-800-661-5050 (toll free) For recall information, call Transport Canada’s Road... -
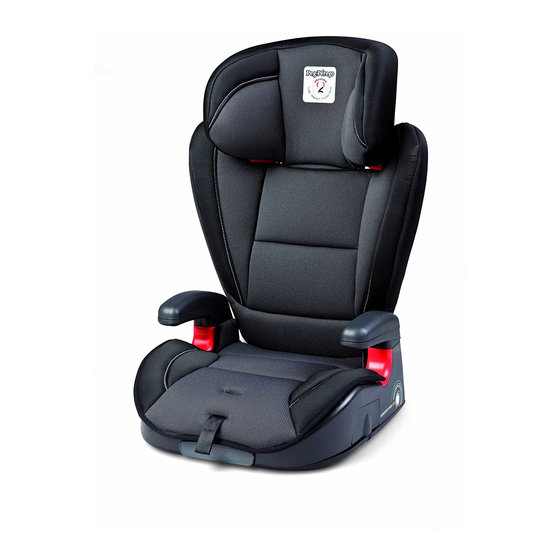
Page 9: Your Booster Seat
Your booster seat Instruction manual pocket Backrest Headrest Shoulder Headrest belt router adjustable handle LUAS connectors Armrest Lap belt router Seat LUAS strap Cup holder Recline handle... -
Page 10: Product Assembly Prior To Use
Product assembly prior to use 1. Always check product prior to assembly. The product is composed of an headrest (a) a backrest (b) and a seat (c). Backrest and headrest are factory assembled. To assemble correctly the product please follow the instructions carefully. - Page 11 Product assembly prior to use 2. Rotate the red stops in the open position and slide the backrest in the housings located behind the seat as shown in the picture. 3. Keeping the product flat, close the red stops until a click is heard.
- Page 12 (b). The product is now ready for use. IMPORTANT NOTE: Viaggio HBB 120 is a High Back Booster. Its headrest and backrest have been designed on the experience made in side impact dynamic testing.
-
Page 13: Product Features
Product features product equipped with integral holders, located at the side of the seat. To operate the cup holder, simply pull /push the part until it stops. WARNING: never put hot liquids in the cup holder. Your child or a nearby occupant may become injured in case of a turn or sudden stop. - Page 14 Product features 3. To return the foot to the original position, pull the lever again and push the seat downward.
-
Page 15: Vehicle Classes Compatibility
. three - wheeled vehicle . truck Vehicle seatbelts design and compatibility Viaggio HBB 120 is designed to be installed with lap and shoulder vehicle belts commonly fitted on most of the available cars. However, in the market there are several different types of vehicles manufactured in different periods. - Page 16 Vehicle seatbelts design and compatibility NON COMPATIBLE VEHICLE BELT DESIGNS WARNING: do not use Viaggio HBB 120 with the following vehicle belt design: 1. Lap/motorized 2. Lap belt only of any shoulder belts. Belts kind. mounted on the door...
-
Page 17: Vehicle Seat Design And Compatibility
Vehicle seat design and compatibility WARNING: do not use Viaggio HBB 120 with the following vehicle seat design: 1. Side facing seats 2. Rear-facing seats or seats that rotate in different positions For your child’s safety, always read your vehicle owner’s... -
Page 18: Installing The Booster Seat In The Vehicle
Installing the booster seat in the vehicle 1. Lean the booster seat on the selected vehicle seat in forward facing mode. 2. Primo Viaggio HBB 120 is equipped with LUAS connectors to be used with your vehicle’s lower anchors. Connectors are stored in the back side of the seat. - Page 19 Installing the booster seat in the vehicle 3. Attach the connectors to the vehicle’s lower anchors. An audible click is heard when the product is attached to the lower anchors. Pull the central strap (b) and push the booster seat against the seat (c).
- Page 20 Installing the booster seat in the vehicle button in order to release the booster seat. IMPORTANT NOTE: use of LUAS connectors are recommended by Peg Perego to achieve the best stability of the product in case of sudden stops or steep turns. Also, using the LUAS will give guarantee that the product is located in...
- Page 21 Installing the booster seat in the vehicle 5. In case of lower anchors unavailability whenever the booster seat is used without LUAS connectors, make sure that the booster seat leans firmly on the seat. IMPORTANT NOTE: this case, make sure that the booster seat is removed from vehicle’s interior...
-
Page 22: Securing The Child In The Booster Seat
Securing the child in the booster seat Make sure that your child sitting comfortable booster seat, with the back fully against the backrest of the booster seat. Pull the vehicle belt and make sure that the lap portion of it passes below both armrests. - Page 23 Securing the child in the booster seat 3. Thread the shoulder belt in the red router located below the headrest. To do this slide the belt from outside toward the center of the product. Check that the belt is not twisted when doing this operation.
- Page 24 Securing the child in the booster seat 4. Picture shows the correct belt pattern around the child in your Primo Viaggio HBB 120.
-
Page 25: Headrest Height Adjustment
Headrest height adjustment 1. Headrest is adjustable in 6 different positions. To adjust the backrest, pull the lever located behind and move the headrest up and down to the desired position. When the handle is released the headrest will lock in place. Move the headrest up and down to ensure that the lock is properly engaged. -
Page 26: Backrest Angle Adjustment
13 by pulling the recline handle (a). Adjust the backrest of your vehicle’s seat following your vehicle owner’s manual (b). Viaggio HBB 120 backrest will follow the vehicle backrest thanks to its free hinge. -
Page 27: Using Viaggio Hbb 120 Without Backrest
Using Viaggio HBB 120 without backrest Your Viaggio HBB 120 has been designed with a removable backrest. The backrest provides protection to your child’s head and shoulders in a side collision. We strongly recommend the backrest to be used as much as possible. - Page 28 Using Viaggio HBB 120 without backrest Make sure that your child sitting comfortably in the seat, with his back fully against the vehicle seat backrest. Pull the belt and make sure that the lap portion of it passes below both armrests.
- Page 29 Using Viaggio HBB 120 without backrest 3. Check that the shoulder belt lies on the shoulder, away from your child's neck and below ear level, as shown in the picture.
- Page 30 Using Viaggio HBB 120 without backrest 4. Picture shows the correct belt pattern around the child in your Primo Viaggio HBB 120.
-
Page 31: Cleaning And Maintenance
Cleaning and maintenance Your booster seat requires a minimum of cleaning and maintenance. Do not clean with harsh products or solvents. Keep moving parts clean. In case, clean plastic parts with a damp cloth. Do not use water with harness and latching mechanisms. Protect the booster seat from extreme cold, water, rain and sun exposure. - Page 32 Cleaning and maintenance 1. To remove the seat upholstery: recline backrest until lies flat; undo plastic hooks starting with rear of the seat (a and b); undo snap buttons located under the armrest (c and d; pay attention to hold the button properly in order to avoid ripping the upholstery apart);...
- Page 33 Cleaning and maintenance remove backrest upholstery, undo the plastic cover first unsnapping it from the top, as shown in the picture. 4. Undo the elastic bands from the hooks located in the backrest structure. Before undoing the hooks for the first time make sure that the correct pattern is understood.
- Page 34 Cleaning and maintenance 5. Remove the backrest upholstery from bottom first. Then free shoulder cover from its structure. 6. Remove the headrest plastic cover unsnapping it from below as shown in the picture (a). Undo elastic hooks from the headrest structure (b).
- Page 35 Cleaning and maintenance Remove headrest upholstery. 8. To refit the backrest upholstery in place, first fit the shoulder cones and then the bottom part.
- Page 36 Cleaning and maintenance 9. Attach the elastic hooks in the center lower structure of the backrest. 10. Put the backrest plastic cover in place as shown in the picture (lower part first, then upper snaps).
- Page 37 Cleaning and maintenance 11. Put the headrest plastic cover in place as shown in the picture (lower part first, then upper snaps).
-
Page 38: Replacement Parts
Replacement Parts 1) ASPI0148NF 2) SPST7164NF 3) BRIVIA• 4) BSCVIA• 5) BSAVIA• NOTE: Spare parts available in different colors* to be specified when ordering.
Need help?
Do you have a question about the VIAGGIO HBB 120 and is the answer not in the manual?
Questions and answers