
Related Manuals for Aleratec 260155


Summary of Contents for Aleratec 260155
- Page 1 USER GUIDE Aleratec DVD/CD Stand-Alone Duplicators Part No. 260155 ..1:1 DVD/CD Copy Cruiser Pro HS™ Part No. 260156 ..1:1 DVD/CD Copy Cruiser Pro HLS™ Part No. 260157 ..1:2 DVD/CD Copy Cruiser Pro HLX™...
- Page 2 9851 Owensmouth Avenue Chatsworth, CA 91311 U.S.A. www.aleratec.com Aleratec™, 1:1 DVD/CD Copy Cruiser Pro HS™, 1:1 DVD/CD Copy Cruiser Pro HLS™, and 1:1 DVD/CD Copy Cruiser Pro HLX™ are trademarks of Aleratec, Inc. Please record the following information to help expedite any warranty claim: Model No.
- Page 3 TV reception. The user is cautioned that changes and/ or modifications made to this equipment, without the approval of manufacturer, could void the user’s authority to operate this equipment. www.aleratec.com...
-
Page 4: Safety Regulations
The use of optical instruments with this product will increase eye hazard. This DVD/CD Duplicator is classified as a CLASS 1 LASER PRODUCT. The CLASS 1 LASER PRODUCT label is located on top of the internal drive enclosure. CLASS 1 LASER PRODUCT LASER KLASSE 1 PRODUKT www.aleratec.com... -
Page 5: Table Of Contents
Quick Operating Sequence Overview ............11 Main Menu ....................12 Setup ..................... 29 Advanced Setup ..................41 Using the Duplicator as a DVD/CD-Recorder ..........51 Specifications ..................53 Troubleshooting ................... 54 Technical Support ................56 Technical Support FAX Back Form ............. 60 www.aleratec.com... - Page 6 www.aleratec.com...
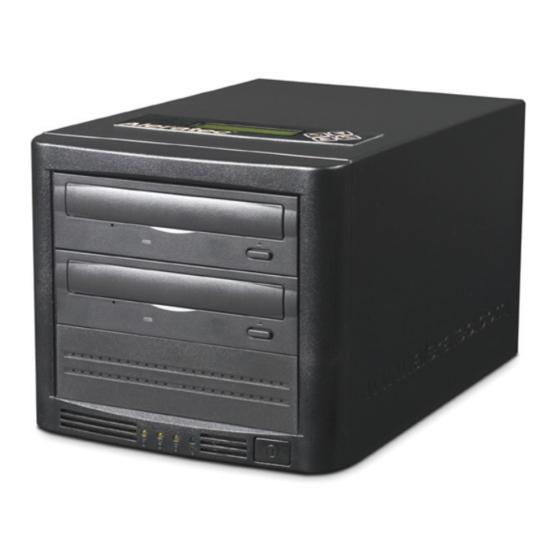
- Page 7 • Page 3 shows the front panel of the DVD/CD-ROM drive and the DVD/CD Recorder used in the P/N 260155 and P/N 260156 DVD/CD Duplicators. Note: The DVD/CD-ROM drive is the top drive. In the P/N 260157 DVD/CD Duplicator, both drives are DVD/CD Recorders.
-
Page 8: Introduction
Do not place near heat sources such as radiators or air ducts, or in a place subject to direct sunlight, excessive dust, mechanical vibration or shock. Good care will help assure maximum product life. Improper operating environment and misuse may void the warranty. www.aleratec.com... -
Page 9: Front Panel
4 Eject Button This button is used to open or close the tray. Note: Part Numbers 260155 and 260156 – DVD/CD-ROM Drive (Top) and DVD/ CD-Recorder (Bottom). Note: Part Number 260157 – top drive in is a second DVD/CD Recorder. -
Page 10: Dvd/Cd Copy Cruiser Pro Display Panel
Introduction DVD/CD Copy Cruiser Pro Display Panel www.aleratec.com Display shows all functions and messages button is used to execute a selected function button is used to cancel a selected function Up arrow is used to scroll up through functions or menus Down arrow is used to scroll down through functions or menus www.aleratec.com... -
Page 11: Precautions
Note: The DVD/CD Duplicator must never be cleaned with a lens cleaning kit! Transportation Keep the original packing materials for future moving or shipping of the DVD/ CD Duplicator. www.aleratec.com... -
Page 12: Overview
11. Setup 6. Prescan 12. Adv Setup Note: Main Menu items “Select Source” (number 8) and “Image” (number 9) are not supported. Note: Main Menu items “Edit Track” (number 10) is for Audio disc only. www.aleratec.com... -
Page 13: Subfunctions
Overview Subfunctions The main menu “Edit Track” (for Audio disc only) function has 4 subfunctions. These are: 10.1 CD to CD Edit 10.2 (Not supported) 10. Edit Track 10.3 Play Audio Track 10.4 Close Session www.aleratec.com... - Page 14 11.12 Burn Mode* 11.13 Display Time 11.14 Button Sound* 11.15 Device Info (Not supported) 11.16 System Info 11.17 Quick Erase Disc 11.18 Full Erase Disc Note: For functions with options, the default setting (where applicable) is indicated with an asterisk (*). www.aleratec.com...
-
Page 15: Subfunctions - Continued
12.10 Load Default 12.11 CD&G Format (Not supported) 12.12 ISRC 12.13 CD-Text (Not supported) 12.14 USB Option 12.15 USB Auto-Link 12.16 Use Big Block Note: For functions with options, the default setting (where applicable) is indicated with an asterisk (*). www.aleratec.com... -
Page 16: Using The Dvd/Cd Duplicator
• In case of emergency, insert the straightened end of a large paper clip or similar rigid object into the Emergency Eject Pinhole to open the tray. Then gently pull the tray out. www.aleratec.com... -
Page 17: Power Up Sequence
A failed disc will remain in the DVD/CD-Recorder. (Default setting: A failed disc is NOT ejected.) To manually eject a disc, press the ENT button to eject a failed disc or press the eject button on the DVD/CD-Recorder to eject the disc. www.aleratec.com... -
Page 18: Main Menu
DVD-RW, DVD+RW, or CD-RW discs inserted as blanks as any DVD/ CD-RW discs inserted in the DVD/CD-Recorder to be used as blank media will automatically be erased, and then the content from the source disc will be recorded on them. www.aleratec.com... - Page 19 When copying audio CDs, it is highly recommended to copy at a speed of 16x or lower to ensure the best possible quality audio reproduction. Go to “Setup” and then “Burning Speed” to change copy speed before selecting tracks. www.aleratec.com...
- Page 20 Erasing Disc The LCD will display the status of the erasing and testing of the DVD/CD. Testing 650.0MB 74:00 When the process is completed, the LCD will display the status. 2. Test OK: 03 www.aleratec.com...
- Page 21 DVD/CD-R/RW disc. When the process is completed, the LCD will display the status. Testing 650.0MB 74:00 Copying 650.0MB 74:00 When the process is completed, the LCD will display the status. 3. Test & Copy OK: 03 www.aleratec.com...
- Page 22 ENT button to start disc verifying, or press ESC to exit. Press the 4. Verify The LCD will display the status of the verification. Verify 650.0MB 74:00 When the process is completed, the LCD will display the result. 4. Verify OK: 03 www.aleratec.com...
- Page 23 OK: 3 Fail: 0 Diff: 0 Press ENT again for the status of each copy. Src: 01 DVD/CD-ROM Total: 650.0MB If the compare result is identical, the LCD will display the message shown. Src: 02 DVD/CD-RW Identical www.aleratec.com...
- Page 24 ENT button again for the status of each copy. Press the Src: 01 DVD/CD-ROM Total: 0 Bytes If the comparison fails, the LCD will display the reason for the failure. Src: 02 DVD/CD-RW TOC not match www.aleratec.com...
- Page 25 www.aleratec.com...
- Page 26 74:00 If a disc can be read correctly, the LCD will display OK. Prescan OK! If it cannot read the source disc correctly, the LCD will display FAIL. A FAIL disc cannot be copied. Prescan Fail! www.aleratec.com...
-
Page 27: Disc Info
ENT button again, and use the arrow keys to display information on the sessions. Session 01 Track 01 - 09 Press the ENT button again, and use the arrow keys to display information on the tracks. Track 01 AUDIO 03:54 www.aleratec.com... - Page 28 Using the DVD/CD Duplicator Main Menu Select Source Not supported. Image Not supported. www.aleratec.com...
- Page 29 16x or lower to ensure good quality audio reproduction. Go to “Setup” and then “Burning Speed” to change copy speed before selecting tracks. This function includes 4 subfunctions. These are: • 10.1 CD to CD Edit • 10.2 (Not supported) • 10.3 Play Audio Track • 10.4 Close Session www.aleratec.com...
- Page 30 ENT and scroll to “Select Track” to select the track you want to copy. Press the ENT button to select the track, a “+” will appear by the track selected. Pressing the ENT button again will cancel the selection. Select Track: 1/10 03:25 Select Track: +1/10 03:25 www.aleratec.com...
- Page 31 “Yes” or “No” selection. To continue, select “Yes” to select tracks from the next disc. Repeat steps 1 - 7 above. If yes is selected, the source disc will be ejected. Insert another audio disc to be edited. Continue edit next Disc? Yes www.aleratec.com...
- Page 32 Closing Session Please wait - - - Note: You will NOT be able to use the new audio CD until you close the session. When the session is closed, this message will be displayed. Closing Complete OK:03 Fail:0 www.aleratec.com...
- Page 33 Load the CD you want to play in that drive and press the play music. Press ESC to index to the next setting. 10-03 Edit Track Play Audio Track Select Track 1/10 04:25 Playing Track-1 00:00 / 03:35 www.aleratec.com...
-
Page 34: Close Session
LCD display will show the process of closing the session: “Closing Session Please Wait —”. Close Session Please Wait--- When the session is closed, this message will show the passed and failed discs. Close Complete OK:03 Fail:0 www.aleratec.com... -
Page 35: Setup
11.10 Eject Disc • 11.11 Burn On The Fly • 11.12 Burn Mode • 11.13 Display Time • 11.14 Button Sound • 11.15 Device Info • 11.16 System Info • 11.17 Quick Erase Disc • 11.18 Full Erase Disc www.aleratec.com... - Page 36 ENT button to change the setting, or ESC to exit. Press the 11-02. Setup CD Burn Speed Use the arrow buttons to select the desired speed, then press the button. CD Burn Speed Auto www.aleratec.com...
- Page 37 This function sets the reading speed of the source DVD/CD-ROM. Press the ENT button to change the setting, or ESC to exit. 11-04. Setup Read Speed Use the arrow buttons to select the desired reading speed, then press the ENT button. Read Speed Maximum www.aleratec.com...
-
Page 38: Startup Menu
This function selects the menu item that will be the first item shown on the display when you turn on the duplicator. The default setting is Copy. Use the arrow buttons to select the desired item (1 - 11), then press the button. 11-06. Setup Startup Menu Startup Menu 1.Copy www.aleratec.com... -
Page 39: Auto Verify
11.08 Auto Compare This setting controls auto compare of data between source and target discs after copying. Default setting is “Off”; press the ENT button to change, or ESC to exit. 11-08. Setup Auto Compare Auto Compare www.aleratec.com... -
Page 40: Auto Prescan
This setting controls auto prescan of the master to verify that it can be read properly, and also tests the reading speed. Default setting is “Off”; press the ENT button to change, or ESC to exit. 11-09. Setup 11-09. Setup Auto Prescan Auto Prescan Auto Prescan www.aleratec.com... -
Page 41: Eject Disc
If you select “Do Not Eject”, the disc will remain in the DVD/CD-Recorder when the job is done and you will have to eject the disc from the DVD/CD- Recorder manually. Press the ENT button to change the setting, or ESC to exit. Eject Disc Do Not Eject www.aleratec.com... -
Page 42: Burn Mode
This setting controls the writing modes of the disc, including “Disc At Once” (DAO) or “Track At Once” (TAO). ENT button to change, or ESC to exit. Default setting is “DAO”. Press the 11-12. Setup Burn Mode Burn Mode www.aleratec.com... -
Page 43: Button Sound
11-13. Setup Display Time Display Time 11.14 Button Sound This setting controls the button sound. ENT button to change, or ESC to exit. Default setting is “On”; press the 11-14. Setup Button Sound Button Sound www.aleratec.com... -
Page 44: System Info
11-15. Setup System Info 11.16 System Info This function will show the system information on the display. ENT button to see the system information, or ESC to exit. Press the 11-16. Setup System Info System Info www.aleratec.com... -
Page 45: Quick Erase Disc
ESC to go back. 11-17. Setup Quick Erase Disc All data will be lost, erase? Yes Erasing disc 00:24 (Quick) When the process is finished the display will show the status. Quick Erase OK:01 Fail:00 www.aleratec.com... -
Page 46: Full Erase
Yes or No and then press the ENT button to execute, ESC to go back. 11-18. Setup Full Erase All data will be lost, erase? Yes Erasing Disc 00:24 (Full) When the process is finished the display will show the status. Full Erase OK:01 Fail:00 www.aleratec.com... -
Page 47: Advanced Setup
• 12.08 Compare Firmware • 12.09 Hardware Diagnostic • 12.10 Load Default • 12.11 CD&G Format (Not supported) • 12.12 ISRC • 12.13 CD-TEXT (Not supported) • 12.14 USB Option • 12.15 USB Auto-Link • 12.16 Use Big Block www.aleratec.com... -
Page 48: Underrun Protect
Audio CD (e.g. 75 minutes of recording time vs. 74 minutes). You can activate the overburn function of the DVD/CD-Recorder through this setting. Default setting is “Off”; press the ENT button to change, or ESC to exit. 12-02. Adv Setup Overburn Overburn www.aleratec.com... - Page 49 You can use this function to copy some DVD/CDs with errors. ress the ENT button to change, or ESC to exit. 12-03. Adv Setup Read Error Skip Read Error Skip 12.04 Not Supported 12.05 Not Supported www.aleratec.com...
- Page 50 Press the ENT button to start the test, or ESC to go back to manual operation. 12-06. Adv Setup Burn-in Burn-in Test Set Burn-in num: Run Continuous Select “Erase&Copy” to test erasing and rewriting to DVD/CD-RW discs only. Burn-in Erase&Copy www.aleratec.com...
-
Page 51: Update Firmware
Searching F/W--- XXX/XXXXX Procedure to make the Firmware disc: Get the latest firmware download from the Aleratec website at www.aleratec.com. Note: Be careful to download the correct firmware; if incorrect firmware is used the duplicator will not function Unzip the firmware and write the file “cdxxx.bin” to a blank DVD/ CD-R or DVD/CD-RW disc. -
Page 52: Compare Firmware
The display will prompt you first for the button test. Follow the instructions on the display to test each button. Enter ESC Hold ESC to Exit After the button function test, the system will self test and then display Test Finished. Test Finished www.aleratec.com... - Page 53 ENT button to change, or ESC to exit. Default setting is “Off”; press the 12-12. Adv Setup ISRC & MCN ISRC & MCN 12.13 CD-TEXT (Not supported) www.aleratec.com...
- Page 54 USB port of your computer. The display will appear as shown at the left. When you are finished with USB Mode, simply disconnect the USB cable from the computer, and the Duplicator will switch to Stand Alone. 12-14. Adv Setup USB Option USB L. H Mode D1: Mult D2: Mult www.aleratec.com...
- Page 55 Now you are back in computer connect USB mode. From here, you can return to the Auto Link mode. Make sure the USB cable is connecting the Duplicator to your computer, and switch the Duplicator’s power switch to OFF and then back to ON. www.aleratec.com...
- Page 56 Duplicator will switch to Stand Alone. 12.16 Use Big Block ENT and use the up and down arrows to toggle between ON and OFF. Press When ON, Big Block enables the use 128-byte blocks for more efficient high speed (12x, 16x, 20x) DVD burning. www.aleratec.com...
-
Page 57: Using The Duplicator As A Dvd/Cd-Recorder
Duplicator to your computer, and installing the software on your computer. Connect the Duplicator to your computer. ▪ Connect the USB 2.0 Data Cable to the Duplicator. Align and gently attach the USB 2.0 Data Cable. USB 2.0 Connector Power Connector www.aleratec.com... - Page 58 Note: This step is not needed if you are not running Windows 98SE. Go to Adv Setup step 13 and switch to USB Mode. Your computer should recognize the DVD/CD-Recorder in the DVD/CD Duplicator. Install the software from the included CD. www.aleratec.com...
-
Page 59: Specifications
Power Requirements • 115-230 VAC Auto Switching Dimensions • 17cm x 17.8cm x 28.9cm (height x width x depth) • (6 5/8” x 7”x 11 3/8”) Weight • 4.6 kg (10.1 lbs) Warranty • Limited 1 Year Parts and Labor www.aleratec.com... -
Page 60: Troubleshooting
Buttons do not function. • May still be busy with last task. • Button malfunction. • Faulty circuit board. Copy completed but • Use Compare function to check. DVD/CD-R disc is not • Try the disc in another DVD/CD-ROM drive. readable/executable. www.aleratec.com... - Page 61 Troubleshooting Symptoms Corrective Action The failure rate is high. • Lower the speed of the DVD/CD-Recorder and try again. • Quality of blank disc is poor. Can not boot-up or fail to • Contact Aleratec Technical Support. upgrade BIOS. www.aleratec.com...
-
Page 62: Technical Support
Technical Support After reading this User Guide, if you need additional assistance with this product, please contact Aleratec Technical Support. Our technical staff will be happy to assist you, but they may need your help to better assist you. Calling Aleratec Technical Support without all the necessary information can be both time consuming and frustrating. -
Page 63: Service And Support
If the product fails during normal and proper use within the warranty period, Aleratec, Inc. will, at its option, repair or replace the product at no cost (except shipping and insurance). This limited warranty does not include... - Page 64 (even if Aleratec, Inc. has been advised of the possibility of such damages).
- Page 65 At the same time, the exchanged products or parts become the property of Aleratec, Inc. When shipping the subsystem for service, you agree to insure the Duplicator, to prepay shipping charges, and to use the original shipping container or equivalent.
-
Page 66: Technical Support Fax Back Form
I am experiencing the following problems with my DVD/CD Duplicator: ________________________________________________________________ ________________________________________________________________ ________________________________________________________________ ________________________________________________________________ ________________________________________________________________ By answering these questions, your problem will be solved more rapidly. Make copies as necessary. You can reach us electronically at: www.aleratec.com on the internet. www.aleratec.com... - Page 67 Notes: www.aleratec.com...
- Page 68 Document Number: 9399038_ENG_Rev. B Copyright © 2007 Specifications subject to change without notice. Aleratec, Inc. 9851 Owensmouth Avenue Chatsworth, CA 91311 U.S.A. www.aleratec.com...
Need help?
Do you have a question about the 260155 and is the answer not in the manual?
Questions and answers