
Related Manuals for Franke GL 62 M


Summary of Contents for Franke GL 62 M
- Page 1 Instructions for use and installation Built-in multi-function oven with 6 cooking modes Kullanım ve montaj talimatları 6 programlı çok fonksiyonlu ankastre fırın GL 62 M GL 66 M...
-
Page 2: Table Of Contents
In case of need, contact our local service centre and use only original spare parts. Your Franke oven uses a special enamel which is easy to keep clean; make sure to clean it frequently to avoid baking on dirt and cooking residue. -
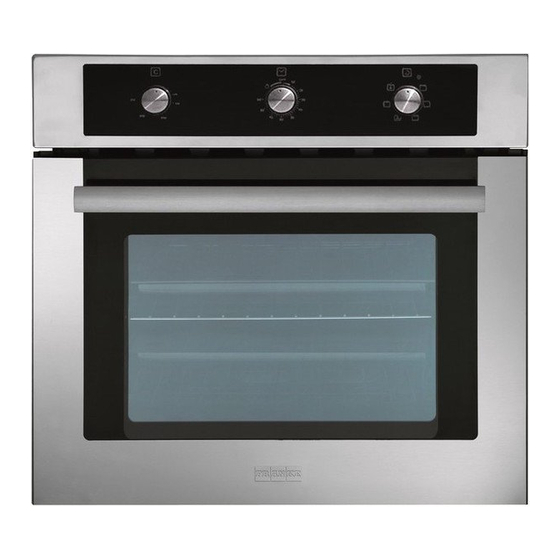
Page 3: A Close Look
Timer / Programmer Franke ovens have a variety of methods of monitoring and controlling cooking times, consult pag.4 for specific detailed instructions; after you have identified the type of control provided by your oven, you will find full... -
Page 4: Use
When the fan is running, you will notice hot air blowing from the front of the oven between the front panel and the oven door; Franke has made sure that the air jet does not disturb the kitchen environment and that noise is kept to a minimum. -
Page 5: Timer Instruction
End Cooking Timer Knob The end cooking timer is a practical device that turns the oven off automatically at a set time, ranging from one to 90 minutes. To use the end cooking timer, the ringer must be wound up by turning knob (C) almost one full turn clockwise;... - Page 6 CANCELLING THE BUZZER SOUND 1) Buzzer will sound after the programmed 2) Press the button to cancel. amount of time elapses. AUTOMATIC COOKING PROGRAM If you want to start cooking immediately, you just have to give in the cooking time. Example: We placed our food into the oven and want it to be cooked for 2 hours and 15 minutes.
- Page 7 We now have programmed our oven to get the food ready at 21:30. Since the cooking time was preprogrammed as 2 hours 15 minutes, your oven will start cooking at 19:15, so that the food is ready at 21:30. Screen just when cooking starts Screen just when cooking ends When automatic cooking is completed, a buzzer alarm is heared and will sound, if not stopped, for 7 minutes.
- Page 8 BUZZER TONE ADJUSTMENT Press the button for 5 seconds ( till you see ‘pr 1’ on the screen). Press the button to decrease buzzer volume Press the button to increase buzzer volume (default is already high) Press the button to record the last heard tone. CREATING YOUR BACKLIGHT COLOUR Press the button for 5 seconds (till display indicates 'r xx' , where xx is a number between...
-
Page 9: Cooking Table
Cooking table Setting the Type of food Weight Shelf Pre- Setting the Cooking selector (Kg) position heatingtime C° duration knob (min.) thermostat (min.) knob Natural 95-100 Lamb Roast Pork 70-80 static Roast Veal 10.5 140-150 cooking Omelette 10.5 25-30 Fruit 25-30 20-25 Hake-Sea bream-Turbot... -
Page 10: Cleaning And Maintaining The Oven
– Clean the enamelled surfaces, and the oven interior, with hot water and non-abrasive detergent. Replacing the oven light Franke ovens are equipped with a circular lamp positioned on the top left at the back of the compartment. Replace the oven light as follows:... - Page 11 Removing the oven door Removal oven door for easy cleaning Before cleaning the oven door, we advise you to follow below steps to seperate oven door from the oven body: 1. Open the door completely. Dismount the locking part on the hinge by lifting with screwdriver.
-
Page 12: Service
Service In case of malfunction, contact a Franke Technical Service Centre (see attached list). Do not call in unauthorised technicians. When contacting the Service Centre, quote the following information: – Type of fault; – Appliance model (Art.); – Serial number (S.N.);... - Page 13 - use adapters, multiple-sockets and/or extension leads; - install or repair the appliance without the aid of an authorised technician. Contact a Franke Authorised Service Centre in the following cases: - installation (to the manufacturer's instructions); - doubt regarding the operation of the appliance;...
-
Page 14: Installation
Installation Important: installation must be done in compliance with established standards and regulations. It must be done by a Franke Technical Service Centre Kitchen unit requirements For built-in units, the components (plastic materials and wooden veneer) must be assembled with heat resistant adhesive (max 100°C): unsuitable materials and... -
Page 15: Installation Instructions
(R) to the right or left so that the oven fits properly. Connection to power mains FRANKE ovens are equipped with a three pole power cable with free terminals. If the oven is permanently connected to the power supply, install a device to ensure that it is disconnected from the power supply, with a contacts opening distance (of at least 3 mm) to ensure total disconnection in conditions of category III overvoltage. -
Page 16: Technical Data
Technical data Power voltage and frequency: 230V ~ 50Hz Useable dimensions of the oven: 435 mm. wide Total power and fuse rating: 424 mm. deep 2,500kW - 16A 315 mm. high The appliance complies with the Heating element power: Useable volume of the oven: following EU Directives: roof 1200 W 58 litres... -
Page 17: Giriş
Gerekli onarımlar, Bu gibi durumlarda en yakın yardım merkezimizi arayınız ve sadece orijinal yedek parça kullanılmasını talep ediniz. Franke marka fırınınızda kolay temizlenen özel emaye kullanılmıştır, bununla birlikte fırını sıkça temizleyerek kalan yemek artıklarının tekrar pişirilmesini önlemek oldukça yararlıdır. Otomatik temizlemeli paneller (eğer fırında mevcutsa) su ve süngerle temizlenmelidir (temizlik talimatlarına bakınız). -
Page 18: Yakından Görünüm
çalışmakta olduğunu belirten fırın dahili lambası yanar. Dakika sayacı/ Programlayıcı Franke fırınları ürün yelpazesinde, her bir ürünün detaylı talimatları verilmiş olan çeşitli kontrol sistemleri ve pişirme süreleri yönetimi mevcuttur; fırın fonksiyonlarından doğru şekilde yararlanabilmek için fırınınızda bulunan kontrol tipini belirlemek yeterli olacaktır. -
Page 19: Kullanım Şekli
Son derece kullanışlı bir fırın olup, 5 farklı pişirme türü arasından seçim yapmanıza imkan tanır. Kontrol paneli üzerindeki (B) ve (F) düğmeleri vasıtasıyla istenilen sıcaklıklar ve farklı programlar seçilebilir. Franke fırınınızı en iyi şekilde kullanabilmek için bilgilendirme sayfasını inceleyiniz. -
Page 20: Zaman Saati Kullanım I
Fanlı ızgara pişirme Termostat düğmesi (F) normalde Maks. pozisyonunda bulunmalıdır, ancak bunun altında bir sıcaklığı seçmek de mümkündür; bu durumda ızgara işlemi daha yavaş gerçekleşecektir. Fırının üst tarafındaki ızgara rezistansı devreye girer ve fan çalışmaya başlar. Tek yönlü ısı yayılımına, fırın içindeki havanın fanla sağlanan sirkülasyonu da eklenir. Bu durum, ısının derine işleme gücünü... - Page 21 ÇALMAKTA OLAN ALARMI SUSTURMA 1) Ayarlanan alarm süresi dolduğunda alarm tuşuna basarak alarmı çalmaya başlar. susturabilirsiniz. OTOMATİK PİŞİRME PROGRAMI Fırına sürdüğünüz yemeği hemen pişirmeye başlayacaksanız, sadece pişme süresini girmeniz yeterlidir. Örnek: Fırınımıza pişireceğimiz yemeği koyduk ve 2 saat 15 dakika pişmesini istiyoruz. 1) Saat şu anda 18:30 2) Pişirme süresi ayar 3) + veya –...
- Page 22 Pişirme programı tamamlandığında, sesli ikaz devrededir ve susturulmaz ise 7 dakika boyunca çalacaktır. 1) Fırını kapatınız. 2) Fırın saatini resetleyiniz. Not: Fırınınız, siz fırın saatini resetleyene kadar devre dışı kalacaktır. Yukarıdaki örnekte önce pişirme süresi girilmiş, otomatik hesaplanan pişme bitim zamanı ise ikinci aşamada tarafımızca değiştirilmişti.
- Page 23 BUZZER TONU • tuşuna 5 saniye basınız ( ekranda ‘pr 1’ yazacaktır). • tuşuna basarak buzzer ses tonunu azaltabilirsiniz. • tuşuna basarak buzzer ses tonunu artırabilirsiniz. • tuşuna tekrar basarak seçilen ses tonunu hafızaya kaydedebilirsiniz.(Fabrika çıkışı yüksek tondur. Üç farklı ses tonu seçilebilir). AYDINLATMA RENGİ...
-
Page 24: Örnek Pişirme Tablosu
Örnek pişirme tablosu Seçim Yemek tipleri Ağırlık Ön-ısıtma Termostat Pişirme düğmesinin (Kg) pozisyonu süresi (dak.) düğmesinin süresi ayarlanması ayarlanması (dak.) C° Doğal statik Kuzu eti 95-100 Domuz Rosto 70-80 pişirme Dana Rosto 10,5 140-150 Omletler 10,5 25-30 Meyve 25-30 Tepside Balık 20-25 Unlu Mamuller 2-4 arası... -
Page 25: Fırının Temizliği Ve Bakımı
– Emayeli kısımlar ve fırının iç bölümleri için sıcak su ve çizmeyen deterjanlar kullanınız. Fırın lambasının değiştirilmesi Franke fırınlarında, arka sol üst tarafta yuvarlak bir lamba bulunmaktadır. Fırının içindeki lambayı değiştirmeniz gerekirse, aşağıdaki işlemleri takip ediniz: - Öncelikle cihazın elektrik hattına bağlantısında kullanılan çok kutuplu anahtar vasıtasıyla elektrik bağlantısının kesilmesi yada kolayda ise fişinin prizden... - Page 26 Fırın kapağının sökülmesi Fırın Kapağının Kolay Temizlenmesi için Yerinden Çıkarılması Fırın kapağını temizlemeye başlamadan önce, kapağı gövdesinden ayırmak için aşağıdaki adımlar izlenmelidir; 1. Fırın kapağını tamamen açınız.Menteşe üzerindeki kilit dilini tornavida yardımı ile yukarıya kaldırarak yerinden kurtarınız. 2. Kilit dilini cam yönünde menteşe gövdesine kadar itiniz. 3.
-
Page 27: Yardım
Yardım Olası çalışma sorunları ortaya çıkması halinde, ekteki listede yer alan bir Franke Teknik Yardım Merkezi ile temasa geçiniz. Yetkili olmayan servislere asla başvurmayınız. Aşağıdaki hususları belirtiniz: – Sorunun tipi; – Cihazın modeli (Art.); – Seri numarası (S.N.); Bu bilgileri fırınla birlikte verilen garanti belgesinde bulunan etiketin üzerinde bulabilirsiniz. - Page 28 - cihaz yakınında alev alıcı sıvılar kullanmak; - adaptörler, priz çoğaltıcılar ve/veya uzatma kabloları kullanmak; - kalifiye olmayan kişilere montaj ve onarımını yaptırmak. Aşağıdaki durumlarda kesinlikle Franke Yetkili Servislerine başvurunuz: - montaj (imalatçı talimatlarına göre); - çalışma şekli hakkında emin olunmaması halinde;...
-
Page 29: Kurulum
Kurulum Önemli: Cihazın kurulumu (montajı) yürürlükteki yönetmeliklere ve normlara uygun olarak yapılmalıdır. Sadece Franke Yetkili Servis personeli taraf ndan ı yapılmalıdır. Cihaz kasasının özellikleriyle ilgili bilgiler Ankastre (gömme) mobilyalarda kullanılan aksam (plastik malzemeler ve sunta türü ahşap malzeme) ısıya dayanıklı... -
Page 30: Montaj Talimatları
öncesinde yüzey rakorunu sağa veya sola hareket ettirerek yerleştiriniz. Elektrik şebekesine bağlantı FRANKE fırınınız, üç kutuplu serbest terminalli bir besleme kablosuyla donatılmıştır. Eğer fırın besleme şebekesine devamlı bağlantılı şekildeyse, aşırı-gerilim III kategorisi durumunda kontakları arasındaki açıklık mesafesi akımı komple kesecek şekilde tasarlanmış... -
Page 31: Teknik Veriler
Teknik Veriler Kullanılabilir fırının boyutları: Besleme gerilimi ve frekansı: genişlik 435 mm 230V ~ 50Hz derinlik 424 mm yükseklik 315 mm Toplam güç ve sigorta: 2,500kW - 16A Kullanılabilir fırın hacmi: Bu cihaz, aşağıdaki Avrupa 58 litre Birliği direktifleri ile uyumludur: Rezistans gücü: üst W 1.200 Sarfiyat (statik fonksiyonlu):...
Need help?
Do you have a question about the GL 62 M and is the answer not in the manual?
Questions and answers