
Related Manuals for ACTi TCM-6630


Summary of Contents for ACTi TCM-6630
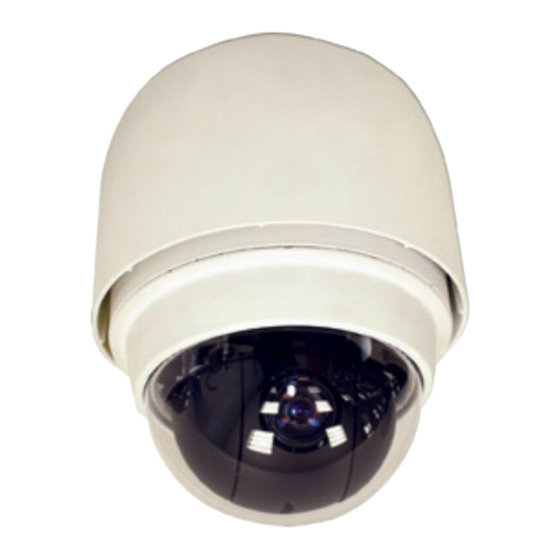
- Page 1 TCM-6630 36x Zoom H.264 IP D/N Outdoor Speed Dome Hardware User’s Manual Ver. 2011/8/30...
-
Page 2: Table Of Contents
TCM-6630 Hardware User’s Manual Table of Contents Precautions Introduction Package Contents ................5 Features and Benefits ..............6 Safety Instructions ................8 Physical description ................ 9 Installation Procedure Installing Speed Dome Cover ............14 Remove the Plastic Protection cap ........14 Apply Lubricant to clear cover .......... - Page 3 TCM-6630 Hardware User’s Manual APERTURE.................. 31 AE MODE ..................32 WBC MODE ................. 32 ID DISPLAY .................. 33 SETUP MENU ................34 TITLE DISPLAY ................36 TITLE SETTING ................37 ALARM SETTING ................ 37 HOME SETTING ................39 SEQENCE ................... 40 AUTOPAN ..................
-
Page 4: Precautions
TCM-6630 Hardware User’s Manual 0. Precautions Read these instructions You should read all the safety and operating instructions before using this product. Heed all warnings You must adhere to all the warnings on the product and in the instruction manual. Failure to follow the safety instruction given may directly endanger people, cause damage to the system or to other equipment. -
Page 5: Introduction
TCM-6630 Hardware User’s Manual 1. Introduction Package Contents TCM-6630 Power Adaptor Network Cable Power, Audio and Video Cable Alarm Cable Waterproof Rubber Sleeve & Mounting Kit Product CD Accessories (Lubricant / Screws) Warranty Card www.acti.com... -
Page 6: Features And Benefits
TCM-6630 Hardware User’s Manual Features and Benefits The IP High Speed Dome is designed to deliver superb performance and durability with an intelligent and stylish housing. It also provides a reliable real time images with outstanding image quality (D1, 720x480). It can compress and transmit real time images with outstanding image quality (30 FPS @ D1, 720 x 480 or 720 x 576) through a standard TCP/IP network. - Page 7 TCM-6630 Hardware User’s Manual H.264/MPEG-4/MJPEG Triple Codec Dual Streaming This device supports 3 compression formats, H.264, MPEG-4 and MJPEG. It brings superior image quality at 30 frames per second up D1 resolution (720 x 480 pixels). Built-in Hardware Motion Detection No more external motion sensors are required.
-
Page 8: Safety Instructions
TCM-6630 Hardware User’s Manual Safety Instructions Don’t use the power supply with other voltages This device is likely to be damaged or damage other equipments / personnel, if you use a power supply with different voltage than the one included with this device. All warranty of this product will be voided in the situations above. -
Page 9: Physical Description
TCM-6630 Hardware User’s Manual Physical description 1) Reset Button Step 1: Switch off IP device by disconnecting the power cable Step 2: Press and continue to hold the Reset Button (with a sharp tipped object, like a pen.) Step 3: Reconnect the power cable while continuing to hold the reset button for 20 seconds. - Page 10 TCM-6630 Hardware User’s Manual 2) Dome Control Protocol To control PTZ action of this Speed Dome, the control protocol of your software must match the one used by the Speed Dome Camera. Use these switches to set your dome control protocol and the baud rate.
- Page 11 TCM-6630 Hardware User’s Manual 4) 22 pin connector for Power / Audio In / Audio Out / Video Out / DIO This 50 cm cable consolidates all these wires to a single connection. Power Input / Audio In / Audio Out / Video Out are pre-connected.
- Page 12 TCM-6630 Hardware User’s Manual Please see the graph below on how to insert terminals to connector housing. www.acti.com...
- Page 13 DVR, no two speed domes should be given the same ID or communication conflict may occur. When controlled only through Ethernet and software (without the use of an ACTi hardware decoder), the dome ID setting may be ignored.
-
Page 14: Installation Procedure
TCM-6630 Hardware User’s Manual 2. Installation Procedure Installing Speed Dome Cover 1) Remove the Plastic Protection cap Remove the plastic protection cap from the speed dome unit. 2) Apply Lubricant to clear cover Apply lubricant included in package to dome cover rubber sleeve. This helps ease installation... -
Page 15: Attach Clear Cover To Speed Dome
TCM-6630 Hardware User’s Manual 3) Attach clear cover to speed dome There are a few micro-steps involved here. First you need to find the plastic stud by the side of dome cover. Insert that into one of the slots at the side of speed dome. -
Page 16: Connecting Cables
TCM-6630 Hardware User’s Manual Lastly use the small screw included in package to lock the dome cover into position. Connecting cables When installing, please note that you should string the cable through the accessories, the rubber waterproof sleeve, the mount kit and then into the ports. Please see image below for sequence. - Page 17 TCM-6630 Hardware User’s Manual There are three locking areas on the mount kit. Put it on top of the speed dome, then rotate it into position. Once it is rotated into position, you may use the other larger screw to keep it in place.
-
Page 18: Network Connection
TCM-6630 Hardware User’s Manual Network Connection Follow the diagram below to connect the IP high speed dome to the respective devices. www.acti.com... -
Page 19: Mounting Options For Speed Dome
TCM-6630 Hardware User’s Manual Mounting Options for Speed Dome Wall Heavy Duty Wall Mount PMAX-0309 Heavy Duty Wall Mount + Junction Box PMAX-0309 + PMAX-0700 www.acti.com... - Page 20 TCM-6630 Hardware User’s Manual Gooseneck Wall Mount - Raised PMAX-0307 Gooseneck Wall Mount - Flat PMAX-0306 www.acti.com...
- Page 21 TCM-6630 Hardware User’s Manual Gooseneck Wall Mount + Junction Box PMAX-0306 + PMAX-0700 www.acti.com...
-
Page 22: Corner
TCM-6630 Hardware User’s Manual Corner Heavy Duty Corner Mount PMAX-0309 + PMAX-0402 Heavy Duty Corner Mount + Junction Box PMAX-0309 + PMAX-0402 + PMAX-0700 www.acti.com... - Page 23 TCM-6630 Hardware User’s Manual Gooseneck Corner Mount PMAX-0306 + PMAX-0402 Gooseneck Corner Mount + Junction Box PMAX-0306 + PMAX-0402 + PMAX-0700 www.acti.com...
-
Page 24: Pole
TCM-6630 Hardware User’s Manual Pole Heavy Duty Pole Mount PMAX-0309 + PMAX-0502 Heavy Duty Pole Mount + Junction Box PMAX-0309 + PMAX-0700 + PMAX-0502 www.acti.com... - Page 25 TCM-6630 Hardware User’s Manual Gooseneck Pole Mount PMAX-0306 + PMAX-0502 Gooseneck Pole Mount + Junction Box PMAX-0306 + PMAX-0700 + PMAX-0502 www.acti.com...
-
Page 26: Ceiling
TCM-6630 Hardware User’s Manual Ceiling Pendant Mount PMAX-0109 Pendant Mount + Junction Box PMAX-0108 + PMAX-0700 ** If your camera need to be located far below the mounting point, please use PMAX-0104 extension tube. www.acti.com... -
Page 27: Appendix
TCM-6630 Hardware User’s Manual 3. Appendix OSD Menu Notes (On Screen Display) OSD Display Format The information shown on the screen are described in terms of OSD display, position and function description in the table below. Position Function OSD Display... - Page 28 TCM-6630 Hardware User’s Manual TCM-6630: Item Layer 1 Layer 2 Layer 3 Default DEFAULT <ON>, <OFF> CAMERA BLC Level <000> ~ <100> BACKLIGHT ☆ AUTO Focus Length <1cm>, <10cm>, 10 cm FOCUS <30cm> <1m> MANUAL <01> ~ <08> ☆...
- Page 29 TCM-6630 Hardware User’s Manual Item Layer 1 Layer 2 Layer 3 Default AUTOPAN CRUISE PRESET POINT <001> ~ <256> SEQUENCE LINE <1> ~ <8> AUTOPAN LINE <1> ~ <4> CRUISE LINE <1> RETURN TIME <001> ~ <128> Min. ENTER EXIT SEQUENCE LINE <1>...
-
Page 30: Configuration Menu
TCM-6630 Hardware User’s Manual Item Layer 1 Layer 2 Layer 3 Default SET MONTH SET DAY SET HOUR SET MINUTE EXIT+SAVE EXIT OSD Configuration Menu The detailed functions and parameter settings of your high speed dome can be set by the OSD (On Screen Display) menu with a control program. -
Page 31: Focus
TCM-6630 Hardware User’s Manual The Backlight Compensation Level ranges from 000 to 100. BLC LEVEL LEVEL EXIT NOTE: If this function is enabled, the WDR function will be disabled automatically. FOCUS Automatically adjusts the focus position to maximize the high frequency content of the picture in a center measurement area, taking into consideration the high luminance and strong contrast components. -
Page 32: Ae Mode
TCM-6630 Hardware User’s Manual MANUAL Select this item if you want to adjust aperture value manually. Higher value enhances the incident ray of camera. APERTURE MENU H APERTURE V APERTURE AE MODE The exposure is the amount of light received by the image sensor and is determined by how wide you open the lens diaphragm (iris adjustment), by how long you keep the sensor exposed (shutter speed), and other exposure parameters. -
Page 33: Id Display
TCM-6630 Hardware User’s Manual degree Kelvin (K). You can select one of the White Balance Control modes according to the condition. The following table shows the colour temperature of some light sources. Light Sources Color Temperature in K Cloudy Sky... -
Page 34: Setup Menu
TCM-6630 Hardware User’s Manual SETUP MENU Users can adjust camera lens model parameters under SETUP MENUs. Depending on the model of dome cameras, the SETUP MENUs are different. FLIP (IMAGE/ME/OFF) User can track an object continuously when it passes through under dome camera with setting Flip to IMAGE (digital flip) or M.E. - Page 35 TCM-6630 Hardware User’s Manual NOTE: The speed dome will only be able to tilt 90 °, or -10° ~ 100 ° with angle adjuster adjustments. ZOOM SPEED This item is used to set the zoom speed for operating the dome camera.
-
Page 36: Title Display
TCM-6630 Hardware User’s Manual The shutter speed is adjustable on TCM-6630. With the slowest shutter speed, users can see objects in a dark environment under 0.2 lux; or see a smooth video image with a higher shutter speed. The options are from <1/2> to <1/60>. -
Page 37: Title Setting
Users can name the zone titles with privacy mask ID numbers for future recognition. NOTE: For TCM-6630, the available area for setting privacy mask is restricted within tilt angle 45°. Follow the steps to set a camera title. - Page 38 TCM-6630 Hardware User’s Manual ALARM SETTING ALARM PIN ALARM SWITCH ALARM TYPE N.C. ALARM ACTION PRESET PRESET POINT DWELL TIME ALWAY EXIT ALARM PIN The dome provides 8 alarm inputs and 2 outputs ( 1 x N.O. and 1 x N.C.). Select an alarm connector which you want to set its alarm-related parameters with this item, and then set its alarm-related parameters in Alarm Setting menu.
-
Page 39: Home Setting
TCM-6630 Hardware User’s Manual SEQUENCE Select a sequence line that the speed dome camer should execute when alarm pin is triggered. The Sequence line should be defined prior in SEQENCE setup menu. AUTOPAN Select an auto-pan line that the dome camera should execute when alarm pin is triggered. The Auto-pan line can be defined in setup AUTOPAN menu. -
Page 40: Seqence
TCM-6630 Hardware User’s Manual HOME FUNCTION The item is used to enable or disable the HOME function. SELECT MODE Select one of the modes that the dome should execute when HOME function is enabled and the RETURN TIME is up. The options are <AUTOPAN>, <SEQUENCE>, <CRUISE> and <PRESET>. - Page 41 TCM-6630 Hardware User’s Manual SEQUENCE SEQUENCE LINE SEQUENCE POINT PRESET POSITION SPEED DWELL TIME RUN SEQUENCE ENTER EXIT SEQUENCE LINE There are eight sets of sequence lines built in the speed dome camera. Using LEFT/RIGHT direction keys to select a line first and then set its sequence points.
-
Page 42: Autopan
TCM-6630 Hardware User’s Manual Speed 15 DWELL TIME The DWELL TIME is the duration time that the speed dome will stay at the sequence point, and the range is from <0> to <127> seconds. The speed dome will go to the next sequence point when the DWELL TIME is up. - Page 43 TCM-6630 Hardware User’s Manual point to complete the auto-pan setting. NOTE: The tilt and zoom value of the start point will be recorded and fixed for the selected auto-pan line. END POINT Users are able to set the end point after the start point is defined. Pan the dome to another position and press <ENTER>...
-
Page 44: Cruise
TCM-6630 Hardware User’s Manual EXIT Exit the AUTOPAN setup menu. CRUISE A Cruise is a route of manual operations that can be stored and recalled to execute repeatedly. It can be formed of pan, tilt position. CRUISE RECORD START... -
Page 45: Wdr Setting
TCM-6630 Hardware User’s Manual Refer to the description to operate the removable IR cut filter. AUTO The internal circuit will automatically decide the occasion to remove the IR cut filter according to the value of light condition calculated by the internal light algorithm. -
Page 46: Privacy
TCM-6630 Hardware User’s Manual function has better effect than the Backlight compensation. WDR SETTING WDR SWITCH WDR FUNCTION AUTO EXIT WDR SWITCH Enable or disable the WDR function with the item. WDR FUNCTION The item is used to define the WDR function mode. - Page 47 TCM-6630 Hardware User’s Manual PRIVACY PRIVACY SWITCH SHADE GRAY SET MASK MASK CLEAR+RESET MASK DISPLAY FIRST EXIT PRIVACY SWITCH The item is used to enable or disable masking function. Set this item to <ON> before configuring mask zone. ...
-
Page 48: Time Function
TCM-6630 Hardware User’s Manual V SIZE(000 ~ 127) User can adjust the vertical size of privacy mask through this item. Set the H and V size to 0 can also delete the selected mask. MASK CLEAR+RESET The item is used to clear the mask settings of the selected privacy mask. Select a mask and press <ENTER>... -
Page 49: Exit Osd
TCM-6630 Hardware User’s Manual Select <ON> to display the Time information on screen, or <NO> not to display. YEAR / MONTH / DAY The items are for setting up the system date. HOUR / MINUTE This items are for setting up the system time. -
Page 50: Product Specification
TCM-6630 Hardware User’s Manual Product Specification TCM-6630 •Device Device Type Speed Dome Camera Image Sensor Sony EXview HAD Interlaced Scan CCD Sensor Size 1/4” (3.2 x 2.4 mm) Horizontal Resolution 650 TVL Day / Night Minimum Illumination Color: 0.1 lux; B/W: 0.01 lux... - Page 51 TCM-6630 Hardware User’s Manual •Audio Compression 8 kHz, Mono, PCM, 16 bit encoding Audio-In 3.5 mm Phone Jack Audio-Out 3.5 mm Phone Jack •Network TCP, UDP, HTTP, HTTPS, DHCP, PPPoE, RTP, RTSP, IPv6, DNS, DDNS, Protocol & Service NTP, ICMP, ARP, IGMP, SMTP, FTP, UPnP Security IP address filtering;...
-
Page 52: Accessing Camera
TCM-6630 Hardware User’s Manual 4. Accessing Camera If you have DHCP server / router in your network: Many network server / routers are able to automatically provide IP addresses through DHCP. If you are using such a network, just plug in your computer and IP Camera into the network and your IP device will acquire network address by itself. - Page 53 TCM-6630 Hardware User’s Manual Please set the settings as below. IP address: 192.168. 0.xxx Subnet mask: 255.255.255.0 (NOTE: xxx should be a number from 1 to 254 except 100, which is used by the IP device. Please also...
- Page 54 TCM-6630 Hardware User’s Manual If you are using a single camera, this is enough to access the device. If you are using multiple devices, you need to change the current device to another unused IP address, so that when the next device is connected to the network, no two devices use the same IP.
- Page 55 TCM-6630 Hardware User’s Manual 10. Click “Apply” 11. Please go to System -> Save & Reboot, and click ”Apply”. Internet Explorer will close after a few seconds. This is normal. 12. Wait for 30 seconds, and open IE again to connect to the IP.
- Page 56 TCM-6630 Hardware User’s Manual www.acti.com...
Need help?
Do you have a question about the TCM-6630 and is the answer not in the manual?
Questions and answers