
Related Manuals for Roland PNC-1860


Summary of Contents for Roland PNC-1860
- Page 1 PNC-1860 PNC-1860 PNC-1860 PNC-1860 PNC-1860 PNC-1410 PNC-1410 PNC-1410 PNC-1410 PNC-1410 PNC-1210 PNC-1210 PNC-1210 PNC-1210 PNC-1210 USER'S MANUAL * This User's Manual is intended for the PNC-1860, PNC-1410, as well as PNC-1210.
-
Page 2: For Canada
AVIS Cet appareil numérique de la classe B respecte toutes les exigences du Règlement sur le matériel brouilleur du Canada. ROLAND DG CORPORATION 1-6-4 Shinmiyakoda, Hamamatsu-shi, Shizuoka-ken, JAPAN 431-2103 MODEL NAME : See the MODEL given on the rating plate. -
Page 3: Table Of Contents
Thank you very much for purchasing the CAMM-1 PNC-1860/1410/1210. • To ensure correct and safe usage with a full understanding of this product's performance, please be sure to read through this manual completely and store it in a safe location. -
Page 4: Typographic Conventions
: Indicates important information to prevent machine breakdown or malfunction and ensure correct use. : Indicates a handy tip or advice regarding use. Windows is registered trademark or trademark of Microsoft Corporation in the United States and/or other countries. Copyright © 1995 ROLAND DG CORPORATION... -
Page 5: To Ensure Safe Use
To Ensure Safe Use Never disassemble or modify Handle the power cord with care. When pulling the power cord this product. from an electrical socket, be Do not step on or damage the power sure to grip the plug. cord, or allow heavy objects to be placed atop it. -
Page 6: About The Labels Affixed To The Unit
About the Labels Affixed to the Unit These labels are affixed to the body of this product. The following figure describes the location and content of these messages. Rating label Do not allow the hands within the space to the front or rear of the unit while in operation. -
Page 7: To Ensure Correct Use
To Ensure Correct Use This product is a precision instrument Do not install in an area subject to dust, Do not connect to an AC outlet that and must be handled with care. high humidity or poor ventilation. supplies other than the specified voltage. When the unit is not in use for an Arrange the power cord and interface extended period, detach the electrical... - Page 8 MEMO...
-
Page 9: Checking Accessories
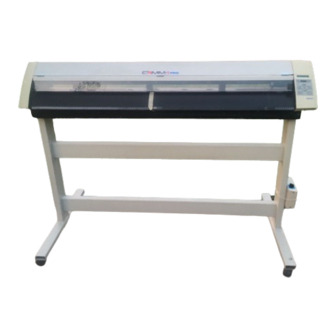
User’s Manual: 1 windows 3.1: 1 windows 95: 1 2 PART NAMES AND FUNCTIONS * In the figures shown, the PNC-1860 is installed on the PNS-186 special stand. 2-1 Front View Some details of the PNC-1410/1210 differ from the figure. Front Cover... -
Page 10: Rear View
SETUP LED carriage. SETUP This lights up when the key is pressed to pause the PNC-1860/1410/ TEST Key TEST 1210. Pressed to execute a cutting test (Use to confirm material specifications as SETUP Key... -
Page 11: Basic Operation
(23-5/8") Connection • Always make sure that the power is off on both the computer and the PNC-1860/1410/1210 whenever any cables are connected or disconnected. • Securely connect the power cord, computer I/O cable and so on so that they will not be unplugged and cause failure during operation. -
Page 12: Installing The Cutter
3-2 Installing the Cutter Always make sure the power switch is OFF before installing (or replacing) the cutter. Do not touch the tip of the blade with your fingers, as the cutting performance of the blade will be impaired. Installation Push-pin (1) Insert a blade into the blade holder until it snaps into place with an audible click. -
Page 13: Loading The Material
Below are shown the allowable widths (horizontal dimension) of materials that can be loaded and the maximum widths that can be cut. Maximum cutting area Acceptable material widths PNC-1860 : 1195 mm (W) x 24998 mm (L) (47" x 984-1/8") PNC-1860 : 90—1372 mm (3-1/2"—54" ) PNC-1410 : 889 mm (W) x 24998 mm (L) (35"... -
Page 14: Loading Roll Material
Roland DG Corp. Loading Roll Material When using stand (The stand is sold separately.) (PNC-1860: PNS-186, PNC-1410:PNS-141, PNC-1210: PNS-130) (1) Install the two shafts on the sheet hanger. Place the rolled (2) Place the roll material on top of the shafts. - Page 15 Pinch roller (3) Pull out as much from the roll as needed, and pass the material from the back of the main unit to the front as shown in the Guide line figure. At this time, line up the right edge of the material with the guide lines at the front and rear of the grit roller near the control panel, and pull the material straight out to the front.
-
Page 16: Loading Flat Material (Standard-Size Material, Cut Material, Etc.)
Close the front cover (7) Close the front cover, then follow the messages on the control panel to use the keys to select "Roll" and press the key. SELECT SHEET ENTER ROLL EDGE PIECE * If cutting is to be performed from the front edge of the material, select "Edge."... - Page 17 (2) Move the left and right pinch rollers so that they are close to the Make sure the left and right margins are the same size respective left and right edges of the material. When using a material Stickers showing the locations of the that is wider than 762 mm (30") , move the middle pinch roller to a grit rollers position near the center of the left and right pinch rollers.
-
Page 18: To Perform Long Cutting
To Perform Long Cutting When performing cutting over a length of 1.5 m (60") or more, first feed out the required length of material. Then follow the steps below to load the material. Pull out the material from the roll and pass it through the unit. -
Page 19: Selecting The Interface
Set each parameter to match the parameters used by the computer or software. (Refer to “Setting the protocol for a Serial connection” on page 21.) * If the communication parameters for the computer and the PNC-1860/1410/ 1210 are not identical, the cutting data cannot be received correctly, which... -
Page 20: Cutting Test - Setting Cutting Speed, Blade Force, And Blade Compensation
For optimum performance, it is necessary to set cutting conditions that match the material, giving consideration to the material's thickness and type of material. The PNC-1860/1410/1210 has an internal "cutting test" to check the cutting conditions. This “cutting test” allows you to determine settings for the cutting speed, blade force and the amount of offset. -
Page 21: Downloading Cutting Data
If the PNC-1860/1410/1210 cannot be selected, choose any model in the PNC-1850, PNC-1200, PNC-950 or PNC-900. (These models support CAMM-GL III.) Select either the parallel (Centronics) or serial (RS-232C) interface. Choose the one that the host computer and the PNC-1860/ 1410/1210 are connected by. -
Page 22: Continuing Cutting
Continuing Cutting Cutting after changing the material Again carry out the procedure described from “3-3 Loading the Material” to “3-6 Downloading Cutting Data” . * There is no need to perform the procedure described under “3-4 Selecting the Interface.” Also, if a material of the same type is used, there is no need to perform a cutting test. -
Page 23: Applying The Completed Cutout
For a Flat Material (Standard-size Material, Cut Material, Scrap, Piece, Etc.) Lower the sheet loading levers and remove the material from the PNC-1860/1410/1210. * If a portion that can still be cut remains, then instead of removing the material, use the cutter... -
Page 24: Care And Maintenance
4 CARE AND MAINTENANCE • Always turn off the PNC-1860/1410/1210 before cleaning it. • Never lubricate the mechanisms. • Use a small amount of water or alcohol for cleaning. Never use solvents such as benzene or thinner can smooth out the material so that it sticks securely. -
Page 25: About The Cutting Area
The workable area spans the length between the two rollers, minus a margin of about 1 mm (about 0.04") on both sides. If the material length is greater than 1,600 mm (62-15/16") when a flat material (paper) has been loaded, the PNC-1860/1410/ 1210 determines it to be a rolled material and sets the material length to 24,998 mm (984-1/8"). -
Page 26: Display Menus Flowchart
Power on + Power on + Power on MENU Openning message PNC-1210 PNC-1860 PNC-1410 ENGLISH JAPANESE DEMO CUT Roland DG Corp. Roland DG Corp. Roland DG Corp. GERMAN FRENCH ENGLISH/JAPANESE/ to select. After loading a sheet, GERMAN/FRENCH/ Press ENTER to enable the setting. - Page 27 Pressing ENTER moves the blade up or down. SUBMENU CROPMARK UPDOWN UPDOWN UP/DOWN ->ENTER Pressing , or moves the cutter in OVER-CUT CALIB MOVE ->CURSOR the +Y, -Y, -X, or +X directions, respectively. OVER CUT OVER CUT OFF <ON> OFF/ON CALIB X CALIB Y CALIB 0.00%...
-
Page 28: Display Menu Lists
8 DISPLAY MENU LISTS This chart lists the menus of the PNC-1860/1410/1210 grouped by usage. Menus indicated by an Circle (" ") are explained further in the section at the end of the chart. Please refer to these additional explanations when using such menus. - Page 29 Selecting the connection interface This selects the interface for connecting a computer to the PNC-1860/ 1410/1210. Set this to “PARALLEL” for a parallel connection or to “SERIAL” for a serial connection.
- Page 30 When set to "IGNORE," cutting is performed using the values for "** gf" set at the top menu. Other setting ENGLISH, JAPANESE, The PNC-1860/1410/1200 is capable of displaying all its menus in GERMAN, ENGLISH either of six languages, English, French, German, Spanish, Italian FRENCH and Japanese.
- Page 31 CROPMARK This is used when cutting around pre-printed graphics on a material, such as when making stickers or seals. With the PNC-1860/1410/ 1210, a material is always loaded parallel to the unit. This means that unless the graphics to be cut have been printed parallel to the material, the cutting lines become shifted from the graphics, and it becomes impossible to accurately cut around the graphics (see Figure A below).
-
Page 32: Blades And Materials
9 BLADES AND MATERIALS This section indicates the proper cutting conditions for various types of materials, as well as blade lifespans. Cutting conditions and blade life vary according to the hardness of the material and the usage environment. Making the settings for the conditions described below does not automatically guarantee attractive cutting results in all situations. -
Page 33: Plotting On Paper Media
1860/1410/1210. If the pen is to be changed during plotting, use "1. Tool number" to set the tool numbers to be used to match the pen numbers set with the software. Because tool changes are not necessary when cutting is performed, the PNC-1860/1410/1210 is ordinarily set not to accept pen-change instructions. -
Page 34: What To Do If
11 WHAT TO DO IF..11-1 What to do if..PNC-1860/1410/1210 troubleshooting Connect the power cord included with the PNC-1860/1410/1210 to the unit, Is the power cord connected correctly? and plug the other end securely into an electrical outlet (see “3-1 Installation and Connections”... - Page 35 Load a sheet and press any key to cancel the error message. Shows motor error status. Motor Error This is displayed when the PNC-1860/1410/1210 is heavily loaded, such as Power ON Again during a paper jam, when heavy stock is cut across a long distance without initial sheet feed, or when the sheet is abruptly pulled from the roll during cutting.
-
Page 36: Error Messages
Baud Rate, Parity, Stop Bits, or Er15:Framing/ Data Bits. The protocol settings for the PNC-1860/1410/1210 must be made correctly in Parity Error order to match the settings your computer is set to use.) Appears if the I/O buffer has overflowed.(There is a problem with the connecting cable, or... -
Page 37: Supported Instruction Sets
12 SUPPORTED INSTRUCTION SETS A "CAMM-GL III Programmer's Manual" is available for separate purchase for those wishing to create their own programs for this machine. For further information, please contact the nearest Roland DG Corp. dealer or distributor. : Compatible. -
Page 38: Character Set
13 CHARACTER SET Automatic backspace... -
Page 39: Specifications
• Range for assured repetition accuracy (*) Repetition accuracy For sheets with a width exceeding 610 mm (24"): Length 4,000 mm (157-7/16") (PNC-1860/ 1410 only) For sheets with a width of 610 mm (24") or less : Length 8,000 mm (315-15/16") -
Page 40: Interface Specifications
The following conditions must be satisfied: - Material type: 3M Scotchcal Mastercut Film, ARLON Series 2100 - Special stand (a roll material must be set at the rear and on the inner sheet hanger) - Side margins: 25 mm (1") or more for both the left and right margins - Front margin: 25 mm (1") or more (After loading the material, using the display menu to select “EDGE”... - Page 41 R9-980506...
Need help?
Do you have a question about the PNC-1860 and is the answer not in the manual?
Questions and answers