Table of Contents
Advertisement
Advertisement
Table of Contents

Related Manuals for ALLEN & HEATH ZED R16 Firewire


Summary of Contents for ALLEN & HEATH ZED R16 Firewire
-
Page 1: User Guide
USER GUIDE Publication AP7236... -
Page 3: Warranty
Limited One Year Warranty This product is warranted to be free from defects in materials or workmanship for period of one year from the date of purchase by the original owner. To ensure a high level of performance and reliability for which this equipment has been designed and manufactured, read this User Guide before operating. -
Page 4: Packed Items
PACKED ITEMS Check that you have received the following: 2 TRACK 1 OUT STUDIO OUT 1 STUDIO OUT 2 AUX 1 CRM L 2 TRACK 1 IN AUX 2 CRM R LINE LINE LINE LINE LINE LINE LINE LINE LINE LINE LINE LINE... -
Page 5: Safety Instructions
SAFETY INSTRUCTIONS WARNINGS Read the following before proceeding : CAUTION ATTENTION: RISQUE DE CHOC ELECTRIQUE – NE PAS OUVRIR Retain these safety and operating instructions for future reference. Adhere to all warn- Read instructions: ings printed here and on the console. Follow the operating instructions printed in this User Guide. -
Page 6: General Precautions
SAFETY INSTRUCTIONS Important Mains plug wiring instructions The console is supplied with a moulded mains plug fitted to the AC mains power lead. Follow the instructions below if the mains plug has to be replaced. The wires in the mains lead are coloured in accordance with the following code: TERMINAL WIRE COLOUR... -
Page 7: Table Of Contents
CONTENTS Thank you for purchasing your Allen & Heath ZED-R16. To ensure that you get the maximum benefit from the unit please spare a few minutes familiarizing yourself with the controls and setup procedures outlined in this user guide. For further information please refer to the additional information available on our web site, or contact our technical support team. -
Page 8: Panel Drawings
PANEL DRAWINGS ZED-R16 This device complies with Part 15 of the FCC Rules. CAUTION Operation is subject to the following two conditions: (1) this device may not cause harmful interference, and RISK OF ELECTRIC SHOCK (2) this device must accept any interference received, DO NOT OPEN including interference that may cause undesired operation. -
Page 9: Introduction To Zed-R16
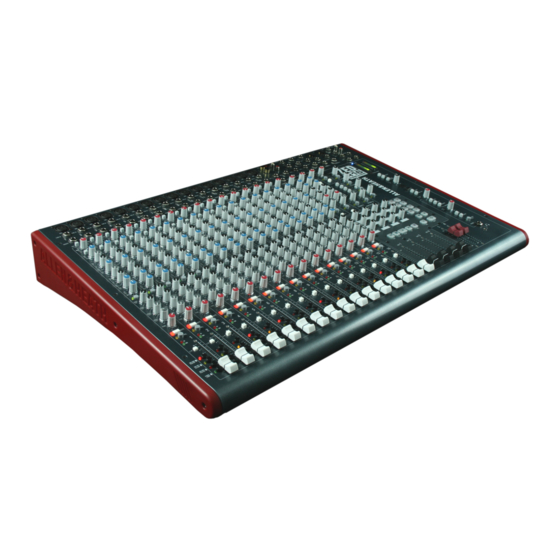
INTRODUCTION TO THE ZED-R16 A Technical Overview: The Allen & Heath ZED-R16 mixer has been carefully and lovingly designed in the beautiful county of Cornwall in the UK and is manufactured alongside a wide range of professional audio mixing consoles. Allen &... -
Page 10: Specifications
SPECIFICATIONS Operating Levels Inputs Mono channel (XLR) Input -6 to –60dBu for nominal (+14dBu in max) Mono channel Line Input (Jack socket) +14 to –40dBu (+34dBu maximum) Insert point (TRS Jack socket) 0dBu nominal +21dBu maximum Stereo Input (Jack sockets) 0dBu nominal (control = Off to +10dB) Stereo input (phono sockets) 0dBu nominal (control = Off to +10dB) -
Page 11: Dimensions
DIMENSIONS 470mm (18.5”) 704mm (27.7”) 704mm (27.7”) Weight kg (lb) Unpacked Packed ZED-R16 13 (29lb) 15 (33 lb) Allen & Heath ZED-R16 User Guide... -
Page 12: Block Diagram
ZED-R 16 BLOCK DIAGRAM DIGITAL SEND POST-EQ FIREWIRE BUS DIGITAL MASTER PEAK TO MIX L-R PHANTOM POWER SWITCH SIGNAL DIGITAL MASTER IN DIGITAL RETURN FIREWIRE BUS +48V POST-EQ DIGITAL RETURN PRE-INSERT ENABLE MIDI GAIN AUDIO BYPASS FADER MAIN LR MUTE L INSERT FADER 4 BAND PARAMETRIC EQUALISER... -
Page 13: Mono Input Channel
MONO INPUT CHANNEL Microphone Input Socket Standard 3-Pin XLR socket wired as Pin 1=Chassis, Pin 2=hot (+), Pin 3=Cold (-). Line Input Jack Socket Standard 1/4” (6.25mm) Jack socket for balanced or unbalanced line level signals. Wired Tip=Hot(+), Ring=cold (-), Sleeve=Chassis. IMPORTANT NOTE: The Line input signal is connected to the XLR input through attenu- ating resistors and coupling capacitors, in other words the two in-... - Page 14 MONO INPUT CHANNEL HF EQ The HF (High Frequency) equaliser affects the frequency response of the higher audible frequencies. The corner frequency of 12kHz is around 3dB from the maximum cut or boost of the circuit. ZED-R 16 HF EQ 20.00 15.00 10.00...
- Page 15 MONO INPUT CHANNEL LMF EQ The LMF (Low Mid Frequency) equaliser affects the lower middle of the audible frequency range. The frequency graduations on the sweep control are the centre frequencies of the EQ. As with the HMF section, the Q factor is variable from 0.8 to 6. The graph shows the Q setting in the minimum, middle and maximum posi- tions, and the extents of the frequency range.
-
Page 16: Mute Switch
MONO INPUT CHANNEL Auxes 1 & 2 AUX1 Each of these controls sends a signal to an auxiliary bus. The signal is sourced pre-fade which means that the level is independent of, and un- affected by the fader. Auxes 1 & 2 are primarily used for foldback moni- toring purposes, as the fader does not affect the level. - Page 17 MONO INPUT CHANNEL Fader The 60mm fader can be used as a normal channel fader where it will affect the level of signal to the main L-R bus and the post- fade auxes. There is 10dB of gain at the top of the travel. The fader can also be used as a MIDI controller if the FADER=MIDI switch is pressed on that channel.
-
Page 18: Stereo Input Channel
STEREO INPUT CHANNEL ST1 (& ST2) Phono & Jack sockets Standard RCA phono sockets and 1/4” jack sockets for unbalanced stereo inputs. The RCA phono sockets normally connect through the jack break contacts so giving a choice of which connector type to use. The left signal does not connect to the right if nothing is plugged into the right socket though, as with some of our other products. -
Page 19: Level Control
STEREO INPUT CHANNEL Auxiliaries 1 & 2 Each of these controls sends a mono signal to an auxiliary bus (a sum of the left & right inputs). The signal is sourced pre-fade which means that the level is independent of, and unaffected by the master level control The control varies the signal level to the bus from off (fully attenuated) to +6dB, with unity gain at the arrow. -
Page 20: Studio Outputs & St3 & 4 Inputs
STUDIO OUTPUTS & ST3 & 4 INPUTS ST3 & 4 Inputs STUDIO OUT 1 STUDIO OUT 2 These stereo inputs have limited features and are provided for additional stereo sources that need to be added to the main L-R mix. The left input jack socket normalises or connects through the break contacts of the right input jack socket, enabling a mono input to be fed to both left and right mix paths. -
Page 21: Aux Masters And Main Outputs
AUX MASTERS & MAIN OUTPUTS. 2 TRACK 1 OUT 2 Track 1 Output XLR connectors AUX 1 Standard 3-Pin XLR panel plug wired as Pin 1=Chassis, Pin 2=hot (+), Pin 3=Cold (-). Electronically balanced, +4dBu = 0VU. These are the main stereo outputs, normally fed from the main L-R mix, they can be fed from the 2 Track 1 AUX 2 phono inputs if the Replace Mix switch is pressed (for... -
Page 22: Master Section
MASTER SECTION CRM L 2 TRACK 1 IN Control Room Monitor jack sockets Standard 1/4” (6.25mm) Jack socket for connecting powered monitor speakers or an amplifier for the engineers control room monitor speakers. Impedance balanced. Wired Tip=Hot(+), Ring=cold (-), Sleeve=Chassis. CRM R Alternate Monitor jack sockets Standard 1/4”... -
Page 23: Phones Level Control
MASTER SECTION Talkback Section 2 TRACK 1 A built in microphone and talkback system allows the engineer to talk to REPLACE L-R the artists in the studio or foldback monitors on stage. The Talk Level con- trol adjusts the gain of the amplifier, be wary of feedback if the talkback TALK signal is routed to the local monitors via the AFL system or the proximity of the studio monitors is such that they are able to feedback to the talkback... -
Page 24: Digital Connections & Switches
DIGITAL CONNECTIONS & SWITCHES ADAT OUT ADAT IN MIDI OUT 9-16 9-16 FIREWIRE ADAT 44.1kHz 48kHz FireWire/ADAT configuration switch This switch determines whether the digital interface is predominantly FireWire or ADAT and will be dependent on what type of external equipment is used. Set to FireWire if a computer or equipment with IEEE 1394 FireWire connection is to be used or ADAT if an ADAT machine only is to be connected. -
Page 25: Digital I/O Configuration Diagrams
DIGITAL INPUT & OUTPUT CONFIGURATIONS DIGITAL I/O CONFIGURATIONS: The following four set-up configuration diagrams show a schematic representation of the ZED-R16 digital I/O section connected to the recording/playback equipment. Note the FireWire channel differences at higher sample rate settings. 1 FireWire mode 44.1 or 48kHz MONO CHANNELS 1 -16 ANALOGUE I/O STEREO MASTER 9-16... -
Page 26: System Compatibility
ZED DICE DRIVERS: SYSTEM COMPATIBILTY DRIVER RELEASE VERSION: V3.3.2 The ZED DICE drivers are supplied to Allen & Heath by TC Applied Technologies Ltd. They are customised versions of drivers used in generic FireWire devices used extensively throughout the Pro Audio industry. We at A&H endeavour to verify the stability and function of these drivers with different computers, operating systems and applications, however certain configurations of computer hardware and operating systems may not have been verified here at A&H. -
Page 27: Connecting To A Computer & Loading Drivers
CONNECTING TO A COMPUTER Downloading the Drivers Your ZED-R16 has software installed and working already, but in order for your Windows or MAC computer to be able to communicate with the FireWire device in ZED-R you’ll need to load some Drivers onto your computer. The installer software is available on the Allen &... - Page 28 CONNECTING TO A MAC Downloading the Drivers Your ZED-R16 has firmware installed and working already, but in order for your MAC computer to be able to communicate with the FireWire device in ZED-R you’ll need to load some Drivers onto your computer. The installer software is available on the Allen &...
-
Page 29: Zed Dice Control Panel
ZED DICE CONTROL PANEL A description of the Control Panel for the ZED DICE driver v3.3.2. Both the Windows & Mac versions are covered by this guide, the differences are highlighted where relevant. The Windows or Mac installer program will install the driver software for the ZED DICE audio streaming device onto your computer, and a control panel application which can be used to check and set up certain parameters such as sample rate and synchronisation source. -
Page 30: Global Settings
ZED DICE CONTROL PANEL The control panel is divided into two main sections, Global Settings and Device Settings. Global Settings All system related settings are here, grouped into four Tabs for Windows, two for the Mac version. Bus Tab: Contains controls for choosing the system clock master device, sample rate, synchronisation source, buffer size, and opera- tion mode. - Page 31 ZED DICE CONTROL PANEL The WDM tab (Windows only) can be used for enabling or disabling the Windows Driver Model audio channels, configuring them as mono, stereo or surround, depending on your computer’s capability, and mapping the WDM channels to the required channels on your ZED-R16.
- Page 32 ZED DICE CONTROL PANEL Device Settings This area of the control panel shows information for the ZED-R16 if connected to the FireWire bus. The device (mixer) is shown in the Devices list on the right, the clock symbol is displayed if it is the clock master and a padlock symbol shows if the device is locked or unlocked (synchronised or not).
-
Page 33: Applications Drawings
KT-88 2 TRACK 1 OUT STUDIO OUT 1 STUDIO OUT 2 AUX 1 CRM L 2 TRACK 1 IN AUX 2 CRM R LINE LINE LINE LINE LINE LINE LINE LINE LINE LINE LINE LINE LINE LINE LINE LINE KEY: 2 TRACK 2 IN AUX 3 ALT L... - Page 34 2 TRACK 1 OUT STUDIO OUT 1 STUDIO OUT 2 AUX 1 CRM L 2 TRACK 1 IN AUX 2 CRM R LINE LINE LINE LINE LINE LINE LINE LINE LINE LINE LINE LINE LINE LINE LINE LINE KEY: 2 TRACK 2 IN AUX 3 ALT L 2 TRACK 2 OUT...
-
Page 35: Modes Of Operation
MODES OF OPERATION RECORDING PRE-EQ FROM AN ANALOGUE MIX The basic mode for ZED-R16 with all the configuration switches in the up position (not pressed). ZED-R16 can be oper- ated as a traditional analogue mixer, using the main L-R mix as a stereo monitor mix for the multitrack recording, or as a PA mix if working live. - Page 36 MODES OF OPERATION RECORDING POST-EQ FROM AN ANALOGUE MIX If the DIG SEND = POST EQ switch is pressed then the digital output from the channel will be sourced from after the equaliser. Use this mode if you want to use ZED-R16 as an analogue mixer and want to EQ the signal being re- corded.
- Page 37 MODES OF OPERATION USING DIGITAL PROCESSING PLUG-INS IN AN ANALOGUE MIX The digital channel inputs and outputs are used to send a signal to the Digital Audio Workstation of software applica- tion where processing plug-ins such as noise gates or compressors can be used, almost as if they were plugged into the insert point on the channel.
- Page 38 MODES OF OPERATION IN LINE MULTITRACK RECORDING AND MONITORING The signal for recording is send pre EQ (it can be post EQ if the DIG SND = post EQ switch is pressed) and the track can be monitored by pressing the DIG RET = post EQ configuration switch. Using this mode emulates the tra- ditional method of monitoring from the replay head of a tape machine which is a reliable way of monitoring what is being recorded.
- Page 39 MODES OF OPERATION ANALOGUE MIXDOWN FROM DIGITAL SOURCE Here, the digital inputs to the channels are selected to go to the channel just before the insert point (replacing the signal from the pre-amp). This mode allows for analogue mixing from a multi-track digital source using the simply gorgeous analogue EQ on the ZED-R16.
- Page 40 MODES OF OPERATION DIGITAL MIXDOWN USING FADERS AS MIDI CONTROLLERS Many people will want to stay in the digital domain once their tracks are recorded. The ZED-R16 appreciates this and allows the channel faders to be used as MIDI controllers where they can be assigned to control the level or other parameter within the Digital Audio Workstation or software application.
- Page 41 MODES OF OPERATION EXTREME FLEXIBILITY—ANALOGUE PLUG-INS! You can even use the EQ in the ZED-R16 channel as an analogue plug-in for your Digital Audio Workstation! To do this press both the DIG RET = PRE INS to source the channel from your DAW and the DIG SND = POST EQ, so the output of the EQ goes back to the DAW.
-
Page 42: Sonar Le Overview
SONAR LE cakewalk DIGITAL AUDIO WORKSTATION SONAR LE Overview. SONAR LE is a software application from Cakewalk and is included free of charge with your new ZED-R16 mixing con- sole. SONAR LE is a first step into the world of sequencing and hard disk recording on the Windows platform. You’ll be able to record 8 tracks simultaneously from your ZED-R16 mixer, arrange songs, then play back 8 tracks simultaneously to your ZED-R16 mixer via the FireWire bus. -
Page 43: Sonar Le Installation
System Requirements (For SONAR LE) (For running SONAR LE on a Windows computer. The system requirements for connecting to ZED-R16 are docu- mented separately) System Require- Minimum Recommended ments Operating System Windows XP Windows XP/Vista/Vista x64 Processor Speed Intel® Pentium® 4 1.3 GHz, Intel®... - Page 44 Next, launch SONAR LE. Click Options/Audio and click on the Drivers tab. The Input and Output Drivers for ZED R should appear in the option boxes. If they don’t, click the Advanced tab and check that the Driver Mode is set to ASIO. The Input drivers are the audio sources to the computer.
-
Page 45: Latency, Dropouts & Buffer Size
To record the audio on tracks 1 & 2, click the R buttons so they light up red, then the record button (circle) on the transport con- trols on the top icon toolbar. (Or select lar- ger transport controls from Views). The audio wave profile will show in the track panes. -
Page 46: Enabling Midi With Sonar Le
Enabling MIDI Control with SONAR LE With SONAR LE running and ZED-R16 connected via FireWire, click Options in the main menu toolbar, then MIDI De- vices. Enable ZED-R as a MIDI input device to SONAR by clicking on it as below. Click OK and return to the main Options menu and click Controllers/Surfaces where you can choose the MIDI control source for your project. -
Page 47: Midi Implementation
ZED-R MIDI IMPLEMENTATION MIDI MESSAGE DATA 1 DATA 2 MIDI MESSAGE TYPE DATA 1 DATA 2 CONTROLLER TYPE CONTROLLER FADER CH1 0-127 SWITCH 1 7F/00 NOTE ON/OFF FADER CH2 0-127 SWITCH 2 NOTE ON/OFF 7F/00 FADER CH3 0-127 SWITCH 3 NOTE ON/OFF 7F/00 FADER CH4... - Page 48 ZED-R MIDI IMPLEMENTATION Changing MIDI Channel The default MIDI channel is 16. To change the MIDI channel follow the following procedure: With ZED-R16 powered off, press & hold down the PLAY button and switch on the mains power to ZED-R16. Release the PLAY button.
-
Page 49: Wiring Diagrams For Audio Leads
WIRING NOTES PROCESSOR Insert cable wiring RETURN INSERT SEND GROUND RETURN SEND LINK RING TO SLEEVE TO UNBALANCE Y-Adapter Y-Adapter 2 Outputs to 1 Input RCA phono jacks adapter 1 Output to 2 Inputs RCA PHONO CABLE UNBALANCED No ! INSTRUMENT CABLE UNBALANCED UNBALANCED... -
Page 50: Product Support
PRODUCT SUPPORT www.allen-heath.com Investigate ALLEN & HEATH’s other ranges at Large Live Sound mixers — iLive digital, ML and GL Series Small Format Live Sound mixers — ZED, MixWizards and PA Series DJ products — Xone Series Sound Management Series — iDR Series Registering your product Thank you for buying the Allen &...
Need help?
Do you have a question about the ZED R16 Firewire and is the answer not in the manual?
Questions and answers