
Related Manuals for Classic Cantabile DP-300


Summary of Contents for Classic Cantabile DP-300
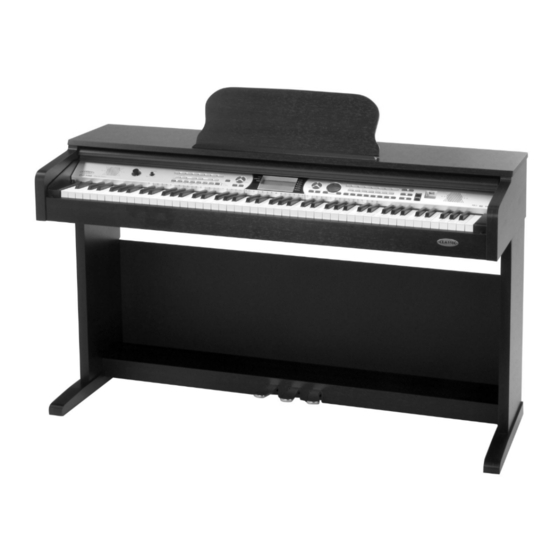
- Page 1 Classic Cantabile DP-300 E-Piano Users manual 00026614/00025070/00025071 Version 01/2012...
- Page 2 INFORMATION FOR YOUR SAFETY! THE FCC REGULATION WARNING (for USA) PRECAUTIONS This equipment has been tested and found to comply with the limits for a Class B digital device, pursuant to Part 15 of PLEASE READ CAREFULLY BEFORE PROCEEDING the FCC Rules. These limits are designed to provide reasonable protection Please keep this manual in a safe place for future reference.
-
Page 3: Table Of Contents
Contents Panel & Display Description Song Front Panel..............4 Listening to the Songs ..........Rear Panel..............4 Song Control..............22 Display.................5 Lesson Mode.............22 Setup Chord Dictionary Setup Guide..............6 DICT1 Chord Learning Mode........24 Power supply...............8 DICT2 Chord Examining Mode.........24 Connections Song Recording Connecting a pair of Headphones.......9 Starting Recording.............25 Connecting an Audio Equipment.........9 Stopping Recording...........26... -
Page 4: Panel & Display Description
Panel & Display Description Front Panel In Song Mode In Style Mode 1.POWER ON / OFF 17.LEFT HAND Turn the power on and off. Choose the left hand in 9.START/STOP 9.START/STOP Lesson Mode. Start or stop playing the Start or stop playing the 2.MASTER VOLUME song. -
Page 5: Display
Panel & Display Description 21.STYLE 28.+ / YES 34.BANK 40.SYNTH Enter the Style Mode. Increase the displayed Select a bank. Enter the voice edit menu. value by 1. 22.VOICE 35.STORE 41.HARMONY Enter the Voice Mode. 29.VOICE DIRECT SELECT Register the panel settings. Turn the harmony effect on BUTTON and off. -
Page 6: Setup
Setup This section contains information about setting up your instrument and preparing to play. Please go through this section carefully before turning the power on. Setup Guide Before you proceeding to assemble the stand, get a Philip's screwdriver (not supplied). Make sure you have the following parts, which are supplied into package. - Page 7 Setup A. Fix and well tighten the right side board [2] and right side board [3] to the pedal box [5] with 4 screws [7]. B. Fix the rear board [4] to the right side board[2] and left side board[3] with 6 screws [8].
-
Page 8: Power Supply
Setup D. Insert the pedal cable [9] into the proper socket of the cabinet [1]. The assembly is complete as the right picture, now you can enjoy this wonderful piano. Power supply Please make sure that POWER ON/OFF switch of the instrument is set to OFF. -
Page 9: Connections
Connections Connecting a pair of Headphones A standard pair of stereo headphones can be plugged in here for private practice or late-night playing. Jack1: When a pair of headphones is plugged into the Jack 1, the Headphone Jack 1 sound can be heard from headphones and speakers of the instrument. -
Page 10: Playing The Demos
Playing the Demos The instrument features 2 wonderful demos. Please refer to DEMO LIST. Press the [STYLE] and [VOICE] buttons simultaneously to start playing the demo. J a z z Select a demo song Use the data dial, the [+/YES] button or the [-/NO] button to select a demo song. -
Page 11: Playing Different Voices With Both Hands-Lower
Playing the Voices Playing Different Voices with Both Hands-LOWER .Press the [LOWER] button. S t r i n g s .Play the voices The notes you play with your right and left hands sound two different voices. The number of the lower voice will be displayed on the LCD .Selecting a voice for VOICE L. -
Page 12: Piano
Playing the Voices Piano No matter what setting you've made from the panel, you can instantly call up the piano setting by a single button press. Press [PIANO] button to enter piano or exit piano mode. P i a n o In the PIANO mode, you can start a style. -
Page 13: Auto Accompaniment
Auto Accompaniment The auto accompaniment feature puts a full backing band at your fingertips. To use it, all you have to do is play the chords with your left hand as you perform and the selected accompaniment style matching your music sill automatically play along, instantly following the chords you play. -
Page 14: Accompaniment Sections
Auto Accompaniment Accompaniment Sections There are various types of Auto Accompaniment sections that allow you to vary the arrangement of the accompaniment to match the song you are playing. They are: Intro, Main (A, B), Fill-in (A, B) and Ending. By switching among them during your performance you can easily produce the 8 B t P i a n o dynamic elements of a professional-sounding arrangement in your... -
Page 15: Tempo
Auto Accompaniment Tempo Each style of the instrument has been programmed with a default or standard tempo; however, this can be changed by using the [TEMPO+/TEMPO-] buttons. 8 B t P i a n o Change the tempo. Use the [TEMPO+] or [TEMPO-] button to change the tempo. While the tempo data is flashing, the data dial can also be used to change the tempo. - Page 16 Auto Accompaniment Chord Basics Three or more notes are played together is defined as a “chord”. The most basic chord type is the “triad” consisting three notes: the root, third and fifth degree of the corresponding scale. A “C major triad”, for example, is made up of the notes C (the root), E (the third note of the C major scale) and G (the fifth note of the C major scale).
-
Page 17: One Touch Setting
Auto Accompaniment The FULL RANGE mode When the chord detection is in the FULL RANGE mode, the instrument will automatically create appropriate accompaniment while you play just about anything using both hands, anywhere on the keyboard. You do not have to worry about specifying the accompaniment chords. The name of detected chord will be displayed. -
Page 18: Dsp Effect
DSP Effect With the built in digital effects, you can add ambiance and depth to your music in a variety of ways such as adding reverb that makes you sound like you are playing in a concert hall or adding harmony notes for a full, rich sound. The effect will be applied. -
Page 19: Harmony
Harmony You can add a variety of harmony notes to the keys you played in the right-hand section. Selecting a Harmony type Select “DUET”. D u e t Press the [<FUNCTION] or [FUNCTION>] button to select Duet. The LCD displays Duet and it is the default harmony type. Change the harmony type. -
Page 20: Mixer
Mixer Press the [MIXER] button. Now you have entered the menu of MIXER. Use the [MIXER] button to select a part to change its volume. R h y t h m _ s Adjust the volume of a musical part. To adjust the selected volume setting, please use the data dial, the [+/YES] or the [-/NO] button. -
Page 21: Registration Memory
Registration Memory The keyboard is an instrument with a variety of controls and functions, the Registration Memory feature can make your performance more easily and efficiently. It allows you save virtually all panel settings to a Registration Memory setting, and you can instantly recall custom panel settings by pressing a single button. -
Page 22: Song
Song The keyboard has a music library of 60 preset songs. Each song can be practiced in LESSON mode. Listening to the Songs Press the [SONG] button to enter the song mode and it will play all songs circularly. R e d R i v e r Select a song. - Page 23 Song Lesson 1 Practice timing M a z u r k a Press the [LESSON] button to enter the lesson mode. Press [LESSON] button to enter the lesson mode, the lesson 1 icon is lightened on the LCD. In Lesson 1 mode, the keyboard only grade the time value of the playing, don't care the correction of the note.
-
Page 24: Chord Dictionary
Chord Dictionary Chord dictionary is essentially a built-in “chord book” that help you to check the chord notes. You can learn the chord and test in this features. DICT 1 Chord Learning Mode D i c t . 1 Press the [CHORD DICT] button and hold it for longer than 2 seconds to enter the DICT 1 mode. -
Page 25: Song Recording
Song Recording With the easy-to-use song recording features, you can record your own keyboard performances as a User song. 3 user songs can be recorded with 6 tracks (1 ACCOMP track, 5 MELODY tracks) each. Starting Recording U s e r S o n g Press [RECORD] button to enter the record preparation mode. -
Page 26: Stopping Recording
Song Recording Stopping Recording Press [RECORD] again while recording can stop this action immediately. R e c _ F u l l When the capacity is full, the recording will be stopped automatically. When the record ending is finished, the recording will be stopped automatically. -
Page 27: U Disk
U Disk There is a standard U HOST external interface which supports the U Disk of 16M ~ 32G capability. It is compatible with the file system format of the FAT 16/32. It is better to use the U Disk which is formatted by the keyboard. Please don't edit these files which come from the keyboard at PC. -
Page 28: Loading The Backup Data From U Disk
U Disk If there is neither midi file nor sub-directory in the root, LCD will N o F i l e ! display “NoFile!”. Use [+/YES]/ [-/NO] button or data dial to select the midi file. Press [START/STOP] button to play it repeatedly. Press [EXECUTE] button to play all files in the current directory circularly. -
Page 29: Saving The Data To U Disk
U Disk Load Voice Select the “LoadVoc” menu and press [EXECUTE] button, the VOC L o a d V o i c files in the “VOICE” directory of U Disk are displayed on LCD, the main name of the file includes 8 characters, the postfix name is VOC, you can select styles by using [+/YES]/[-/NO]button or data dial. -
Page 30: Other Functions
Other Functions Turning the Metronome ON/OFF Press the [METRONOME] button to turn the metronome on. Press the [METRONOME] button again to turn the metronome off. Tuning Select “TUNE”. Use [<FUNCTION]/ [FUNCTION>] button to select TUNE. The LCD displays the tune value. The value ranges from -50 to 50 and the T u n e default value is 0. -
Page 31: Pedal Assign
Other Functions Pedal Assign Select “Ped Soft”. Use [<FUNCTION]/ [FUNCTION>] button to select pedal assign. P e d S o f t There are three pedal functions you can select: Soft Pedal, Memroy Select Pedal and Start/Stop Pedal. Press [+/YES] and [-/NO] simultaneously will set the pedal type to default. -
Page 32: Midi Functions
MIDI Functions By using the MIDI functions you can expand your musical possibilities. This section explains what MIDI is, and what it can do, as well as how you can use MIDI on your instrument. What's MIDI? MIDI is an acronym that stands for Musical Instrument Digital Interface, which allows electronic musical instruments to communicate with each other, by sending and receiving compatible Note, Control Change, Program Change and various other types of MIDI data, or messages. -
Page 33: Troubleshooting
Troubleshooting Problem Possible Cause and Solution The speakers produce a “pop” sound This is normal and is no cause for alarm. whenever the power is turned ON or OFF. No sound when the keyboard is played. The R1/R2/L voice volume (Mixer) settings could be set too low. -
Page 34: Voice List
Voice List Name LCD Name Nylon Guitar 1 NylonGt1 Synth Strings 3 SynStrs3 Ukulele Ukulele Choir Aahs 1 ChoirAh1 PIANO Acoustic Grand Piano 1 GrandPn1 Nylon Open NylonO Choir Aahs 2 ChoirAh2 Stereo Grand Piano 1 StGrPn1 Nylon Guitar 2 NylonGt2 Voice Oohs VoiceOoh... -
Page 35: Voice List
Voice List Synth Calliope CaliopLd Guitar Noise GtNoise High SuoNa HiSuoNa Chiff Lead ChiffLd Guitar Cut Noise GtCutNos SuoNa & Luo SuoNaLuo Charang CharanLd Slap String Bass SlapStBs LuSheng LuSheng Wire Lead WireLead Breath Noise BrtNoise GuanZi GuanZi Solo Voice VoiceLd Flute Key Click FlKeyClk... -
Page 36: Style List
Style List Name LCD Name Cha Cha 2 ChaCha2 Vienna Waltz VinaWtz Beguine 1 Beguine1 Slow Waltz 2 SlwWltz2 8BEAT 8Beat Piano 8BtPiano Beguine 2 Beguine2 Polka 1 Polka1 8Beat Pop 8BtPop Rumba 1 Rumba1 German Polka GerPolka Pop Funk PopFunk Samba 1 Samba1... -
Page 37: Song List
Song List LCD Name Name JAZZ & FUSION June Samba JunSamba FOLK & COUNTRY Red River Valley RedRiver Guitar&Saxphone Gt&Sax Troika Troika The Hip Hop's Night HipHopNt Susanna Susanna Blue Lunch BluLunch Cai Yun Zhui Yue CaiYun Cobweb Cobweb Danube Wave Of Danube Wine Wine... -
Page 38: Chord List
Chord List...
Need help?
Do you have a question about the DP-300 and is the answer not in the manual?
Questions and answers