Table of Contents
Advertisement
Quick Links
Advertisement
Table of Contents

Subscribe to Our Youtube Channel
Related Manuals for Classic Cantabile DP S1


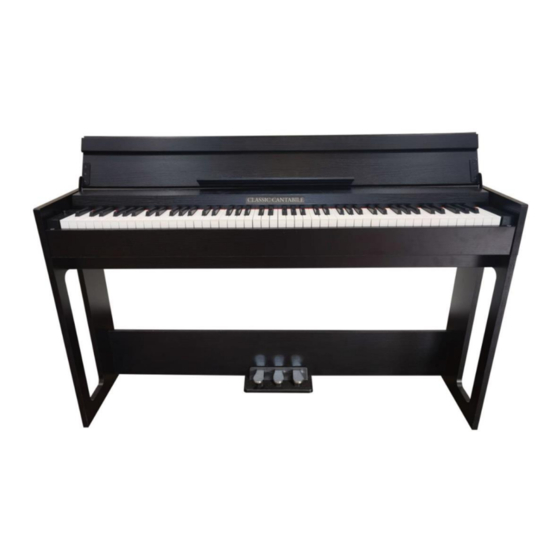
Summary of Contents for Classic Cantabile DP S1
- Page 1 DP S1 Slimline Digital Piano User Manual Version: 09/2021...
- Page 2 Thank you for choosing this product. ensure that you are fully satisfied with this product, carefully read and understand this manual before using this instrument. Keep this manual in a safe place. The operating instructions must be passed on to all subsequent users. Observe operating instructions! The WARNING signal word identifies hazards that, without precautions, could result in serious injury.
- Page 3 Caution Please observe the following basic information in order not to endanger yourself or others and to avoid damage to external devices. Warning Do not disassemble the instrument and do not modify it. This could result in electric shock. Entrust a specialist workshop with any necessary service and maintenance or contact your dealer.
-
Page 4: Table Of Contents
Contents Assembly........................ 5 Rear connection panel ..................8 USB to Host ......................8 Pedal ........................8 AUX Out ....................... 8 AUX IN: ........................ 8 Power supply socket .................... 8 Headphone jacks ....................9 Operating elements ..................... 10 Left control panel ....................10 Power ......................10 Master Vol .......................10 Function assignment of the keyboard keys ............10... -
Page 5: Assembly
Assembly First prepare the two side parts ① of the substructure for assembly. To do this, attach the brackets ② and ③ to the side parts. Use the short M4x14 screws ④ for this purpose. Ensure the correct position of the respective angles. Screw two furniture connectors ⑤... - Page 6 Now attach the pedal unit ⑥ to the pedal plate. ⑦. Use the two long M4x40 screws ⑧ for this purpose. Insert the four eccentric nuts ⑨ into the openings on the back of the pedal plate. Now mount the substructure consisting of pedal plate ⑦ and side parts ① and fasten the connection by twisting the eccentric nuts.
- Page 7 Securely fasten the console ⑩ to the base using the two short M6x20 screws ⑪. Connect the pedal cable to the socket on the back of the piano and plug the hollow plug of the power supply into the power supply socket on the back of the instrument. ►...
-
Page 8: Rear Connection Panel
Rear connection panel USB to Host The USB to Host jack allows you to connect your piano to a computer using a USB A->B cable. Pedal Connecting socket to the triple pedal of the piano base. AUX Out The AUX Out connector allows you to connect your piano to a music amplifier. AUX IN: The AUX In input allows you to play music signals from an external music source through your piano's speakers. -
Page 9: Headphone Jacks
Headphone jacks The two headphone jacks on the bottom left of the console can be used simultaneously. When connecting headphones to headphone jack 1, the instrument's speakers are deactivated. When connecting to the headphone jack 2, the sound of the instrument is given out via the headphones and additionally still via the loudspeakers. -
Page 10: Operating Elements
Operating elements Left control panel Power Use the power switch to start up your instrument. Please switch off your instrument when not in use to save energy. Master Vol This knob allows you to adjust the volume of your piano playing. This instrument has an Auto Power Off function. -
Page 11: Voice
Voice Hold down the function key and press any VOICE key to change the timbre of your instrument. Layer / Split / Splitpoint With the Layer function, two voices can be combined and superimposed. First select the first of the two desired voices as described in the section “Voice”. Now press the LAYER ON/OFF key while holding the function key to activate the Layer function. -
Page 12: Twinova
With the split function, two different voices can be selected for the left and the right half of the keyboard. First select the voice for the right hand as described in the section “Voice”. Now press the SPLIT ON/OFF key while holding down the function key to activate the split function. Now you can select the voice for the left hand as described in the section “Voice”. -
Page 13: Touch Sensitivity
Touch sensitivity The touch sensitivity can be adjusted, or deactivated if required. Press and hold the function key and press the TOUCH ON/OFF key to disable or enable the instrument's touch sensitivity. When touch sensitivity is disabled, all notes played will sound at the same volume regardless of the strength of the particular keystroke. -
Page 14: Metronome And Tempo Setting
While holding the function key, press one of the two TRANSPOSE keys one or more times to achieve the desired pitch adjustment. While holding the function key, press both TRANSPOSE keys simultaneously to return to the standard tuning. Metronome and tempo setting Press and hold the function key and press the METRONOME ON/OFF key to activate or deactivate the metronome. -
Page 15: Reverb
Reverb To enhance the room sound of the piano, the instrument has a reverb function. Press the REVERB ON/OFF key while holding the function key to deactivate or reactivate the reverb effect. When the reverb effect is activated, four different effect types are available for selection. -
Page 16: Auto-Power-Off-Function
A demo is also available for each timbre (voice) of the instrument. First select the desired voice as described in the VOICE section. Now press the SOUND DEMO key while holding the function key to play the corresponding demo. To switch off the piano's confirmation tone (beep), press the BEEP NOTE ON/OFF key while holding down the function key. -
Page 17: Trouble Shooting
Trouble Shooting If a malfunction occurs, please check the following error sources. Error Cause Solution The piano does not turn on 1.the power cord is not 1.plug in the power cord plugged in correctly 2.the power outlet has no 2.use another power outlet power The piano does not emit 1.the volume is set to the... -
Page 18: Product Specifications
Product Specifications Keyboard 88 touch sensitive hammer keys Touch sensitivity 5 Levels and Off Max. Polyphonie Voices Demo 1 Piano Demo, 10 Voice Demo Pedals 3 (Soft, Sostenuto, Sustain) Connections Aux-In, Line-Out, USB to Host, 2x Headphones (6,35mm Stereo), Pedal, Power supply Speaker power 2x20W... -
Page 19: Quick Guide
Quick guide Hold function key + Deactivate / activate Auto Power Off (special function without function key) With the instrument switched off, hold down the leftmost key + Power On. Select voice / select second voice if layer activated select left voice if split activated Activate / deactivate layer - then second voice can be selected Activate / deactivate split -... - Page 21 WEEE Declaration (Waste of Electrical and Electronic Equipment) Your product has been designed and manufactured using high quality materials and components that are recyclable and reusable. This symbol means that electrical and electronic equipment must be disposed of separately from household waste at the end of their service life.
Need help?
Do you have a question about the DP S1 and is the answer not in the manual?
Questions and answers