Table of Contents
Advertisement
Quick Links
Advertisement
Table of Contents

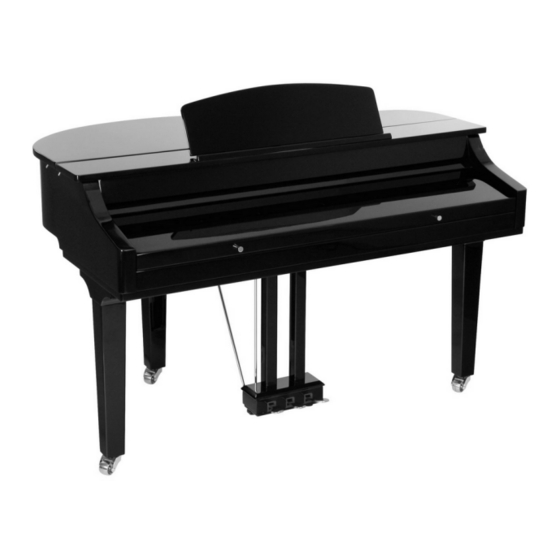
Related Manuals for Classic Cantabile GP 500


Summary of Contents for Classic Cantabile GP 500
- Page 1 GP 500 Digital Piano Users manual 00016472/00025072 Version 01/2012...
- Page 2 Using the Instruction Manual Congratulations on your purchase of this digital piano! The piano is an user friendly piano with fabulous sound quality and advance feature such as style record and self-learning. No matter you are adult or children, you will enjoy playing the piano as it provides amazing styles for accompaniment, expressive tones, and real time record.
- Page 3 Main Feature Keyboard: 88 hammer action key. Operation: use DIAL & [+/YES] & [-/NO] button or direct select button to select desired menu & parameters . Voice: 559 voices in total, 28 voices can be selected conveniently from the panel. Style: 203 styles in total, including 3 user styles, 16 voices can be selected conveniently from the panel.
-
Page 4: Table Of Contents
Contents Set-up Guide........6-10 Memory Data..............Store and Load............General Guide....... Top View............One Touch Setting..........Front View ............Front Panel............Record..........30-32 12-13 LCD Display............. 30-31 Record Song............Playback Song............Connections........13-14 Delete Song............... Using the AC Power Jack........ Using Headphones.......... -
Page 5: Set-Up Guide
Set-up Guide Before proceeding to assemble the stand, Make sure you have the following parts ( see the illustration): Pedal component Right leg component Left leg component Rear leg component Piano body M 12X45mm hexagonal bolt O 3x15mm screw Copper pole Wrench... - Page 6 Set-up Guide Follow the illustration below to finish the set-up procedure. Please reverse the carton to upside down and place it in the horizontal before you initial assembly the piano. Make sure the bottom surface of carton is up. Then open the box, take off the foams which used for protected piano body. (See the below illustration for reference.)
- Page 7 Set-up Guide Put the left leg component (C) on the left of piano body. Find the sunken hole on the component and correspond the hole on the piano body. Then place a washer into this sunken hole, Use Wrench (J) to tighten 4 pieces of hexagonal bolt (2 on each side) by clockwise turn.
- Page 8 Set-up Guide Use screws(H) to tighten the two copper poles (I) onto the back of Pedal component(A). Make sure the direction of the placement is correct before screwing. (See the below illustration for reference.) Then reserved the Pedal component with two copper poles(I), and use the hexagonal bolt(G) to tightly settled it with the piano body according finished assembly in left leg component, fix the other side of copper Pole onto the piano body (E).
-
Page 9: Set-Up Guide
Set-up Guide Reverse the piano after finished assembly. Please carefully reverse the piano avoid touched floor cause damaged or broke any leg components or pedal component. Then moved the carton box and all package goods. You can enjoy play the piano now. carefully reverse the piano avoid damaged or broke any legs... -
Page 10: General Guide
General Guide Top View Top View Front View Front View Control Panel MIDI OUT Jack Music Stand AUX. OUT Jack (R/L) Headphones Jack Multifunctional Pedal Piano Keyboard Sostenuto Pedal a.c Power Jack Sustain Pedal MIDI IN Jack... -
Page 11: Front Panel
General Guide Front Panel 18 19 BRILLIANCE knob VOLUME knob STYLE direct select button 001 8BtRock 041 Slo wBald 064 T ango 074 Samba1 TEMPO + / TEMPO - button 012 16B e at1 047 Slo wRock 069 C haCha1 084 Disco ACCOMP + / ACCOMP - button 112 Swing1... -
Page 12: Lcd Display
General Guide POWER ON/OFF switch LCD Display DUAL NOTE Indication SPLIT FILL A / B TOUCH TREBLE CLEF DUAL BASS CLEF SPLIT VOICE/STYLE/DEMO/SONG SD CARD TOUCH RECORD / STYLE RECORD MEASURE BEAT car d TEMPO CHORD MEMORY / ONE TOUCH SETTING LEFT / RIGHT HAND LESSON MODE Connections Using the AC power jack... -
Page 13: Using Headphones
Connection Using Headphones There are two headphone jacks on the left underneath the piano body. Headphones Jack 1 When an optional set of stereo headphones is connected with the headphones jack 2, the sound from speakers Headphones will switch off automatically resulting in only sound from Jack 2 headphone to be heard. -
Page 14: Preparation
Preparation Power on key combination Press the [RECORD] & the [PLAY/STOP] button synchro- MELODY MELODY MELODY STYLE PLAY/ RECORD ACCOMP RECORD STOP , nously when it is power on It can clear the record data. Power on/o ff switch Press the [STORE] &... -
Page 15: Voices And Effects
Voices and Effects Voice select VOICES 559 voices in total. 001 StGrPn1 029 StHarEp 092 StMarim 121 ChurOr2 147 VelSteGt 182Abass1 274 SSlowStr 107 DrwOrDet 125Accordi1 024 StHonk 080 StVibes 161 StCleGtr 229 TheVin 282 SoloStr 28 voices can be directly selected. Each direct select button 287 StChoir1 305 SweetTp 323 BrasSec1... -
Page 16: Split Point
Voices and Effects Split point DUAL You can play two sounds on different parts of DUAL SPLIT SPLIT the keyboard. It is called Split mode. TOUCH TOUCH Press [SPLIT] button to turn on the LOWER VOICE, LCD lights the SPLIT flag and displays VOICE L and its name. "... -
Page 17: Touch Response
Voices and Effects Touch Response This function allows you to activate the dynamic level when playing the keyboard. Press the [TOUCH] button, LCD lightens the TOUCH flag " " DUAL DUAL SPLIT and displays touch response type 00 Touch briefly. "... -
Page 18: Style Control
Style Control The piano has a total of 203 styles, from 001 to 203, including 3 user styles. The default style is 001. Select a Style Press [STYLE] button to set the piano to the "style DEMO STYLE VOICE mode". The "STYLE " flag and the style number will TOUCH show up on the display. -
Page 19: Start A Style
Style Control Start a Style Start immediately: [START/STOP] button to start the style. START/ SYNC SYNC INTRO/ CHORD FADE STOP STOP START ENDING MODE Chord. Mode: FINGERED FULLRANGE Press the [CHORD MODE] button for the first time to enter the FINGERED mode, the relevant LED is lightened. START/ SYNC SYNC... -
Page 20: Fill A/B
Style Control Fill A/B In NORMAL mode, press button to insert 1 measure fill and LCD flashes 'A'. After one measure is over, NORMAL TOUC H style will be returned. In NORMAL mode, press ] button to insert 1 measure fill and LCD flashes 'B'. -
Page 21: Fade
Style Control Fade Light FADE IN: START/ SYNC SYNC INTRO/ CHORD FADE STOP STOP START ENDING MODE Press the [FADE] button when style is not playing , FADE " " LED lights. START/ SYNC SYNC INTRO/ CHORD FADE STOP STOP START ENDING MODE... -
Page 22: Tempo
Style Control Tempo Use the [TEMPO+] [TEMPO-] button and the [+/YES] - TEMPO + TOUC H [-/NO] button and the DIAL to adjust the tempo from 30 to 280. Press the [TEMPO+] [TEMPO-] synchronously to set to the default tempo. - TEMPO + TOUC H Selecting the style when it stops, the tempo will change with the... -
Page 23: Recognizing Chords
Style Control Recognizing Chords FINGERED Default mode for A.B.C. is off on the piano. FULLRANGE Press [CHORD MODE] button to turn on this "auto bass START/ SYNC SYNC INTRO/ CHORD FADE STOP STOP START ENDING MODE chord" function. The left section of the keyboard is known as the "chord area", while playing the chord, both the bass and the chord voices sound. - Page 24 Style Control Chord Basics Three or more notes played together constitute a "chord". The most basic chord type is the "triad" consisting three notes: the root, third, and fifth degrees of the corresponding scale. A "C major triad", for example, is made up of the notes C (the root), E(the third note of the C major scale),and G (the fifth note of the C major scale).
-
Page 25: Function Menu
Function Menu Press [FUNCTION/NEXT] [FUNCTION/BACK] button to enter the menu of function. The default option of the menu is "TUNE". When you enter the menu next time, you will find the option is the same as last time. Press [FUNCTION/NEXT] [FUNCTION/BACK] button to select the option to be set. -
Page 26: Split Point
Function Menu Split Point This function sets the point that separate the entire FUNCTION keyboard to two section. BACK NEXT The LCD displays the split point value. [+/YES] [-/NO] DIAL to change the split point. You may also use keyboard to change the split point by + /YES simply selecting the note you desired to be the point of separation. -
Page 27: Midi Setting
Function Menu MIDI Setting FUNCTION RECEIVE can be used to set the channel of MIDI IN. The default setting is "all ". Otherwise, channel 1~16 can BACK NEXT also be selected separately. Use [+/YES] / [-/NO] button or the DIAL to select the channel. -
Page 28: Memory
Memory Memory feature can be used to preset 48 complete control-panel setups which could be recalled whenever needed. Bank There are 8 banks in total; each bank has 6 memories (M1~M6). Press [BANK] button, the LCD displays "00x Mem Bank", with 00x showing the Bank that has been selected. -
Page 29: One Touch Setting
One Touch Setting One Touch Setting is a powerful and convenient function that allows you to reconfigure all settings instantly with the touch of a single button. In this function, 4 types of parameters (M1~M4) will be loaded to match the current style. Press [O.T.S.] button to turn this mode on and the O.T.S. -
Page 30: Start Recording
Record Waiting for recording: MELODY MELODY MELODY MELODY MELODY Press the [RECORD] button for the second time to enter STYLE PLAY/ RECORD ACCOMP RECORD STOP the record mode. The LCD lightens the REC flag, four beats flashes synchronously to indicate waiting for recording. Flash At the same time an empty track will be selected to be Flash synchronously... -
Page 31: Playback Song
Record Playback Song MELODY MELODY MELODY MELODY MELODY STYLE PLAY/ RECORD ACCOMP RECORD STOP Press the [PLAY/STOP] button for the first time to enter the user song selected mode. The LCD displays the current song name and number. Use the [+/YES] or [-/NO] button and DIAL... -
Page 32: Style Record
Style Record Style record allows user to produce a new rhythm through recording and editing an built-in style. Be note that the built-in rhythm are programmed with CM7.3 styles can be recorded and the data will not be lost after the power is off. You are also allowed to save the recorded style to SD card. -
Page 33: Record A New Style
Style Record + / YES - / NO Use the [+/YES] [-/NO] button and DIAL to select the others includes Record, Copy, Quantify, Edit and Delete. If the user style selected is empty, only Record and Copy can be selected. At any moment of style recording state, pressing [STYLE RECORD] button again will exit from the recording state. - Page 34 Style Record FUNCTION Press [FUNCTION / NEXT] to enter rhythm selection menu. BACK NEXT Press [+/YES], [-/NO] button or rotate the DIAL to select a + / YES original rhythm. Press [FUNCTION / BACK] to return previous menu. - / NO Press [FUNCTION/NEXT] button to enter the paragraph...
-
Page 35: Copy A Style
Style Record Copy a Style + / YES Select a user style slot to be used to store the new style. - / NO Press [FUNCTION/NEXT] button to enter choice menu. Press [+/YES], [-/NO] button or rotate the DIAL to choose "Copy "... -
Page 36: Edit A Style
Style Record Press [FUNCTION/NEXT] to enter the paragraph menu. FUNCTION Press [+/YES], [-/NO] button or rotate the DIAL to select the BACK NEXT paragraph of rhythm: Main _ A, Main _ B, Intro _ M, Intro_m, Fill _ A, Fill _ B, Ending _ M, Ending _ m. FUNCTION Press [FUNCTION/NEXT]... -
Page 37: Delete A Style
Style Record Press [FU NC TION/NE XT] but ton to enter page of the abbreviation of st yle n ame. FUNCTION BACK NEXT O nly 8 characters or digits can be inputted. LCD now displays "Save? " Flash Press [FU NC TION/NE XT] but ton to enter next menu. -
Page 38: Song
Song There are 100 songs in total, includes 57 songs with left and right melody parts, 33 style songs and 10 piano songs. DEMO START/STOP the song: STYLE VOICE Press [SONG] button to enter the song mode, the song flag on LCD is lightened. It will play all songs in circle. -
Page 39: Lesson 1
Song According to the type of the song, the content of your practice by left hand is not the same. If you choose chord song, the left hand practices the chord, otherwise, left hand practise the melody. 1-42, 57 song can permission practice the left hand and right hand. 43-56 , 58-100 song only used to right hand practice. When the song is playing, the staff displayed on the LCD indicate the melody and chord position, LCD shows the last note played by RIGHT track, and it will be convenient for you to practice . -
Page 40: Lesson 3
Song Lesson 3 L&R CHORD DICT. Press [LESSON] button in LESSON 2 to enter the LESSON 3 mode. LESSON 3 LESSON In LESSON 3 mode, it will score your practice by the correction of the time value and note. START/ SYNC SYNC INTRO/... - Page 41 Chord Dictionary DICT 2 (CHORD TEST MODE) Press button again to enter DICT 2 mode. The chord L&R CHORD DICT. area on the LCD will display a random chord , while the keyboard position doesn't display anything on LCD. When you play the correct chord within 3 seconds, LESSON 1 the next chord (random) will be displayed on LCD to LESSON...
-
Page 42: Pedal
Pedal Foot Switch FUNCTION + /YES The piano can assign the Multifunctional pedal in function BACK NEXT menu. (See FUNCTION) - / NO PEDAL SOFT If pedal assign is set as pedal soft , it will activate the " " soft effect when you step the pedal. -
Page 43: Play
SD Function In the SD mode, it won't respond to the other function. Use the [+/YES] [-/NO] button and DIAL to choose the SD menu you want. SPLIT take a step forward. Press the [EXECUTE] button to TOUCH take a step back. Press the [MENU] button to... -
Page 44: Load
SD Function Load SPLIT TOUCH Select the menu Load and press the " " [EXECUTE] button, the Load menu are displayed on the LCD, it includes Load " Song , LoadSty and LoadMem . Use the " " " " "... -
Page 45: Save
SD Function Save SPLIT Select the menu Save and press the " " [EXECUTE] button, TOUCH the Save menu are displayed on the LCD, it includes " SaveSong , SaveSty and SaveMem . " " " " " You can select either with DIAL or the [+/YES]... -
Page 46: Delete
SD Function Save Memory SPLIT Select the menu "SaveMem" and press the [EXECUTE] button, you can select the storage directory with DIAL TOUCH [+/YES] [-/NO] button. Press the [EXECUTE] button to enter next step, LCD will SPLIT naming play display the state, you can the keyboard to input the filename. - Page 47 SD Function The file name includes 1-8 characters which can be inputted with the keyboard. Keyboard & ASCII Character Relative Table is as follows: Explanation: [BACK]: [SHIFT]: [DELETE]: To erase the character which 26 letters will be displayed with move the current cursor to the left. capital letter by pressing the key- cursor flashes.
-
Page 48: Midi Function
MIDI Function What is MIDI Musical Instrument Digital Interface. The standard interface between PC and Electronic instrument. AUX.O UT It is equipped with standard MIDI interface, including 1 MIDI IN and 1 MIDI OUT. Connection It can connect with PC or other MIDI equipment. MIDI Connection Connection rule In midi connection, the equipment which controls another equipment is called Host Equipment. -
Page 49: Midi Application
MIDI Function MIDI Application The piano can control other equipments or electronic instruments. Some equipments can be used to control the keyboard. PC recorded data (MIDI) can be played on the keyboard. -
Page 50: Specifications
Specifications LCD display Multi-functional LCD Keys 88 hammer action key 、 Polyphony 64-note (turn off DSP effect) 38-note (turn on DSP effect) 559 Voices Voice Style 203 Styles, including 3 user styles 100 Songs Song Demo 2 Demos Power on/off switch, Volume, Brilliance, Accomp +/-,Tempo +/-, Lesson, Control button L&R, Chord Dictionary, Mixer, Function Back/Next, Voice, Style, Song, O.T.S. -
Page 51: Appendix
Appendix 1-Voice List Velocity Cro ssfade E.P. 2 Name Name Layered E.P. 1 Vibraphone 1 / W Piano Vibraphone 2 / W Stereo Grand Piano 1 Layered E.P. 2 Vibraphone & Bell Stereo Grand Piano 2 Nylon E.P. ibraphone & Harpsichord Warm E.P. - Page 52 Appendix 1- Voice List Name Name Name Accordion 2 Fretless Bass Detuned 2 Stereo Muted G.T. Fretless Bass Detuned 3 Accordion 3 OverDriven G.T. 1 Chorus Accordion Slap Bass 1 OverDriven G.T. 2 Mustte Slap Bass 2 Detuned Overdriven G.T. Accord ItSolo Distortion G.T.
- Page 53 Appendix 1- Voice list Name Name Name Tremo lo S trings 1 E cho Syn th Voice 29 4 S ynt h Br ass 2 Tremo lo S trings 2 29 5 O rchestra Hit 1 S ynt h Br ass 3 Slow Tremolo Strings 1 29 6 O rchestra Hit 2...
- Page 54 Appendix 1- Voice List Name Name Name PWM Pad B lown Bot tle Sita r Sine Pad Detu ned Sita r S haku hac hi Warmly Pad Ban jo W hist le 1 Horn Pad Sha mise n W hist le 2 Pad 3 (Po lysynth) Koto O carina...
- Page 55 Appendix 1- Voice List Name Name Ster eo Strings & Piano Breath Noise 2 Orch estr a Heartbea t Full Strin gs 1 Laugh Full Strin gs 2 Applause 2 Sym phon ic Helic opter 1 Stereo Choir & Strings Fire Trombone &...
-
Page 56: Appendix 2-Style List
Appendix 2- Style List Nu mbe r Nam e Number Name Numbe r Name Quick St ep 8BEAT Natural Ballad DANCE 8 Beat Rock Love Ballad Down Beat G uitar Pop 1 Easy Ballad Techno 8 Beat 1 Slow Ballad Progressive Sweet Beat Folk Ballad... - Page 57 Appendix 2- Style List Numbe r Name Number Name Number Name Acid Jazz Lambada Polka2 Cool Jazz Ballad Pop Cha Cha1 US March Swing Shuffle Pop Cha Cha2 Musette Big Band 40 s ' Salsa French Musette Big Band Medium Bossa1 Mazurke Dixieland...
-
Page 58: Appendix 3-Song List
Appendix 3-Song List Number Name PIANO Moseta Dance Brave Cavalier Four Little Swans Habanera Turkish March Aria Away In A Manger Wedding March “Jesus, Saviour Pilot Me” America The Beautiful CLASSICAL Carmen -EntracteII A nnen Polka P ianosonatan 08 IN Cm IN Pathetique B rahms Wal tz A ida Carmen -Prelude... - Page 59 Appendix 3- Song List FOLK & COUNTRY Santa Lucia Country Jambalaya Susanna Bridge Battle Hymne Of The Republic The Old Gray Mare American Patrol In The Rain GOLDEN & POP On London Bridge Are You Lonesome Tonight Only You End Of The World House Of Rising Sun ’...
-
Page 60: Appendix 4-Demo List
Appendix 3- Song List Num ber Name JAZZ & FUSION Little Brown Jug Maple Leaf Rag June Samba Funk I Can..Sea Shore Guitar&Saxphone Blue Lunch Cobweb Wine Jazz Old Man Dark Eyes Carlos The Jazz ORIENTAL South Mud Bay Give You A Rose Flowi n g Rill Appendix 4-Demo List... -
Page 61: Appendix 5-Chord List
Appendix 5- Chord List C Madd9... -
Page 62: Appendix 6-Midi Implementation Chart
Appendix 6- MIDI Implementation Chart Functio n Transmitted Re cogn ized Remarks Basic De fau lt Channel Changed 1- 16ch 1- 16ch × De fau lt × Mode Messages × Alte re d *********** Note 0- 12 7 0- 127 Number :...
Need help?
Do you have a question about the GP 500 and is the answer not in the manual?
Questions and answers