Advertisement
Table of Contents
- 1 Important Safety Instructions
- 2 DEEP Cleaner
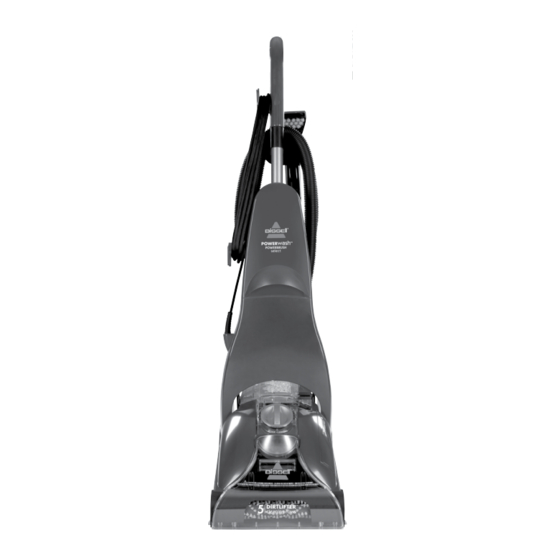
- 3 Product View
- 4 Cleaning Formula
- 5 Special Features
- 6 Before You Clean
- 7 Carpet Cleaning
- 8 Hard Floor Cleaning
- 9 Maintenance and Care
- 10 Machine Care
- 11 Machine Storage
- 12 Troubleshooting
- 13 Please Do Not Return this Product to the Store
- Download this manual
Advertisement
Table of Contents

Related Manuals for Bissell 44L6 series


Summary of Contents for Bissell 44L6 series
- Page 1 USER'S GUIDE 44L6 SERIES 220-240V Thank You Safety Instructions Product View Assembly Operations 6-11 Maintenance and Care Troubleshooting Replacement Parts Accessories Warranty Consumer Care...
- Page 2 My great-grandfather invented the floor sweeper in 1876. Today, BISSELL is a global leader in the design, manufacture, and service of high quality homecare products like your BISSELL PowerWash PowerBrush Select deep cleaner.
-
Page 3: Important Safety Instructions
■ moistened by cleaning process Use only cleaning products formulated ■ by BISSELL for use in this appliance to Do not leave machine when it is plugged in ■ prevent internal component damage Do not service machine when it is plugged in ■... -
Page 4: Product View
Cleaning formula: Brushes Keep plenty of genuine BISSELL 2X cleaning formula on hand so you can clean and protect whenever it fits your schedule. Always use genuine BISSELL deep cleaning formulas. Non-BISSELL cleaning formulas may harm the machine and will void the warranty. - Page 5 ssembly WARNING: Your PowerWash PowerBrush Select deep cleaner comes in five easy to Do not plug in your cleaner assemble components: until you have completely assembled • Handle assembly it per the following instructions and • Upper body assembly are familiar with all instructions and operating procedures.
-
Page 6: Special Features
This offers extra protection against dirt and tough stains to keep your carpets looking good longer. WARNING: Measuring Cup To reduce the risk of fire, use only BISSELL deep cleaning formula for full size machines in your deep cleaner. Use of cleaning formulas that contain Carry... -
Page 7: Before You Clean
A. Using the BISSELL Tough Stain Precleaner, generously spray evenly over soiled area, do not overwet. B. Wait 3-5 minutes before deep cleaning. C. Clean as normal using your BISSELL ATTENTION: deep cleaner, following the instructions below. Some Berber carpets have a tendency to fuzz with wear. -
Page 8: Carpet Cleaning
3. While pressing the spray trigger, formulas may harm the machine and make one slow forward wet pass void the warranty. and another back. Let the BISSELL 2X deep cleaning formula and DirtLifter PowerBrush do the work for you. Caution: Do not overwet. - Page 9 perations Empty the 2-in-1 water tank (cont) 2. Empty collection water from bottom of tank. 3. After each use, remove and rinse the lint screen located on the tank lid. 4. If nozzle needs to be cleaned, remove by grasping handle at the top and pulling forward.
- Page 10 perations ReadyTools™ (cont) Tip: To clean with sliding 6. To begin cleaning with attachments, follow crevice tool, slide brushes the instructions on pages 7-8 for filling the forward to clean stain, slide 2-in-1 water tank. back to suction 7. Set the ReadyTools dial to the TOOLS setting.
-
Page 11: Hard Floor Cleaning
Hard Floor Tool 2. Fill BISSELL Hard Floor Solutions to the indicated fill line in the built in measuring cup and pour into mouth of bladder. 3. Fill the bladder with clean hand hot tap water and set aside. -
Page 12: Maintenance And Care
aintenance and care Machine care For best results, a few simple steps can assure your machine is well maintained after your cleaning is complete. 1. Turn power switch OFF. Unplug the machine and wrap the power cord. 2. After emptying the 2-in-1 water tank, rinse it with running hot tap water, taking care to clean underneath and around the heavy duty bladder. -
Page 13: Troubleshooting
If it is broken or missing, please refer to Replacement Parts on page 14. A replacement belt may Slots Pump Belt be ordered by calling BISSELL Consumer Care. Complete installation instructions will accompany the replacement belt. When replacing belt access door be sure to line up... - Page 14 eplacement parts Item Part no. Part name 203-0104 Tank Assembly Complete 203-0102 Tank Base 203-8114 Removable Nozzle 215-0628 Replacement Pump Belt (with instructions) 015-0621 Replacement Brush Belt (with instructions) 203-0105 Lint Screen ccessories While not all of these parts may not have come with your machine, all are available to you for purchase, if desired.
- Page 15 User's Guide is not covered. BISSELL recommends that the original packaging be kept for the duration of the warranty period in case such need arises within the warranty period that the item need re-packing and transportation.
- Page 16 ISSELL consumer care If your BISSELL product should require service: Call BISSELL Consumer Care at the numbers below and we will give you the location of a BISSELL Authorized Service Center in your area. If you have questions about your warranty or need replacement parts please contact the numbers below.
Need help?
Do you have a question about the 44L6 series and is the answer not in the manual?
Questions and answers
How to use the upholstery cleaner
To use the Bissell 44L6 Series upholstery cleaner:
1. Check Tags and Fabric: Ensure the upholstery tag shows “W” or “WS.” Do not use the cleaner on fabrics marked “X,” “S,” velvet, or silk. Check for colourfastness in a hidden area and inspect stuffing for color bleed.
2. Vacuum First: Thoroughly vacuum the upholstery using a brush and crevice tool to remove debris and pet hair.
3. Prepare the Cleaner:
- Fill the 2-in-1 water tank as instructed (see page 8 of the manual).
- Set the ReadyTools dial to the “TOOLS” setting to allow spray and suction from the hose.
4. Attach Tool: Connect the appropriate cleaning tool to the end of the hose.
5. Clean the Upholstery:
- Press the spray trigger to apply cleaning solution.
- Move the tool slowly back and forth over the surface.
- Release the trigger and suction up dirty water.
- Work in small sections and avoid overwetting.
6. After Cleaning:
- Rinse the tools under clean running water.
- Allow upholstery adequate time to dry.
This answer is automatically generated