Bissell 58F8 Series User Manual
Hide thumbs
Also See for 58F8 Series:
- User manual (17 pages) ,
- User manual (17 pages) ,
- User manual (17 pages)
Table of Contents
Advertisement
Quick Links
USER'S GUIDE
Remanufactured 58F8, 44M3 Series
2
Thank You
3
Safety Instructions
4
Product View
5
Assembly
6-8
Operations
8-12
Maintenance and Care
13
Troubleshooting
14
Replacement Parts
14
Accessories
15
Warranty
16
Consumer Services
®
Earn BISSELL Rewards!
Earn BISSELL Rewards!
R
egister your
R
egister your
product today!
product today!
See details on
See details on
back page
back page
Advertisement
Table of Contents

Related Manuals for Bissell 58F8 Series


Summary of Contents for Bissell 58F8 Series
- Page 1 Earn BISSELL Rewards! Earn BISSELL Rewards! egister your egister your product today! product today! See details on See details on back page back page ® USER'S GUIDE Remanufactured 58F8, 44M3 Series Thank You Safety Instructions Product View Assembly Operations 8-12...
- Page 2 Your BISSELL vacuum is well made, and we back it with a limited days warranty. We also stand behind it with a knowledgeable, dedicat- ed Consumer Services department, so, should you ever have a prob- lem, you’ll receive fast, considerate assistance.
-
Page 3: Important Safety Instructions
MPORTANT SAFETY INSTRUCTIONS When using an electrical appli- Turn off all controls before plugging or ■ ance, basic precautions should be unplugging vacuum cleaner. observed, including the following: Use extra care when cleaning stairs. ■ Read all instRuctions Do not pick up flammable materials ■... -
Page 4: Product View
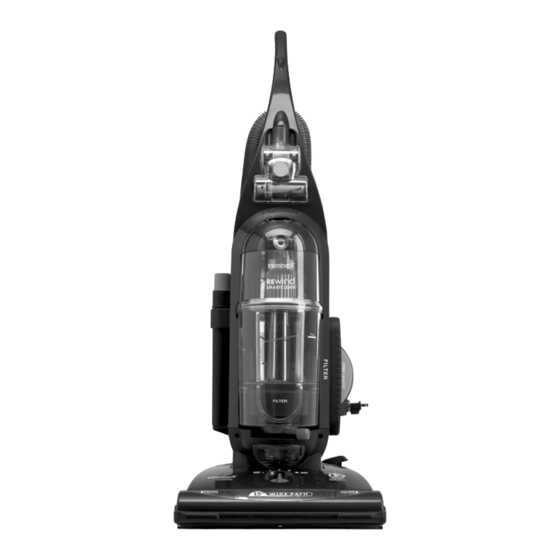
roduct view Handle Stretch Hose TurboBrush ® Tool (select models only) Hose Clip Clean Carpet Sensor (select models only) Clean Filter Indicator (select models only) Quick Carrying Reach ® Handle Crevice Tool Handle Extension Combination Wand Dusting Brush/ Easy Empty ™... -
Page 5: Attach Handle To Vacuum
ssembly you need: phillips head screwdriver. attach handle to vacuum 1. Locate the vacuum handle and remove the screw packet taped to the base of the handle. 2. Stand the vacuum upright and slide the base of the handle firmly into the grooves at the top of the vacuum body. -
Page 6: Power Switch
perations automatic cord rewind 1. Gently pull out power cord and stop when yellow line is visible. Do not pull power cord beyond the red line. Plug cord into electrical outlet. 2. To return cord, turn vacuum power switch OFF, and remove plug from outlet. Hold plug and press automatic cord button to wind cord into reel. - Page 7 perations clean carpet sensor (select models only) clean carpet sensor detects dirt and debris being picked up while vacuum is Clean Carpet Sensor in use. Red light: Vacuum picking up dirt. alternate to green and Red: Slightly soiled area. green light: Vacuum detects clean area. clean filter indicator (select models only) the indicator tells you when the air flow in your vacuum is reduced due to...
-
Page 8: Maintenance And Care
perations empty dirt container empty when dirt reaches the “full” line on the container. Full Line 1. Turn power OFF. Unplug power cord from electrical outlet. 2. Slide Lock ‘n Seal lever to “Unlock” position. Unlock Position Lock Position 3. Grasp dirt cup handle portion and pull straight out to remove from vacuum and empty. -
Page 9: Cleaning The Pre-Motor Filter
aintenance and care cleaning the inner & outer circular filter continued 4. Separate the outer foam filter and inner pleated circular filter. Wash each individually by hand in warm water. Mild detergent may be used if desired. Rinse well; let filters com- pletely air dry before replacing in filter cup. -
Page 10: Replace Drive Belt
aintenance and care checking rotating floor brush and drive belt check your vacuum’s rotating floor brush and drive belt regularly for wear or damage. 1. Turn power OFF. Unplug vacuum cord from electrical outlet. 2. Place handle in low position and turn vacu- um over so bottom side is facing up. -
Page 11: Clearing A Clog
aintenance and care clearing a clog low suction or poor pickup may be due to a clog in the vacuum. if you notice a change in the sound of the vacuum motor, check for clogs. 1. Turn power OFF. Unplug vacuum cord from electrical outlet. - Page 12 aintenance and care (select models only) Replace headlight Turn power OFF. Unplug vacuum from electrical outlet. 2. Using a flat screwdriver or coin, insert into the slot on the right of the lens and gently push inner latch to the left to remove the lens. 3.
-
Page 13: Troubleshooting
1-800-237-7691. w w w . b i s s e l l . c o m... -
Page 14: Replacement Parts
Style 16 Outer Circular Pre-Motor Filter 32076 Style 7/9/16 Post-Motor Filter 203-1215 Style 7/9/16 Pre-Motor Filter ccessories these items are available for purchase as accessories for your bissell vacuum: to purchase call 1-800-237-7691 or visit www.bissell.com. Item Part No. Part Name 203-2447... -
Page 15: Warranty
Subject to the *EXCEPTIONS AND EXCLUSIONS identified below, upon receipt of the product BISSELL Homecare, Inc. will repair or replace (with new or remanufactured components or products), at BISSELL’s option, free of charge from the date of purchase by the original purchaser, for days any defective or malfunctioning part. - Page 16 Grand Rapids MI 49501 ATTN: Consumer Services Or visit the BISSELL website - www.bissell.com When contacting BISSELL, have model number of cleaner available. Please record your Model Number: ___________________ Please record your Purchase Date: ___________________ note: please keep your original sales receipt. it provides proof of purchase date in the event of a warranty claim.
Need help?
Do you have a question about the 58F8 Series and is the answer not in the manual?
Questions and answers