
Subscribe to Our Youtube Channel
Related Manuals for Bissell PowerForce Vacuum


Summary of Contents for Bissell PowerForce Vacuum
- Page 1 ® PowerForce U S E R ’ S G U I D E 3525/3530/3537/46E5/71Y7 SERIES Safety Instructions Product View Assembly Operations 7-10 Maintenance and Care 10-11 Troubleshooting Replacement Parts Consumer Services Warranty...
- Page 2 Your BISSELL PowerForce is well made, and we back it with a limited one year warranty. We also stand behind it with a knowledgeable, dedicated Consumer Services Department, so, should you ever have a problem, you’ll receive fast,...
-
Page 3: Important Safety Instructions
MPORTANT SAFETY INSTRUCTIONS When using an electrical appliance, basic Keep hair, loose clothing, fingers, and all parts of ■ precautions should be observed, including the body away from openings and moving parts. following: Turn off all controls before plugging or unplugging ■... -
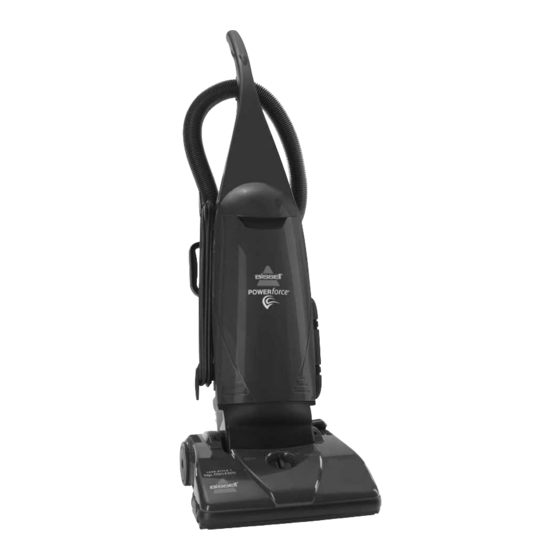
Page 4: Product View
roduct view Handle Cord Clip Hose Clip Hose Bag Door Carrying Handle Power Switch Quick Release ™ Cord Wrap Crevice Tool Quick Reach ® Extension Handle Wand Twist ‘n Snap ™ Combination Hose Upholstery/Dusting Brush Tool Washable Tool Storage Post-Motor Clips Power Cord Filter... -
Page 5: How To Use This Guide
User’s Guide will greatly enhance your ability to get the most performance from your bISSEll Powerforce for many years. ssembly The only tool you’ll need to assemble your vacuum cleaner is a Phillips screwdriver. -
Page 6: Operation
Handle position Press the handle release pedal with your foot to Before cleaning under low furniture, place your bISSEll Powerforce into one of three check area first for objects that might cleaning positions. harm the unit or block the vacuum hose. -
Page 7: Power Cord
Power cord upper and lower cord wrap. When you are done using your bISSEll Powerforce, return it to the upright position and store the power cord. WARnInG: Turn vacuum cleaner OFF. -
Page 8: Check Rotating Floor Brush And Drive Belt
Replace dust bag never reuse a dust bag. Use only bISSEll Style 7 Dust bags in your bISSEll Powerforce. Style 7 Envirofresh Micro filtration Dust bags (# 30861) ® Style 7 Dust bags (# 32120). Unplug cleaner from electrical outlet. -
Page 9: Replace Drive Belt
Replace if worn. Check air passageway for obstructions. Remove debris from this area. Replace drive belt Use only bISSEll Style 7 Replacement belts (#32074) in your bISSEll Powerforce. Unplug cleaner from electrical outlet. With rotating floor brush removed from vacuum... -
Page 10: Troubleshooting
aintenance and care Suction Inlet Clearing clog The hose on the back of the vacuum cleaner that carries the dirt from the powerfoot to the dust bag can sometimes become clogged. If you notice a change in the sound of the vacuum motor, check for clogs. -
Page 11: Please Do Not Return This Product To The Store
Contact us directly at 1-800-237-7691. eplacement Parts - BISSELL PowerForce You may purchase parts from your retailer, by calling bISSEll Consumer Services or by visiting our website. below is a list of common replacement parts. While not all of these parts may have come with your specific model, they are available for purchase if desired. -
Page 12: Limited One-Year Warranty
Subject to the *EXCEPTIONS AND EXCLUSIONS identified below, upon receipt of the product BISSELL Homecare, Inc. will repair or replace (with new or remanufactured components or products), at BISSELL’s option, free of charge from the date of purchase by the original purchaser, for one year any defective or malfunctioning part.
Need help?
Do you have a question about the PowerForce Vacuum and is the answer not in the manual?
Questions and answers
manual for powerforce helex
The manual for the Bissell PowerForce Vacuum can be found in the User’s Guide that comes with the vacuum.
This answer is automatically generated