Becker Highspeed 7934 Instructions For Use Manual
Personal navigation device
Hide thumbs
Also See for Highspeed 7934:
- Specifications (2 pages) ,
- Operating instructions manual (85 pages)
Table of Contents
Advertisement
Quick Links
Advertisement
Chapters
Table of Contents

Related Manuals for Becker Highspeed 7934


Summary of Contents for Becker Highspeed 7934
- Page 1 Instructions for use US...
-
Page 2: Safety Message Hierarchy
>>> SAFETY MESSAGE HIERARCHY This manual uses the following types of Safety message hierarchy safety messages to draw your attention to > US important safety and other information for use of the Traffic Assist Highspeed. Please review the symbols and content of the boxes below. -
Page 3: Table Of Contents
Safety message hierarchy Table of Contents Safety information The Traffic Assist Highspeed Navigation Music Pictures Unpacking the Traffic Assist Highspeed Checking the delivery Delivery contents Complaints procedure Handling the packaging Description of the unit Traffic Assist Highspeed - basic unit Cable for power supply from cigarette lighter Battery... - Page 4 >>> TABLE OF CONTENTS Navigational mode What is navigation? > US Selecting navigation Aids for navigation Rapid access Navigation menu Map display Rapid access Structure of rapid access Navigation menu and map display The list of destinations Icons used Operating rapid access Starting using an existing destination Scrolling in the destinations memory Displaying or editing destinations...
- Page 5 This manual nor any parts thereof may not be reproduced for any purpose whatsoever without the express written consent of HARMAN/BECKER Automotive Systems GmbH. © Copyright 2007, HARMAN/BECKER Automotive Systems GmbH All rights reserved.
-
Page 6: Safety Information
>>> SAFETY INFORMATION Safety information > US • The unit may only be operated if the traffic situation permits and if you are absolutely certain that you, your fellow passengers or other road users will not be put at risk, encumbered or distracted by it. This unit should not be used as a substitute for the personal judgment of the driver. - Page 7 Dispose of defective units and the rechargeable battery according to the applicable legal requirements. • No warranty is granted in the case of improper use. These safety instructions also apply to genuine HARMAN/BECKER original accessories.
-
Page 8: Navigation
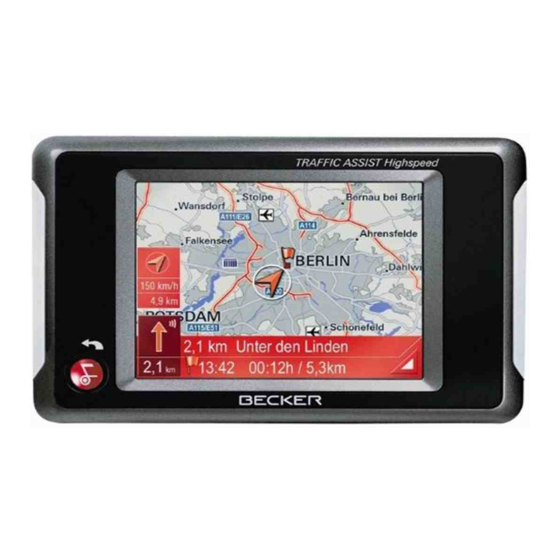
>>> THE TRAFFIC ASSIST HIGHSPEED The Traffic Assist Highspeed > US The Traffic Assist Highspeed is a powerful PND (Personal Navigation Device) for use in vehicles and closed spaces. The unit should be protected from dampness and dirt. The Traffic Assist Highspeed can be used as a: •... -
Page 9: Unpacking The Traffic Assist Highspeed
Delivery contents Complaints procedure Please contact your local dealer if you have any complaints. The unit can also be sent directly to Harman/Becker in its original packaging. Handling the packaging Keep the original packaging in a dry place, at least for the warranty period. -
Page 10: Cable For Power Supply From Cigarette Lighter
>>> THE TRAFFIC ASSIST HIGHSPEED Description of the unit > US The Traffic Assist Highspeed consists of the basic Traffic Assist Highspeed unit, and the accessories included in the deliv- ery. You will find photos of the individual parts under: •... -
Page 11: Grid Power Supply Unit
SD memory card A memory card is used as a storage medium for road maps, music tracks and images. The map data is preinstalled on the card supplied with the unit. If you intend to listen to music or view images using the Traffic Assist Highspeed, you can save these to the free space on the memory card. -
Page 12: Information About Documentation
Registration You can register your product using our software service; we will then inform you of any new updates and other news. You can register online on the Becker homepage (www.becker.de). The “Registration” menu item is located under “Service“. Repairs The unit must not be opened if it is dam- aged. -
Page 13: Overview Traffic Assist Highspeed
OVERVIEW TRAFFIC ASSIST HIGHSPEED >>> > US Scope of supply Overview Traffic Assist High- speed 1 Traffic Assist Highspeed - PND (Personal Navigation De- vice) 2 Memory card (containing navigational data) 3 USB connection cable 4 Cable for power supply from car's cigarette lighter (12 Volts) 5 Unit bracket... - Page 14 >>> OVERVIEW TRAFFIC ASSIST HIGHSPEED > US Front of unit with controls and displays 1 Touchscreen showing the main menu selected 2 Touchscreen key Press = activates the corresponding key command 3 Back key ( Press = returns to numerous applications Press for longer = switches the Traffic Assist Highspeed on and off 4 Mood light...
- Page 15 Rear of unit 1 Point for connecting up an external antenna (external antenna not included in the scope of supply) 2 Memory card slot 3 Sound piece for loudspeaker OVERVIEW TRAFFIC ASSIST HIGHSPEED >>> > US...
-
Page 16: On/Off Switch
>>> OVERVIEW TRAFFIC ASSIST HIGHSPEED > US Side of unit 1 ON/OFF switch 2 Mini USB connection 3 3.5 mm connection for headset (headset not included in the scope of supply) -
Page 17: Maintenance And Care
Maintenance and care General operations The unit is maintenance-free. For proper care of the exterior surface of the unit, a commercially available cleans- ing fluid for electrical devices may be ap- plied using a soft damp cloth. DANGER Danger to life by electrocution. Always switch off the unit and disconnect the grid power supply unit before cleaning the unit, supplied components, or acces-... -
Page 18: Battery Quality Declaration
Please contact your authorized dealer. Use only genuine BECKER original spare parts. Display quality declaration In some cases, for technical reasons, a few discolored dots (pixels) may be visible on the display. -
Page 19: Inserting The Memory Card
Note: A small slider is located on one side of the card. 10101 10102 5011 There is a card slot on the left-hand side of the unit. The card compartment is equipped with a spring-actuated lock and ejection mechanism. NOTICE The memory card should only ever be in- serted and ejected when the unit is switched off. -
Page 20: Connecting Up To Power Supply
>>> GENERAL OPERATIONS Power supply > US Note: First always switch off the Traffic Assist Highspeed before connecting up or re- moving the power supply. Using the battery The internal power supply is via the inte- grated rechargeable battery. The recharge- able battery is maintenance-free and does not require any particular care. -
Page 21: Connecting To The Cigarette Lighter
Connecting to the cigarette lighter Power supplies using a vehicle battery are connected up as follows using the cable sup- plied for the cigarette lighter. > Hold the USB socket at the corrugated grip area and push it into the connect- ing socket to the stop without employ- ing excessive force. -
Page 22: Switching Off
Highspeed On/Off The unit is switched on and off using the button 5014 WARNING Deactivate the Becker moodlights while driving in your vehicle in order to pre- vent visual distraction from the road traf- fic. Switching on > Press the button for a few seconds. -
Page 23: Fitting The Unit Bracket
For example, there may be regulations in your state which forbid mounting the unit/bracket windshield. HARMAN/BECKER assumes no liabili- ty for driver errors or the non-observance of applicable laws. Note: The Traffic Assist Highspeed and unit bracket must not be exposed to long pe- riods of direct sunlight. -
Page 24: Adjusting The Unit Bracket
>>> GENERAL OPERATIONS NOTICE > US Also ensure that there is enough space to easily slide the Traffic Assist Highspeed back out of the bracket. Clean the mounting area on the wind- shield or dashboard so that it is clean and free of grease. -
Page 25: Basic Information About The Touchscreen
Vertical movements > Loosen the fastening screws (2) on both sides far enough to be able to swivel the carrier plate (7) downward from above without exerting excessive force. > Use one hand to hold the foot (5) and swing the support plate (7) up to the center or down into the position you want. -
Page 26: Calibration
>>> GENERAL OPERATIONS Operation > US The buttons which appear in the menus or message windows should simply be touched so that they are displayed as if they had been pressed. If the key pressed is not permitted in the current situation, a short signal will sound. -
Page 27: Scrolling Through The Lists
Entering characters Characters are entered by pressing the keys in the central area. Once the entry is complete, the process is concluded by pressing the key, and the entry passed on to the Traffic Assist Highspeed for processing. Adopting suggestions When a navigation destination is entered, the Traffic Assist Highspeed compares the entry with the set of data on the memory... -
Page 28: Deleting Characters
>>> GENERAL OPERATIONS Special characters Special characters do not have to be used > US when entering the names of towns and streets. The Traffic Assist Highspeed will change entries from AE, OE, and UE, if necessary. Special characters can be useful when naming destinations and routes. -
Page 29: Transferring Using The Sd Card Reader
The back button The button is integrated in the bot- tom left-hand corner of the casing. It has various functions: • Pressing and holding switches the Traf- fic Assist Highspeed to standby and back on again when in standby mode. •... -
Page 30: Transferring Pieces Of Music And Pictures
>>> GENERAL OPERATIONS Transferring using the USB port > US The USB port is used to link the Traffic Assist Highspeed directly to a personal computer. For transfers, the Microsoft program must be installed on the comput- er. This is available free-of-charge from the manufacturer. -
Page 31: Faults
Faults If unit faults relating to the operating sys- tem occur, messages to this effect will be displayed. These should be acknowl- edged. If the activated function cannot then be executed, the Traffic Assist High- speed must be restarted using the ON/ OFF switch or the reset button. -
Page 32: Navigational Mode
>>> NAVIGATIONAL MODE What is navigation? Navigational mode > US Navigation (Latin navigare = to travel by sea) is generally understood to mean find- ing the position of a vehicle, determining the direction of and distance from the de- sired destination, and establishing and fol- lowing a route to this destination. -
Page 33: Selecting Navigation
Selecting navigation Navigational mode is called up from the main menu. > Press the key in the main Navigation menu. Depending on the status and the map data stored on the memory card, you may be asked if you would now like to set your navigation map. -
Page 34: Rapid Access
>>> NAVIGATIONAL MODE Rapid access > US Rapid access allows you to select from the key functions to quickly start navigation. Rapid access is illustrated below using sample destinations. Structure of rapid access Navigation menu and map display In rapid access, the Navigation menu for calling up this menu is displayed in the top line on the left. -
Page 35: Icons Used
Icons used The following icons are used in the list of destinations. Icon Meaning This destination is a standard 6026 destination without any spe- cial features. This destination is protected. 6025 Once the destination memory is full, this destination is not automatically deleted. -
Page 36: Change To Map Display
>>> NAVIGATIONAL MODE The destination is moved Move this en- > US forward by one position. try up This function is only available in the case of protected destinations. The destination is moved Move this en- back by one position. try down This function is only available in the case of... -
Page 37: The Navigation Menu
The Navigation menu If you do not want to select a destination quickly or if the planned destination is not yet available in the destinations memory, you can use the navigation menu to deter- mine a new destination. 6001 > In rapid access, press the Navigation key at the upper edge of the menu... -
Page 38: Navigation Menu: Address
>>> NAVIGATIONAL MODE Navigation menu: Address > US A selection window for specifying the des- tination is opened from the Navigation menu by pressing the Address 6002 6003 > In the navigation menu, press the button. dress The selection window for the address ap- pears. -
Page 39: Navigational Mode
You can also: • Display the destination on the map • Define options of the drive profile • Save the destination in the destinations memory • Start directions to the destination im- mediately. Selecting the town The destination town can be entered using its name or postcode. -
Page 40: List Of Streets
>>> NAVIGATIONAL MODE Using the list of towns If you have already entered some of the > US letters of the town you want, you can use function to display all the towns List containing the combination of letters in question. -
Page 41: Drive Profile
Selecting the Intersection After you have entered the destination city and street, you can use the junction menu field to display all the streets branching off from or crossing the destination street to assist you in finding your way. > Press the key to display all Intersection the Intersections in the vicinity of your... -
Page 42: Navigation Menu: Point Of Interest
>>> NAVIGATIONAL MODE Saving destination button opens an entry menu for > US Save entering a name for the destination en- tered. If a name has been entered and adopted using , the destination is transferred to rapid access and protected there. -
Page 43: Point Of Interest: Nearby Gps Position
The search area selection window appears. 6011 You can now use the buttons to select the search area you want. Point of interest: Nearby GPS position > Press the button. Nearby GPS position 6062 The following specifications are possible for searches in this point of interest win- dow. -
Page 44: Points Of Interest
>>> NAVIGATIONAL MODE You will find information about working with the entry menu in the chapter "En- > US tries made with the entry menu" on page You will find information about scrolling in lists in the "Scrolling through the lists" on page 26 chapter. -
Page 45: Navigation Menu: Select On Map
Navigation menu: Select on If the destination required cannot yet or can no longer be found in the destina- tions memory, the button Select on map allows you to select it directly. No address details are asked for in this case. -
Page 46: Scrolling Through The List Of Routes
>>> NAVIGATIONAL MODE Navigation menu: Route plan- ning > US The route planning menu allows you to create and select individual routes. In ad- dition to selecting and setting a wide range of details, you can also define legs of the journey. -
Page 47: The New Route Button
Using a route The following buttons are available: Meaning Map symbol Shows all stages inside actual route in the map. Opens the "address win- New route dow" for entering a new destination address Activates individual Edit route points for process- Calculates the difference Calculate in distance and the jour-... -
Page 48: The New Route Button 46
>>> NAVIGATIONAL MODE The Edit key Existing routes can be changed in the Edit > US menu. 6013 > Press the key to change existing Edit routes. The route planning window appears. The following functions are available: Meaning This box can be used to enter a new route point. -
Page 49: The Map Info Key
Navigation menu: Settings The settings of relevance to the navigation functions can be found in the Settings menu. Note: All settings must be confirmed by press- ing the key. You can exit the current settings button at any time without sav- ing any changes by pressing the button 6002 6014... -
Page 50: The Signpost Info Key
>>> NAVIGATIONAL MODE If you activate this entry, Info box > US the point of compass, the speed and the sea level are displayed. > Confirm your selection by pressing the key. The Route info key You can select settings in the Route info settings window: 6018 The following settings are possible. -
Page 51: The Volume Key
> Select the fields Interstates Ferries one-by-one and choose Tollways one of the following options for each: Setting Meaning Allowed With this option, the corresponding road type 6059 is included in the route calculation. Avoid With this option, wher- ever possible, the corre- 6061 sponding road type is avoided. -
Page 52: The Automode Key
>>> NAVIGATIONAL MODE The Out of town button Out of town > US indicates the speed limit above which you will re- ceive an acoustic warning when driving outside built-up areas. Warning Warning dicates the speed limit above which you will re- ceive an acoustic warning when particular condi- tions apply: during rain... -
Page 53: The Route Planning Key
Decide whether you wish 2D autozoom to work with Zoom in, Standard, Zoom out or No autozoom as your de- fault setting while navi- gating in the 2D display. With the Autozoom op- tion, the zoom range var- ies according to your speed: When you drive slowly, the scale is de- creased. -
Page 54: The Format Key
>>> NAVIGATIONAL MODE The Format key Using the Format configuration window, > US you can specify which units of measure- ment to use for time and distance. Setting Meaning Press this field to toggle Time between the 12-hour and 24-hour clock display. Press this field to toggle Distance between the kilometer... -
Page 55: The Load Map Key
The Load map key The Traffic Assist Highspeed works using the map material stored on the memory card. The relevant files must be loaded in accordance with the present location and the destination. Press the Load map button to display the loaded map material. -
Page 56: Map Display With Driving Guidance
>>> NAVIGATIONAL MODE Map display with driving guidance > US 6029 If the navigation function has been acti- vated, the position icon will indicate your current location on the map. 6030 Depending on which setting was made in the option mode, the position icon may remain stationary while the map moves, or vice-versa. -
Page 57: Using The Map Display
The following function keys appear in the toolbar: Icon Meaning See "Display route (toolbar)" on page 57. See "Position and display mode (toolbar)" on page 57. See "Daytime - Night-time design (toolbar)" on page 58. See "Change display (tool- bar)" on page 58. See "Point northwards (tool- bar)"... -
Page 58: Information Rows
>>> NAVIGATIONAL MODE WARNING > US The volume of the navigation unit should be set so that noises outside the vehicle can be heard. The bar displays disappear after three sec- onds if the buttons are not pressed. Information rows While directions are being given, a maxi- mum of three information rows may be displayed (or hidden) with the following... -
Page 59: Daytime - Night-Time Design (Toolbar)
Choose this function whenever you want, for example, to locate your current position again after the map dis- play has shifted. • When the position key is deactivated, the map remains stationary and the po- sition icon moves across the map to the edge of the touchscreen. -
Page 60: Point Northwards (Toolbar)
>>> NAVIGATIONAL MODE Point northwards (toolbar) Use the compass key to orient the map on > US the touchscreen toward the north. > Press the compass key. The map is pointed north on the touch- screen. Move map (toolbar) In move mode, you can shift the map in any direction required. - Page 61 The following options are available. Selection Meaning Terminates driving guid- Main menu ance and allows you to use other functions such as MP3 Player. Terminates driving guid- Navi menu ance and switches to rap- id access mode. Map icon Switches to map display. Terminates driving guid- Quit naviga-...
-
Page 62: Position Information (Toolbar)
>>> NAVIGATIONAL MODE Position information (toolbar) You can call up the information window if > US you require information on a particular point on the map display. If information has been stored, this window shows the address of the particular point on the map and offers a number of functions so you can decide on your next step. -
Page 63: Music Operations
Selecting music playback Music operations Music playback is called up from the main menu. > Press the key in the main menu. Music Calling up without active navigation The MP3 player is called up and appears with its main screen. •... -
Page 64: Track Skip
>>> MUSIC OPERATIONS Operating the MP3 Player > US Various key panels are arranged around the track line to simplify operations. Track skip The names of the next and previous tracks are displayed above and below the current music track. >... -
Page 65: Folder Overview
Folder overview All the music folders saved on the memory card are listed next to the folder button. > Press (see arrow). The tracks in the current folder are dis- played. You can also directly select a track here. The track currently playing is marked with a CD symbol. -
Page 66: Navigation During Mp3 Player Operation
>>> MUSIC OPERATIONS > US 7014 A bar diagram displays the current volume in relation to total volume. This relation- ship is also displayed numerically above the diagram. You can use the 8010+1 keys to change the volume in the direction indicated by the arrow. -
Page 67: Pictures Mode
Selecting Pictures Display Pictures mode The pictures display is called up from the main menu. 3001 > Press the key in the main Pictures menu. The Picture Viewer is called up and ap- pears with its main screen. • If the last image displayed is present on the memory card, this will be displayed in the image area. -
Page 68: Operating The Picture Viewers
>>> PICTURES MODE Operating the Picture Viewers > US Various key panels are arranged around the picture display to simplify operations. Scrolling 8010+1 keys can be used to scroll in the direction indicated by the arrow and to therefore move between the pictures at the current folder level. -
Page 69: Folder Viewing Mode
Folder Viewing Mode Under the picture displayed in the Picture Viewer, the picture's folder level is dis- played in a key panel. 8003 > Press the key panel. Folder viewing mode appears. 8004 In this viewing mode, the name of the cur- rent folder level is displayed in the top line. -
Page 70: Settings
>>> SETTINGS Selecting the settings Settings > US You can pre-select various basic settings for all applications of the Traffic Assist Highspeed. > Push the button Settings menu. This calls up the setting menu for the fur- ther selections. The setting menu The various setting possibilities can be se- lected from the setting menu. -
Page 71: Ending The Status Display
9021 The charge condition is displayed using the level gauge. In the example, the bat- tery still has a charge of two-thirds of its capacity. The charging operation is indicated by the mains socket symbol in the status display. 9021 Ending the status display By pushing the button the status dis-... -
Page 72: Language
9029 9028 > Push the button Mood light The light bars are controlled accordingly. Set language to WARNING Deactivate the Becker moodlights while driving in your vehicle in order to pre- vent visual distraction from the road and traffic. 9031... -
Page 73: Information
> Push the button Information The information display appears. Please note particularly the product desig- nation and the details of the software ver- sion. Always quote these details in the event of queries with Harman/Becker ser- vice department. -
Page 74: Specialist Words
>>> SPECIALIST WORDS Active Sync Specialist Words Active Sync is a Microsoft product. This is > US the standard synchronization software for Windows mobile units such as your Traf- fic Assist Highspeed. The program can be downloaded free-of-charge from the inter- net. -
Page 75: File
File Index File on a CD/storage card/microdrive which contains MPS titles. SD Card (Secure Digital) The Secure Digital Card was developed in 2001 by SanDisk on the basis of the older MMC standard. An SD card is a re-writ- able change-over storage card. Stylus A stylus is an input pointer which is used for the operation of touchscreens, mobile... -
Page 76: Keywords
>>> KEYWORDS > US Active Sync ....29 Adjusting the volume ... . 53 Autozoom . - Page 77 Memory Card ....73 Memory card ....17 Motorway .
-
Page 78: Technical Data
>>> TECHNICAL DATA Technical Data • Dimensions: > US (W x H x D) in mm 127 x 81.2 x 49.4 • Weight: 187 grams • Processor: 400 MHz Processor CISC-architecture • Screen: 3.5 inch Touchscreen with 16 Bit color depth 65536 colors Low reflection values •... -
Page 79: Fact Sheet
FACT SHEET >>> FCC Information FACT SHEET > US This unit complies with the requirements of Part 15 of the FCC Guideline. Operation of the unit is subject to the following conditions: (1) The unit must not cause electrical interference. (2) The unit must suppress received electrical interference, including any interference which could cause malfunctions of the unit. -
Page 80: Disposal
> US Customer information on the disposal of electrical and electronic devices (private households) According to the self-proclaimed corporate principles of Harman/Becker Automotive Sys- tems GmbH, your product has been developed and manufactured from high-quality, recy- clable materials and components. - Page 81 How Does State Law Apply? This warranty gives you specific legal rights, and you may also have other rights which vary from state to state. Who Gives This Warranty? Harman Becker Automotive Systems Becker - Göring - Str. 16, 76307 Karlsbad, Germany Becker of North America 650 East Crescent Ave...
Need help?
Do you have a question about the Highspeed 7934 and is the answer not in the manual?
Questions and answers