Table of Contents
Advertisement
Advertisement
Table of Contents

Subscribe to Our Youtube Channel
Related Manuals for Craftex B1979C


Summary of Contents for Craftex B1979C
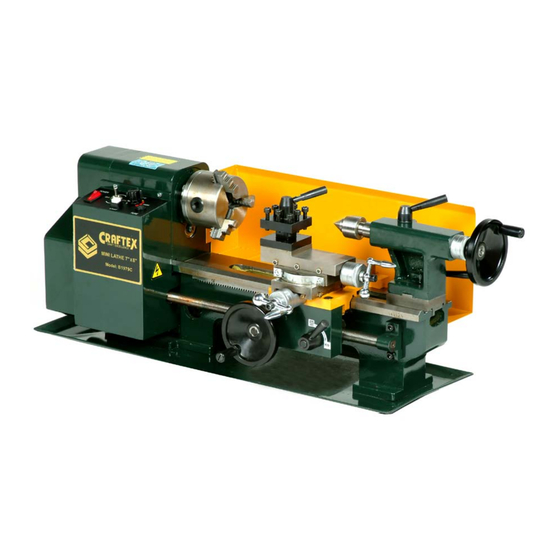
- Page 1 B1979C – MINI METAL LATHE, 7” X 8” OWNER’S MANUAL...
-
Page 2: Table Of Contents
Table Of Contents General Safety Instructions………………………………………………..…Page 4 Introduction………………………………………………………………….…Page 5 Package Contents………………………………………………………….…Page 6 Installation and Test Run………………………………………………...Page 7 - 9 Maintenance and Operation……………………………………………Page 10 -17 Replacement of Chuck………………………………………………Page 11 Replacement of Jaws & Compound Rest Adjustment…………..Page 12 Tailstock Adjustment & Replacement of brushes………………..Page 13 Tool Post Adjustment……………………………………………….Page 14 Automatic Feeding……………………………………………….….Page 15 Threading……………………………………………….……………Page 16... -
Page 3: General Safety Instructions
GENERAL SAFETY INSTRUCTIONS EXTREME CAUTION SHOULD BE USED IN OPERATING ALL POWER TOOLS. KNOW YOUR POWER TOOL, BE FAMILIAR WITH ITS OPERATION. READ THE OWNER’S MANUAL AND PRACTICE SAFE USAGE PROCEDURES AT ALL TIMES. CONNECT your machine ONLY to the matched and specified power source. ... -
Page 4: Introduction
Introduction As part of the growing line of Craftex woodworking equipment, we are proud to offer the B1979C Mini Metal Lathe. The Craftex name guarantees Craft Excellence. By following the instructions and procedures laid out in this owner’s manual, you will receive years of excellent service and satisfaction. The B1979C is a professional tool and like all power tools, proper care and safety procedures should be adhered to. -
Page 5: Package Contents
B1979C – PACKING LIST... -
Page 6: Installation And Test Run
Installation and Test Run When unpacking the case, that your machine B1979C has arrived in, try and follow the following instructions. 1) Remove the top board and the tip-boards first, and then twist the 4 bolts off the bottom. Look into the accessory bag where you will find 4 rubber feet for the lathe. - Page 7 5) Your B1979C is now ready to be turned ON. Before doing so, please be sure that the power switch, direction switch and the speed control adjustment are in the “OFF”...
- Page 8 Additional Remarks This machine has an overload protective switch, which limits the depth of feed. When the main spindle is turning at 1000r/min in the bottom gear, the depth of the feed must be within 4mm (0.16”) For the spindle turning at 1000r/min in top gear, the depth of the feed must be within 2mm (0.079”).
-
Page 9: Maintenance And Operation
Maintenance and Operation Your Craftex B1979C Mini Metal Lathe will provide you with years of excellent service and satisfaction. Like any other machine, maintenance is very important to the life of your lathe. There are a few certain things that one should do as regular as possible in order to keep the lathe in top condition. -
Page 10: Replacement Of Chuck
Daily Maintenance 1) Inspect each operating part of the machine to ensure the condition of lubrication 2) Examine each component to ensure that no parts have functional problems 3) Clean and remove any dirt, debris or obstacles in and around the machine in order top prevent machine damage. -
Page 11: Replacement Of Jaws & Compound Rest Adjustment
Replacement of jaws The jaws are in two types – the internal jaws and the external jaws. Please pay notice that the number of jaws fit with the number inside the chucks groove. Do not mix them together. When you are going to mount them, please mount them in ascending order, and when taking them out, take them out in descending order (3-2-1) one by one. -
Page 12: Tailstock Adjustment & Replacement Of Brushes
Tailstock Rest Adjustment When you are going to change the position or replace the tailstock you need to loosen the nut. Replacement of Carbon Brushes Replace the carbon brushes by removing the brush covers both on the motor cover and on the bottom right side of the speed control as shown in the figure below (10A &... -
Page 13: Tool Post Adjustment
Tool Post Adjustment When you are going to adjust the tool post position, you only need to loosen the lever shown in the below figure (B). After you have finished, be sure to tighten. If you are going to replace the work cutter, you need to loosen the screws show in the diagram below (A) -
Page 14: Automatic Feeding
Automatic Feeding Adjust the feeding direction selector to the direction you desire. Then press down the handle (A) as shown in the figure below and continue with the automatic feeding procedure. When feeding, never try to change the feed direction. Threading Select the feeding direction selector to the thread direction you desire. - Page 15 Operation Use the chuck to hold the workpeice firmly. Then use the rolling center to fix the other end. If you change the rolling center to the drilling chuck you can start your drilling immediately. See figure below. Use the chuck to hold the work-piece firmly and the cutter to start the lathes face cutting as show in the figure below.
-
Page 16: Operation Of Cutting
By changing the tool post angle and adjusting the compound rest, you can do internal cutting as shown in the figure below. After adjusting the angle of the compound rest, you can perform bevel cutting as shown below. -
Page 17: Parts Listing
B1979C – PARTS LISTING... -
Page 21: Warranty
CRAFTEX 2 YEAR LIMITED WARRANTY Craftex warrants every product to be free from defects in materials and agrees to correct such defects where applicable. This warranty covers two years for parts and 90 days for labour (unless specified otherwise), to the original purchaser from the date of purchase but does not apply to malfunctions arising directly or indirectly from misuse, abuse, improper installation or assembly, negligence, accidents, repairs or alterations or lack of maintenance.
Need help?
Do you have a question about the B1979C and is the answer not in the manual?
Questions and answers