Table of Contents
Advertisement
Advertisement
Table of Contents

Related Manuals for Craftex CX801


Summary of Contents for Craftex CX801
- Page 1 CX801 HEAVY DUTY BENCH TOP LATHE User Manual...
-
Page 2: Table Of Contents
TABLE OF CONTENT General Safety Instructions ............... 3 Specific Safety Instructions ..............4 Heavy Duty Bench Top Lathe Features............. 5 Physical Features ..................6 Un-packing ....................7 Setup ......................7 Mounting to a workbench ................8 Leveling the lathe ..................8 Installing the Tool Rest ................ -
Page 3: General Safety Instructions
GENERAL SAFETY INSTRUCTIONS Do not attempt to operate the machine until you have read thoroughly and have understood completely all instructions, rules and conditions contained in this manual. Failure to comply can result in accidents involving fire, electric shock, or serious personal injury. Know your machine. -
Page 4: Specific Safety Instructions
CX801 HEAVY DUTY BENCHTOP LATHE SPECIFIC SAFETY INSTRUCTIONS Like all power tools and machinery, proper safety and attention must be adhered to. There is danger associated with using any tool or machine so pay careful attention each and every time you use your tool. If you are not familiar with the operations of a lathe, you should obtain the advice and/or instructions from a qualified professional. -
Page 5: Heavy Duty Bench Top Lathe Features
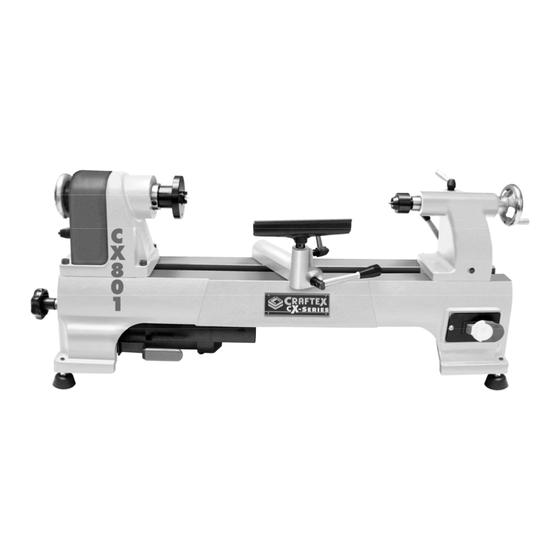
FEATURES MODEL CX801 HEAVY DUTY BENCH TOP LATHE As part of the growing line of Craftex woodworking equipment, we are proud to offer CX801 a Heavy Duty Bench Top Lathe. By following the instructions and procedures laid out in this owner’s manual, you will receive years of excellent service and satisfaction. -
Page 6: Physical Features
PHYSICAL FEATURES... -
Page 7: Unpacking
The figure below shows minimum workplace for the lathe. Figure-1 Loose parts WARNING CX801 weighs approximately 105 lbs. Do not over-exert yourself. Get the IMPORTANT help of an assistant for safe moving. While doing inventory, if you can not find any part, check if the part is already installed on the machine. -
Page 8: Mounting To A Workbench
MOUNTING ON A INSTALLING THE TOOL WORKBENCH REST The lathe should be mounted on a Locate the hole on the tool rest base and workbench proper height. thread the lock handle into the hole. See workbench must be rigid and flat enough Figure-3. -
Page 9: Installing The Bed Extension (Optional)
BED EXTENSION INSTALLING / REMOVING (Optional) TAILSTOCK CENTER The bed extension is available as an optional component (MODEL# Clean the tailstock center shank and the CX801EXT). The bench top lathe has tailstock quill and insert the center firmly been factory drilled with two holes at the by hand into the tailstock quill. -
Page 10: Installing/Removing Faceplate
INSTALLING / REMOVING INSTALLING / REMOVING FACEPLATE HEADSTOCK CENTER Make sure the switch is in OFF position The headstock spindle is designed with and the cord is disconnected from the an MT2 taper. power source. Clean the spindle bore and center's taper Attach the faceplate to the headstock by and insert the center into the spindle bore threading it on the spindle. -
Page 11: Test Run
During the test run the machine should TEST RUN run smoothly and create very little noise or vibration. If there is an unusual noise Once you have assembled your machine coming from the machine or the machine completely, it is time for a test run to make vibrates excessively, turn the machine sure that the machine works properly and OFF and investigate the problem. -
Page 12: Changing Spindle Speed
CHANGING THE SPINDLE shifting the belt tension lever and tighten it SPEED securely after adjustment. The CX801 Heavy Duty Bench Top Lathe Release the V-belt tension by shifting the features 6 spindle speed changes: 480, belt tension lever, located under the bed 1270, 1960, 2730, 3327 and 4023 RPM. -
Page 13: Tool Rest & Base
lathe. The tailstock can be moved along TOOL REST & BASE the bed slide ways. Before moving the tailstock, loosen the tailstock lock lever. The tool rest base can be moved along Move the tailstock by hand to the desired the bed slide-ways. -
Page 14: Alignment Between Centers
ALIGNMENT BETWEEN MAINTENANCE CENTERS During the life of your machine, you will need practice some regular The center alignment has been adjusted maintenance to keep your lathe in peak properly at the factory before the machine performance condition, is shipped to you. However, after lengthy operation, the centers may be out of alignment. -
Page 15: Troubleshooting
TROUBLESHOOTING PROBLEMS CAUSES CORRECTION CUTTING TOOL 1. Work-piece is not 1. Clamp it firmly. VIBRATION clamped firmly. 1. Work-piece is clamped 1. Check balance. incorrectly. 2. Adjust center POOR 2. Tailstock center and Alignment. MACHINE ACCURACY headstock center is out of alignment. -
Page 16: Parts Breakdown
CX801 PARTS BREAKDOWN... -
Page 17: Pars List
CX801 PARTS LIST INDEX DESCRIPTION SCREW - SET M6-1.0 X 6 PSS02M HEADSTOCK HANDWHEEL P0624002 PULLEY SAFETY COVER P0624003 SCREW - SET M4-0.7 X 6 PSS79M SPINDLE PULLEY P0624005 BEARING 6004Z P6004 HEADSTOCK CASTING P0624007 BEARING 6005ZZ P6005 SPINDLE P0624009... - Page 18 BELT TENSION LOCK KNOB P0624046 PIN - ROLL 3 X 12 PRP61M SHAFT P0624048 SPACER M18 P0624049 COMPRESSION SPRING P0624050 LOWER PULLEY ACCESS PLATE P0624051 NUT - HEX 3/8-16 PN08 RUBBER FOOT P0624053 SCREW - PAN HD PHILLIPS M5-0.8 X 10 PS09M WASHER - FLAT M5 PW02M...
-
Page 19: Warranty
Proof of purchase is necessary. All warranty claims are subject to inspection of such products or part thereof and Craftex reserves the right to inspect any returned item before a refund or replacement may be issued.
Need help?
Do you have a question about the CX801 and is the answer not in the manual?
Questions and answers