Table of Contents
Advertisement
Quick Links
Advertisement
Chapters
Table of Contents

Related Manuals for Blaupunkt TravelPilot 100


Summary of Contents for Blaupunkt TravelPilot 100
- Page 1 Mobile Nav igation TravelPilot 100 Device instructions...
-
Page 2: Device Overview
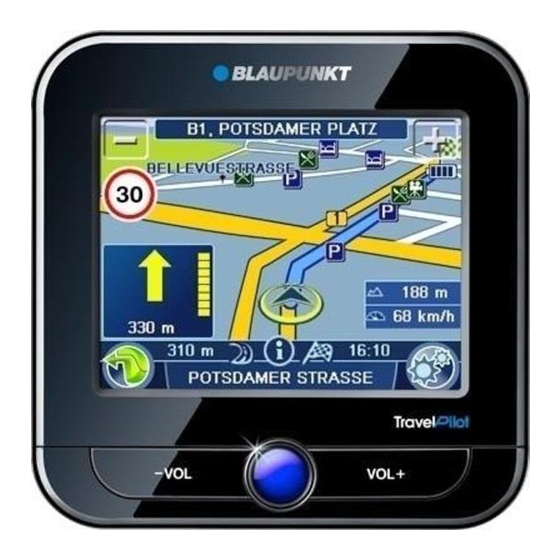
Device overview Device overview... - Page 3 Device overview 1 Display (touchscreen): Simple and intuitive operation by touching the buttons on the dis- play. 2 VOL -: Decreases the volume 3 On/Off switch: • Long press (longer than 3 seconds): Switches the device on or off. • Short press: Opens the main menu.
-
Page 4: Table Of Contents
Contents Device overview ........2 Safety notes ........5 Use as directed ........5 Road safety ..........5 General safety notes ......5 Cleaning notes ........5 Disposal notes ........5 First use ..........6 Scope of delivery ........6 Protective screen fi lm ......6 Charging the battery ......6 Switching on the device......6 Setting the language ......6 Select simple mode/expert mode ....7... -
Page 5: Safety Notes
Safety notes Safety notes • If battery liquid comes into contact with your eyes or skin, immediately fl ush with wa- For your personal benefi t, carefully read the fol- ter and consult a doctor. lowing safety notes before operating the device •... -
Page 6: First Use
CAUTION! Unapproved chargers could damage batteries Press and hold the On/Off switch for longer Use only the original chargers from Blaupunkt for than 3 seconds. operating and charging to correctly charge the battery and protect it against overvoltage. -
Page 7: Select Simple Mode/Expert Mode
First use | Installation in the vehicle Select simple mode/expert mode Installation in the vehicle After setting up the language and confi rming the For temporary installation in a vehicle, the navi- licensing contract, 2 modes are offered for opera- gation device features a holder to attach it to the tion. -
Page 8: Inserting The Device In The Mounting Cup
Installation in the vehicle | Switching on/off Switching on/off The On/Off switch is used to switch the device on and off. Switch-on Press and hold the On/Off switch for longer than 3 seconds. Switch-off Press and hold the On/Off switch for longer than 3 seconds. -
Page 9: Technical Data
Technical data Technical data Dimensions (W x H x D) 99 x 99 x 16.9 mm Weight approx. 175 g Operating temperature -20 °C ... 60 °C Storage temperature -30 °C ... 70 °C Power supply Battery: Li-ion, 3.7 V/850 mAh Charger cable for cigarette lighter: Input 12 V Battery charger: Input 100 to 240 V (50/60 Hz),... -
Page 10: Troubleshooting Table
Troubleshooting table Troubleshooting table Problem Cause Measure The device does not work or The operating system is over- Perform a reset (Ch. "Switching does not work correctly. loaded. on/off") Reset the factory settings (ch. "4.4.7 User Data Management" in separate navigation instruc- tions). - Page 11 fi le system. the fi le system FAT16 or FAT32. Due to continued technical developments, Blaupunkt cannot guar- antee the correct functioning of memory cards from different man- ufacturers and different types of cards. Try a memory card from a...
-
Page 13: Warranty
Warranty Dear Customer, Thank you for buying Blaupunkt Navigation system. This unit comes with 12 months warranty on the product from the date of purchase against defective material or workmanship. In case of a defect, Blaupunkt undertakes to get the set repaired / replaced as per company’s discretion. - Page 14 Warranty PART B CUSTOMER’S COPY MODEL No: ___________________________________ DATE OF PURCHASE: __________________________ UNIT Sr. No.: ___________________________________ CUSTOMER NAME & ADDRESS DEALER NAME & ADDRESS (SEAL) _______________________________________________ _______________________________________________ _______________________________________________ _______________________________________________ TEL. _________________________________________ TEL. _________________________________________ Customer’s Signature Dealer’s Signature This card is valid only if it is fi lled in and stamped by our authorised dealer on the date of purchase. For any further information, please contact.
- Page 15 ___________________________________________________________________________________ ___________________________________________________________________________________ ___________________________________________________________________________________________________________ ___________________________________________________________________________________________________________ ___________________________________________________________________________________________________________ ___________________________________________________________________________________________________________ ___________________________________________________________________________________________________________ ___________________________________________________________________________________________________________ ___________________________________________________________________________________________________________ ___________________________________________________________________________________________________________ ___________________________________________________________________________________________________________ ___________________________________________________________________________________________________________ ___________________________________________________________________________________________________________ ___________________________________________________________________________________________________________ ___________________________________________________________________________________________________________ ___________________________________________________________________________________________________________ ___________________________________________________________________________________________________________ ___________________________________________________________________________________________________________ ___________________________________________________________________________________________________________ ___________________________________________________________________________________________________________ ___________________________________________________________________________________________________________ ___________________________________________________________________________________________________________ ___________________________________________________________________________________________________________...
- Page 16 Murthy 0091-2505805 9849004688 © 2008 All rights reserved by Blaupunkt. This material may be reproduced, copied or distributed for personal use only. This product is protected by certain intellectual property rights of Microsoft. Use or distribution of such technology outside of this product is prohibited without a license from Microsoft.
- Page 17 Mobile Nav igation TravelPilot 100 TravelPilot 300 TravelPilot Lucca 3.5 Navigation instructions...
- Page 18 Table of contents 1 Warnings and Safety information ............ 6 2 Getting started with TravelPilot ............7 2.1 Simple and Advanced modes ..............8 2.2 Hardware buttons ................9 2.3 Buttons and other controls on the screen ..........10 2.3.1 Using keyboards ..................11 2.4 Using the map ...................
- Page 19 Table of contents 3 Navigating with TravelPilot ............27 3.1 Selecting the destination of a route ............27 3.1.1 Selecting the Cursor as the destination ............27 3.1.2 Entering an address or part of an address ..........28 3.1.2.1 Selecting a midpoint of a street as the destination ..........28 3.1.2.2 Selecting an intersection as the destination ............29 3.1.2.3 Selecting a city centre as the destination ............30 3.1.2.4 Tips on entering addresses quickly ..............31...
- Page 20 Table of contents 4 Reference book (Advanced mode)..........40 4.1 Map screen ..................40 4.1.1 Icons on the map ..................43 4.1.1.1 Battery, GPS position quality and Vehicle type indicator........43 4.1.1.2 Status indicator strip ..................45 4.1.1.3 Next two route events (Turn Preview fi elds) ............45 4.1.2 Objects on the map ................46 4.1.2.1 Streets and roads ..................46 4.1.2.2 Elements of the active route................46...
- Page 21 Table of contents 4.5 Settings menu................... 64 4.5.1 Map Screen settings ................65 4.5.2 Sound settings ..................65 4.5.3 Route Planning options ................66 4.5.4 Regional settings ..................68 4.5.5 Navigation settings .................69 4.5.6 Warning settings ..................70 4.5.7 GPS settings ..................70 4.5.8 Menu settings ..................71 4.5.9 Track Log settings ...................71 5 Glossary ..................
-
Page 22: Warnings And Safety Information
1 Warnings and Safety information 1 Warnings and Safety information The navigation device does not release you from your responsibility as a driver for correct and prudent behaviour in traffi c. Distraction from the traffi c can cause accidents DANGER! Do not operate the device while driving. -
Page 23: Getting Started With Travelpilot
2 Getting started with TravelPilot 2 Getting started with TravelPilot TravelPilot is optimised for in-car use. You can use it easily by tapping the screen buttons and the map with your fi ngertips. Tasks Instructions Using the retractable You do not need a stylus to use TravelPilot. Tap the buttons and the map stylus with your fi... -
Page 24: Simple And Advanced Modes
2 Getting started with TravelPilot Tasks Instructions Gestures You do not need gestures to access the basic navigation features. You need (drag&drop) to drag and drop the screen only in cases like: • Moving the handle on a slider. • Moving the map: grab the map, and move it in the desired direction. -
Page 25: Hardware Buttons
2 Getting started with TravelPilot The features and settings available in each mode are as follows: Type of action Available in Available in Explanation Simple mode Advanced mode Navigating to a selected map point See page 27 Navigating to a street address See page 28 Navigating to an incomplete address See page 28... -
Page 26: Buttons And Other Controls On The Screen
2 Getting started with TravelPilot You can turn mobile devices on or off at any time. When mobile devices is switched off, TravelPilot does not calculate your GPS position and it does not update the route or the driving instructions. When you turn the device on again, TravelPilot continues navigating as soon as the GPS receiver has determined your position. -
Page 27: Using Keyboards
2 Getting started with TravelPilot Type Example Description How to use it Switch When there are Tap it to turn the only two choices, switch on or off. a checkmark shows whether the feature is enabled. Virtual Alphabetic and Each key is a touch keyboard alphanumeric screen button. -
Page 28: Using The Map
2 Getting started with TravelPilot 2.4 Using the map The map screen is the most frequently used screen of TravelPilot. It can be accessed from the Navigation menu by tapping For further information about the map screen, see page 40. 2.4.1 Checking the details of a map location •... - Page 29 2 Getting started with TravelPilot Action Button(s) Description Moving the No buttons You can move the map into any direction: tap and hold the map with map, and move your fi nger to the direction in which you drag&drop want to move the map. If GPS position is available and you have moved the map, button appears.
- Page 30 2 Getting started with TravelPilot Action Button(s) Description Viewing Gives you the following map perspectives in TravelPilot: modes • classic top-down view (2D) • perspective view (3D) The value always shows the mode the button switches to: If you are in 2D mode, you can see the button and you need to tap it to switch to 3D mode.
-
Page 31: Status Information And Hidden Controls On The Map
2 Getting started with TravelPilot Action Button(s) Description Fit-to-screen This button does not appear on the Map screen. It is available on the following screens: • Plan on Map screen: When you have an active route, you can display it in its full length on the map. •... - Page 32 2 Getting started with TravelPilot Icon Information Details Action Next route event GPS position and Tap this area to open the Route (next manoeuvre) an active route Information screen. are available, and you navigate the recommended route. This area gives you information about the type and distance of the next route event.
- Page 33 2 Getting started with TravelPilot Icon Information Details Action Route recalculation During route recalculation, Nothing happens if you tap this progress this fi eld shows the area of the screen. recalculation progress between 0% and 100%. Indicator strip Nothing happens if you tap this - sounds muted/enabled area of the screen.
-
Page 34: Using The Cursor (The Selected Map Location)
2 Getting started with TravelPilot Icon Type More information Distance There are distance type values that can be shown: information • Distance remaining to reach the destination • Distance remaining to reach the next via point • Current altitude The next area is a combined status fi eld. Tap this area to open the Quick menu (page 54). Icon Status for More information... -
Page 35: Travelpilot Concepts
2 Getting started with TravelPilot Button Action Saves the Cursor as a POI(available in Advanced mode only) Saves the Cursor as a Favourite location Saves the Cursor as a Road Safety Camera location (available in Advanced mode only) Marks the map with a Pin at the Cursor (available in Advanced mode only) Opens a screen with the name, address and coordinate information of the Cursor, and the list of POIs near it 2.5 TravelPilot concepts... -
Page 36: Returning To Normal Navigation
2 Getting started with TravelPilot • If you choose pedestrian: The icon is at your exact GPS position. The direction of the icon shows your actual heading. • If you choose any of the vehicles: The icon is aligned to the nearest road to suppress GPS position errors. -
Page 37: Original Position In The Cursor Menu
2 Getting started with TravelPilot 2.5.2.4 Original position in the Cursor menu When the Cursor menu is open, a special icon ( ) shows the Cursor position the menu was opened with. You can move and zoom the map, and you can set the Cursor to a different place. The usual Cursor ) appears, and the buttons of the Cursor menu initiate actions for this new location. -
Page 38: Itinerary
2 Getting started with TravelPilot • Emergency vehicles • Bicycle • Pedestrian • Road types • Unpaved Roads • Permit Needed • Motorways • Toll Roads • Charge Roads • Ferries • Cross-border Planning • Carpool Lanes (appears only when used in the USA) TravelPilot automatically recalculates the route if you deviate from the proposed itinerary. -
Page 39: Track Logs
2 Getting started with TravelPilot You have the following options on the Itinerary screen: Button Description Any of the list items Opens the map with the selected manoeuvre in the middle. Changes the detail level of the Itinerary. The levels are as follows: •... -
Page 40: Route Demonstration
2 Getting started with TravelPilot 2.5.8 Route demonstration A simulation drives you through the route, following the driving instructions (page 36). You can choose from a simulation at high speed or at normal driving speed. You can use it, for example, to see which bridge TravelPilot planned for the route; if you do not want to take that bridge, you can avoid it. -
Page 41: Camera Types
2 Getting started with TravelPilot Saving Road Safety Cameras To save the location of a Road Safety Camera, place the Cursor ( ) at the desired location, then tap the following buttons: Camera warning The warning for Road Safety Cameras can be turned on in Warning Settings. Tap the following buttons: When you approach a Road Safety Camera with the warning enabled, the following happens: •... -
Page 42: Camera Directions
2 Getting started with TravelPilot Symbol Type Description Section These speed cameras work in pairs, and do not measure your current speed control but your average speed between the two speed cameras. Both identify your car and record the exact time you pass them. They use the difference between the two points in time to calculate your average speed. -
Page 43: Navigating With Travelpilot
3 Navigating with TravelPilot 3 Navigating with TravelPilot You can set up your route in TravelPilot in several ways: • if you need a simple route (a route with only one destination, without any intermediate via points), you can select the destination and start navigating to it right away •... -
Page 44: Entering An Address Or Part Of An Address
3 Navigating with TravelPilot 3.1.2 Entering an address or part of an address If you know at least a part of the address, it is the quickest way to select the destination of the route. Using the same screen, you can fi nd an address by entering: •... -
Page 45: Selecting An Intersection As The Destination
3 Navigating with TravelPilot Pick the settlement from the list. Enter the street name: Start entering the street name on the keyboard. Get to the list of results: • After entering a couple of characters, the names that match the string appear in a list. •... -
Page 46: Selecting A City Centre As The Destination
3 Navigating with TravelPilot Get to the list of results: • After entering a couple of characters, the names that match the string appear in a list. • to open the list of results before it appears automatically. Pick the street from the list. Tap the button. -
Page 47: Tips On Entering Addresses Quickly
3 Navigating with TravelPilot The map appears with the selected point in the middle. Tap (Simple mode) (Advanced mode) from the Cursor menu. The route is then automatically calculated, and you can start navigating. 3.1.2.4 Tips on entering addresses quickly •... - Page 48 3 Navigating with TravelPilot • : The map appears with the Cursor in the middle. Modify the location of the Cursor if necessary, then tap . The POI will be searched around the given location. • : The POI will be searched around the current GPS position. •...
-
Page 49: Selecting The Destination With A Saved Poi Search Criteria
3 Navigating with TravelPilot 3.1.5 Selecting the destination with a saved POI search criteria POI search criteria can be saved in the POI section of the Manage menu, but TravelPilot is already shipped with some saved criteria you can use instantly when searching for a POI. The procedure is explained starting from the Navigation menu. -
Page 50: Creating A Multi-Point Route (Inserting A Via Point)
3 Navigating with TravelPilot The map appears with the selected point in the middle. Tap (Simple mode) (Advanced mode) from the Cursor menu. The route is then automatically calculated, and you can start navigating. 3.2 Creating a multi-point route (inserting a via point) Multi-point routes are created from simple routes, so a route must be active fi... -
Page 51: Creating A Multi-Point Route (Appending A New Destination)
3 Navigating with TravelPilot 3.3 Creating a multi-point route (appending a new destination) Multi-point routes are created from simple routes, so a route must be active fi rst. One of the ways of expanding the route is to add a new destination. The previous destination becomes the last via point of the route. -
Page 52: Viewing The Whole Route On The Map (Fit-To-Screen)
3 Navigating with TravelPilot 3.5 Viewing the whole route on the map (Fit-to-Screen) The map can be moved and scaled to show the whole line of the route. You do not need to manipulate the map manually. The Plan on Map feature does it for you. In Advanced mode you have the following options to enter Plan on Map: •... -
Page 53: Deleting The Next Via Point From The Route
3 Navigating with TravelPilot 3.9 Deleting the next via point from the route The easiest way to delete the upcoming route point (the next via point) in both Simple mode and Advanced mode is to open the Route Information screen by tapping the Turn Preview fi eld ( ) on the Map screen, and then tapping In Advanced mode, you have another option. -
Page 54: Saving A Route
3 Navigating with TravelPilot Repeat the above steps, then tap later to stop the recording. TravelPilot labels the Track Log with a time stamp. (As an alternative, you can tap the button in the Quick menu to start, and later to stop the Track Log recording.) Simulating a Track Log on the map Tap the following buttons:... - Page 55 3 Navigating with TravelPilot In the very likely case when the start position of the saved route is different from the current GPS position, you need to confi rm whether you want to stop navigating from the current GPS position to use the start point of the loaded route.
-
Page 56: Reference Book (Advanced Mode)
4 Reference book (Advanced mode) 4 Reference book (Advanced mode) On the following pages you will fi nd the description of the different menu screens of TravelPilot in Advanced mode. In Simple mode, these functions work the same way, but only a few of them are available. - Page 57 4 Reference book (Advanced mode) Symbol Name Action Turn Preview, that is, the next Opens the Route Information screen route event Second upcoming route event Opens the Itinerary Trip data Opens the Trip Information screen Battery status Opens the Quick menu GPS position quality Opens the Quick menu Vehicle used in route calculation...
- Page 58 4 Reference book (Advanced mode) Symbol Name Action Open/Close Map control buttons Tap this button to show or hide the following map control buttons: • Zoom in/out • Rotate left/right (3D map only) • Tilt up/down (3D map only) • Zoom preset buttons (2D map only) •...
-
Page 59: Icons On The Map
4 Reference book (Advanced mode) Symbol Name Action Tilt preset buttons (available in Tap one of the preset buttons to Advanced mode only) set the tilt and zoom levels to fi x, predefi ned values. Smart Zoom is disabled. These buttons are available in 3D mode. - Page 60 4 Reference book (Advanced mode) Icon Description The battery is not charging but it is full. The battery is not full but it still has enough capacity. You need to recharge the battery. The GPS reception quality shows the current accuracy of the position information. Icon Description TravelPilot is connected to the GPS receiver, but the signal is too weak and the...
-
Page 61: Status Indicator Strip
4 Reference book (Advanced mode) 4.1.1.2 Status indicator strip This is a complex indicator. In one strip it indicates the following status information: Icon Description The sound output of TravelPilot is muted. The sound output of TravelPilot is enabled. TravelPilot records a Track log when GPS position is available. Track log recording is disabled. -
Page 62: Objects On The Map
4 Reference book (Advanced mode) Icon Description Enter motorway. Exit motorway. Board ferry. Leave ferry. Approaching the next via point. Approaching the destination. In certain situations when route events are not important, these fi elds show other useful pieces of information. - Page 63 4 Reference book (Advanced mode) Symbol Name Description Start point The fi rst point of the route. Normally, if GPS position is available, it is the start point of the route. If there is no valid GPS position, TravelPilot uses the last known GPS position as the start point. When you are using a saved route, TravelPilot asks you if you want to use your GPS position or the fi...
-
Page 64: Detour Menu
4 Reference book (Advanced mode) 4.1.3 Detour menu This screen contains quick detour possibilities during navigation. It can be opened directly from the Map screen by tapping You have the following options: • On the main part of the screen you can see the fi rst page of Saved Search Criteria. Select any of the criteria to quickly receive the list of nearest matching POIs, and instantly plan a new route to the desired one, or insert it as a via point in your active route. - Page 65 4 Reference book (Advanced mode) Button Description Opens a new screen with the address and coordinate of the Cursor, and the list of nearby POIs. Opens the full-screen Cursor menu with all the possible options. A new route is calculated with the Cursor as the destination. The previous route is deleted.
-
Page 66: Position Menu
4 Reference book (Advanced mode) Button Description The Cursor is saved as the location of a Road Safety Camera (speed camera or red light camera). A new screen appears where you can set the type of the camera, the direction of the measured traffi c, and the speed limit checked (if applicable). - Page 67 4 Reference book (Advanced mode) You have the following data and functions on this screen: Name Description Function Route line The upper part of this screen shows your planned Tap this fi eld to change the route as a horizontal line. Its leftmost point is content of all data fi...
-
Page 68: Trip Information Screen
4 Reference book (Advanced mode) Name Description Function Appears only if at least one via point exists. Deletes the next via point from the route. Appears only if there are no via points in the route. Deletes the active route. 4.1.7 Trip Information screen The Trip Information screen has both route and travel data you might need during your journey. - Page 69 4 Reference book (Advanced mode) Name Description Function Distance Shows the distance you need to travel on the route Tap this fi eld to show it on the Remaining before reaching your fi nal destination. map screen in one of the Trip Data fi...
-
Page 70: Trip Computer Screen
4 Reference book (Advanced mode) Most of the fi elds on this screen have a symbol next to them. This symbol shows whether the fi eld it is attached to is shown on the map as a Trip Data. It also shows the position of the data as follows: Symbol Description This value is not shown on the map screen. - Page 71 4 Reference book (Advanced mode) If you tap any of the switches in the Quick menu except for the Vehicle type, the Map screen immediately returns. A switch is on if its lamp is lit. The Vehicle type button is different. It is a multi-value button. It opens a list of available choices, and the symbol of the selected vehicle is shown on the button.
-
Page 72: Gps Data Screen
4 Reference book (Advanced mode) 4.1.9 GPS data screen Tap the following buttons: to open the GPS Data screen and to see the status of the GPS reception. Icon Colour Name Description Green TravelPilot has a connection to the GPS position receiver and GPS position information is quality... -
Page 73: Find Menu
4 Reference book (Advanced mode) Icon Colour Name Description Sky view circle The virtual sky shows the visible part of the sky above you, with your position as the centre. The satellites are shown at their current positions. The GPS receives data from both the green and yellow satellites. -
Page 74: Route Menu
4 Reference book (Advanced mode) 4.3 Route menu Save, load and edit your routes. Tap the following buttons: Button Description Reference Opens a screen with useful route data. page 50 You can browse the driving instructions that TravelPilot follows page 22 during navigation. -
Page 75: Manage Saved Routes
4 Reference book (Advanced mode) Button Description Reference Renaming or deleting Favourites page 61 Creating, updating or deleting POIs page 61 Creating, updating or deleting POI groups Modifying POI visibility settings Creating, renaming or deleting Saved Search Criteria page 63 4.4.1 Manage Saved Routes You can manage the previously saved routes. -
Page 76: Manage Track Logs
4 Reference book (Advanced mode) 4.4.3 Manage Track Logs You can record Track Logs, then play them back, display them on the map, and see their details. Tap the following buttons: Button Description Starts recording the track that you drive. (You can also start recording a track log in the Quick menu.) Stops the ongoing Track Log recording. -
Page 77: Manage Favourites
4 Reference book (Advanced mode) 4.4.4 Manage Favourites You can manage the list of your Favourites. Tap the following buttons: Button Description Button with the name Opens the selected Favourite for editing. of the Favourite Deletes the selected item in the list of Favourites. Clears the list of Favourites. - Page 78 4 Reference book (Advanced mode) Button / Icon Description This POI group and all its subgroups are shown on the map. This POI group and some of its subgroups are shown on the map. When a POI group is open for editing: Button Description Items in the POI group will not be shown on the map.
-
Page 79: Manage Saved Search Criteria
4 Reference book (Advanced mode) 4.4.6 Manage Saved Search Criteria You can manage the list of search criteria previously saved to easily fi nd frequently searched POI types. Tap the following buttons: Button Description Button with the name Tap to rename the saved query. of the Saved Search Criteria Deletes the selected item in the list. - Page 80 4 Reference book (Advanced mode) 4.5 Settings menu You can confi gure the program settings, and modify the behaviour of TravelPilot. Tap the following buttons: The Settings menu has two pages of submenus. Tap to access the other options. Button Description Reference You can fi...
-
Page 81: Map Screen Settings
4 Reference book (Advanced mode) Button Description Reference This screen has no navigation feature. It merely provides information about the maps and licenses included with your navigation system. You can switch to Simple mode. In Simple mode only a few of the page 8 above settings are available. -
Page 82: Route Planning Options
4 Reference book (Advanced mode) Button Description Voice Guidance Volume The slider adjusts the loudness of voice prompts. In its leftmost position, the voice guidance is suppressed; in its rightmost position, the master volume applies. Key Sounds Key sounds are audible confi rmation of either pressing hardware buttons or tapping the touch screen. - Page 83 4 Reference book (Advanced mode) Vehicle types: • • Taxi • • Emergency vehicles • Bicycle • Pedestrian Road Types Used for Route Planning: Type Description Motorways You might need to avoid motorways when you are driving a slow car or you are towing another vehicle.
-
Page 84: Regional Settings
4 Reference book (Advanced mode) Option Description Economical Combines the benefi ts of Fast and Short: TravelPilot calculates as if it were calculating the Fast route, but it takes other roads to save petrol. Easy Results in a route with fewer turns. With this option, you can make TravelPilot to take, for example, the motorway instead of series of smaller roads or streets. -
Page 85: Navigation Settings
4 Reference book (Advanced mode) Time and Time Zone Settings: Button Description Auto Time Correction Use this feature to synchronise the clock of your device to the very to GPS accurate time provided by the GPS receiver. Use Auto Time Zone Use this feature to synchronise the time zone of the clock of your device to the time zone based on your current GPS position. -
Page 86: Warning Settings
4 Reference book (Advanced mode) Button Description Automatic Overview This feature switches the map view to Overview mode when the next route event is at a distance. Overview is a zoomed out 2D view to let you see the surrounding area. You have the following controls for Automatic Overview: •... -
Page 87: Menu Settings
4 Reference book (Advanced mode) Button Description GPS Enabled Turn the connection to the GPS receiver on or off. Turning off the GPS receiver can be useful for indoors use or demonstration purposes. Port The communication port used between the GPS receiver and the application. - Page 88 4 Reference book (Advanced mode) Button Description Track Logs Max. Size You can set the maximum database size for the automatically saved track logs. When the limit is reached, the oldest automatically saved track logs will be deleted. Create NMEA/SIRF Log Independently of the normal track log, you can instruct TravelPilot to record the native GPS data received from the GPS device.
-
Page 89: Glossary
5 Glossary 5 Glossary 2D/3D GPS reception The GPS receiver uses satellite signals to calculate its (your) position and need at least four signals to give a three-dimensional position, including elevation. Because the satellites are moving and because objects can block the signals, your GPS device might not receive four signals. If three satellites are available, the receiver can calculate the horizontal GPS position but the accuracy is lower and the GPS device does not give you elevation data: only 2D reception is possible. - Page 90 5 Glossary Route A series of destinations to be reached one after the other. A simple route contains one start point and only one destination. Multi-point routes contain one or more via points (intermediate destinations). The last route point is the fi nal destination and the route is cut into different legs (from one destination to the next).
-
Page 91: End User Licence Agreement
6 End User Licence Agreement 6 End User Licence Agreement 1. The contracting parties 1.1. Contracting parties to present Agreement are, on the one hand: Nav N Go Kft (23 Bérc utca, H-1016 Budapest, Hungary; Hungarian reg.no.: 03-09-111944) as Licensor the legal user (as defi... - Page 92 6 End User Licence Agreement 5. Owner of copyrights 5.1. The Licensor - unless contractual or legal regulations state otherwise - is the exclusive owner of all material copyrights vested in the software product. 5.2. Copyrights extend to the whole software product and its parts separately as well. 5.3.
- Page 93 6 End User Licence Agreement the Licensor does not warrant for the software product being completely error free, and the Licensor is not bound by any contractual obligation by which the software product obtained by the User should be completely error free. 8.2.
- Page 94 © 2008 All rights reserved by Blaupunkt. This material may be reproduced, copied or distributed for personal use only. This product is protected by certain intellectual property rights of Microsoft. Use or distribution of such technology outside of this product is prohibited without a license from Microsoft.
- Page 95 Mobile Nav igation TravelPilot 100 TravelPilot 300 TravelPilot Lucca 3.5 Powered by Maps MapmyIndia Maps End User License Agreement This End-User License Agreement (EULA) is a legal agreement between you (either an individual or a single entity) and CE INFO SYSTEMS PVT. LIMITED for the digital maps database and updates hereof that run navigation in associated hardware collectively the "MapmyIndia Maps"...
- Page 96 5. Limitation of Liability. CE INFO SYSTEMS PVT LIMITED shall not be held responsible for any actual, anticipated or speculative loss of profi t or direct, indirect, incidental, special, or consequential damages, including, without limitation, loss of revenue, data, or use incurred by you or any third party arising out of your use or possession of the Maps, whether in an action in contract or tort or based on a warranty, even if CE INFO SYSTEMS PVT.
Need help?
Do you have a question about the TravelPilot 100 and is the answer not in the manual?
Questions and answers