Table of Contents
Advertisement
Advertisement
Table of Contents
Troubleshooting

Related Manuals for Livestrong LS16.9T


Summary of Contents for Livestrong LS16.9T
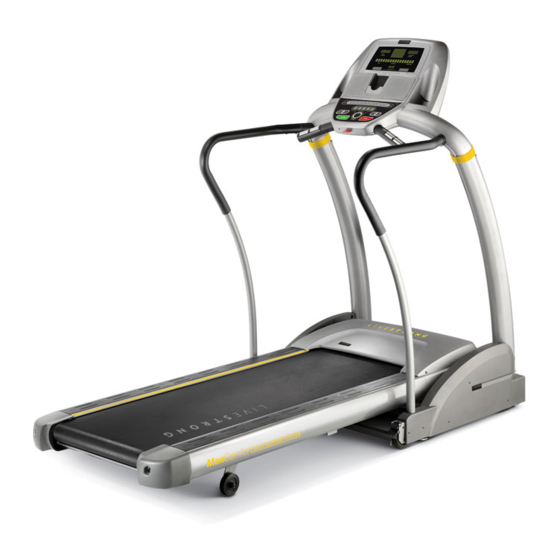
- Page 1 FOR MODEL : LS16.9T TRE ADMILL US ER ’S GUID E...
- Page 2 They connect people and communities to drive social change, and call for state, national and world leaders to help fight this disease. Anyone, anywhere can join the fight against cancer. Join them at LIVESTRONG.org.
- Page 3 Purchases of this product ensure that a minimum of $4M will go to the Lance Armstrong Foundation and the fight against cancer. Whether your goal is to win races or simply enjoy a fuller, healthier lifestyle, a LIVESTRONG treadmill ™...
-
Page 4: Grounding Instructions
I MP OR TAN T PRECAUT IO NS SAVE THESE INSTRUCTIONS Read all instructions before using this treadmill. When using an electrical product, basic precautions should always be followed, including the following: Read all instructions before using this treadmill. It is the responsibility of the owner to ensure that all users of this treadmill are adequately informed of all warnings and precautions. - Page 5 To reduce the risk of burns, fire, electrical shock or injury to persons: WARNING • Never use the treadmill before securing the safety tether clip to your clothing. • If you experience any kind of pain, including but not limited to chest pains, nausea, dizziness, or shortness of breath, stop exercising immediately and consult your physician before continuing.
- Page 6 A S S E M B LY IMPORTANT: READ THESE SAFETY INSTRUCTIONS BEFORE USE! WARNING During the assembly process of the treadmill there are several areas that special attention must be paid. It is very important to follow the assembly instructions correctly and to make sure all parts are firmly tightened.
- Page 7 CONSOLE IPOD DOCK ® CAUTION AVERTISSEMENT PRECAUCIÓN KEEP HANDS AND FEET GARDER LES MAINS ET LES MANTENGA LAS MANOS Y READING RACK AWAY FROM THIS AREA. PIEDS LOIN DE CETTE REGION. LOS PIES LEJOS DE ESTA HIGH-PRESSURE LES AMORTISSEURS À HAUTE AREA.
- Page 8 PR E- AS S EM BLY Disassemble box and remove the cardboard packaging that is not beneath the treadmill. Do not attempt to lift the treadmill at this time. Remove plastic wrap from console masts. *NOTE: During each assembly step, ensure that ALL nuts and bolts are in place and partially threaded in before completely tightening any ONE bolt.
- Page 9 A S S E M BLY S T E P 2 HARDWARE BAG 2 CONTENTS : BOLT (B) SPRING WASHER (C) ARC WASHER (D) 15 mm 8.2 mm 8.4 mm Qty: 6 Qty: 6 Qty: 6 A Pull LEAD WIRE through RIGHT CONSOLE MAST.
- Page 10 A S SE MB LY ST E P 3 HARDWARE BAG 3 CONTENTS : BOLT (E) SPRING WASHER (C) 10 mm 8.2 mm Qty: 4 Qty: 4 A Open HARDWARE BAG 3. LEFT SIDE RIGHT SIDE B Attach CONSOLE MAST CAPS onto the bottom of CONSOLE using 2 BOLTS (E) and 2 SPRING WASHERS (C).
- Page 11 A S S E M BLY S T E P 4 HARDWARE BAG 4 CONTENTS : BOLT (B) SPRING WASHER (C) ARC WASHER (D) 15 mm 8.2 mm 8.4 mm Qty: 4 Qty: 4 Qty: 4 A Open HARDWARE BAG 4. B Slide CONSOLE through MAST RINGS.
- Page 12 A SS EM B LY ST EP 5 HARDWARE BAG 5 CONTENTS : SCREW (F) 15 mm Qty: 18 A Open HARDWARE BAG 5. B Align LEFT HANDLEBAR with CONSOLE as shown. CONSOLE HANDLEBAR CAP C To attach the top of the LEFT HANDLEBAR to the CONSOLE, HANDLEBAR slide HANDLEBAR CAP through...
- Page 13 A S S EM BLY ST EP 6 HARDWARE BAG 5 CONTENTS : SCREW (F) 15 mm Qty: 18 A Continue using HARDWARE BAG 5. B Attach HANDLEBAR COVER to LEFT HANDLEBAR using 3 SCREWS (E). C Repeat on other side. Before the first use, lubricate the treadmill deck by following the instructions in the Maintenance...
-
Page 14: Safety Key
B E F OR E YO U BEGIN CONGRATULATIONS! on choosing your treadmill. You’ve taken an important step in developing and sustaining an exercise program! Your treadmill is a tremendously effective tool for achieving your personal fitness goals. Regular use of your treadmill can improve the quality of your life in so many ways. HERE ARE JUST A FEW OF THE HEALTH BENEFITS OF ExERCISE: •... -
Page 15: Proper Usage
PROPER USAGE Your treadmill is capable of reaching high speeds. Always start off using a slower speed and adjust the speed in small increments to reach a higher speed level. Never leave the treadmill unattended while it is running. When not in use, remove the safety key and keep out of reach of children, turn the on/off switch to off and unplug the power cord. -
Page 16: Tensioning The Running Belt
TENSIONING THE RUNNING BELT The running belt has been properly adjusted at the factory before it was shipped. At times the belt can move off-center during shipment. CAUTION: Running belt should NOT be moving during tensioning. Over-tightening the running belt can cause excessive wear on the treadmill as well as its components. - Page 17 TR E A D M IL L O P E RAT ION PACE CALORIES HE ART R ATE C H A N G E D I S P L AY CLOCK / DATE P R E S S T O S C R O L L F I T N E S S J O U R N A L S Y S T E M...
- Page 18 M O N IT OR DI S PL AY SPEED • Shown as MPH. Indicates the speed of the treadmill belt. TIME • Shown as Minutes:Seconds. Indicates the time remaining or the time elapsed in your workout. PULSE • Shown as Beats Per Minute. Indicates your heart rate (displayed when contact is made with both pulse grips).
- Page 19 IMPORTANT: The heart rate function on this product is not a medical device. While heart rate grips can provide a relative estimation of your actual heart rate, they should not be relied on when accurate readings are necessary. Some people, including those in a cardiac rehab program, may benefit from using an alternate heart rate monitoring system like a chest or wrist strap.
- Page 20 DAT E & CL O CK S ET U P 1) Enter Setup Mode: Press and hold 1 and 2 BUTTONS for 3-5 seconds. 2) Use the ENTER button to confirm settings. 3) Settings include: MONTH, DAY, YEAR, HOUR, MINUTE, and AM/PM. 4) Review Settings: You can review your settings at any time while in Setup Mode.
- Page 21 P R OG RA M : IN C L IN E I N T E R VA L S ( P 3 ) Walk or run a series of alternating SPEED and INCLINE levels. Time-based goal with 10 difficulty levels to choose from.
- Page 22 PR O G R A M : W E I GH T L O S S ( P4 ) Walk or run a series of alternating SPEED and INCLINE levels. Time-based goal with 10 difficulty levels to choose from. Warm-up and cool-down last 4:00 minutes each and are included in program times. PROGRAM SEGMENTS 2:00 2:00...
- Page 23 P R OG RA M : 10 K ( P7 ) Walk a series of alternating INCLINE levels. Distance based goal with 4 difficulty levels to choose from. Distance shown as Kilometers. PROGRAM SEGMENTS Segments repeat until Distance is reached 0.16 0.16 0.16...
- Page 24 PR O G R A M : I N T E R VA L S H R ( P9 ) Automatically adjusts peak and valley incline levels within your desired heart rate. Perfect for providing an intense workout with recovery bursts. Time based goal. Set WORK INTERVAL TIME using PROGRAMMING BUTTON, KEYPAD or ARROW KEYS and press ENTER.
- Page 25 P R OG RA M : C U S T OM 1 & 2 ( P 1 1 - P 1 2 ) Lets you create and reuse a perfect workout for you with specific speed, incline and time combination. The ultimate in personal programming.
- Page 26 LI VE T R AC K PE RF O RM A N CE T RA CK E R ™ Research shows that those who journal their fitness routines or workouts, on average, achieve greater success than those who do not. Because your new treadmill is equipped with an exclusive LIVETRACK Fitness Journal ™...
- Page 27 TIME or DISTANCE – The total time or distance goal you selected and the time or distance you have left to complete to meet your weekly goal. A) The “GOAL” and “LEFT” will display alternately every 3 seconds. B) A “GOAL DONE” message will appear when goal is completed. C) If the date and clock are not set and/or a weekly goal is not set, WEEKLY GOAL will display zeros.
- Page 28 E NT E RTA I NM EN T I NF O R MAT I ON US I N G NO N- i P o d M P3 / C D PL AY E RS ® Using Speaker/MP3 Audio Function Universal MP3 Player Leave RUBBER PLUG at bottom of DOCKING STATION.
-
Page 29: Perceived Exertion Level
CO ND I TI O N I N G G U IDEL INES ALWAYS CONSULT YOUR PHYSICIAN BEFORE BEGINNING AN ExERCISE PROGRAM. HOW OFTEN? (Frequency of Workouts) The American Heart Association recommends that you exercise at least 3 to 4 days per week to maintain cardiovascular fitness. - Page 30 TA R G ET H EA R T R AT E Z ON E C HA RT What is Target Heart Rate Zone? Target Heart Rate Zone tells you the number of times per minute your heart needs to beat to achieve a desired workout effect.
- Page 31 T IP S STRETCHING STRETCH FIRST Before using your product, it is best to take a few minutes to do a few gentle stretching exercises. Stretching prior to exercise will improve flexibility and reduce chances of exercise related injury. Ease into each of these stretches with a slow gentle motion.
- Page 32 TI PS THE IMPORTANCE OF WARM UP & COOL DOWN WARM UP The first 2 to 5 minutes of a workout should be devoted to warming up. The warm-up will limber your muscles and prepare them for more strenuous exercise. Make sure that you warm-up on your product at a slow pace.
- Page 33 W E E K LY L O G SH E ET S WEEK # W EEKLY GOAL D ATE D I S TA N CE CA L OR IE S T IM E CO MM E NT S SU ND AY M ON D AY TUES D AY WE D N E SD AY...
- Page 34 MO N TH LY L O G S HEETS M ON TH MONTHLY GOAL WEEK # DI S TANCE CALORIES TIME M ON TH LY TO TALS : M ON TH MONTHLY GOAL WEEK # DI S TANCE CALORIES TIME M ON TH LY TO TALS : M ON TH MONTHLY GOAL...
-
Page 35: Common Product Questions
TR OU B LE S H O OT I N G COMMON PRODUCT QUESTIONS ARE THE SOUNDS MY TREADMILL MAKES NORMAL? All treadmills make a certain type of thumping noise due to the belt riding over the rollers, especially new treadmills. -
Page 36: Troubleshooting - Heart Rate
PROBLEM: Operating speed appears inaccurate. SOLUTION: Auto-calibrate the treadmill: WARNING • Power on the treadmill and have the safety key in position on the console. Press and hold the elevation “+” and speed “-” buttons for approximately 5 seconds to enter DO NOT stand on running belt while the Engineering Mode. -
Page 37: Maintenance
M A IN TE NA N C E Cleanliness of your treadmill and its operation environment will keep maintenance problems and service calls to a minimum. For this reason, we recommend that the following preventive maintenance schedule be followed. AFTER EACH USE (DAILY) Clean and inspect, following these steps: •... - Page 38 LI MI T E D HO M E-USE WA RR AN T Y Weight Capacity = 181 kg / 400 LBS What IS NOT covered: • Normal wear and tear, improper assembly or maintenance, or FRAME • LIFETIME installation of parts or accessories not originally intended or Warranty on the frame against defects in compatible with the equipment as sold.
- Page 40 PATENTS OR PATENTS PENDING US 6273843 TW 586429 TW 494765 US 7104930 CN 03206094.7 CN 01230904.4 US 6682460 LS16.9T. Rev. 1.1 | © 2009 Johnson Health Tech North America, Inc. Products | Designed & Engineered in the U.S.A. | Made in China...
Need help?
Do you have a question about the LS16.9T and is the answer not in the manual?
Questions and answers