
Related Manuals for Livestrong LS7.9T


Summary of Contents for Livestrong LS7.9T
- Page 1 TREADMILL OWNER’S MANUAL Read the TREADMILL gUIDE before using this OWNER’S MANUAL.
- Page 2 Purchases of this product ensure that a minimum of $4M will go to the Lance Armstrong Foundation and the fight against cancer. Whether your goal is to win races or simply enjoy a fuller, healthier lifestyle, a LIVESTRONG treadmill can help you ™...
- Page 3 ENTER YOUR SERIAL NUMBER IN THE BOX BELOW: SERIAL NUMBER: LIVESTRONG LS7.9T TREADMILL MODEL NAME: » Refer to the SERIAL NUMBER and MODEL NAME when calling for service.
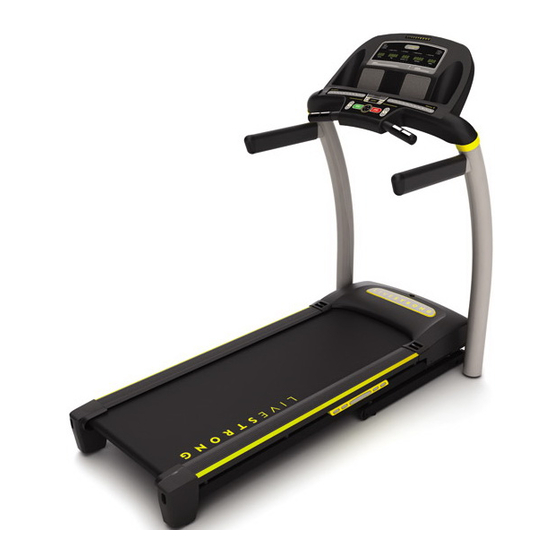
- Page 4 SPEAKERS TOUCH PAD PANEL AND DISPLAY WINDOWS CONSOLE FAN GRIP PULSE HANDRAILS WATER BOTTLE HOLDER ON/OFF SWITCH SAFETY KEY PLACEMENT CIRCUIT BREAKER CONSOLE MAST POWER CORD FOOT LOCK LATCH (UNDERNEATH DECK) MOTOR COVER RUNNING BELT / RUNNING DECK SIDE RAIL TRANSPORT WHEEL ROLLER END CAP REAR ROLLER...
- Page 5 PRE ASSEMBLY TOOLS INCLUDED: F 6 mm T-Wrench UNPACKING F 5 mm L-Wrench Place the treadmill carton on a level, flat surface. It is recommended that you place a PARTS INCLUDED: protective covering on your floor. Take CAUTION when handling and transporting this unit.
-
Page 6: Assembly Step
ASSEMBLY STEP 1 Cut the yellow banding straps and lift the HARDWARE BAG 1 CONTENTS : running deck upward until the foot latch locks. Remove all contents from BOLT (A) SPRING WASHER (B) FLAT WASHER (C) underneath the running deck. 20 mm 15 mm 15 mm... - Page 7 ASSEMBLY STEP 2 Open hardware bag 2. HARDWARE BAG 2 CONTENTS : Pull lead wire through right console BOLT (A) SPRING WASHER (B) FLAT WASHER (C) mast. After pulling the lead wire through the 20 mm 15 mm 15 mm mast, the top of the console cable should Qty: 4 Qty: 4...
- Page 8 ASSEMBLY STEP 3 Disengage the deck lock latch with your HARDWARE BAG 3 CONTENTS : foot to lower the running deck. BOLT (D) SPRING WASHER (B) FLAT WASHER (C) 45 mm 15 mm 15 mm Open hardware bag 3. Qty: 4 Qty: 4 Qty: 4 gently place the console on top of the...
- Page 9 TREADMILL OPERATION This section explains how to use your treadmill’s console and programming. The BASIC OPERATION section in the TREADMILL gUIDE has instructions for the following: • LOCATION OF THE TREADMILL • USING THE SAFETY KEY • FOLDING THE TREADMILL •...
- Page 10 L S 7.9 T CURRENT WORKOUT L AST WORKOUT AVER AGE WORKOUT LIFETIME TOTAL P R O G R A M S WEIGHT LOSS 2 P R O G R A M S P R E S S T O S C R O L L MANUAL POWER WALK 1 WALK/RUN 1...
-
Page 11: Console Operation
CONSOLE OPERATION Note: There is a thin protective sheet of clear plastic on the overlay of the console that should be removed before use. A) LED DISPLAY WINDOWS: incline, time, calories/heart rate, distance and speed. B) LIVETRACK LED INDICATORS: indicates which LIVETRACK information is being displayed. -
Page 12: Display Windows
CURRENT WORKOUT L AST WORKOUT AVER AGE WORKOUT LIFETIME TOTAL P R O G R A M S P R O G R A M S WEIGHT LOSS 2 P R E S S T O S C R O L L MANUAL POWER WALK 1 WALK/RUN 1... -
Page 13: Getting Started
GETTING STARTED 1) Check to make sure no objects are placed on the belt that will hinder the movement of the treadmill. 2) Plug in the power cord and turn the treadmill ON. 3) Stand on the side rails of the treadmill. 4) Attach the safety key clip to part of your clothing making sure that it is secure and will not become detached during operation. -
Page 14: Program Information
PROGRAM INFORMATION NOTE: Adjusting the speed and/or incline during your workout will affect the program intensity resulting in the speed and incline changing accordingly for each program segment. P1) MANUAL: Allows ‘on the fly’ manual speed and incline changes. P2–P3) WEIGHT LOSS 1 & 2: Challenges with various combinations of hills and valleys (incline & speed levels). Weight loss 1 &... - Page 15 P6–P7) WALK/RUN 1 & 2: Walk and run a series of alternating speed levels. Walk/Run 1 & 2 workout segments (valley segments last 90 seconds, peak segments last 30 seconds) Warm-up Cool-down Walk/Run 1 Walk/Run 2 (Warm-up and cool-down last 4:00 minutes each and are included in workout times) P8–P9) INCLINE 1 &...
- Page 16 LIVETRACK™ FITNESS JOURNAL SYSTEM CURRENT WORKOUT L AST WORKOUT AVER AGE WORKOUT LIFETIME TOTAL P R O G R A M S P R O G R A M S WEIGHT LOSS 2 P R E S S T O S C R O L L MANUAL POWER WALK 1 WALK/RUN 1...
- Page 17 ACCUMULATED DATA Once LIVETRACK is activated, you can scroll through your accumulated data in multiple formats by pressing the ™ LIVETRACK button. A workout is saved when: the program ends, the console is paused and not resumed after 10 minutes, ™...
-
Page 18: Using Your Cd / Mp3 Player
USING YOUR CD / MP3 PLAYER 1) Connect the included AUDIO ADAPTOR CABLE to the AUDIO IN JACK on the top right of the console and the headphone jack on your CD / MP3 player. 2) Use your CD / MP3 player buttons to adjust song settings. 3) Remove the AUDIO ADAPTOR CABLE when not in use. - Page 19 LIMITED HOME-USE WARRANTY...
- Page 20 EXCLUSIONS AND LIMITATIONS WEIGHT CAPACITY = 325 lbs (147 kilograms) Who IS covered: • The original owner and is not transferable. FRAME = LIFETIME What IS covered: Warranty on the frame against defects in workmanship and materials for a lifetime period of the buyer from the date of purchase, so long •...
- Page 21 SERVICE/RETURNS • In-home service is available within 150 miles of the nearest • Equipment used for commercial purposes or any use other authorized repair center (Mileage beyond 150 miles from than a single family or Household, unless endorsed by an authorized service center is the responsibility of the Manufacturer for coverage.
- Page 24 PATENTS OR PATENTS PENDING US 6273843 TW 586429 TW 494765 US 7104930 CN 03206094.7 CN 01230904.4 US 6682460 LS7.9T Rev. 1.2 | © 2009 Johnson Health Tech North America, Inc. | Designed & Engineered in the U.S.A. | Made in China...
Need help?
Do you have a question about the LS7.9T and is the answer not in the manual?
Questions and answers
does this need lubrication-can't find place for it belt quit turning
Yes, the Livestrong LS7.9T requires lubrication. The lubrication point is underneath the running belt.
This answer is automatically generated
How do I get my treadmill out of line belt mode so I can start using it again